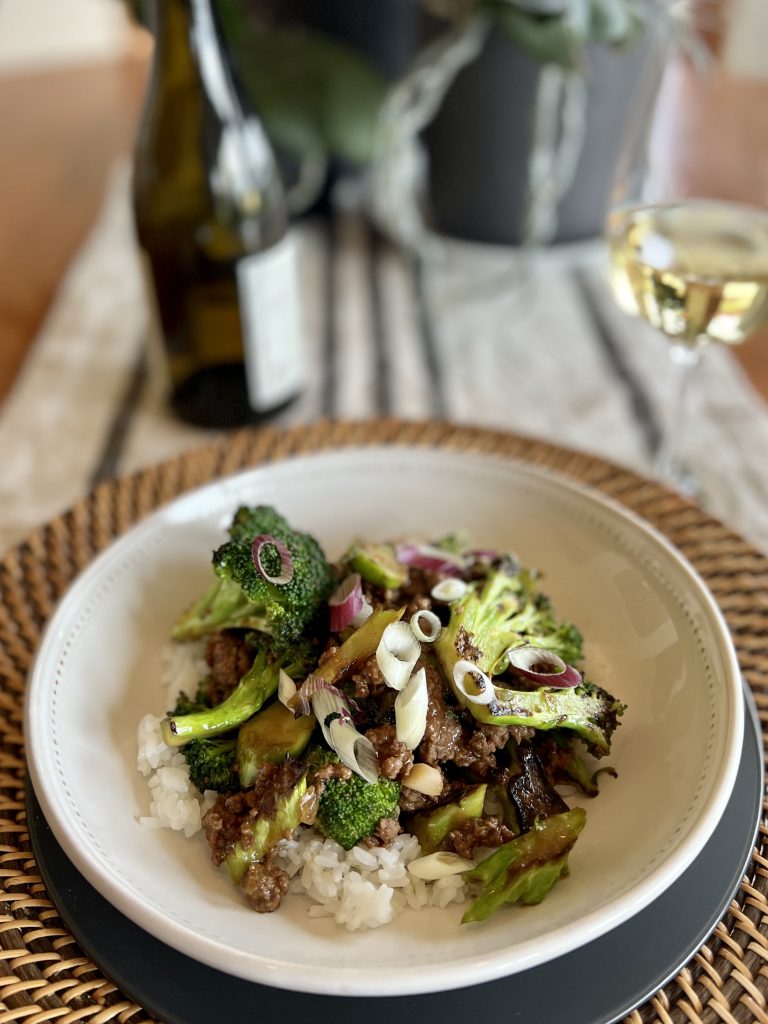
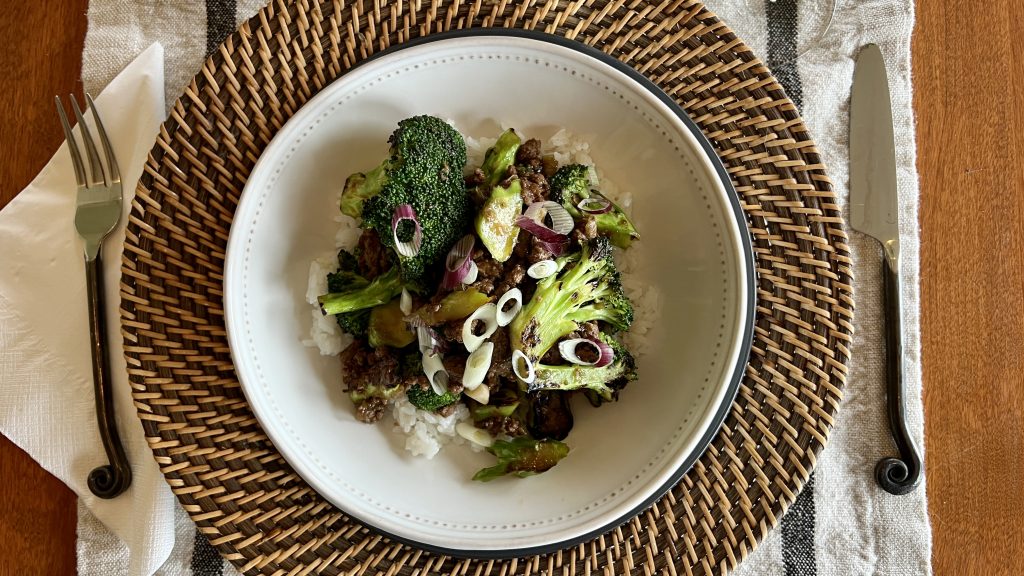
This weeknight-friendly Gingery Broccoli Beef stir-fry recipe came to me at the just-right time. Since last November we’ve been abuzz with houseguests. I took a four-month business course, and I started to teach cooking classes. And we’ve made the most of being able to travel again to see family. I can’t get enough of this gingery broccoli beef for four reasons, and think you might, too:
It's not often one sees the straight line in how recipes evolve, but this one is a perfect example. I learned this gingery broccoli and beef recipe from my friend Mandy. Mandy added oven-roasted broccoli to Michelle at Unbound Wellness's Mongolian Ground Beef. In a step toward speed and energy efficiency I stir-fry the broccoli in the same pan as the beef. I cut the broccoli stems into thin coins, and slice the florets to have have flat edges that allow a similar caramelization as roasting. Triple score: this way it takes less time, uses less electricity, and has one less pan to wash. Taking a page from traditional stir-fries, I add the sauce directly to the pan with the browned beef and broccoli. The stir-fry method seems a little more like the Chinese beef and broccoli dishes I have always loved, just using the weeknight classic ground beef.
Mandy and I have each made our adaptations from Michelle's original yet the spirit remains the same.

Grass-fed beef is the way to go. Grass fed beef is lower in overall fat than grain fed beef. Not only that, grass-fed beef contains two to six times more Omega-3 fatty acids than feed-lot beef. and is packed with B vitamins, vitamins A, E, and other antioxidants compared to grain fed beef. Thinly-sliced sirloin would easily work.
Don't count this recipe out for vegans. I suspect that plant-based meat crumbles or crumbled and browned tofu would be a swell swap for the ground beef in this recipe. If you give either option a try, please let the rest of us know how it goes.
If low-carb is your jam, swap the rice for cauliflower rice like Mandy does. It serves four, so my sweetheart and I each have dinner and a grab-and-go lunch with very little effort.
Don't be shy with the ginger! I uses pieces that are longer than my thumb and about twice as wide. The three-step recipe is really straightforward: Start your pot of rice first, and in about 20 minutes you'll have tasty, simple weeknight meal.

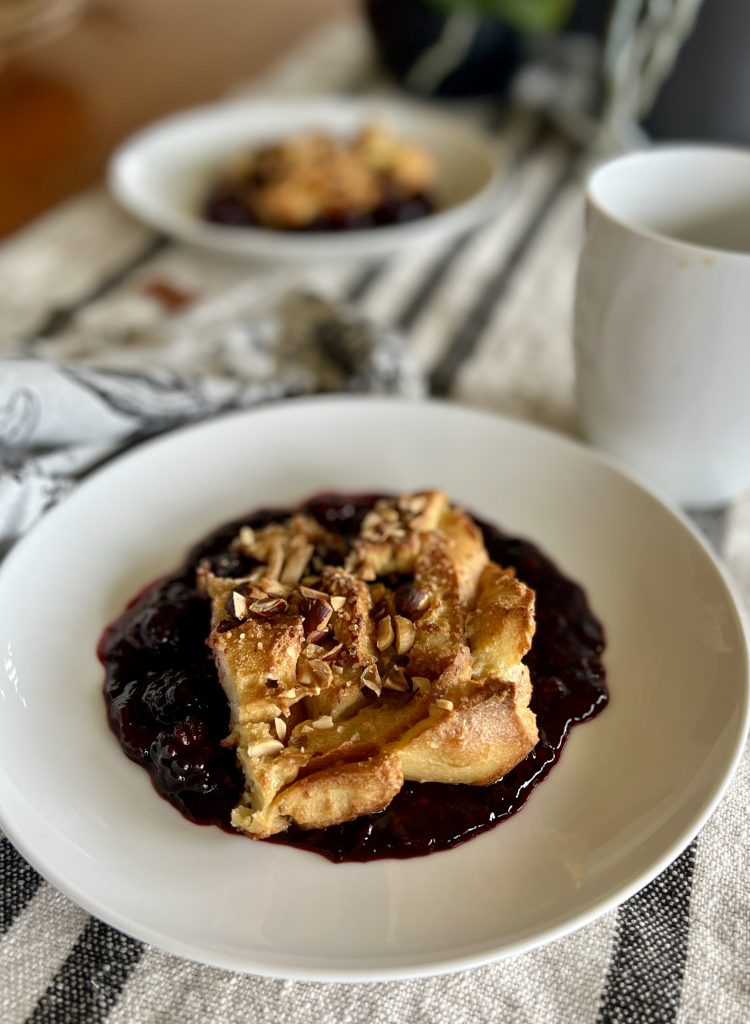
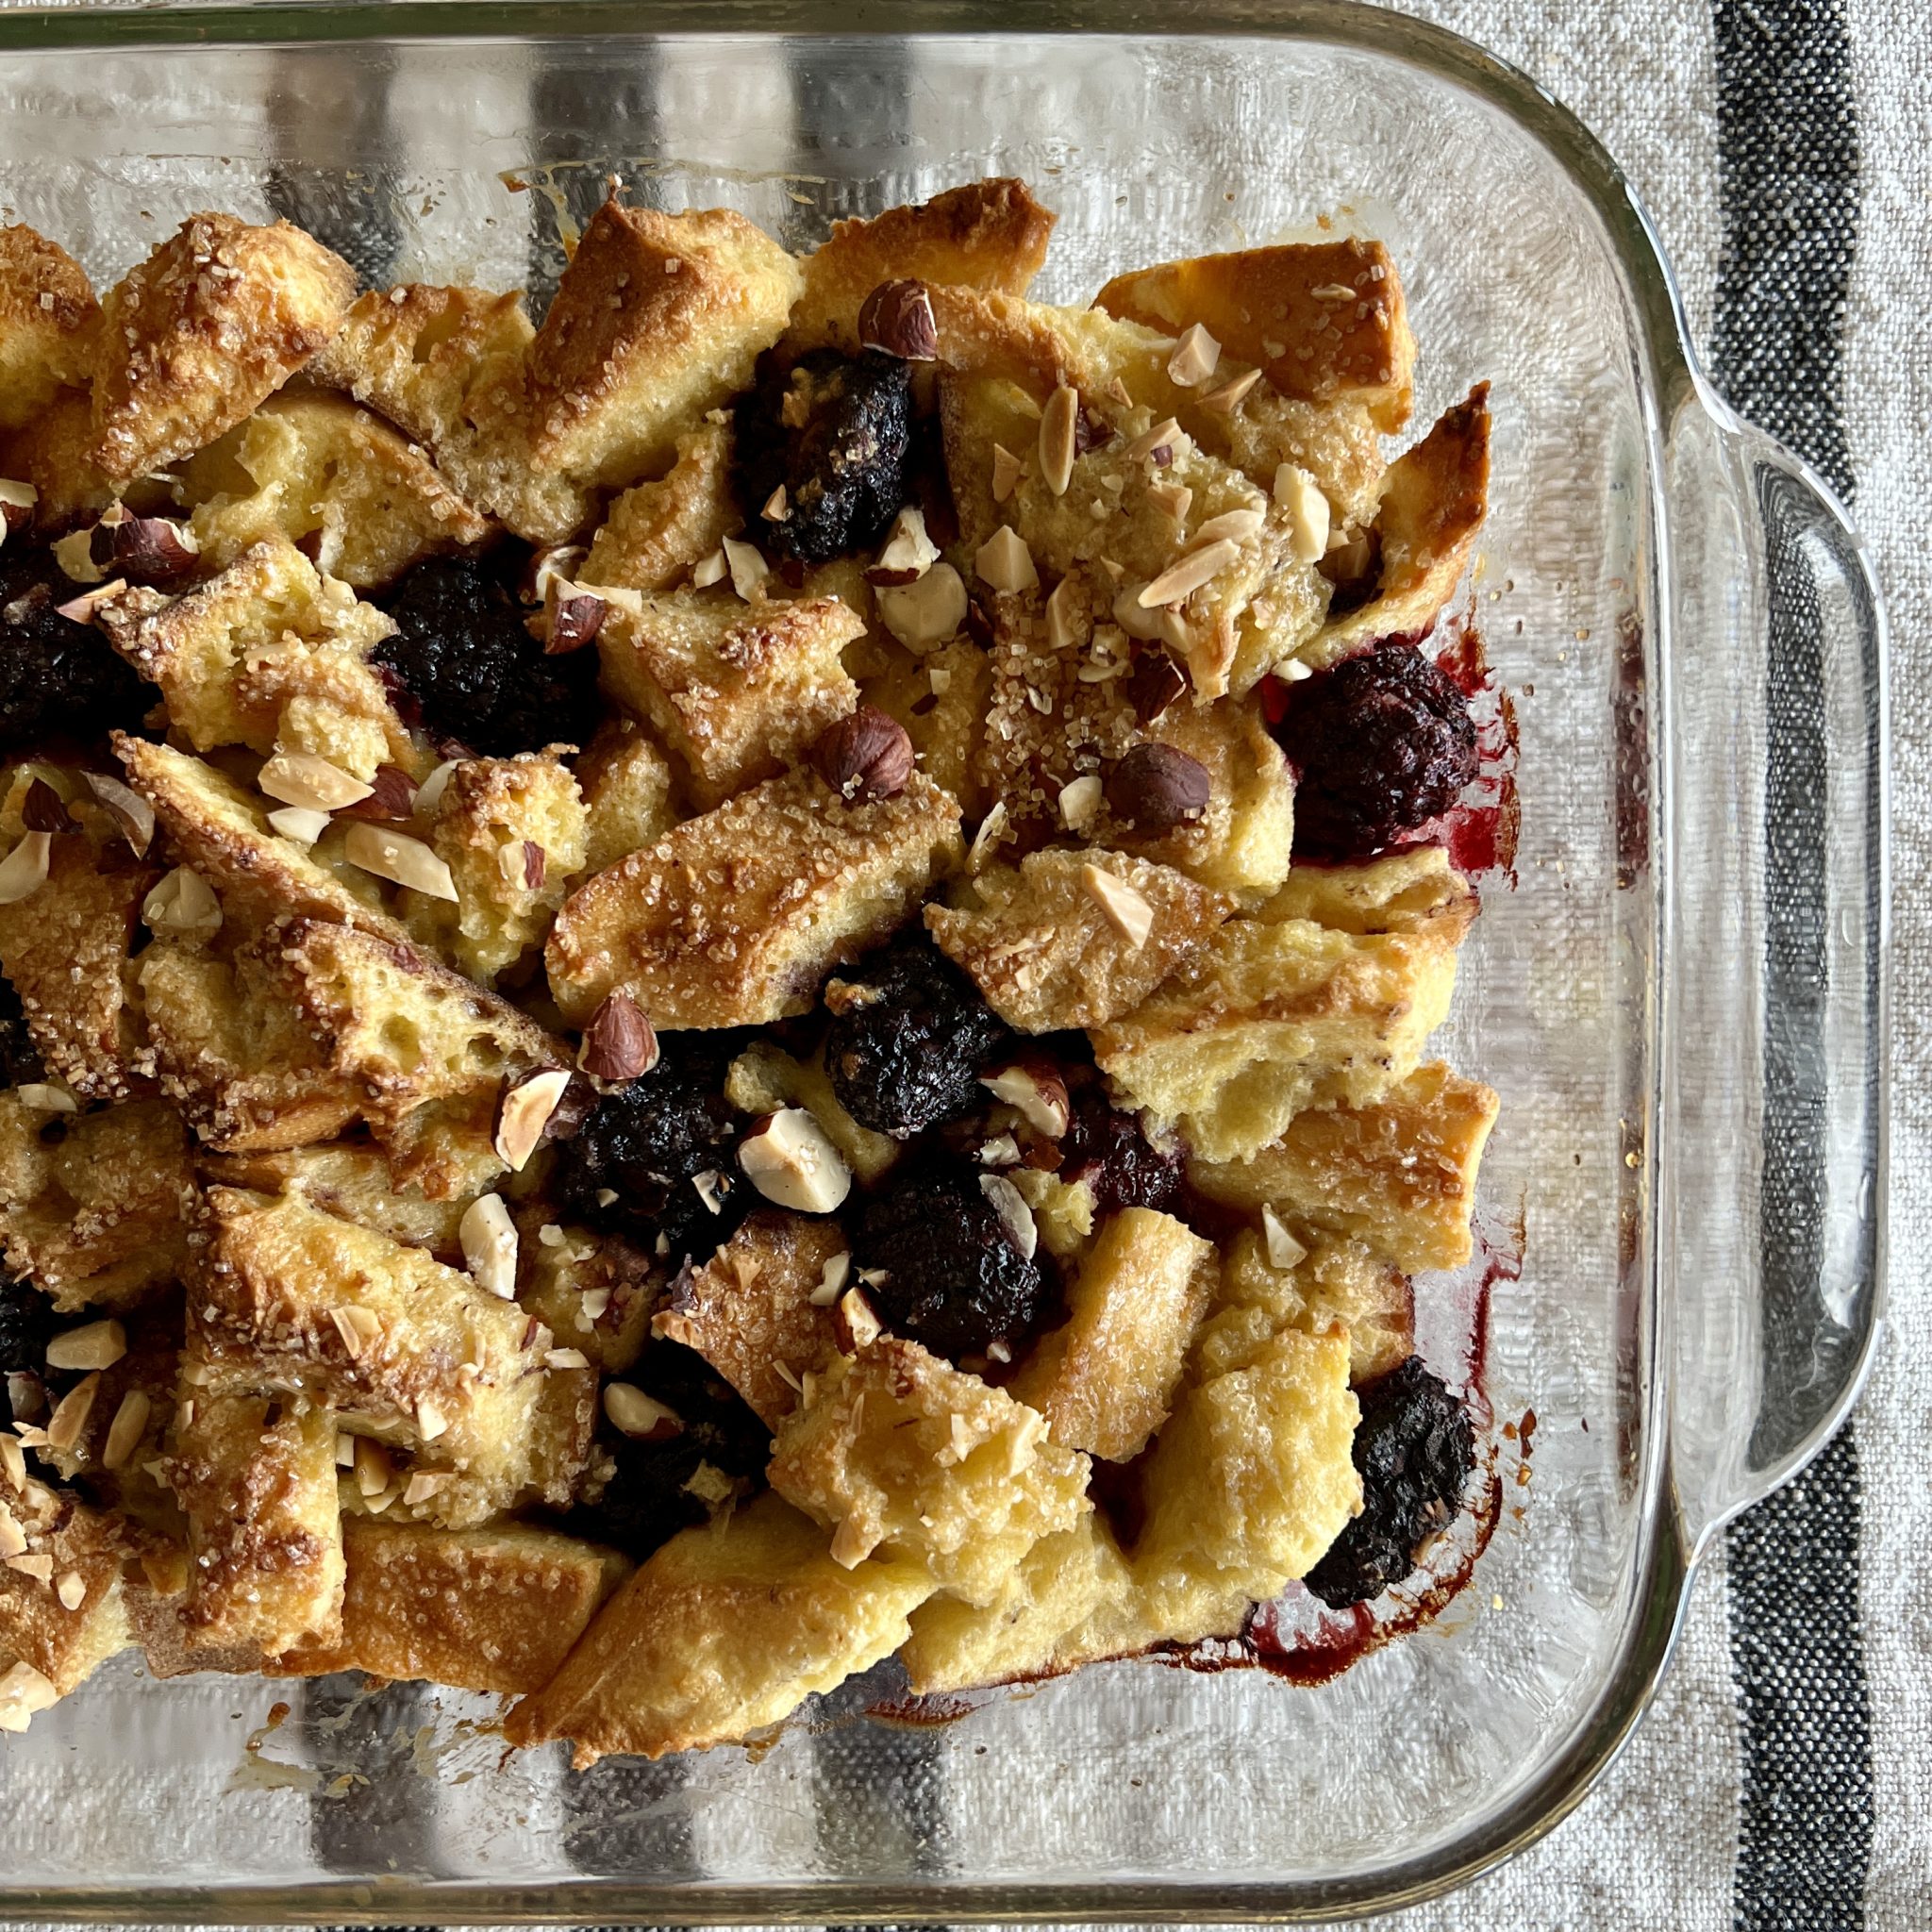
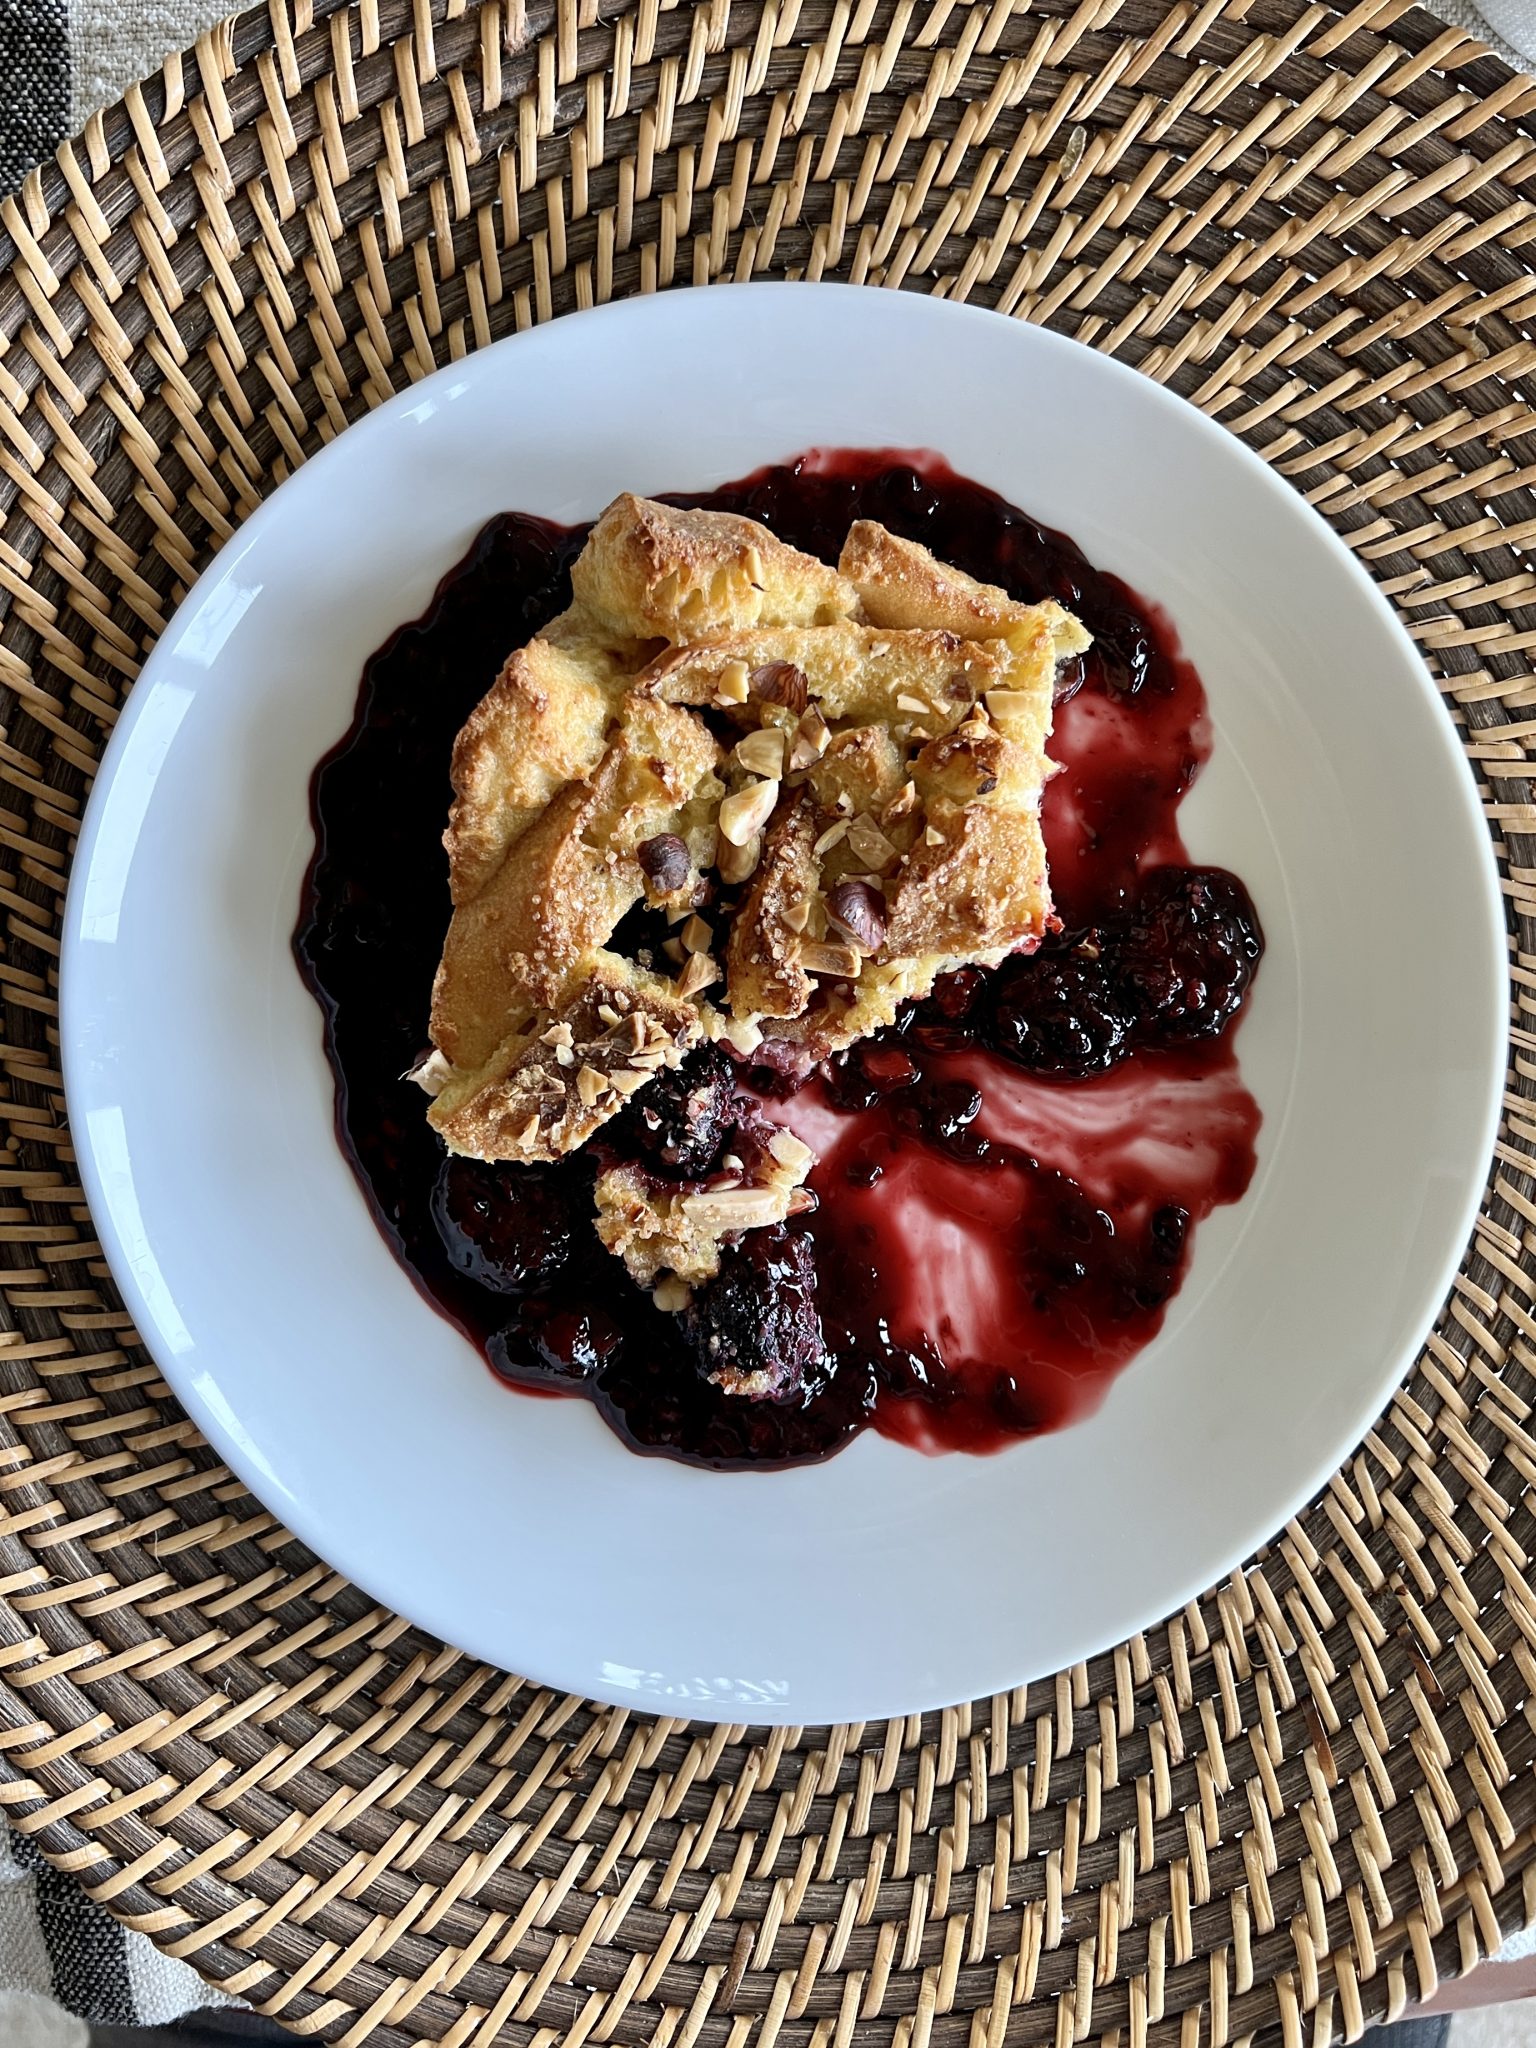
Brunch. A nice word made even nicer with baked French toast and berries. It is bursting with exquisite berry flavor, especially when served with its joyful berry compote. And best yet, it can be made hours before and popped into the oven last-minute.
With this recipe in hand, go ahead! Invite your favorite moms over on Sunday, or set up a fun friends brunch. This pretty dish is also perfect for upcoming baby or bridal showers, or a just-because celebration breakfast treat. Or, why not make it with kids the night before to let the anticipation of a special breakfast build in their dreams?
Where I live, we'll be flooded in the best berries in the world in a couple of months. While we wait, we home cooks reach to the back of our freezers where last year's ripe bounty is preserved. I feel especially accomplished when use the last bag of icy blueberries or blackberries just in time for the new harvest.
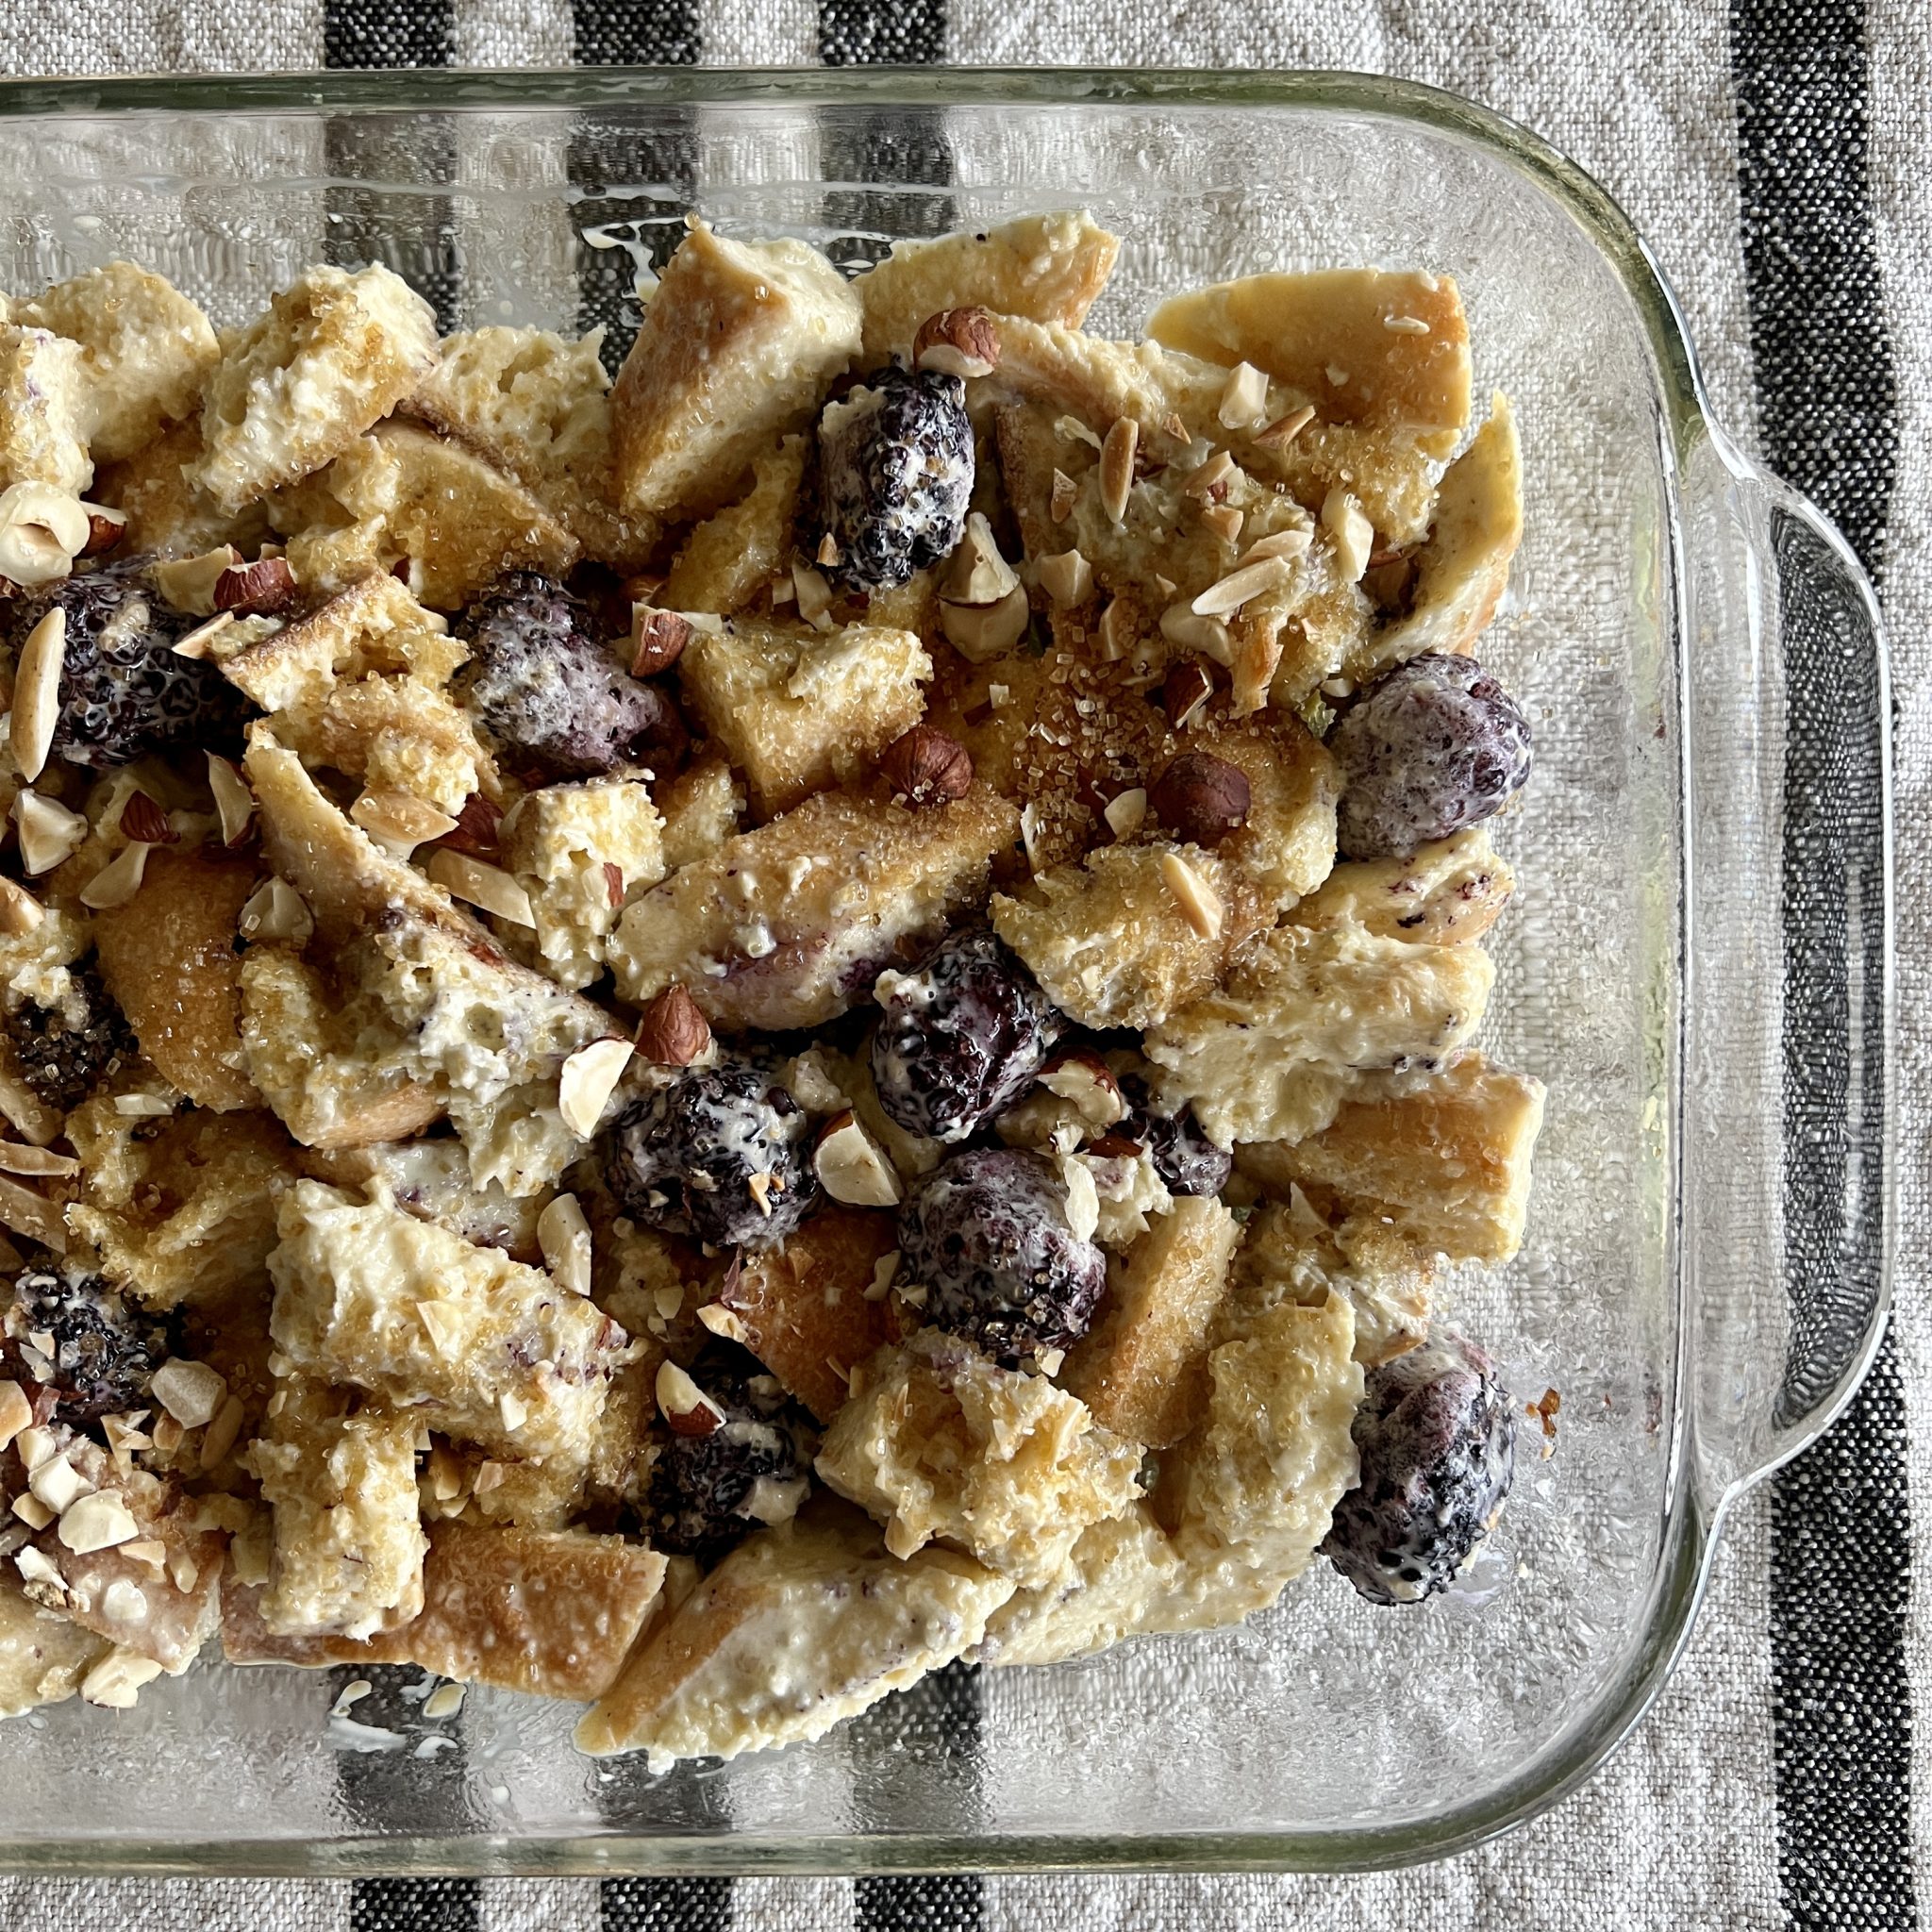
Make-ahead berry French toast is perfect with any of the berries-- straw, blue, black, Marion, huckle, rasp, or a colorful mix. Use frozen berries, or fresh. A note on berries-- it is worth waiting for peak-of-season varieties for the full flavor experience. Unless it is summer berry season where you live, quality brands of frozen berries will taste better than less-than-ripe store bought.
The quick custard is customizable, too. Use cream if you have it for the most silky texture, but any dairy or non-dairy milk will work well. Just follow the modification outlined in the recipe below. Spotlight the berry-burst flavor with a simple vanilla custard, or try adding add grated lemon or orange zest (2-3 teaspoons) for complexity. Or maybe a little cinnamon or cardamom (1/2 - 1 teaspoon.)
Assemble and bake the French toast right away, or assemble it the night before you plan to serve it. The bread soaks up the custard, integrating into one lovely dish with soft cakelike insides and crispy edges and top once baked. It easily cuts into beautiful serving squares. For best make-ahead results, stir the berries into the bread/custard mixture just before popping it into the oven.
You'll already have the oven on, so Oven-Baked Bacon is the way to go. Try this method.
Sweet and Spicy Shrimp + Melon Salad would be refreshing.
A fresh Spinach, Mint, and Goat Cheese Salad would be a nice touch.
Or this Shaved Asparagus Salad with Parmesan and Raisins would be nice.
Strawberry and Sparkling Rosé Punch would be fun.
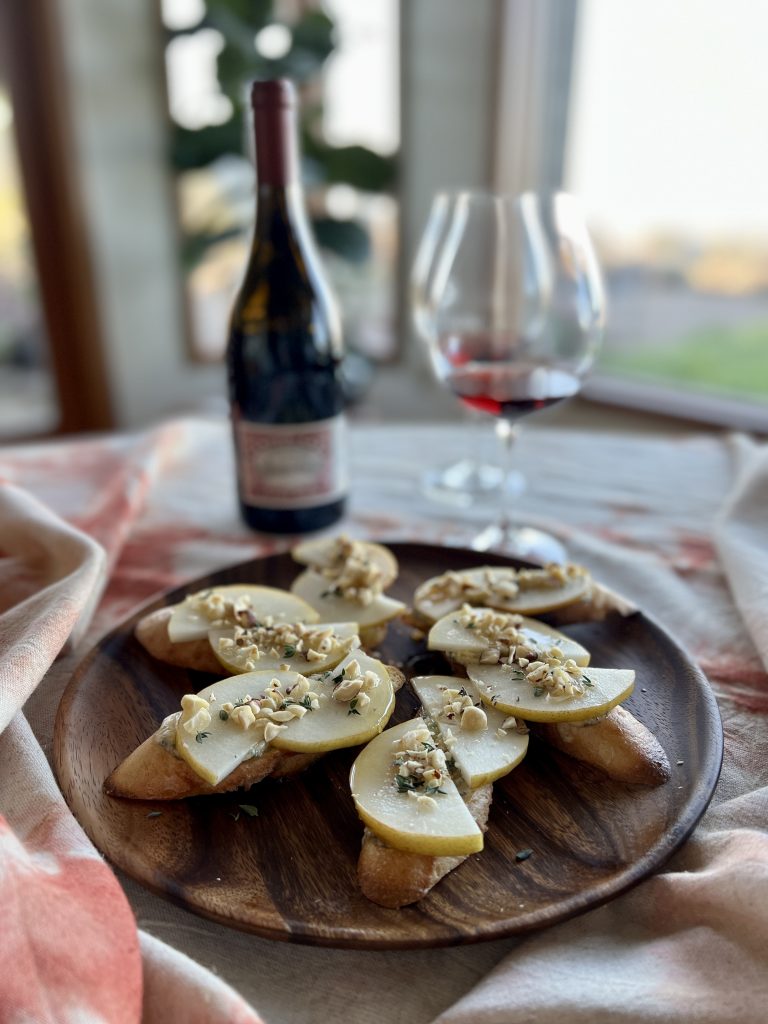
If we're going to talk Blue Cheese and Pear Tartine, we might start with this. What the heck is a tartine, anyway?
Tartine (the direct translation is "a slice of bread and butter") is how the French refer to an open-faced sandwich, or really anything served on a toasty slice of amazing bread. (Italians have their own version called crostini, or "little toasts.") It's fair to say that in France all kinds of delicious things can become tartine toppings. I've read about whole-in-the-wall tartineries in Paris that turn out glorious little morning, noon, and nighttime snacks using just a toaster oven and a few delicious toppings. It seems that the only limiting factor to what might go on a tartine is a person's imagination.

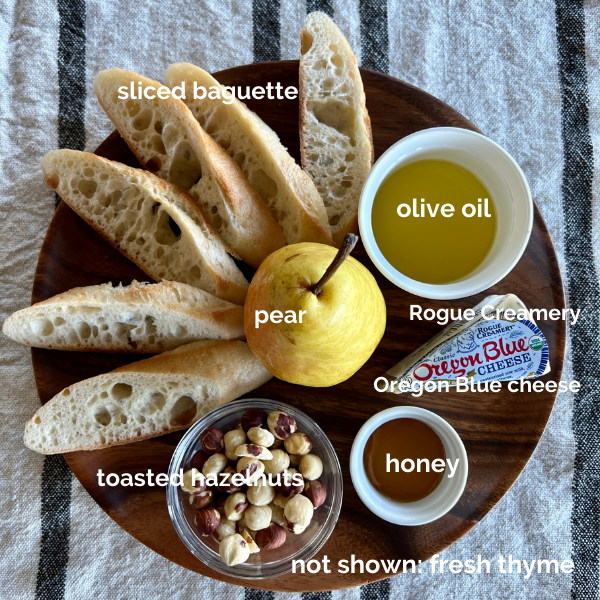
With this in mind, I decided to make a little collection of tartine that reflects special places right where I live. This Blue Cheese and Pear Tartine recipe samples the micro-cuisine of Oregon's Rogue River valley. Rogue Creamery makes the most fabulous Rogue River Blue cheese. Before aging, the wheels are wrapped in Syrah leaves that have been soaked in pear spirits which is, well, wow! Rogue River Blue is a cool-weather seasonal cheese that sells out every year, and when that happens, their Oregon Blue is my next choice. It is also cave aged, and mild and creamy.
The Rogue River Valley is also famous for its pears, with a long history that goes back to seeds pioneers in covered wagons brought west in the mid-1800s. If you've ever been the happy recipient of Harry & David pears, also a Rogue Valley institution, you know how special our Oregon pears are.
My gift to you!
If you'd like the larger collection of tartine recipes I've dreamed up that reflect Oregon's Columbia River, Hood River, and Willamette Valley, click here to request one.
With the weather drawing more of us outdoors and the days growing longer, springtime feasts and little improptu gatherings are starting to happen. Do think of making blue cheese and pear tartines, either for a special breakfast, a light lunch, or as an appetizer for your get-togethers. Use whatever blue cheese and pears you find at your market.

Oregon's tourism board, Travel Oregon, has a remarkably organized the state into regional "food trails" and provides visitors with lovely guides to each. If you find yourself in my neck of the woods, Travel Oregon will send you a guide prior to your visit. I also offer cooking classes in my home where you can have a wraparound experience-- local food and wine in the Oregon countryside with an expansive view.
If you don't have a trip to Oregon planned you can also replicate our special cuisine at home by sharing one of my online cooking class experiences. Here is more information about my online and in-person cooking classes.
Garlicky Greens and Grilled Cheese Sandwich: Recipe here.


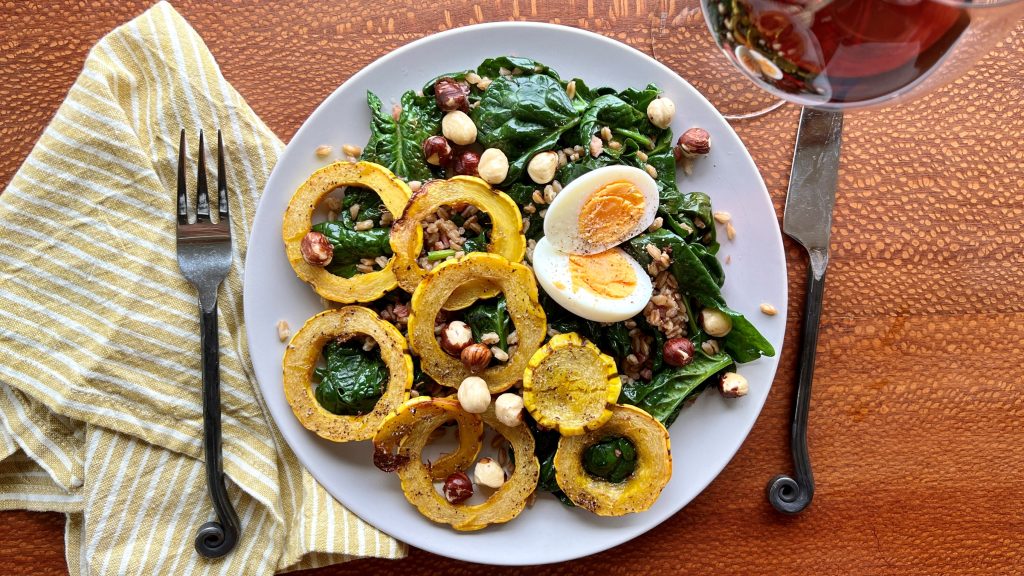
Every now and then I cook for just myself, something like this warm spinach salad with pancetta vinaigrette, warm barley, toasted hazelnuts, an egg, with beautiful golden crowns of Delicata squash. It takes me back to my single days when I first learned to eat alone. For 47 years of my life there was family at my dinner table, and suddenly eating alone was such a hard thing. I had finally learned to enjoy it by the time this one particularly extraordinary guy came along.
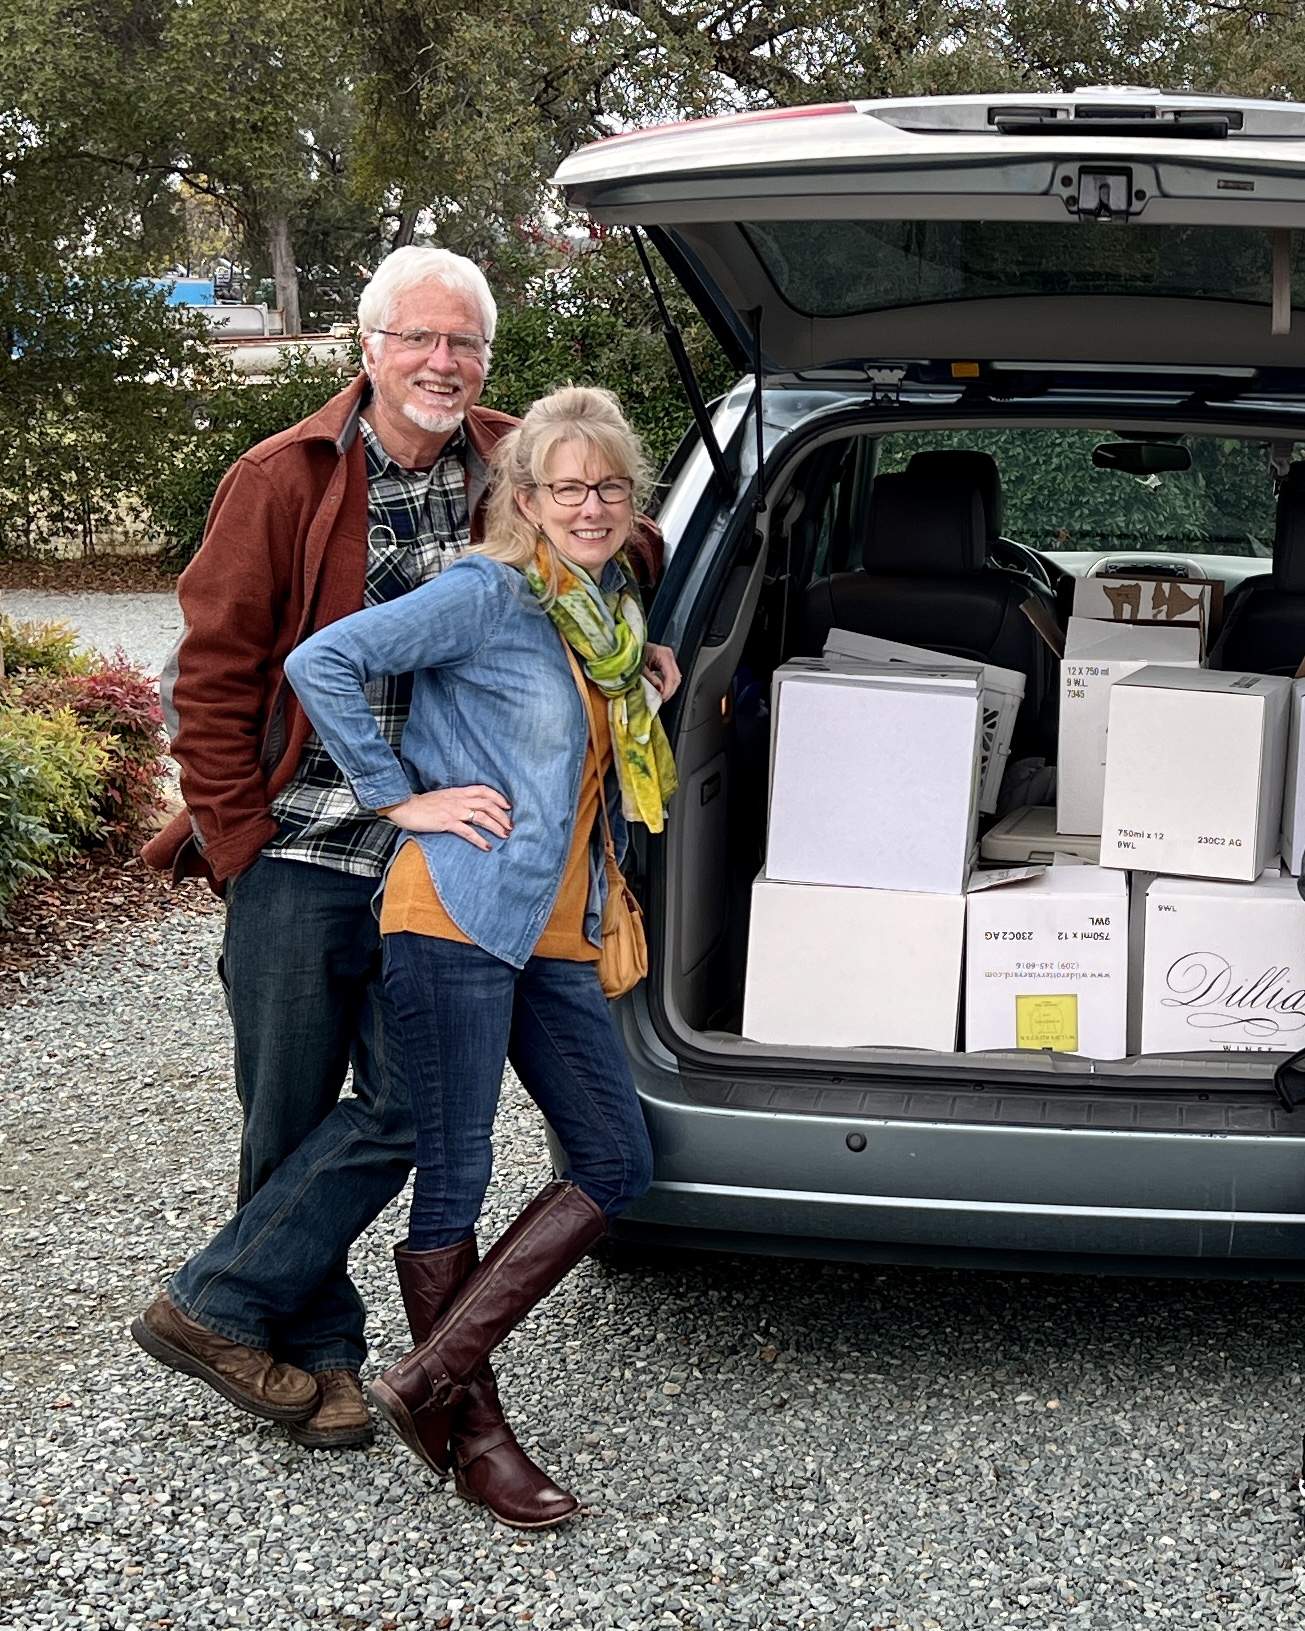
What can I tell you about my this man, who became my husband? First, Scott is a never-ending source of puns that always make me laugh. He is really sweet with his mother, daughters, sons, grandchildren, my whole family, friends, grocery checkers, wait staff, dogs and cats, well, everyone. He always takes the generous view of (nearly) all people.
Going places with him is always a fun adventure.
We once hiked what seemed like 400-foot high sand dunes to visit the Oregon coastline. The wind was howling, it was raining, and my hikers were filled with sand. It had not been my favorite afternoon, and we still had to climb back over the dunes to get to our car. I was over it. He pulled out his phone, pretended to dial, and held the phone to his ear.

"Hello?" he said with a serous façade. "My wife is ready to have the helicopter pick her up and return her to the chateau. Twenty minutes? Great, thank you." Scott always knows how to make me laugh, and how to gently move my legs-- and my attitude-- in the right direction.


I could go on about how smart and good looking he is, too. But here's what you really need to know. At this moment one of Scott's most dearly beloveds is in long-term hospital care. She lives far away, and when he couldn't be at her side in the first days of her medical situation he was nearly beside himself. He has now spent a few weeks at her bedside helping her heal, with more time away from home to come. He has full-heartedly embraced the task of caregiving in the most beautiful way, with strength, humor, devotion, and hope.
So, this won't be the last time I make spinach salad with pancetta vinaigrette for one. I'll be doing more dining alone off and on for a time, while this amazing person I call my husband is away doing God's work of loving so well.
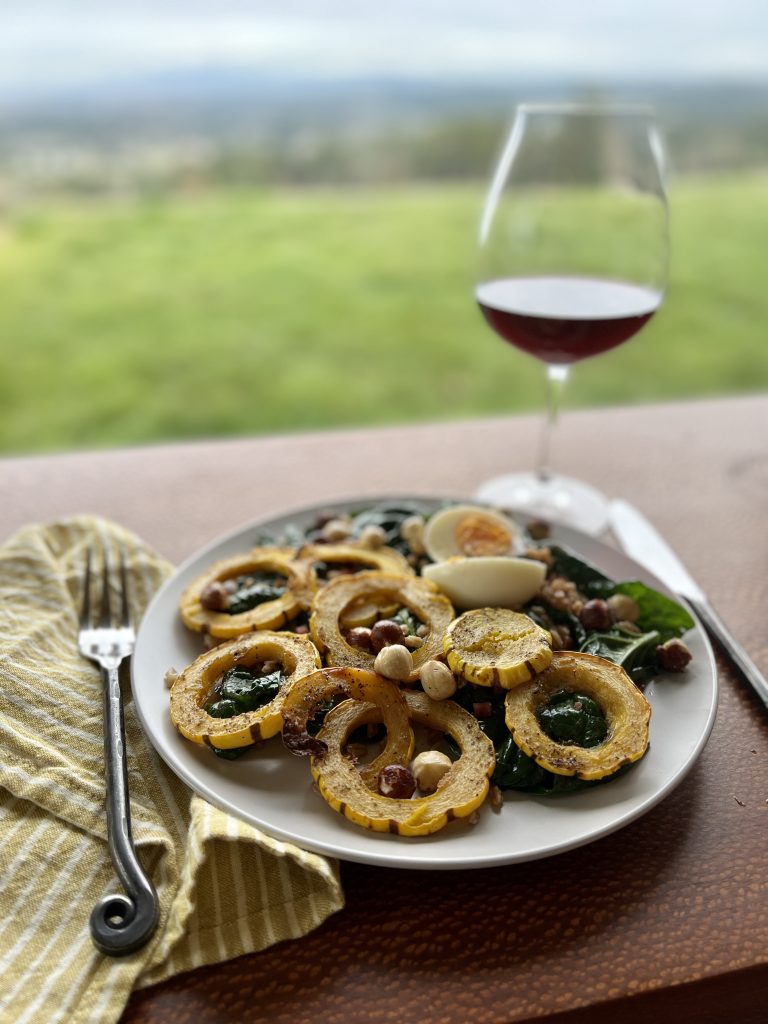
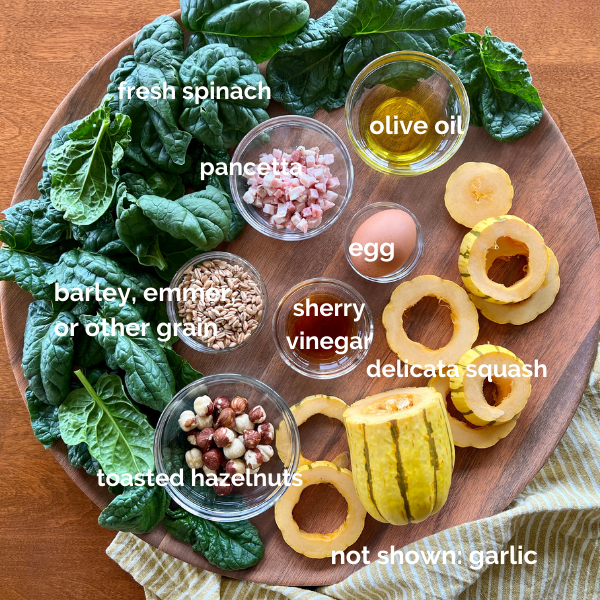
This pretty shoulder-season main-dish salad uses hearty curly spinach, the last of the winter Delicata squash in my vegetable basket, and some warm cooked barley, naturally gluten-free buckwheat groats, or farro. Warm salads are so satisfying during the spring and autumn season changes. This one is every bit as yummy to eat as it is lovely to look at.
Portland's James Beard award winning Joshua McFadden's book, Six Seasons; A New Way with Vegetables provides the inspiration for the pancetta vinaigrette. I divert from his recipe in a few places-- I use the olive oil and rendered pancetta to lightly wilt hearty spinach right in the pan. Sherry vinegar is my choice for this dish instead of red wine vinegar that Chef McFadden uses, and I add it just as the spinach is finished wilting in the pan. And, since I'm cooking for one, I reduce the overall ingredient quantities.
Roasted Mushroom, Grain + Spinach Salad: Get the recipe here.
Crunchy Cold Buckwheat Noodle Salad + Peanut Sauce: Get the recipe here.
If you like this recipe, please give it a rating by clicking on the green stars on the recipe card below. That will help others find it in their searches, too. If you like this post, please subscribe to receive my newsletter for more recipes, cooking tips, and cooking class information. When you sign up, you'll receive a free downloadable Taste of Oregon tartines recipe booklet.
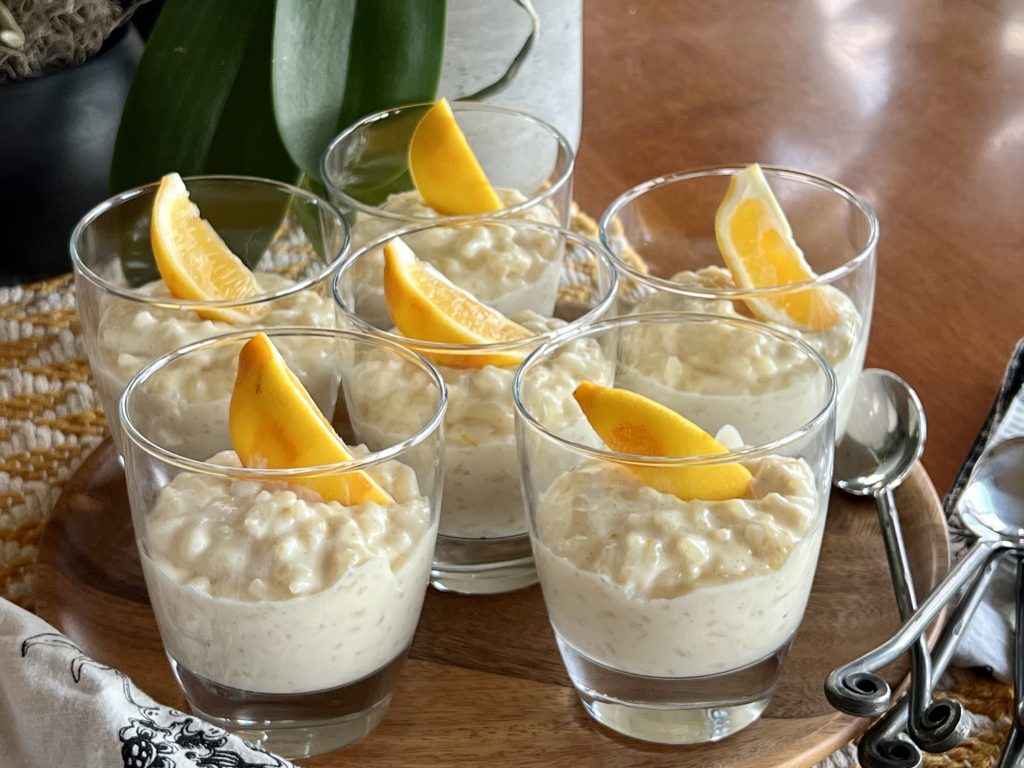
I wish I had a nickel for every time the words "comfort food" have been used in the United States since March 2020. With the money, I'd launch a campaign to deliver a cup of Vanilla Lemon Rice Pudding to the doorstep of every American, thereby redefining comfort food in our culture.
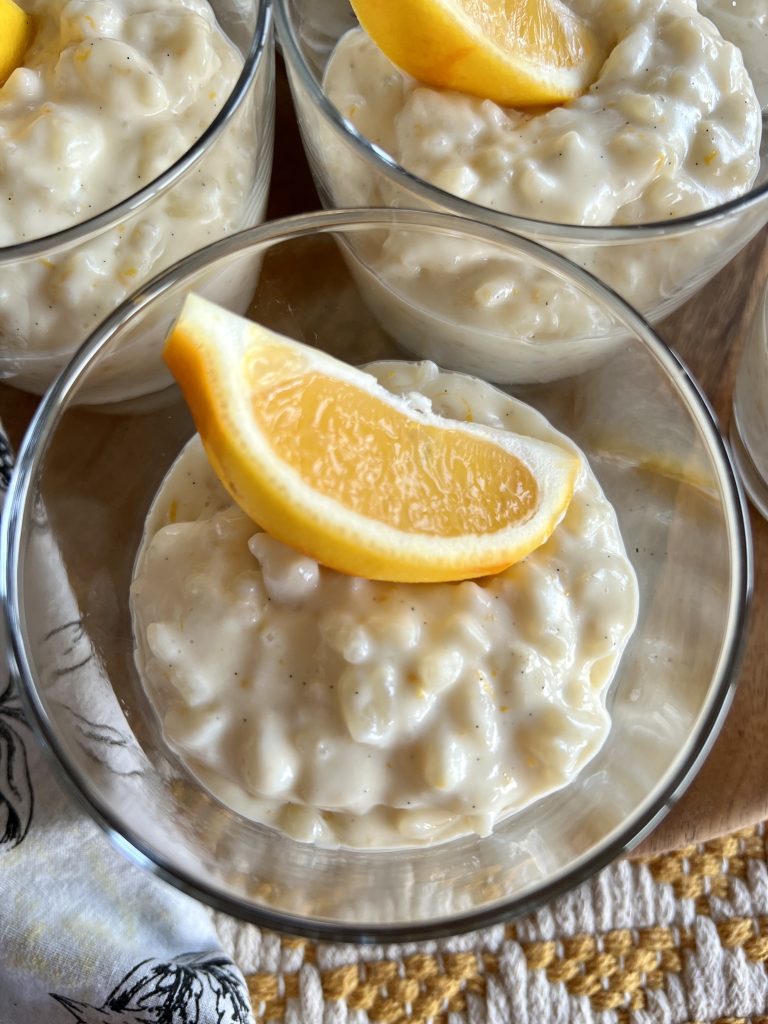
This recipe is gently sweet, creamy but not cloying. It is alive with lemon zest, and ethereal with a whole vanilla been (or vanilla extract.) Vanilla Lemon Rice Pudding is far more exciting than any other rice pudding I've ever had. Yet as comforting as your favorite cashmere sweater.
I learned of this bit of deliciousness from Katherine Burns of Rue Dauphine Paris. Katherine's Rue Dauphine Paris Instagram feed is full of glorious photos of her visits to historic gardens, churches, shops, and arrondissements in Paris, some lovely French recipes, and a glimpse of how she brings the Parisian lifestyle into her own Seattle home. Another bit of fun-- she and May of Noisettes 1420 (also a fabulous peek into Paris) host a Francophile book club, which I promise myself to participate in some soon day.
Needless to say, discovering Rue Dauphine Paris has brought me a bit of joy in these travel-less days, and has me wishing Katherine would be my guide to Paris one day.
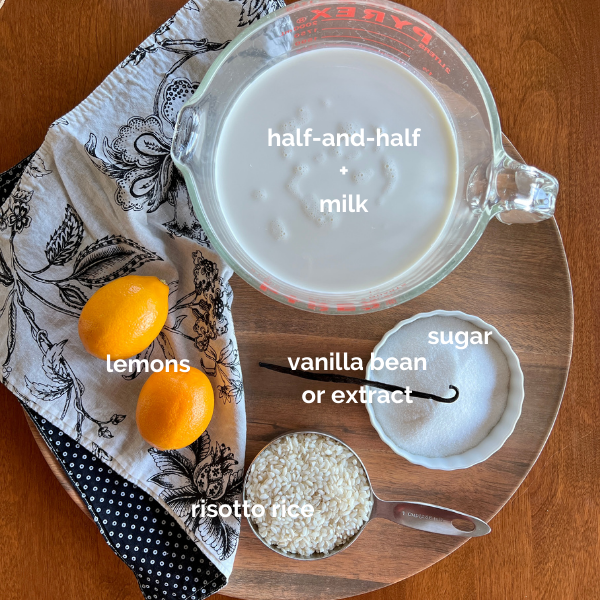
Katherine graciously allowed me to share her vanilla rice pudding recipe with you. I've renamed it to bring justice to the magic the lemon brings. I've made a slight change to the dairy component, swapping her 4 cups of whole milk + 1 1/4 cups heavy cream for 1 quart of half-and-half and 1 1/4 cups milk), otherwise this is completely hers. This change retains the silky creaminess of her version, but leaves me with no wasted partial carton of whipping cream. She is right in that the sweet aroma of lemon and vanilla this offers when bubbling on the stovetop is most pleasant.
You should definitely use Meyer Lemons when they are in season for this. The floral mandarin/lemon flavor is fantastic. I think orange zest would also be wonderful, like a creamsicle. However, standard Eureka or Lisbon (everyday grocery store0 lemons will still take you over the moon.
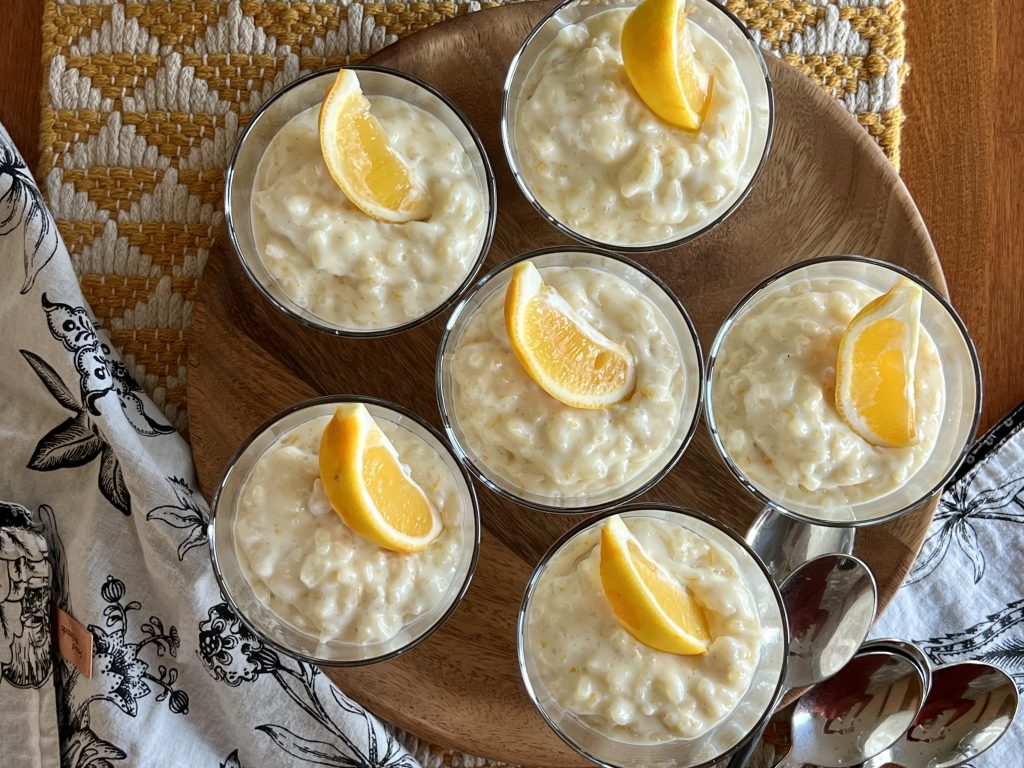
Katherine serves hers in flowery china cups, a touch of French charm, with a drizzle of caramel sauce. I like serving the rice pudding with a wedge of the zested lemon. A squeeze over the top brings a little acidic component as a balance to its sweet creaminess.
When I started dreaming of Vanilla Lemon Rice Pudding in the middle of the night, I knew I had to share it with you. It has become my new favorite sweet treat. Maybe it will become yours, too, as you dream of far away places.
Nutty Chocolate Port Ice Cream Sundae: Get the recipe here.

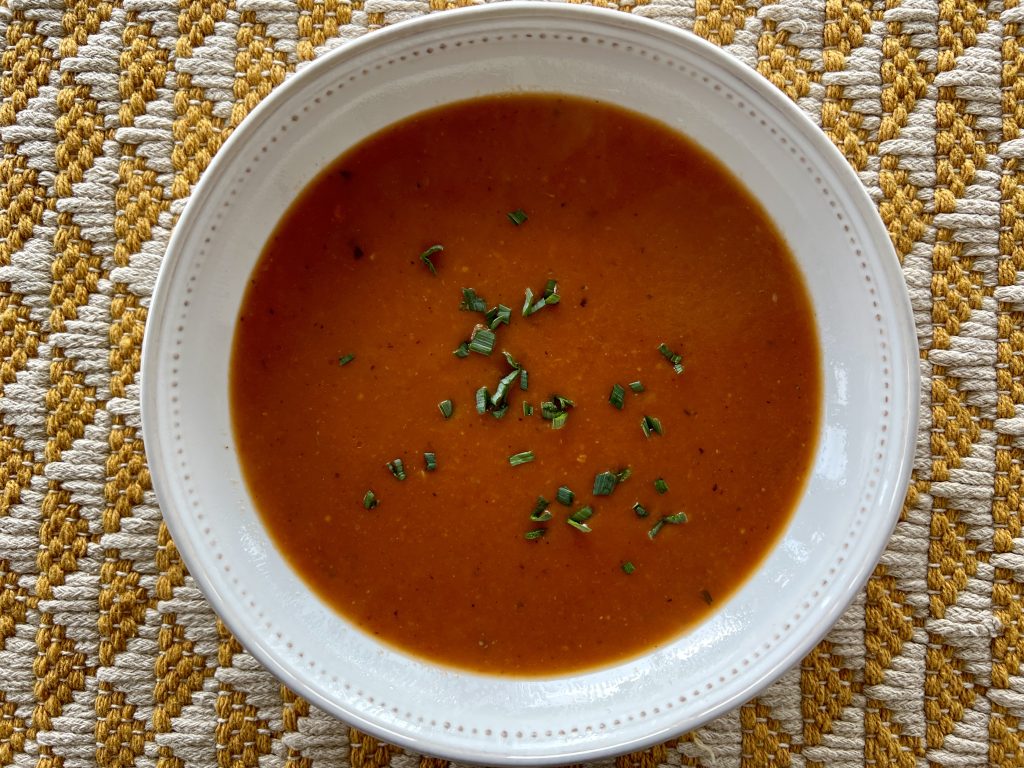
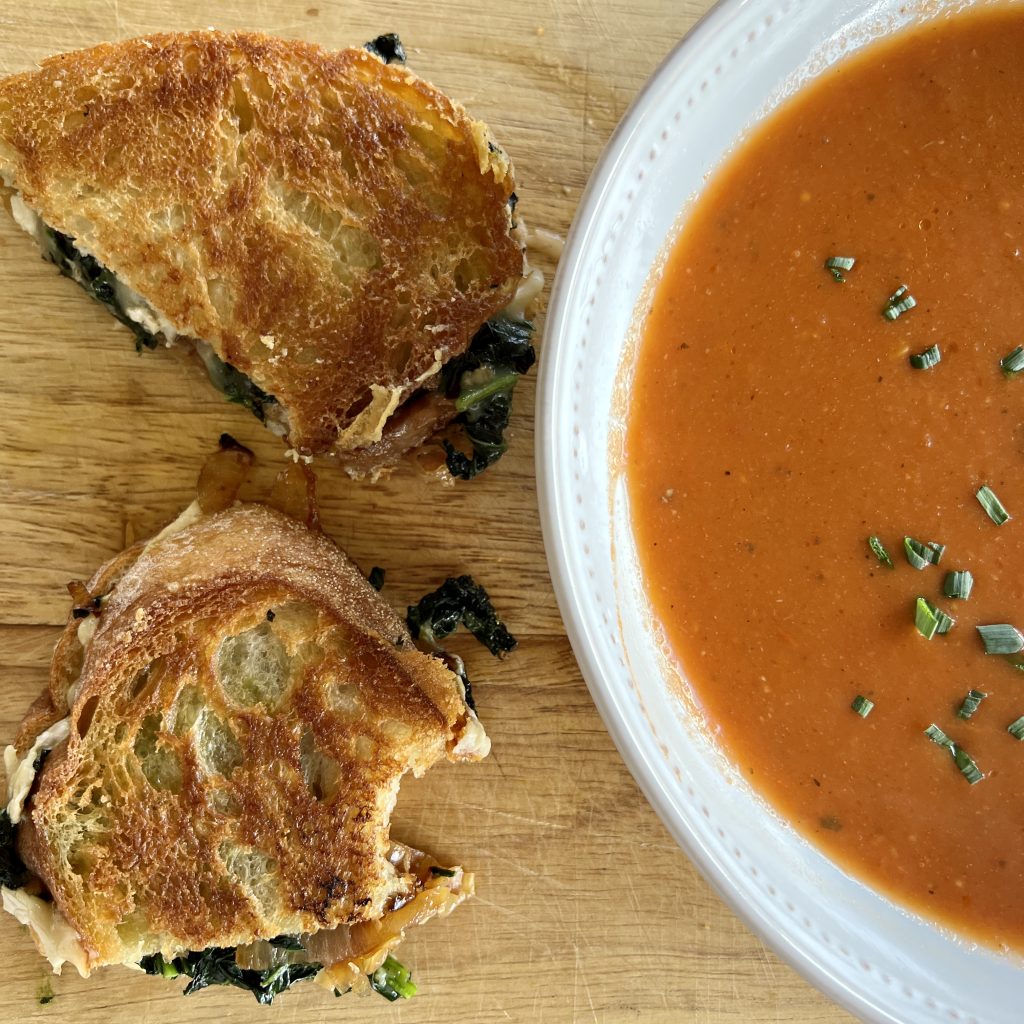
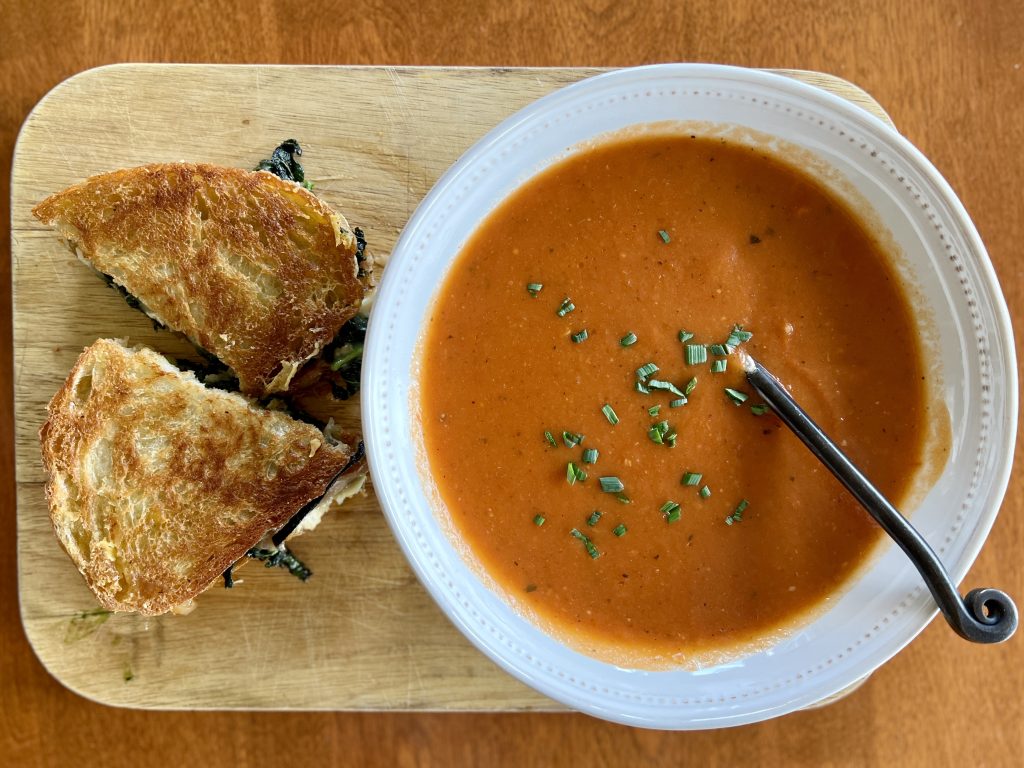
Yesterday I shared with you The World's Best Grilled Cheese Sandwich, made with garlicky greens, caramelized onion, and brie. It's only fitting that you have The World's Best Tomato Soup recipe to go with it. The two are a match made in heaven.
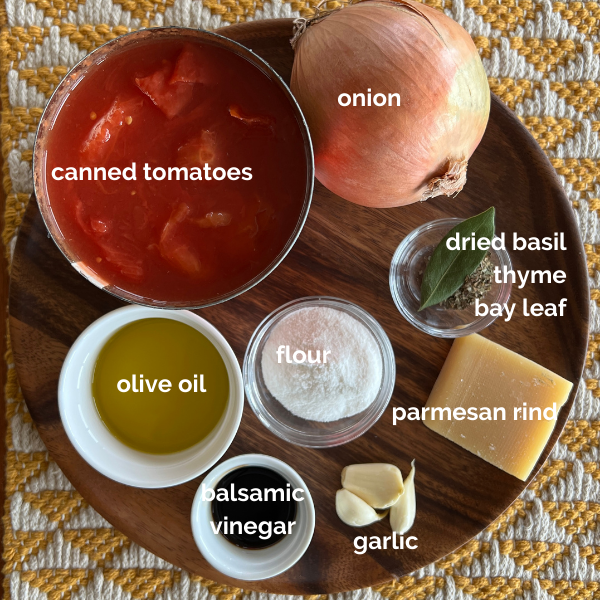
I've driven Interstate Five through California's agricultural regions many times. Enough times to see truckloads of produce pulling off the highway into the many canneries there. May I tell you that not all canned tomatoes are of the same quality? I've observed truckload after truckload of hard pink balls in the truck-trailers. It's not hard to know how they will perform in flavor and texture next to their red, ripe cousins. My practical observation is that you truly get what you pay for in canned tomatoes. Unless you use a lot of canned tomatoes, the price differential is relatively small. It might not make that much difference in a stew with lots of other flavors, but here's my rule of thumb: If the word tomato is in the title of the food I'm making, like tomato sauce, for example or the world's best tomato soup, I spend the extra dollar.
First, lets talk equipment. This is a time when an immersion blender is more than handy. Yes, you can blend the soup in batches in either a food processor or blender. However, a stick blender will get the job done and reduce the amount of cleanup you'll have. I've not met a cook yet who would argue with that!
Because it's still late winter I used dried herbs and a bay leaf, which also gets blended into the soup, but in the growing season, trade those herbs out for fresh basil, fresh thyme, or any of the tender, leafy herbs that suit you.
Two other touches make the soup extra special. I save parmesan rinds for times like this. Just throw one in during the short simmering period for an extra flavor boost. The rind will soften and become somewhat gooey looking, but holds together just fine and can easily be fished out prior to blending. If you don't have a parm rind on hand that's just fine. The soup is still lovely so don't let that stop you from making it. The second bit of magic comes with a hearty drizzle of balsamic vinegar as a finishing touch.
The olive oil in here gives it a creamy texture and appearance, but if you love a splash of milk or cream in your tomato soup, by all means use it.
If you like this recipe, please leave it a star rating by clicking on the green stars below the title in the recipe card below. If you like the 101-Mile Kitchen project, I'd be honored if you subscribed to the newsletter!

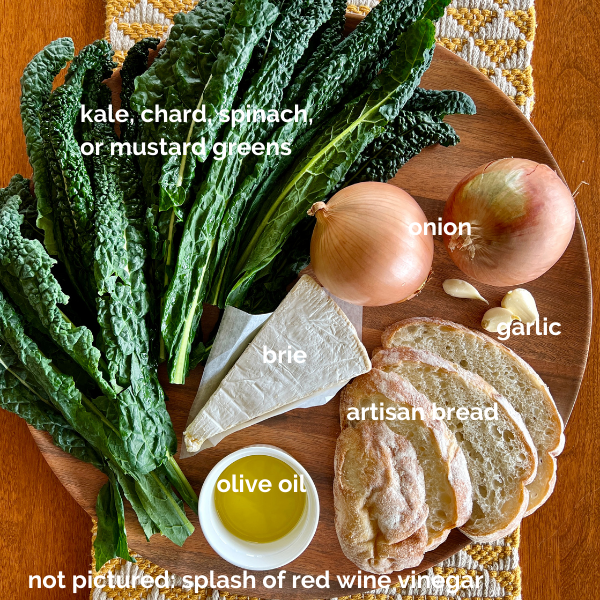
I often make soup and some kind of grilled sandwich or panini for supper in the cool weather months, and this week's sandwich was a true hit. Garlicky greens and caramelized onion grilled cheese made with creamy brie is a rather fancy sandwich. I'm going so far to say this is the world's best grilled cheese to date.
In my town there is one special spot that adds so much to my experience of living here. Provisions Market Hall is a beautiful place full of gastronomical goodness and so much more. Inside is a gorgeous florist, a wine shop, a beautiful kitchen and gift shop, a specialty foods grocery complete with lovely cheeses and charcuterie, freshly baked breads and pastries, wood oven baked pizzas with bubbly crusts, a coffee shop, and delicious lunch items. Provisions is a place of visual wonder, yes, but also offers practical support to the entire spectrum of us who cook and offer hospitality at home. When you visit Eugene, you just must visit Provisions.
I met a friend for lunch there last week ordered their chard and brie grilled sandwich special. It was so delicious I couldn't wait to try making it at home. I used kale because that's what I had on hand. Chard, kale, or even spicy mustard greens would each be gladly received in this glorious sandwich.
If you're a fan of the classic tomato soup and grilled cheese combination, this is the sandwich you'll want going forward. The slightly bitter greens, sweet earthy caramelized onion, and bloomy brie are the perfect foil to tomato soup. Tomorrow I'll share my recipe for the best tomato soup so you'll have the matched set.
There is nothing tricky here. Caramelize a few onions, cook some greens, and layer them on top of brie. Using a really good bread will also make a difference, so try for that, too.
World's Best Tomato Soup. Get the recipe here.
Winter White Vegetable Soup. Get the recipe here.
Pumpkin Black Bean Soup. Get the recipe here.

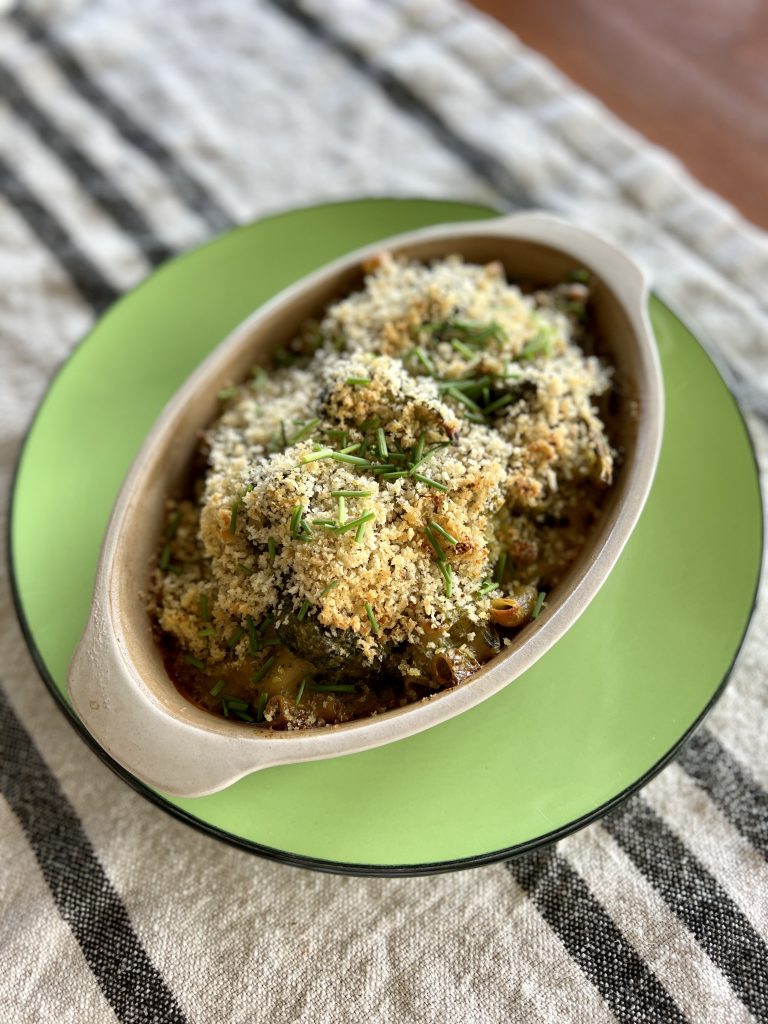
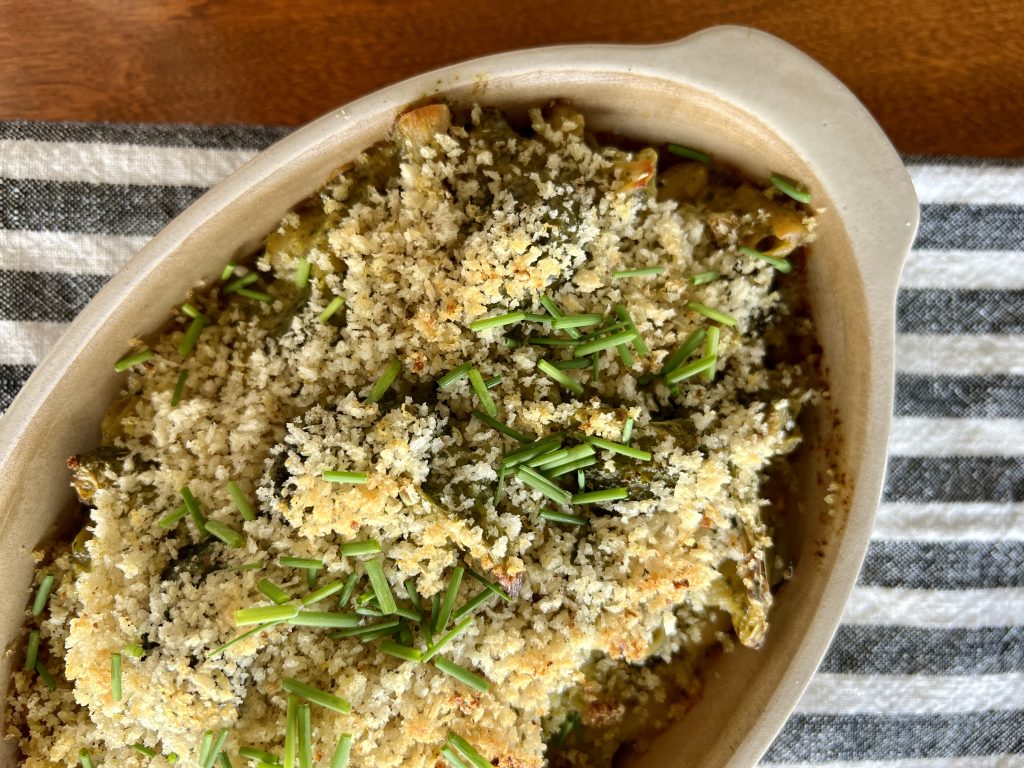
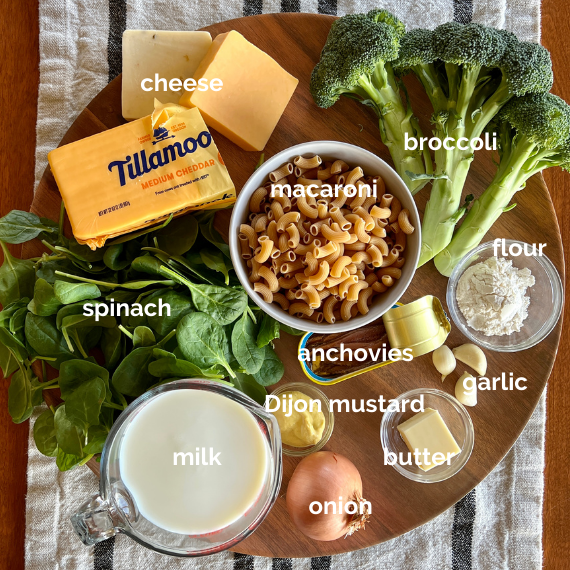
Adulting has been especially challenging this week, and comfort food has been as important as ever. Green Goddess Macaroni and Cheese has that magical combination of being carb-y, cheesy-gooey, and packed full of good-for-you stuff that ensures that if this is all you eat for a week, you'll at least be getting your vegetables.
This recipe amps up the adult factor with the addition of Dijon mustard and a few anchovies to the cheesy base. These additions offer an exciting depth of flavor snuggled up with the same cozy familiarity you expect from good ol' macaroni and cheese.
When the going gets tough for friends and family we ask, "How can I help?" Often the response is something like, "Well, there's nothing anyone can really do except send your love/ good energy/ healing thoughts/ prayers." I'm a big fan of asking the universe to surround my beloveds in need, but when I hear that there's nothing I can physically do to help it is frustrating to not DO something.
This week the shoe is on the other foot. I have been on the other side of those words how can I help? and have learned their hidden power.
Even when there is nothing practical others can do to help, the willingness of a friend to accept a small chunk of my burden has a remarkable effect. Every person who asks this forms a network of support and love that lessens my emotional weight. Every one of the beautiful souls who steps forward to ask how can I help? becomes an invisible army around us-- my family and me.
So never be discouraged if there's "nothing you can do". Your presence, your calls, your prayers and good juju are so important. So impactful. So encouraging. Such a display of kindness. Love personified, even.
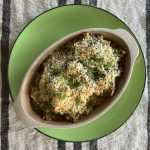
And, if you can, show up with a dish like this one so your loved one is sure to eat their vegetables all wrapped up in the comfort of good ol' macaroni and cheese.

Anchovies and Dijon mustard make this recipe incredibly wine-friendly, not that plain mac and cheese needs a lot of help with that! And this week there definitely has been wine! We found the 2020 Conde Valdemar Blanco Rioja from Valdemar Estates Winery in Walla Walla, Washington to be a better than perfect pairing. It is light, clean, and refreshing-- in other words, a wonderful foil to the rich cheese dish. This is truly a joyful wine.
I used to always make mac and cheese with this ratio:
One pound pasta/ 4 tablespoons flour/ 4 tablespoons butter/ 4 cups milk/ 4 cups (one pound) shredded cheese. This ratio feeds a tribe.
Since most of us here are feeding one, two, three or four people on a daily basis I've revised my formula:
One-half pound pasta/ 2 tablespoons butter/ 2 tablespoons flour/ 2 cups milk/ 2 cups (1/2 pound) shredded cheese. In our household, that makes enough for a very handy two meals apiece. If you are feeding a bigger household, guests, or a gathering, just double the recipe as it is written.
Yes, there are little anchovy fishies tucked into this dish. Umami, friend! Do give them a try. Adding the raw broccoli florets to the mixture right before baking keeps them a wee bit crunchy and not lost in the creamy pasta. The crispy topping adds a wonderful textural note, too. You may be tempted to forgo that part, but it is a low-effort-high-reward addition.
You'll also note that I used our local favorite Tillamook Creamery Cheddar and Monterey Jack cheeses in this dish. If you don't have a local cheesemaker near you, these are worth seeking out.
. . . for you, or for those you love:
Carrot Risotto with Green Garlic Sauce: Recipe Here.
Easy Winter White Vegetable Soup and Infinite Variations: Recipe Here.
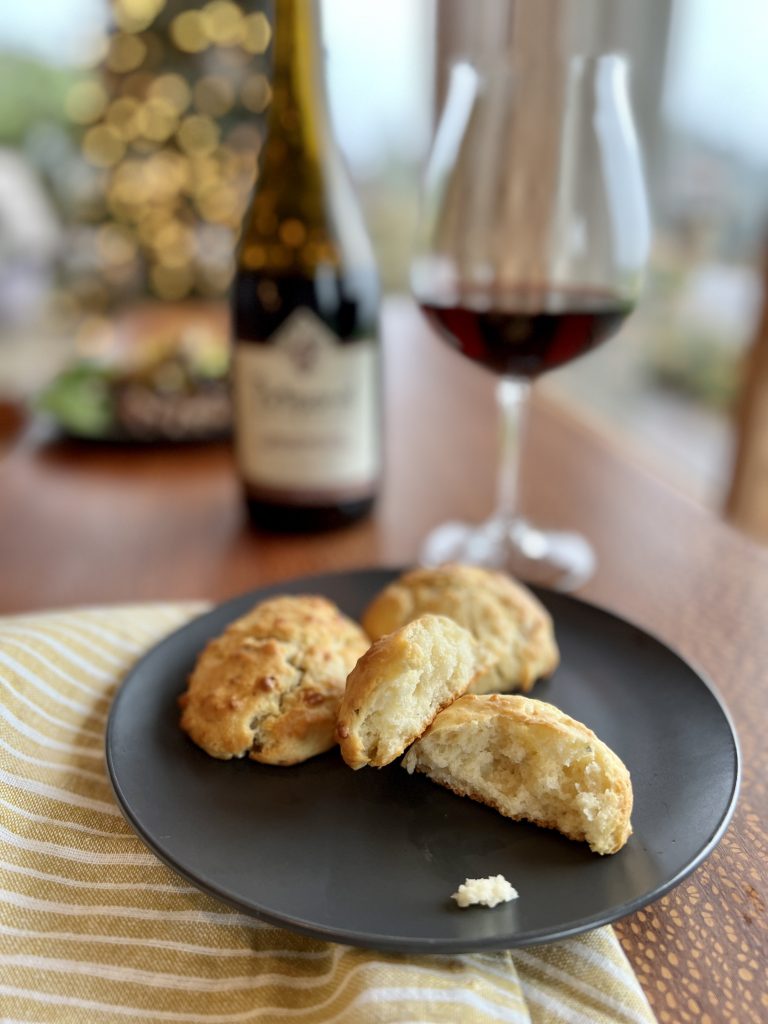
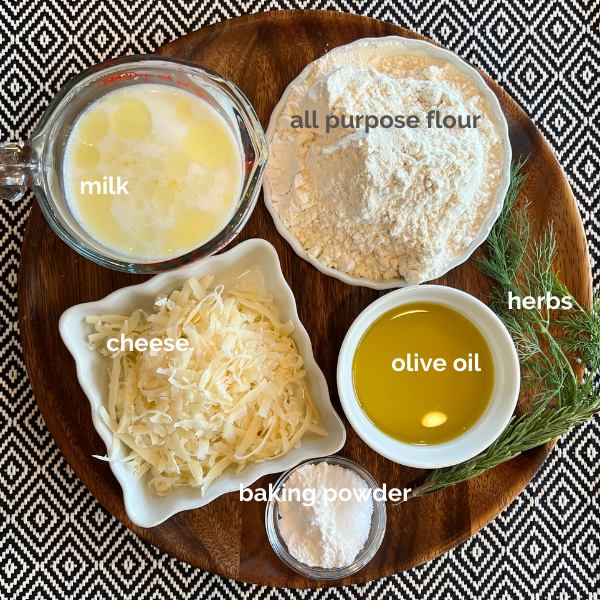
For every aspirational, time-consuming, detail-laden recipe in a cook's repertoire, she needs ten like this one in her bag of tricks. These 20-minute, one bowl Quickie Olive Oil Drop Biscuits have elevated so many meals in my lifetime. They are a perfect last-minute additional to all the soups and stews of the season. The biscuits also compliment any main-dish salad, and are a great way to stretch a meal when guests pop in (like back in the BC days.) Really, they are perfect wherever a dinner roll or biscuit would fit.
A fun trick is to make the biscuits small, dropped from a dinner spoon instead of a soup spoon, and serve them as an appetizer or snack with a glass of wine, an American version of gougères.

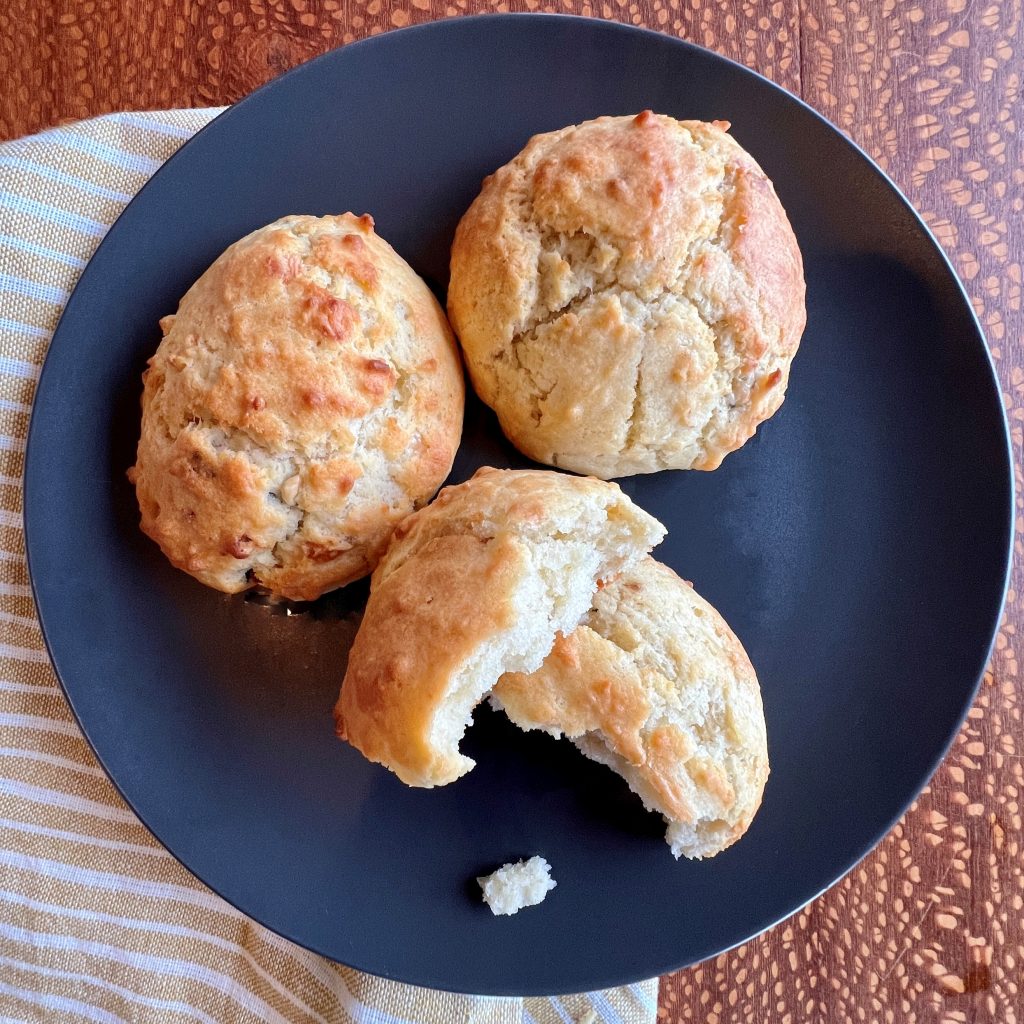
Selling point number one-- quickie olive oil drop biscuits are made in lightening speed. As in, begin preheating your oven now, and your biscuits will be mixed and formed before the oven is up to heat. There are only four primary ingredients to gather and measure here. Using olive oil eliminates the step of cutting in butter. Without the need to roll out and cut the dough like a typical biscuit you save that time, and a lot of cleanup by keeping everything contained in one bowl and not spread all over the counter.
Next, you'll fall head-over-heels for them because they are highly customizable. Olive oil drop biscuits without any of the optional add-ins are deliciously simple, and they become even more remarkable with the addition of some cheese, fresh or dried herbs, or better yet, both cheese and herbs. Any cheese that can be crumbled with your fingers or grated works here, and I often use a combination of cheeses just to use up the left-over nubbins.
Lastly, I love this recipe for olive oil droppers because it makes a relatively small batch. Did you know that in 2020, 53% of American households has one or two members? Most of us can't use a dozen biscuits. This fact is something I'm taking note of more and more when developing recipes, and you should see a change in the recipe sizes on these pages.
Any of the variations of Winter White Vegetable Soup: Get recipe here.
Healing Chickpea Orzo Bowl in Ginger Broth: Get recipe here.
Roasted Mushroom, Grain, + Spinach Salad. Get recipe here.
Roasted Peppers, White Beans, Feta + Simple Herb Sauce, made sheet-pan-style instead of grilled. Get recipe here.

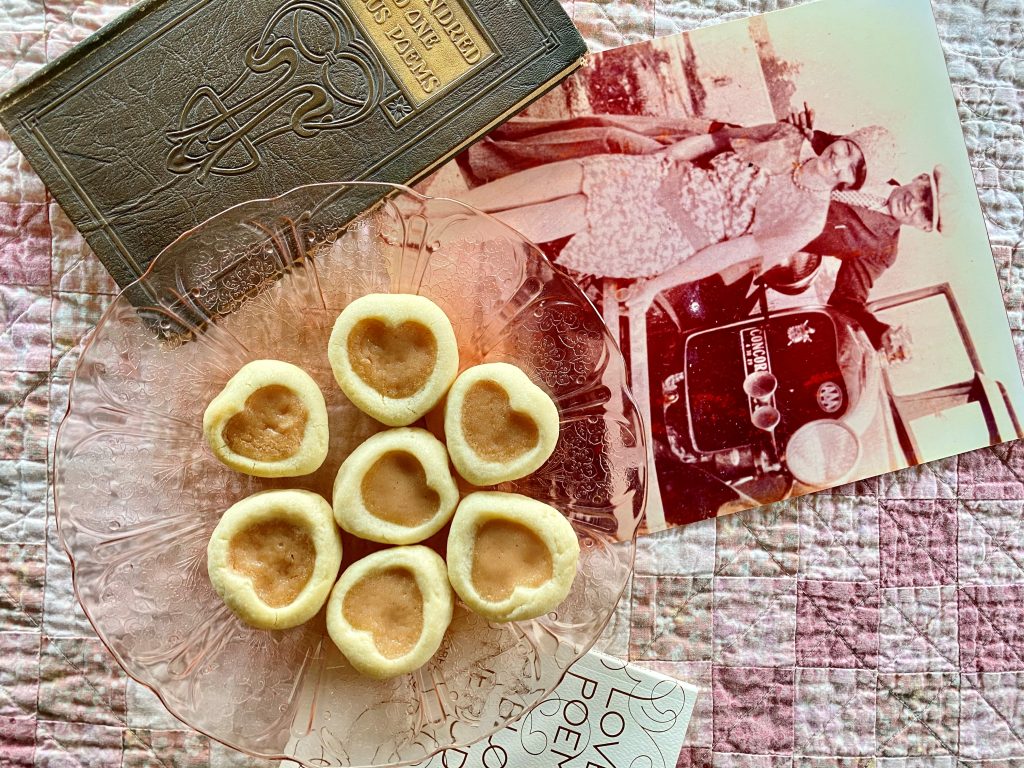
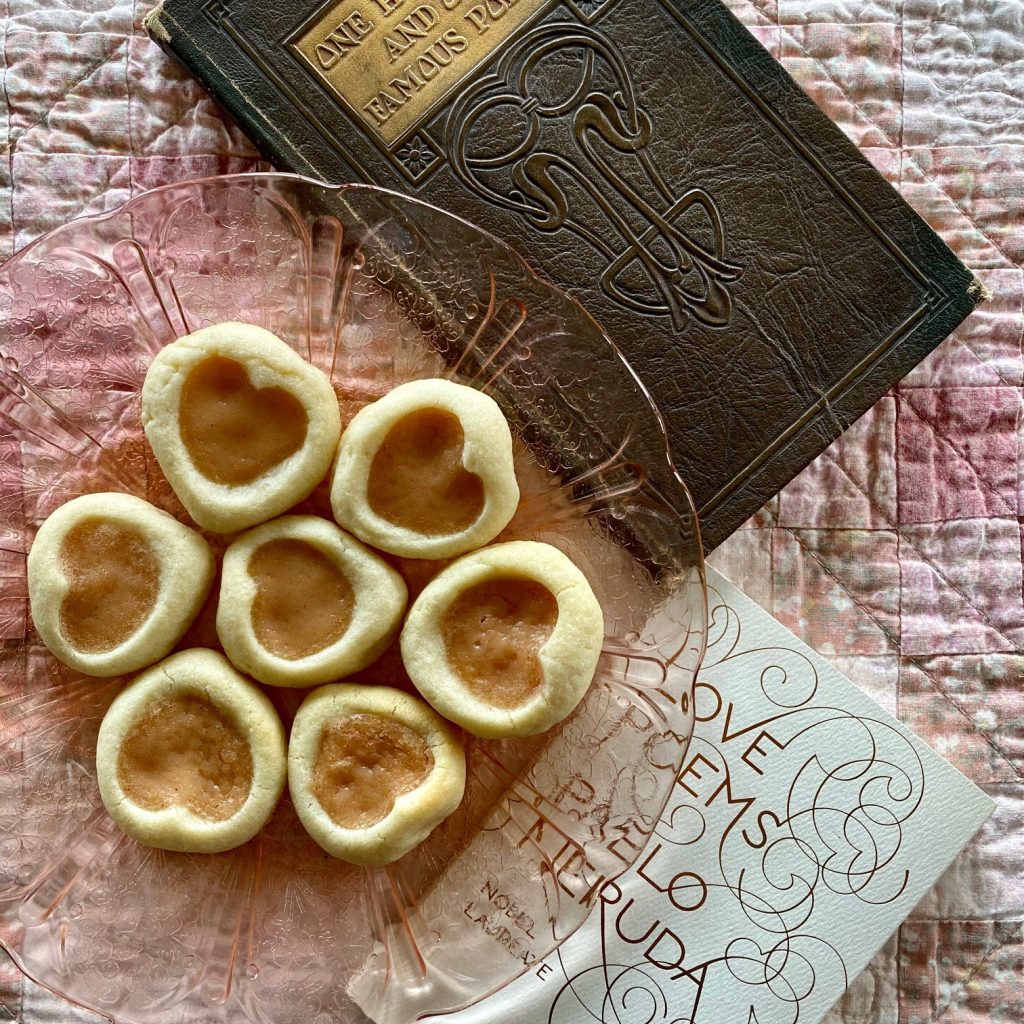
Making food for people, especially these Valentine Shortbread Heart Cookies with Blood Orange filling, is an act of love. Mr. Fred Rogers, my truest childhood hero, said, "Love isn't a state of perfect caring. It is an active noun like struggle. To love someone is to strive to accept that person exactly the way he or she is, right here and now.”
Love is showing up, on repeat, day after day. It's the things you never knew you'd do. Like spending nights in the NICU next to your newborn's incubator. Or forgiving the hurt of a friend over and over again until you don't remember it anymore, which you hope is soon. Sometimes you are the target of your own love when you allow yourself to let go of guilt, grief, or fear.
"I know the secret of life: If you want to have loving feelings, do loving things."
Anne Lamott
The wonderous thing about love, is that you will mess it up. That's just part of it.
Just like the verb cooking, loving calls for a lot doing. Trial, practice, mistake-making, and what can feel like wasted time and resources. But your flops are exactly how you learn to love better. The trick is to not give up. Keep practicing. Your acts refine as you practice them. Your acts become who you are. With a little tenacity your love eventually looks more like the soufflé you'd hoped for and less like the dog's breakfast.
Remember all this when you make these pretty little Valentine heart shortbread cookies for your beloveds. Each time you press your pinky into the dough, you imprint the part of yourself that is set on loving. The soft, unchilled dough gives way to make adorable little heart shaped vessels that hold a tad of sweet blood orange goodness you also have made.

As you form the little Valentine hearts, they will remind you of your beloveds. Some, like a crotchety uncle, hide their tenderness in crooked wrinkles. Some, like an emotional 8th grader, absolutely cannot contain their contents. Others are the picture of every-hair-in-place perfection. The likeness of each heart says they belong together on the plate. Their uniquenesses make the plateful interesting. Just like you and your beloveds.
Strawberry Sorbet and Strawberry Dairy-Free Ice Cream: Get the recipe here.
Chewy Hazelnut Meringue Cookies: Get the recipe here.
Flourless Walnut Cake, with plain, spice, and coffee-flavored versions. Get the recipe here.


You’re in the right place! I’m Pam Spettel, home cooking expert and guide, and I’m here to show you how to break up with cooking and hospitality anxiety, learn how to use recipes as guides rather than strict rules, and let your cooking intuition and confidence soar.
Superpower: Dreaming up recipes that work, serving them to my friends and family, and writing little stories about how cooking them well is the same as loving well.
Inspiration: Ingredients! The fresh, colorful, fragrant, local, seasonal ingredients found in the Pacific Northwest are my creative medium.
Heroes: Local food and wine producers– the people who keep me, my family, and our community nourished and happy.