Making food for people, especially these Valentine Shortbread Heart Cookies with Blood Orange filling, is an act of love. Mr. Fred Rogers, my truest childhood hero, said, "Love isn't a state of perfect caring. It is an active noun like struggle. To love someone is to strive to accept that person exactly the way he or she is, right here and now.”
Love is showing up, on repeat, day after day. It's the things you never knew you'd do. Like spending nights in the NICU next to your newborn's incubator. Or forgiving the hurt of a friend over and over again until you don't remember it anymore, which you hope is soon. Sometimes you are the target of your own love when you allow yourself to let go of guilt, grief, or fear.
"I know the secret of life: If you want to have loving feelings, do loving things."
Anne Lamott
Messing Up is OK
The wonderous thing about love, is that you will mess it up. That's just part of it.
Just like the verb cooking, loving calls for a lot doing. Trial, practice, mistake-making, and what can feel like wasted time and resources. But your flops are exactly how you learn to love better. The trick is to not give up. Keep practicing. Your acts refine as you practice them. Your acts become who you are. With a little tenacity your love eventually looks more like the soufflé you'd hoped for and less like the dog's breakfast.
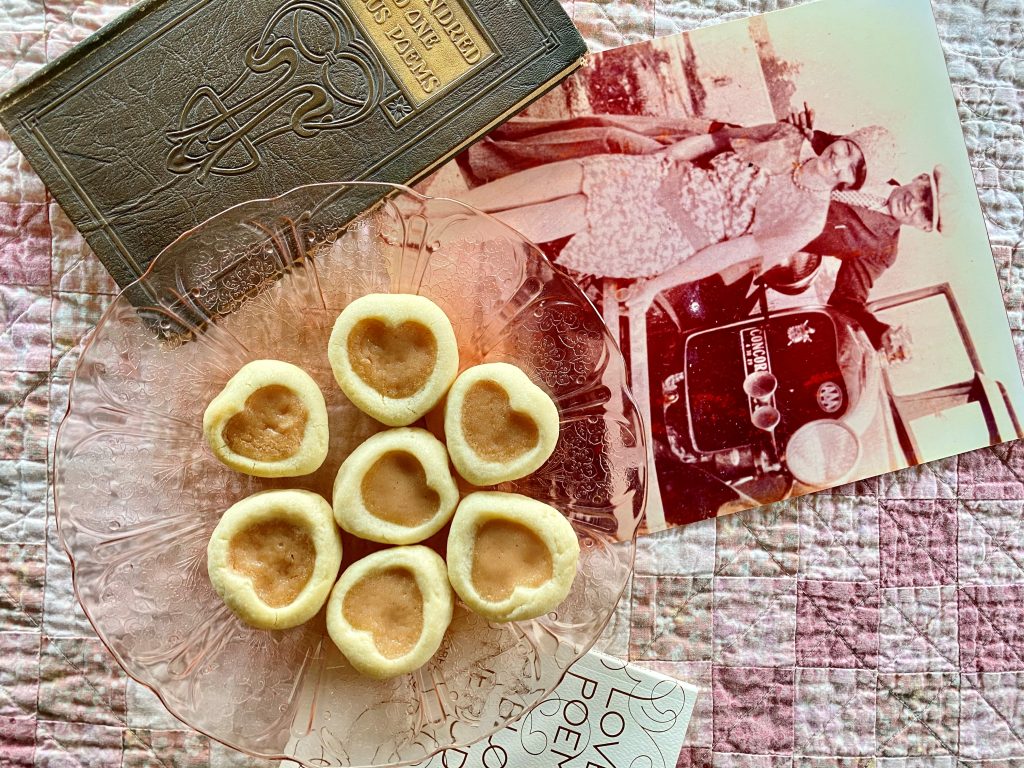
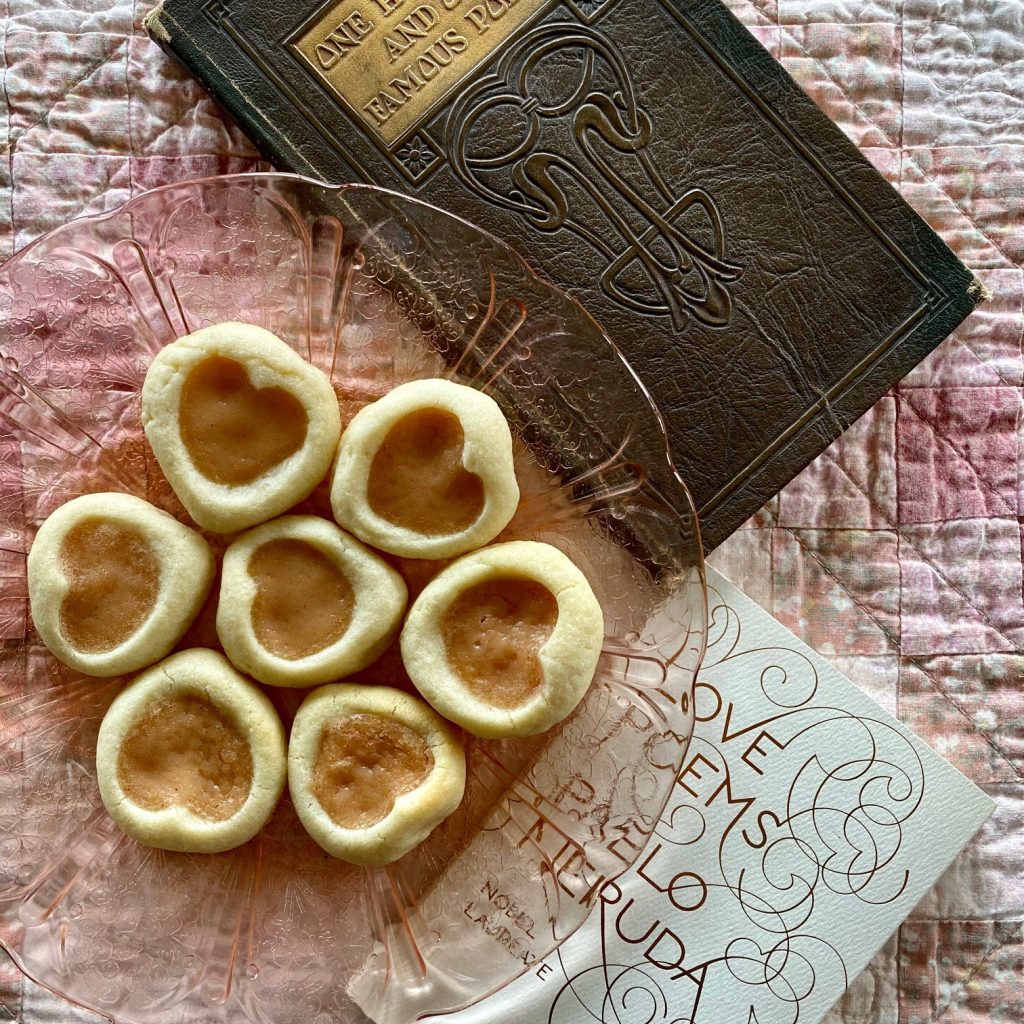
Remember all this when you make these pretty little Valentine heart shortbread cookies for your beloveds. Each time you press your pinky into the dough, you imprint the part of yourself that is set on loving. The soft, unchilled dough gives way to make adorable little heart shaped vessels that hold a tad of sweet blood orange goodness you also have made.
As you form the little Valentine hearts, they will remind you of your beloveds. Some, like a crotchety uncle, hide their tenderness in crooked wrinkles. Some, like an emotional 8th grader, absolutely cannot contain their contents. Others are the picture of every-hair-in-place perfection. The likeness of each heart says they belong together on the plate. Their uniquenesses make the plateful interesting. Just like you and your beloveds.
Pinkyprint Valentine Shortbread Heart Cookies with Blood Orange Curd
Course: Dessert
Season: Mist (November - March)
Dietary: Nut-Free
Preparation: Baking
Prep Time: 50 minutesminutes
Cook Time: 14 minutesminutes
Chilling Time: 2 hourshours
Total Time: 3 hourshours4 minutesminutes
Servings: 40cookies
Author: Pam Spettel
A simple shortbread base, filled with love and pink blood orange curd. No need for perfection here-- just celebrate each cookie's unique heart, just as you do your beloveds.
Make a double boiler by simmering 3" deep of water in a large saucepan. In a medium/large stainless steel bowl, whisk together eggs, yolks, and sugar until sugar just starts to dissolve.
Whisk in both juices and zest.
Set bowl over saucepan of simmering water. Cook curd, stirring with a rubber spatula almost constantly, until it begins to thicken. It should have the consistency of loosely whipped cream. Remove from heat.
Stir in butter cubes all at once, stirring until butter is completely melted and fully incorporated. Strain through a fine mesh strainer to remove bits of zest and any solid egg proteins.
Chill at 2 hours before using in the cookies. This makes about 1 ¾ cups-- you will only use about ½ cup for the cookies. Store the rest for another purpose.
For the Vanilla Pinkprint Cookie Dough
Line two baking sheets with parchment or non-stick mats.
Using an electric mixer, beat the butter, sugar, and salt on medium-high until light and fluffy, 2 - 3 minutes.
Beat in the egg and vanilla until fully incorporated and fluffy. On low speed, blend in the flour until just incorporated.
Using small scoop, scoop up a bit of dough and roll into a 1" ball with your palms. Place on the baking sheet. Using your pinky, press down near the top of the ball, making an indentation. Make another indentation right next to it. Make a third indentation centered in the hollow just below the first and second indentations to begin making a heart shape in the dough. Use your fingers to elongate the edge at bottom of the ball, and to make a dent in the edge of the top of the ball. Repeat, making fun little heart shapes, each with their own personality, using up the dough. You should have close to 20 hearts on each baking sheet.
Chill dough hearts until they are very firm, at least an hour. This part is critical, or you'll end up with a puddle in the end.
Putting the cookies all together:
Preheat oven to 350°. Bake one sheet for 7 minutes. Working quickly, once again use your pinky to depress the heart shape that has puffed up. It will be hot, so use caution. Using a very small spoon, like a baby or demitasse spoon, fill the depressions with cold blood orange curd. Don't over flow! Place the cookies back in the oven for another 5 - 7 minutes, keeping a close eye. You want them fully cooked and just barely beginning to go golden on the bottom, but not browning on the cookie itself. Allow to cook for two or three minutes on the baking sheet, to set up, them remove to a cooling rack to complete cooling. Store in an airtight container for up to a week, if they last that long.
Notes
Make It Your Own:Use store- bought lemon, lime, or raspberry curd instead of making your own. Easier yet, fill them with any red or pink jam.Save time by simply using your thumb to make an indent. No need to make a heart to make these cookies pretty and delish all year long.
I had forgotten how much I adored egg foo young. The recipe, "Eggs, Edamame, Bean Sprouts" in Nigel Slater's 2020 book, Greenfeast: Autumn, Winter opened my aroma memory floodgates. I was taken back to very special meals in Chinese restaurants as a child.
That sent me searching the phenomenal "Omnivore's Cookbook," with its hundreds of classic and modern Chinese dishes by Maggie Zhu. Her traditional egg foo young versions include the brown sauce I remember. Approachable recipes and interesting family history fill her beautiful blog.
This recipe is a mash-up of tradition and change. Omnivore's Kitchen for tradition. Greenfeast for the addition of edamame. My own addition of making the brown sauce mushroomy.
Making Egg Foo Young at Home
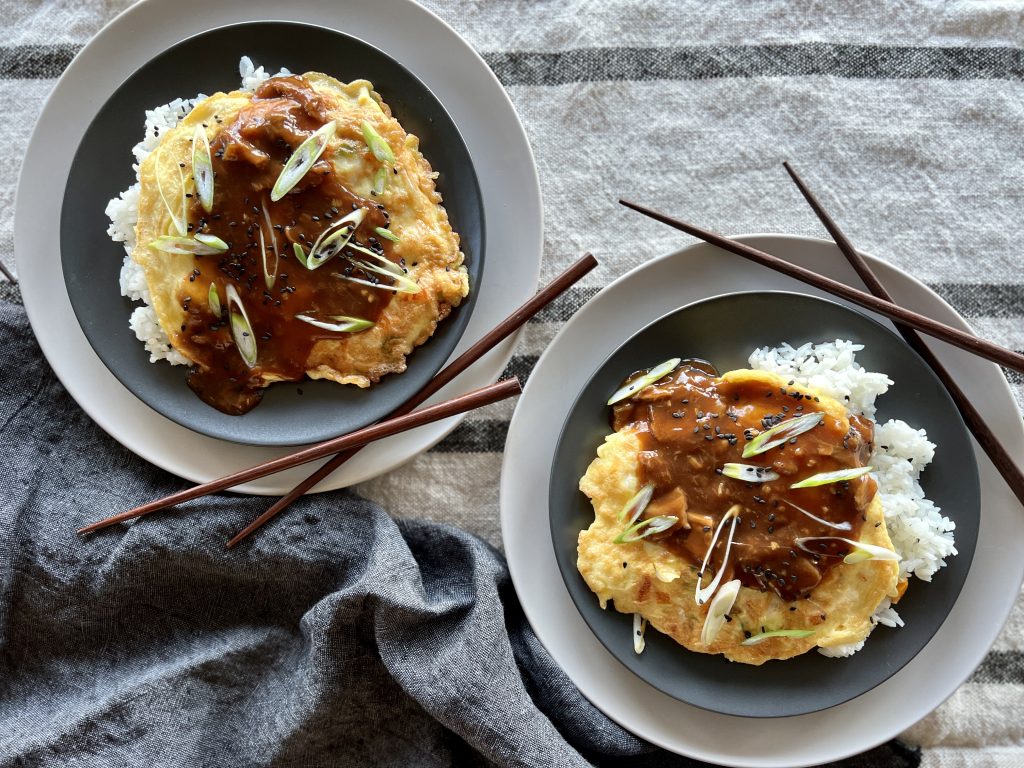
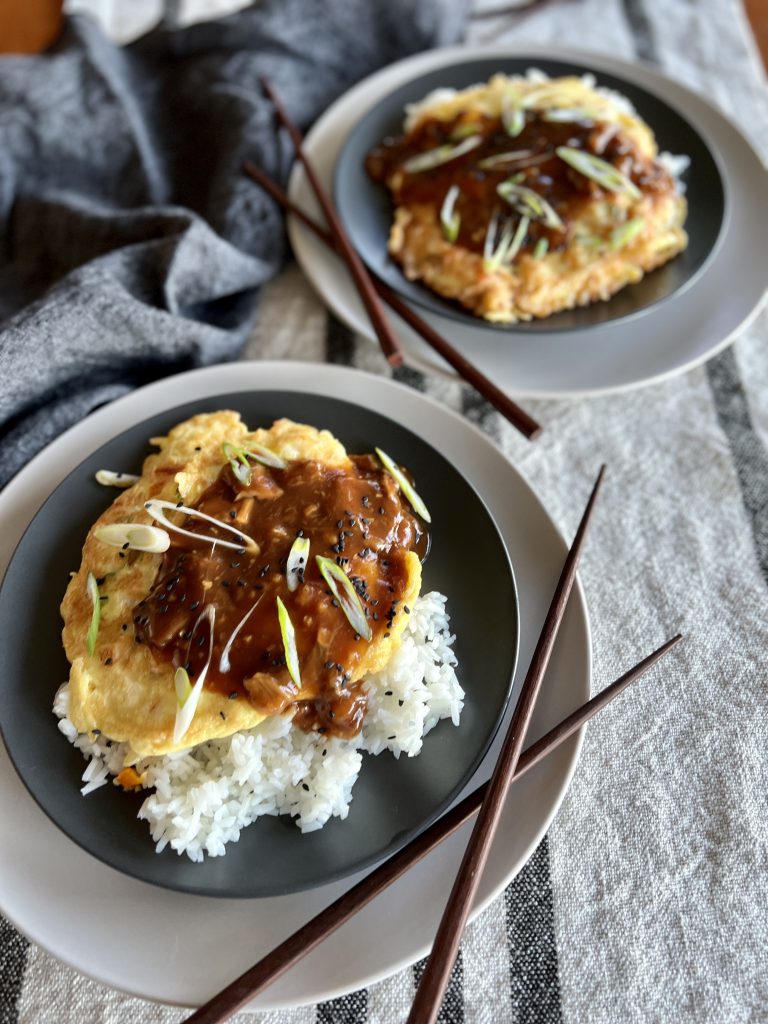
Maggie Zhu's trick for getting the omelette, as she calls it, thick and puffy is to use a fair amount of vegetable oil in the pan. Her recipes say to use between 2 and 8 tablespoons of vegetable oil. Less oil will give you a flatter, less puffy, less traditionally Chinese omelette, she says, and she is right. I found that 6 Tablespoons in my 8" skillet is perfect for that tall, puffy egg foo young that I remember having in Chinese restaurants. The extra oil helps the Chinese omelette become well-browned, with the slightest crusty crispness that is more traditional.
If mushrooms aren't your thing like they are mine, omit them. Instead of the water, substitute dark vegetable or chicken stock. Here's my recipe for a rich brown roasted vegetable stock.
The edamame is optional, or peas or finely chopped broccoli can be a substitute. Egg foo Young doesn't require animal protein, so leave that out if you'd like. Once you get the hang of it, you'll see that egg foo young is more of a method than a prescription. It can be filled with any number of things, just like a French-style omelette.
The resulting egg foo young is amazingly easy, restaurant take-out fast, and powerfully delicious. I hope you like it.
Egg Foo Young
Course: Breakfast + Brunch, Main Dish, Quick + Easy
Cuisine: Chinese
Season: All Season
Dietary: Dairy-Free, Gluten-Free, Vegetarian
Preparation: Fast + Easy
30 minutesminutes
Total Time: 30 minutesminutes
Servings: 46" egg patties
A Chinese take-out favorite made in a flash at home. Fill your egg foo young with any number of fillings to suit your mood or what you have on hand.
⅓cupedamame, peas, or finely chopped broccoli, optional
3green onions, two finely chopped and one thinly sliced on the diagonal
1cupcooked shrimp, chicken, or ham, finely chopped, optional
salt and black or white pepper to taste
6Tablespoonsvegetable oil*
Instructions
Cook the Sauce
In a small saucepan, use your fingers to break the dried mushrooms into small, irregular pieces and cover them with 1¼ cups hot water. Set aside for 15 minutes. Whisk all the remaining sauce ingredients into the saucepan with the mushrooms and cook over medium heat, whisking occasionally, until the sauce simmers and thickens, about 5-6 minutes. Keep warm.
Cook the Egg Pancakes
In a medium mixing bowl, beat the eggs with a fork until well combined. Add the bell pepper, bean sprouts, chopped green onions, and shrimp, chicken or ham, if using. Season with salt and pepper.
Heat the oil* in a small skillet over medium to medium high heat. Scoop about ½ cup of the egg mixture into the skillet. Fry until golden brown, about 4 minutes per side. Repeat with the remaining egg mixture. This should make about four 6" patties.
Serve with steamed short-grained rice, spooning the mushroom sauce over the top. Garnish with sliced green onion.
Notes
This recipe is adapted from Maggie Zhu at Omnivore's Kitchen. I thank her for her delicious blog and the step-by-step guidance in learning to cook Chinese dishes. *Maggie's recipe for egg foo young says to use between 2 and 8 tablespoons of vegetable oil. Less oil will give you a flatter, less puffy traditional omelette, she says, and she is right. I found that 6 Tablespoons in my 8" kitchen is perfect for that tall, puffy egg that I remember having in Chinese restaurants.
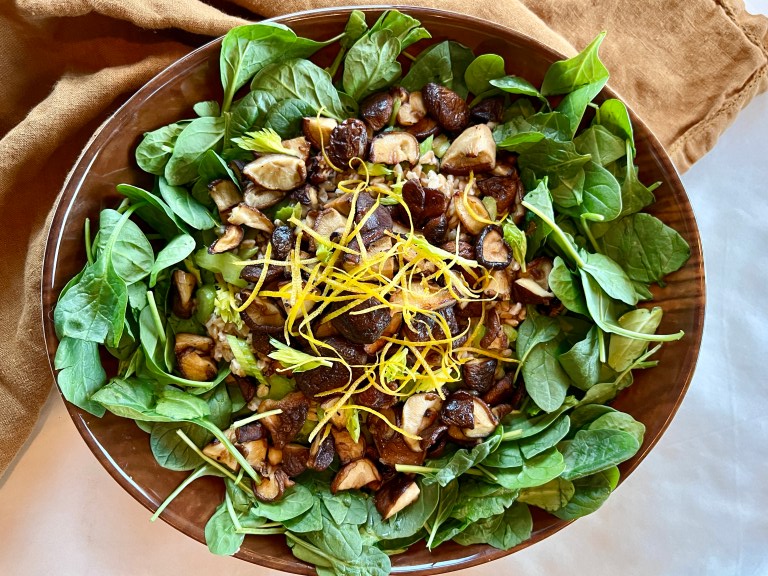
Feasts, cookie platters, cocktail parties, and office holiday goodies, oh my! As fun as it is, it doesn't take long to feel the overwhelm of holiday system overload, just when the mood of the day calls for merry and bright. As a remedy to seasonal splurges, include a salad of roasted mushrooms, warm grains, and baby spinach into your menu this week.
Making the Roasted Mushroom, Grain and Spinach Salad
This quick little main-course salad starts with four easy-to-come by ingredients and a light but flavorful lemon vinaigrette. The vinaigrette is made even better by using Meyer lemons, just coming into peak season.
Here I go on about celery again. Celery adds an essential textural crunch to this dish, and a bit of delicious freshness that you will welcome to your winter plate. I view this as this as a subtle necessity.
In the extraordinary Pacific Northwest food playground we have easy access to an array of cultivated and wild mushrooms. One trial of this recipe I used a shiitake-only approach. Another trial used a melange of chestnut, oyster, shiitake, and crimini mushrooms. I loved it both ways. If you can only access white buttons or brown criminis, please use them! Your dish will be as delicious as ever.
You have a lot of running room when it comes to the grain you use in your roasted mushroom salad. I used Purple Valley Barley, an organic product from my local Lonesome Whistle Farm. Lonesome Whistle also carries wheat berries, emmer (a farro) and oat groats that would be perfect. If you are new to this type of thing and eat gluten, I suggest starting with pearled barley, or just jump right in and try one of the above grains. If you eat gluten-free, give buckwheat groats or brown rice a try.
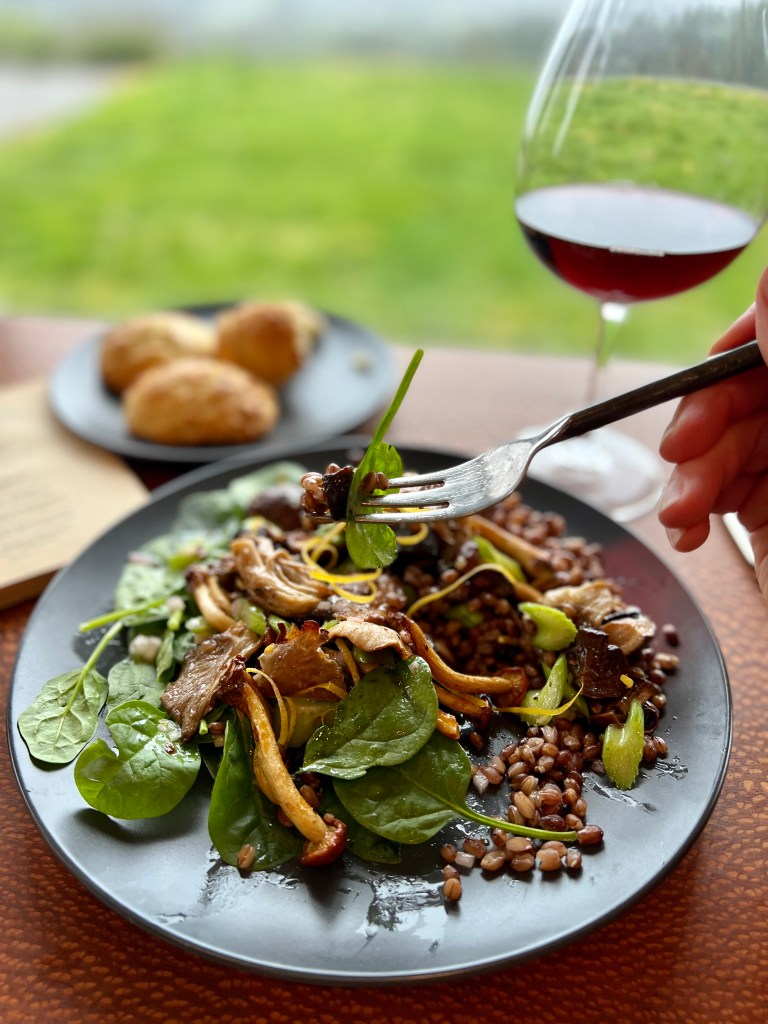
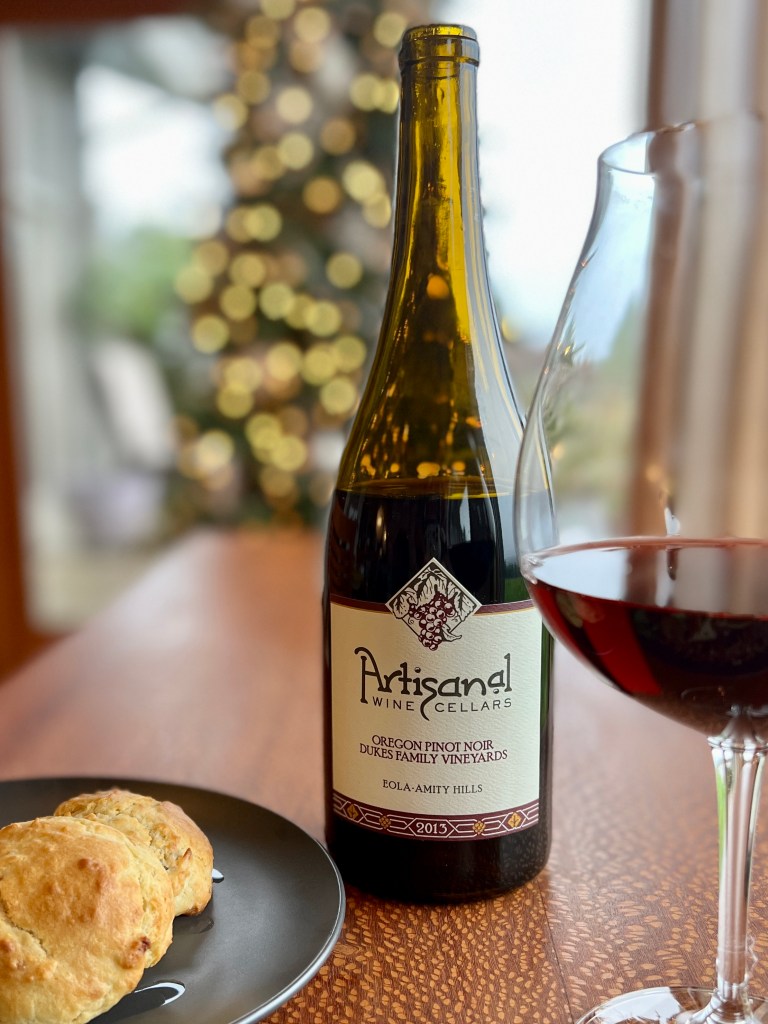
What Wine Should I Serve with Roasted Mushroom, Grain, and Spinach Salad?
I started off suggesting a mushroom, warm grain, and spinach salad as a detoxifying healthy choice, so maybe through the holidays consider a tonic of pomegranate juice and sparkling water? Or not! I highly suggest the Artisanal Wine Cellars 2015 Dukes Family Vineyard Pinot Noir. Tom and Patty Feller, and their daughter, Mia, are a family operation dedicated to handcrafted expressive wines. The grapes in this bottle were grown by Pat and Jackie Dukes of Dukes Family Vineyard. We view the Artisanal's Pinot Noirs to be beautiful wines at incredible values.
Roasted mushrooms, warm chewy grain, and fresh spinach dressed in the best ever lemon vinaigrette. This fantastic fast and easy layered salad is hearty enough for satisfying cool weather meals, light enough to counterbalance seasonal feasts and spurges.
1½lb.mushrooms of your choice, singularly or in combinationcrimini, shiitake, chestnut, chanterelle, hedgehog, button, etc.
5stalkscelery, and leaves if your head has them
1cupwhole grain of your choice, prepared according to package directions and kept warm*barley; emmer, spelt, or einkorn farro; wheat berries; oat or buckwheat groats; brown, black, purple, red, or wild rice, etc.
8-10oz.fresh baby spinach
lemon vinaigrette, recipe below
zest of 2 lemons, in strips
Best Ever Lemon Vinaigrette
½cuplemon juice, Meyer lemon preferred, zested firstabout 2 large lemons
2clovesgarlic, pressed or very finely minced
1shallot, finely minced
tsp.maple syrup
salt and pepper to taste
Instructions
Preheat the oven to 400° convection. Line a baking sheet with foil and spray it with oil or non-stick spray.
Begin cooking your chosen grain according to package directions. (For example, quick-cooking par cooked farro from Trader Joes takes 10 minutes to cook; unhulled barley takes up to 40 minutes.) Once it is cooked, keep it warm while the other steps come together.
Prepare the Best Ever Lemon Vinaigrette, recipe below.
Wipe mushrooms clean and trim them if necessary. If you are using shiitakes, remove the stems. Leave the small ones whole, cut the medium-sized ones in half, and the largest ones into quarters for similarly sized pieces that will roast at the same rate. Place them in a heap on the prepared baking sheet. Spoon about ¼ of the lemon vinaigrette over the mushrooms. Use your hands to toss the mushrooms in the vinaigrette, coating each piece lightly and evenly. Spread the mushroom pieces out on the pan, and place in the oven. Roast for 12 minutes, remove from the oven and stir. Spread them out again and roast them for another 10 minutes or so until they are deeply colored and their juices have almost evaporated. Don't leave them much longer than this or they will lose their tenderness.
While the mushrooms are roasting, thinly slice the celery and set aside. When the grains are cooked and drained, stir in ¼ of the vinaigrette and continue to keep gently warm. Place the spinach on the platter or individual plates.
When the mushrooms are done roasting, add the sliced celery and give it a good toss. Spoon the dressed grains in the center of the plate, and top with the mushroom/celery mixture. Drizzle a little more of the vinaigrette over the layered salad.** Garnish with strips of lemon zest, which are not only eye-catching, but add a delicious flavor note. Serve while warm.
Make the Best Ever Lemon Vinaigrette
Combine all ingredients on a pint-sized jar with a tight fitting lid. Shake until the salt and maple syrup are dissolved. Shake before each use.
Notes
*I've made this recipe using organic locally-grown barley, with buckwheat groats, and with a package of "10-Minute Farro" sometimes found at Trader Joes. Follow the package directions for any grain you use for both serving size and cooking times. **You will have a little of the vinaigrette left over. Don't be sad about this-- use it on your next kale or lettuce salad, on top of baked or broiled fish, or to dress a pan of roasted vegetables. When Meyer lemons are in season, be sure to use them. The typical Eureka or Lisbon lemons are wonderful, too, but Meyers offer a step up in flavor.I recently found that the water that remains when cooking whole-grain barley is delicious as a sipper. Cook the barley "pasta-style" floating freely in a pot of water, and reserve the water. It's as tasty as any stock, and can be used as a soup base or warming cup. This recipe is easily halved and easily doubled. If you double it, use two sheet pans to roast the larger amount of mushrooms.
Are you ready for a true confession?
I rarely cook from a recipe. The first time I made this Pumpkin + Homemade Chicken Sausage Pasta there was no script. I tell you this so you understand my process of getting a recipe from my brain to your screen-- one that I know will work for you at home and that you can trust. A recipe that will hopefully make it onto your table.
How an Idea Becomes a Recipe
A new recipe concept starts with thinking and dreaming about the flavors, colors, scents, and textures of ingredients. This work happens when I'm asleep and when I'm awake-- all the time! All that I have learned in over 50 years of cooking and eating informs how a new recipe idea comes together.
Step One
Intuition led the way when I first made this marigold Pumpkin + Homemade Chicken Sausage Pasta, like with most things I cook. I found it warm and comforting. It was delicious enough to share, and didn't take a fortnight to make, and so on to trial number two.
Step Two
The second run is where I pay keen attention to quantities, timing, and cooking nuances you might want to know that will ensure success. Paper and pen are right next to me noting details as I work it through. At this stage I ask myself some hard questions: Is this really the kind of recipe you might want. Does this recipe create a solution for you? Will it delight you and your family and guests? Is it a thing you might really make at home? How can I instill confidence and cheerlead you through the steps?
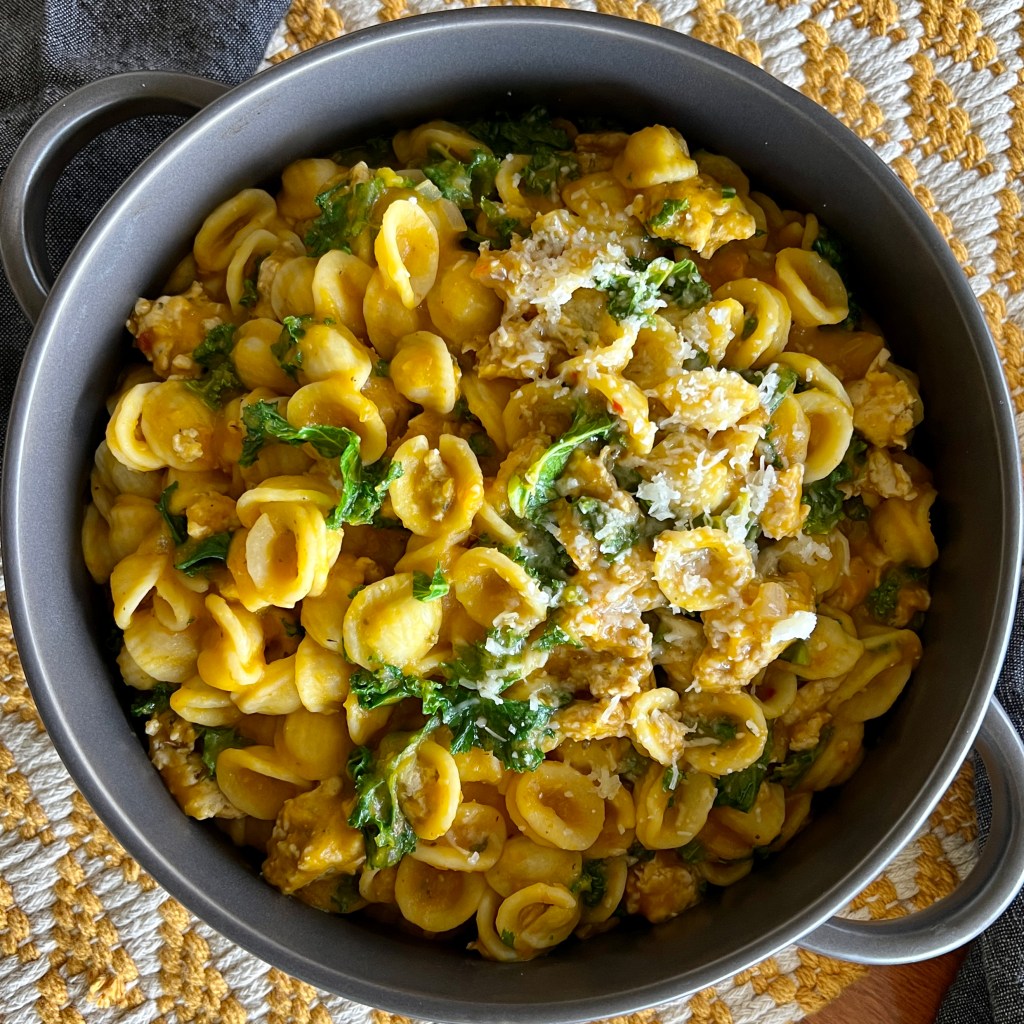
Pumpkin + Homemade Chicken Sausage Orecchiette
Step Three
When I agreed with my initial idea that you might really like this recipe, I moved on to a third Pumpkin + Chicken Sausage Pasta trial. Once again I prepare the recipe again from my notes, writing down any new thoughts or learnings that come. This is the step where I photograph the process using natural light and no filters-- no spin or tricks. Then off I go to write up the recipe in standard format for you.
Lastly and most importantly, I invite your feedback. If a recipe step is unclear, if there is something that you loved or that didn't go right, or if you have an idea that you tried that made it even better, I'm all ears! Please email me at pam@101milekitchen.com. I warmly welcome your comments on the post, too. Every time you leave a star rating on the recipe you help others find it through the Google maze. I value that, as well. In short, you are at the center of my work.
Making the Pumpkin + Homemade Chicken Sausage Pasta
Please don't let the idea of making sausage intimidate you. It is as fast and easy as adding a few herbs and spices to some purchased ground meat. Try it with ground pork or turkey if you prefer. I just happen to like the lightness of the chicken with this ample portion of pasta. Casings or fancy techniques are not called upon. This particular spice blend was borrowed from a recipe I wrote about years ago.
The sausage recipe is versatile. Roll it into meatballs. Brown it and use it on pizza, salad or in other pastas. Form it into patties to snuggle into a bun or next to your breakfast eggs.
Pumpkin puree is easy to do at home. Click here for link to a Facebook Live video of me explaining the easy process of making pumpkin puree from scratch. Laugh along with me at my very first and awkward Facebook Live tutorial! However, feel free to use canned pumpkin puree if that works best for you. The recipe uses two cans of solid-pack pumpkin puree (just one if you want to cut the recipe in half.) Recipes that aren't scaled to use an entire can of something that will otherwise go to waste are simply annoying.
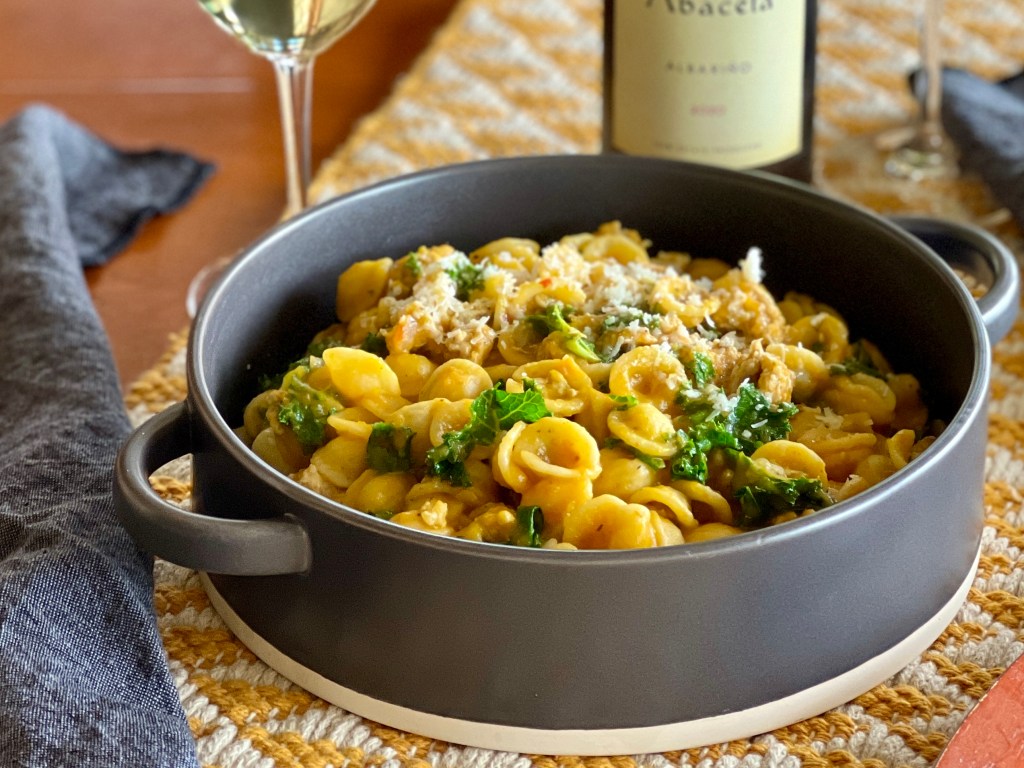
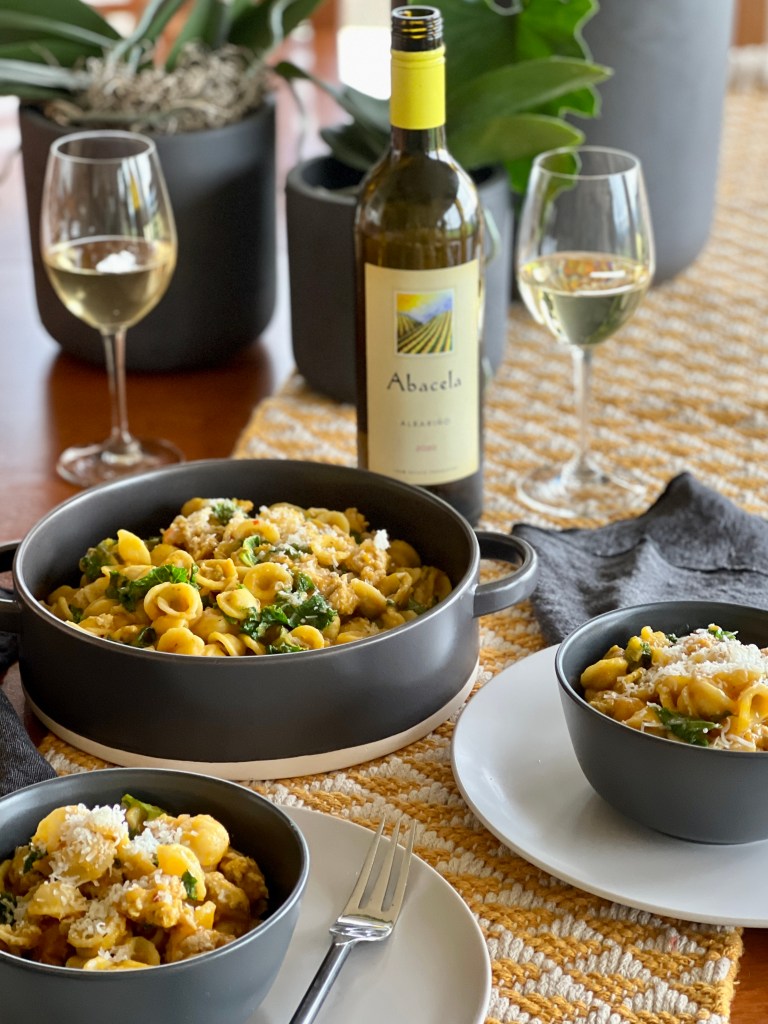
Wine Pairing with Pumpkin + Chicken Sausage Pasta
When you are looking for a wine-friendly autumn dish, Pumpkin + Homemade Chicken Sausage is it. A light Italian or Rhone red would be lovely, or any number of dry white wines. Award-winning Abacela Albarino 2020 from Oregon's Umpqua Valley is just lovely with the dish. You'll find this light and dry Albarino with no residual sugar and just 13% alcohol, to be a beautifully complimentary weight for this lighter pasta. Fresh fruit and floral aromas and a nice acidity bring the experience into graceful balance.
1lb.orecchiette or other small pastause gluten free pasta if you choose
2Tbsp.olive oil
1largeshallot, minced
3cupspumpkin puree (two 15 oz. cans)
½cupdry white wine
1bunchcurly or lacinato kale, large ribs removed, chopped into 1" pieces
salt + pepper to taste
Instructions
Make the Sausage
Crumble the ground chicken into a mixing bowl. In a small bowl, mix remaining herbs and spices. Sprinkly the herbs and spices over the ground chicken and drizzle with the olive oil. Rinse your hands in cold water and gently knead the spices into the ground chicken until thoroughly combined. Set aside.
Make the Pasta and Sauce
Put a large pot of generously salted water on to boil for the pasta. While the water comes to a boil, in a wide pan brown the sausage mixture in olive oil-- enough to cover the bottom of the pan. Stir frequently, breaking up the sausage into bite-sized bits. This should take 6-8 minutes. Remove cooked sausage and juices to a plate and set aside.
In the same wide pan heat another swirl of olive oil. Saute the minced shallot in the olive oil until tender and translucent, about 3 minutes. Add the pumpkin, white wine, and salt to taste. Stir together and heat until gently bubbling.
When the water is boiling, add the pasta and cook according to package directions. This may happen before or after the pumpkin mixture has come together.
When the pasta is cooked al dente (it will finish cooking in the sauce, so don't overcook it!) reserve 2 cups of the pasta cooking water and drain the pasta. (Don't forget this step, as it helps make a beautiful silky sauce!) Drain the pasta and return it to its cooking pot.
Add the chopped kale and cooked sausage and its juices back into the pan with the pumpkin mixture and stir in one cup of the pasta water. Scrape the sausage/pumpkin mixture into the cooked pasta and stir. Add enough more of the reserved pasta water to create a smooth, silky sauce that evenly coats the pasta. The pasta will continue to absorb the liquid, so be generous. Adjust salt and pepper. Serve in a large serving dish or in individual pasta bowls.
Notes
It is conceivable to garnish this dish with grated Parmesan or Romano cheese, however my cheese-loving husband says this is the "cheesiest pasta with no cheese" he's ever eaten! Omitting it makes the dish dairy-free. If you'd prefer, you can use store-bought hot Italian chicken sausage, but this is such an easy and delicious sausage recipe I do hope you'll give it a try.
This recipe is designed for a very special group of people who started out as neighbors and became dear friends. Ever since we moved to the 101-Mile Kitchen we gather frequently to relax, shoot the breeze, eat and drink. This recipe is a thank you to these amazing souls who have kept my heart from drooping during the last 20 months of living in an upside down world, and to the universe for putting us in each other's paths.
Besides being funny, smart, and caring, our neighbors all enjoy cooking great food and drinking nice wine. (There might be a splash of bourbon here and there, too.) Sometimes we have a full-on meal, but most often we meet over easy noshes, charcuterie, spreads and dips, and casual dishes. I can't wait to make this poutine for them.
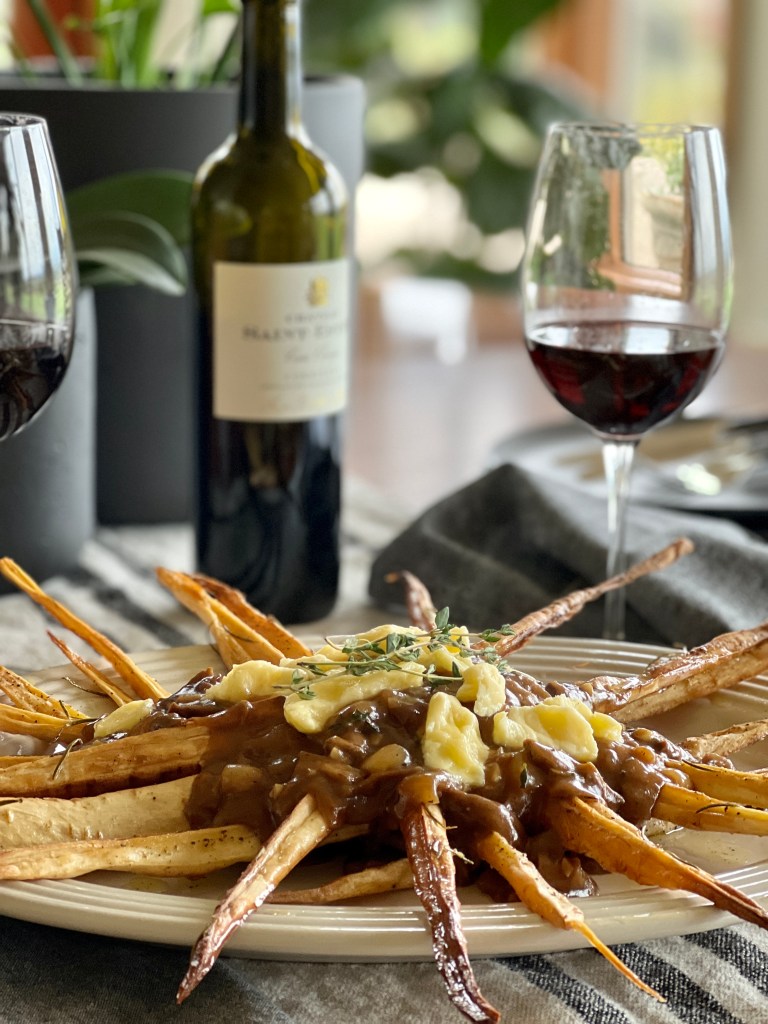
What is the Best Pairing?
While it makes a terrific main course at its heart poutine is bar food and doesn't need a precious pairing. I'd suggest a Southern Rhone style blend. This time I served the poutine with a very inexpensive ($13) 2017 Château Saint-Estève Cuvée Classique Corbières Rouge-- a nice old world 60% Grenache- 40% Syrah blend. It is lively, with whispers of herbs and deep fruit that compliment the umami and herbal flavors in the gravy.
Of course most ales and beers are also delightful with poutine.
Making the Poutine + Gravy
Parsnip Poutine + Rich Mushroom Gravy is another of those one-hour wonders. It takes maybe ten minutes to prep the ingredients, 16 minutes in the oven to get the parsnips on their tender and crunchy way while the mushrooms rehydrate, and another 15 or 20 minutes to make the gravy while the parsnips are finishing off. A foil-lined sheet pan, a large pan, a knife, and a bowl are the only tools used so clean-up is speedy.
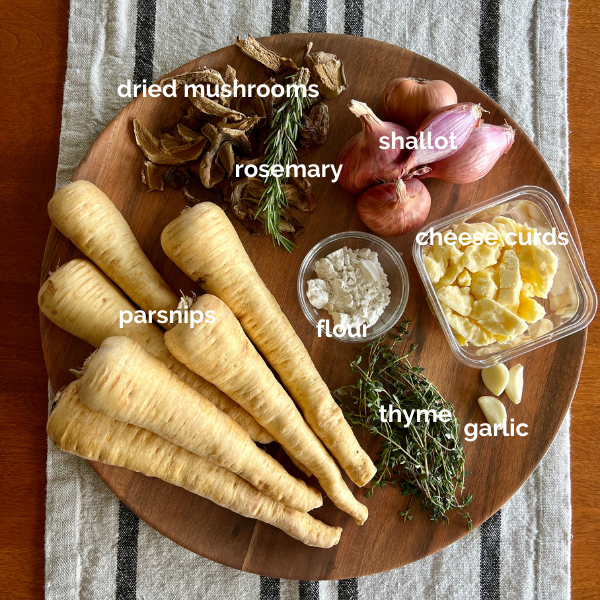
Parsnips and shallots grow just about anywhere, so they should fit in to most people's imaginary 101-mile sourcing radius. You can find dried Porcini mushrooms at many groceries and online. My favorite source is Pistol River Mushroom Farm in Southern Oregon. Dried mushrooms seem expensive until you realize that one ounce of dried mushrooms is equal to 8 ounces of fresh. The dark color of the soaking liquid becomes the intensely flavored broth for the gravy-- something a fresh mushroom just can't do.
As an aside, tuck this mushroom gravy recipe away to use in many other ways. I can't wait to ladle it onto a split and fluffed baked potato one cold winter's day.
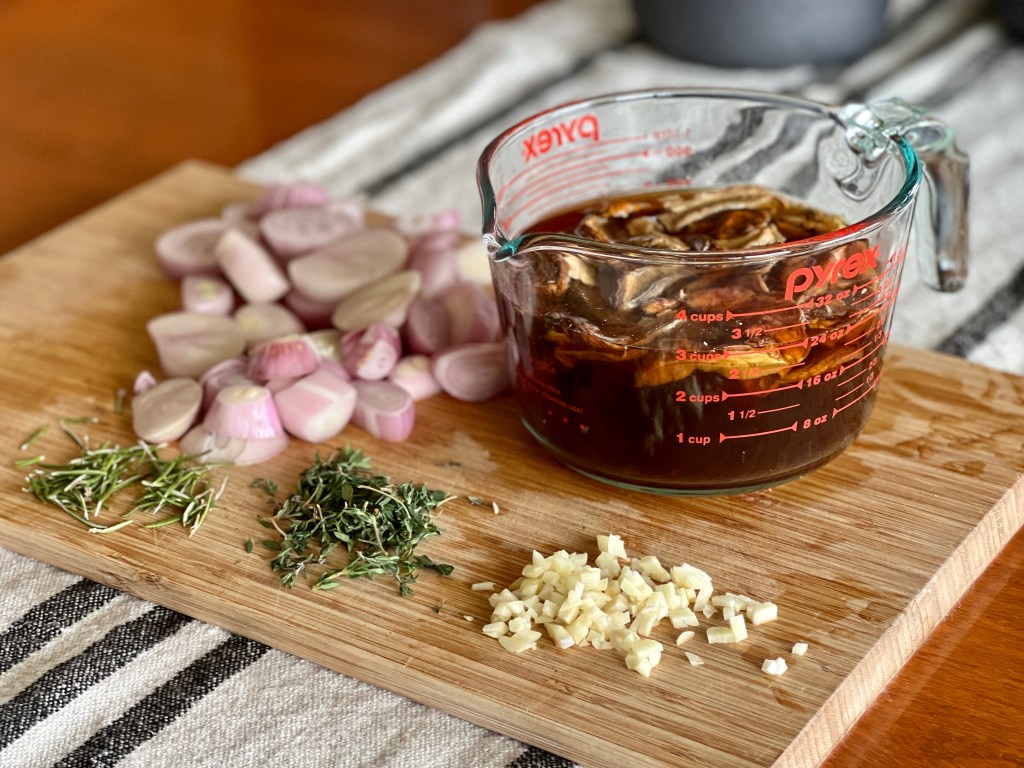
The parsnips roast, the mushrooms soak and the shallots, garlic, and herbs are prepped; caramelizing the shallots; the mushrooms and their soaking water go into the gravy; everything is plated and topped with cheese curds.
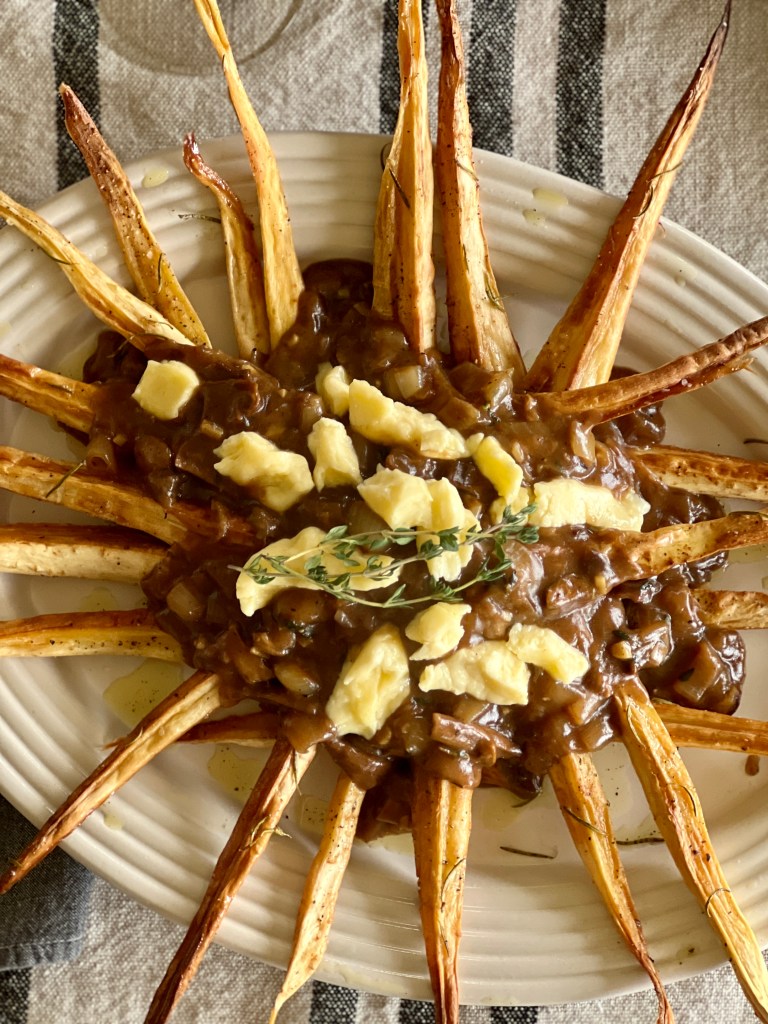
You'd never know there was no meat in this rich silky poutine gravy, and the crunchy, chewy roasted parsnips take it to new but familiar places. A fantastic main or "bar food" course for vegans and omnivores alike.
1 oz.dried porcini mushrooms, or other dried cooking mushroom
12oz.shallot, approximately 4 large peeled and sliced ½" thick
3clovesgarlic, minced
2tablespoonsfresh thyme leaves, plus more for garnish
2½tablespoonsGF One-for-One flour, rice flour, or all-purpose flour
salt and pepper
¼lb.cheese curds, or goat cheese
Instructions
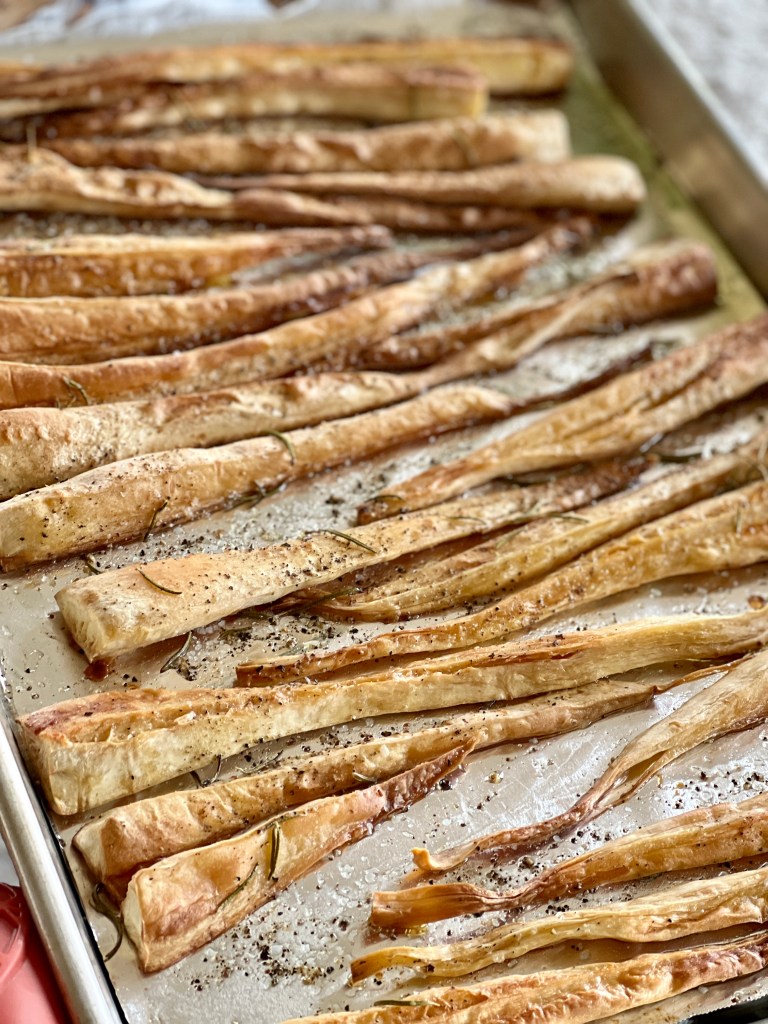
For the Parsnips
Preheat the oven to 400° convection and line a baking sheet with foil.
Trim and peel the parsnips. Quarter them lengthwise, and if they are especially thick, cut them again into eighths. Lay them out on the foil lined baking sheet, and drizzle them generously with olive oil. Toss them with your hands to evenly cover them in the olive oil, and spread them out flat at much as possible. Sprinkle them lightly with salt and black pepper. Bake for 16 minutes, and them flip them over. Reduce the oven heat to 350°. Sprinkle again with salt and pepper, and drizzle olive oil on any parts that look parched. Sprinkle the rosemary leaves over the parsnips and return to the oven for another 16-20 minutes. Check them often for doneness-- the thick tops will be browned and tender, the thin ends will be well browned and somewhat crispy.
For the Mushroom Shallot Gravy
As soon as the parsnips are in the oven, place the dried porcini in a 4-cup measuring cup or bowl, and cover with hot tap water to the 3-cup mark. Set aside.
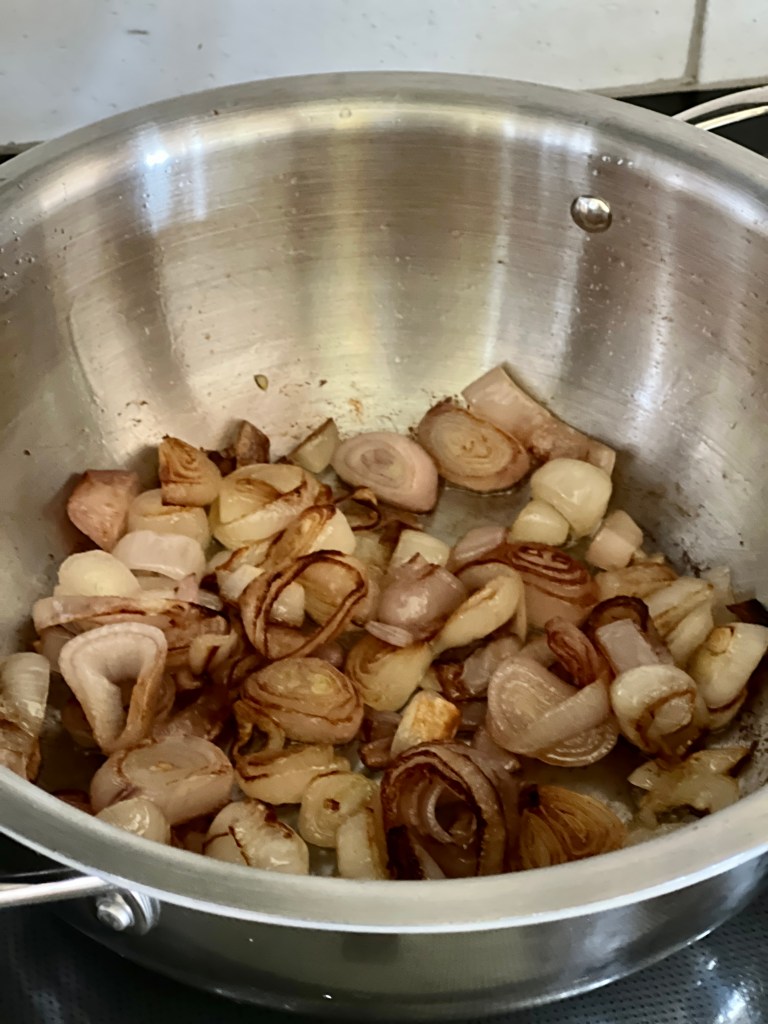
Heat enough olive oil over medium-high heat to generously cover the bottom of a sauteuse or large pan. Slide in the sliced shallots and leave without turning until the bottoms are browned. Stir, flipping them over, and again allow them to brown. After the first ten minutes add the minced garlic, thyme, and a 4-finger pinch of salt. Continue the browning process until the shallots are completely tender but not mushy, and have a good amount of browned caramelization throughout.
Stir in the flour, and continuously stir until the flour is well incorporated and beginning to stick to the pan. Stir for about three minutes.
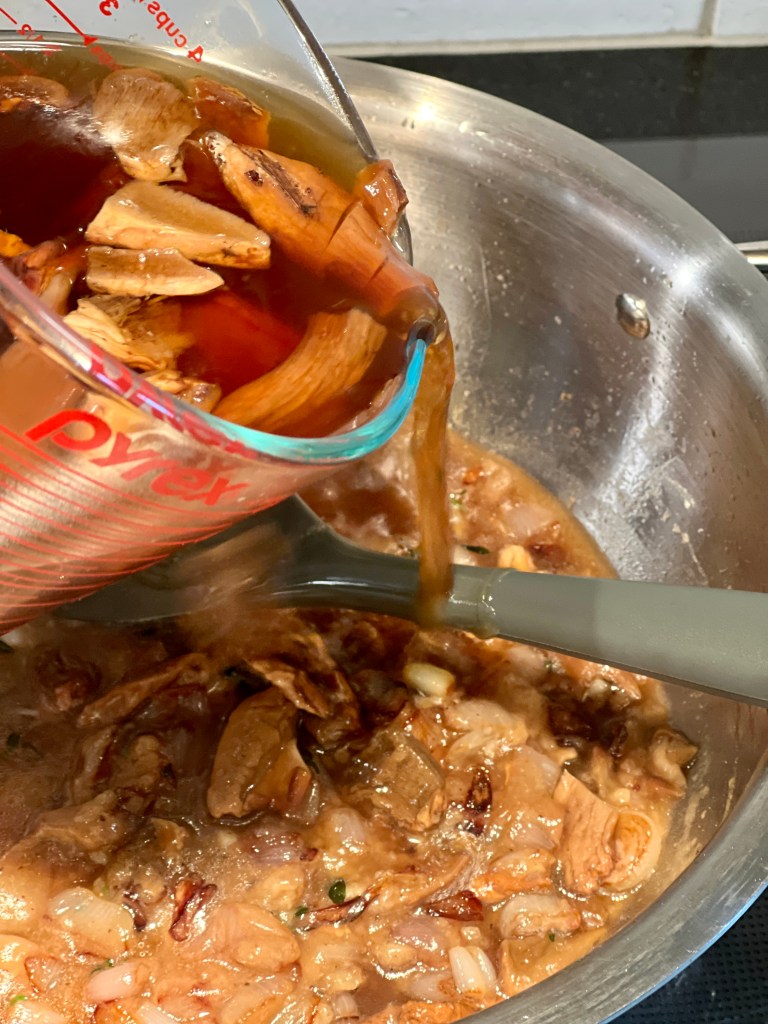
Gradually ladle in the soaked mushrooms and their dark brown soaking liquid, stirring between ladlefuls, until it it incorporated. You will see the gravy begin to thicken immediately-- stir throughout this process to avoid any lumps.
Stirring frequently, bring the gravy to a boil, and add some more salt. There should be about one teaspoon total in the gravy, or to taste. Add a very generous amount of black pepper to season. Allow the gravy to bubble and thicken for about 6 minutes.
Bring it All Together
Arrange the roasted parsnips on a large warmed platter in a spiky spoke-like fashion. Ladle the hot gravy in the center. Arrange the cheese curds over the gravy, and top with a bunch of thyme for garnish. Serve while piping hot.
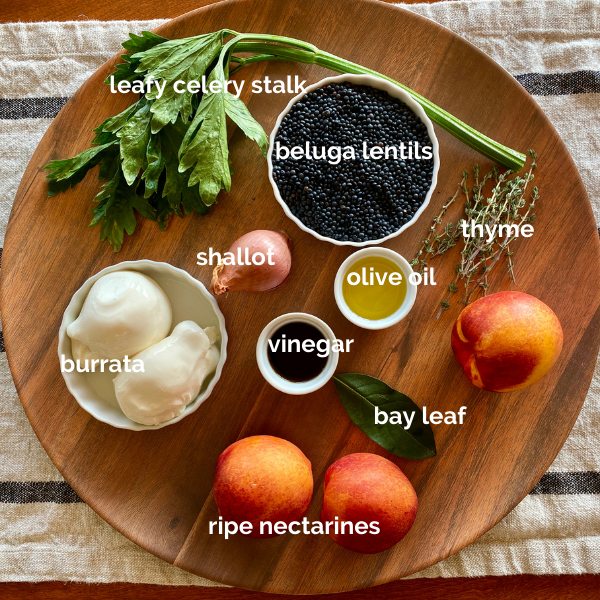
Beautiful Black Beluga Lentil, Grilled Nectarine + Burrata Salad
I've been experimenting with the design Rule of Threes in my cooking. Used in graphic design, interior design, and fashion-- really anywhere design concepts are applied-- the principle is that things arranged in groups of three are more appealing, evocative, and satisfying.
Long ago, it is said, Nordstrom sales associates were required to dress this way-- skirt, blouse, sweater; slacks, shirt, vest; dress, boots, scarf, etc. Accessories were the grace notes added to the rule of threes formula. I've begun to think this is true for the food on a plate as well.
Not only does this method of cooking work from a taste and visual point of view, but it is actually pretty easy to pull together a dynamic dish using this concept.
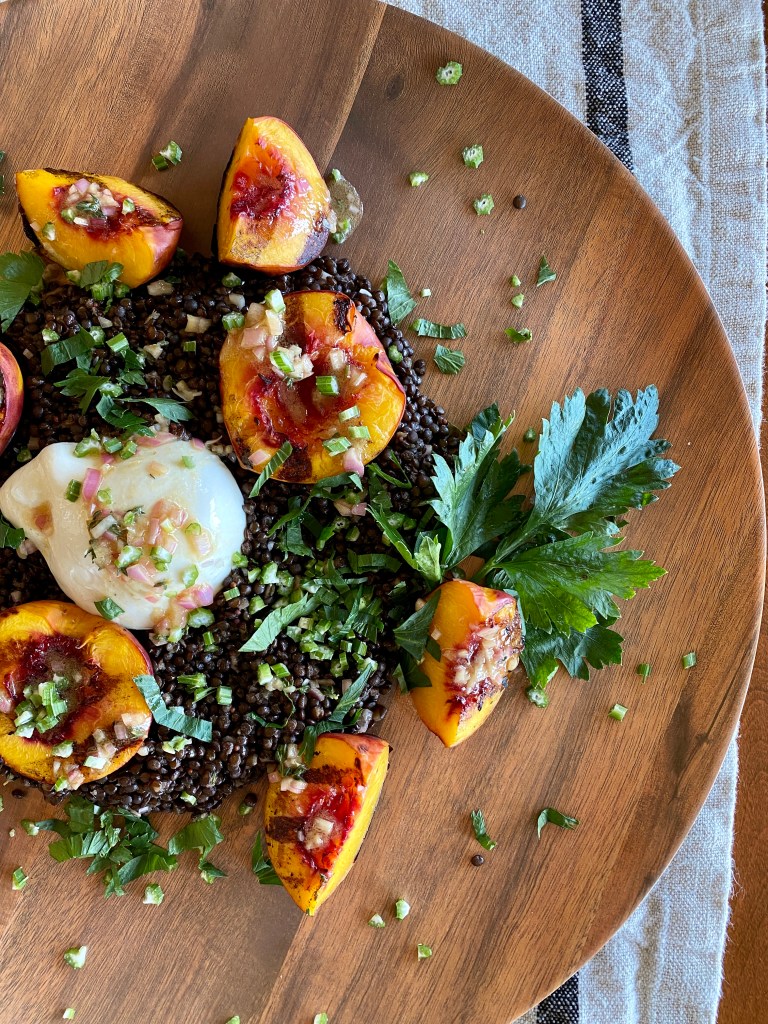
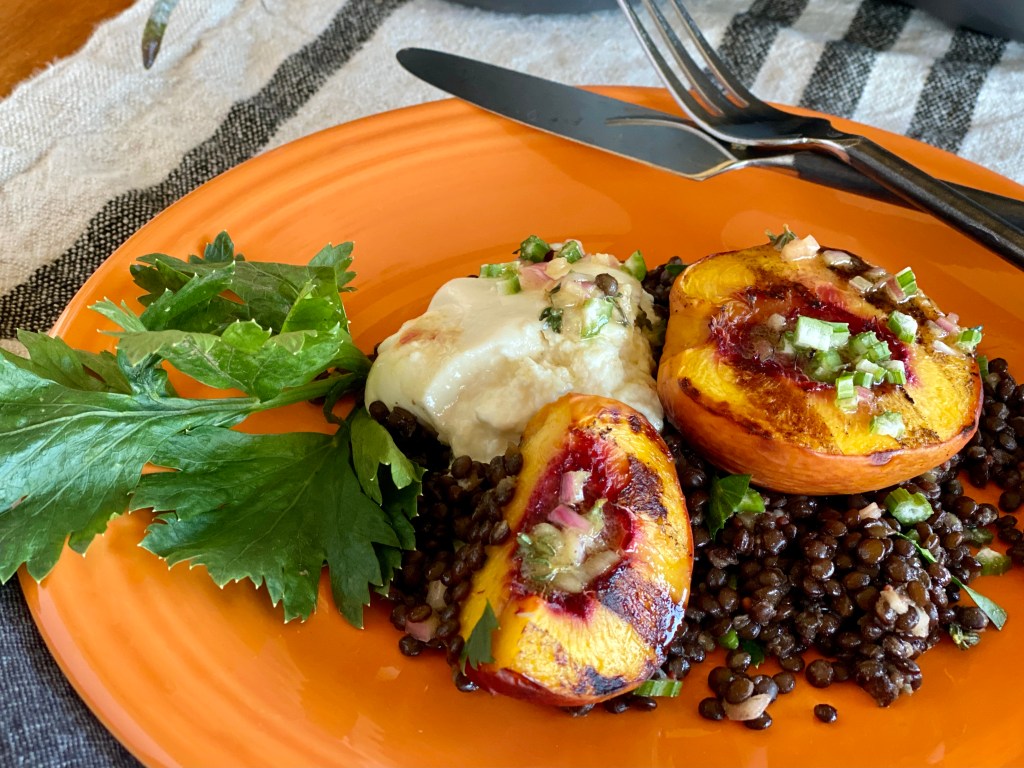
Beluga Lentil, Grilled Nectarine + Burrata Salad
In this 30-minute dish the triad of warm earthy lentils, smoky-sweet nectarines, and cool creamy burrata is more than the sum of its parts. Each of the parts requires very little or no preparation. The simple vinaigrette acts like the jewelry that ties the whole ensemble together.
The rule of threes concept worked perfectly in this recent red pepper, white bean, and feta recipe, too. The smoky bright red peppers, the earthy light white beans, and sharp tangy feta create a synergy that is tied together with a crown of herb sauce. Magnificent, yet simple.
It only looks challenging! Make Beluga Lentil, Grilled Nectarine + Burrata Salad soon for an ever so delicious, beautiful, fancy-fast-easy brunch, lunch, or dinner. Make it vegan by omitting the burrata, and it is still delicious. Serve it alongside meat, or enjoy it as a vegetarian main course.
How can you use this Rule of Threes concept in your cooking and meal planning? I'd love to hear about your ideas and experiments!
Beluga Lentil, Grilled Nectarine + Burrata Salad
Course: Breakfast + Brunch, Main Dish, Quick + Easy, Salad, Side Dish
This triad of earthy lentils, smoky-sweet nectarines, and creamy burrata is more than the sum of its parts. Quick to make but ever so delicious and versatile, make this soon for a fancy-easy brunch, lunch, or dinner. Make it vegan by omitting the burrata, and it's still delicious.
In a small jar with a tight-fitting lid, place the minced shallot and Dijon mustard. Stir gently. Add about half of the thyme leaves stripped from the stems, salt and pepper. Cover the shallot mixture with the vinegar of your choice. Eyeballing it, add enough olive oil to double the volume in the jar, or about the same in height to the shallots and vinegar. Shake until the salt is mostly dissolved and the mustard is thoroughly incorporated. Set aside.
Now Make the Beluga Lentil, Grilled Nectarines + Burrata
Light or preheat your grill for a hot, direct fire/heat.
In a medium saucepan, place the lentils, bay leaf, a pinch of salt, and 3 1/2 cups water. Bring lentils to a boil, then reduce heat to a low simmer. Cook uncovered, stirring every 5 minutes or so, for about 20 minutes or until the lentils are al dente, but not mushy and broken. Begin chcking their doneness at the 15 minute mark.
While the lentils are cooking, place the halved nectarines on a preheated grill over direct heat. Oil the grates first, and place the nectarine halves cut side down. Do not move them until the 3 minute mark, and check for rich grill marks. They may need another minute or so to become deeply marked. Flip them and grill another 3 minutes until the skins have grill marks, for a total of 6-7 minutes. Don't let the nectarines overcook-- you just want them warmed through and kissed with flavor from the grill.
When the lentils are done, drain off any remaining liquid. Sitr in the diced celery and leaves, reserving some of the leaves for garnish. Mound this onto plates or a serving platter.
Arrange the nectarines on to mounded lentils. You may chose to halve some of them.
Place the burrata on top of the lentils. Sprinkle the remaining thyme and celery leaves over the top and serve.
Notes
This recipe serves three people as a main course, or six people as a side dish.This salad is especially luxurious served warm, but equally delightful served chilled, especially if you need to make the components ahead of time.Peaches would be just as lovely in this dish as the nectarines. Use what you have or prefer.Recipe star ratings are very welcome and appreciated. Thank you for taking the time to provide your feedback this way.
Hello there, and how are you? Are you getting enough summer joy?
I've been thinking about all I want to soak up before summer is over. Here is what I am inspired to do before the season changes:
Eat all the canteloupes. I'm always sad when there are no more for the year.
Read a book in the hammock, start to finish. Not in one day, but over a few, maybe napping between pages.
Star gaze. The Perseids meteor shower peaks this week. Check out SkyView Lite, a free app that makes the constellations and planets come alive. When observing the night sky I feel very small, at once frightening and comforting.
Make more summer fruit sorbet, like this one, and this one. We've had chocolate, apricot, blueberry, and blackberry sorbets this year, too, and I'll share those recipes with you, next summer.
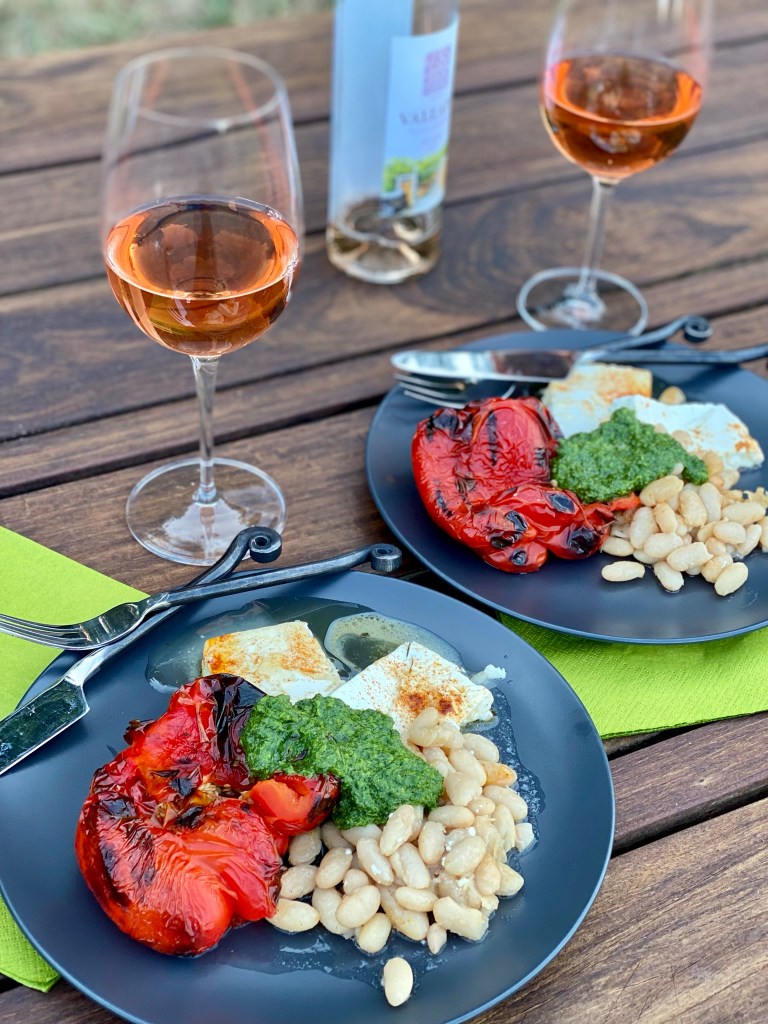
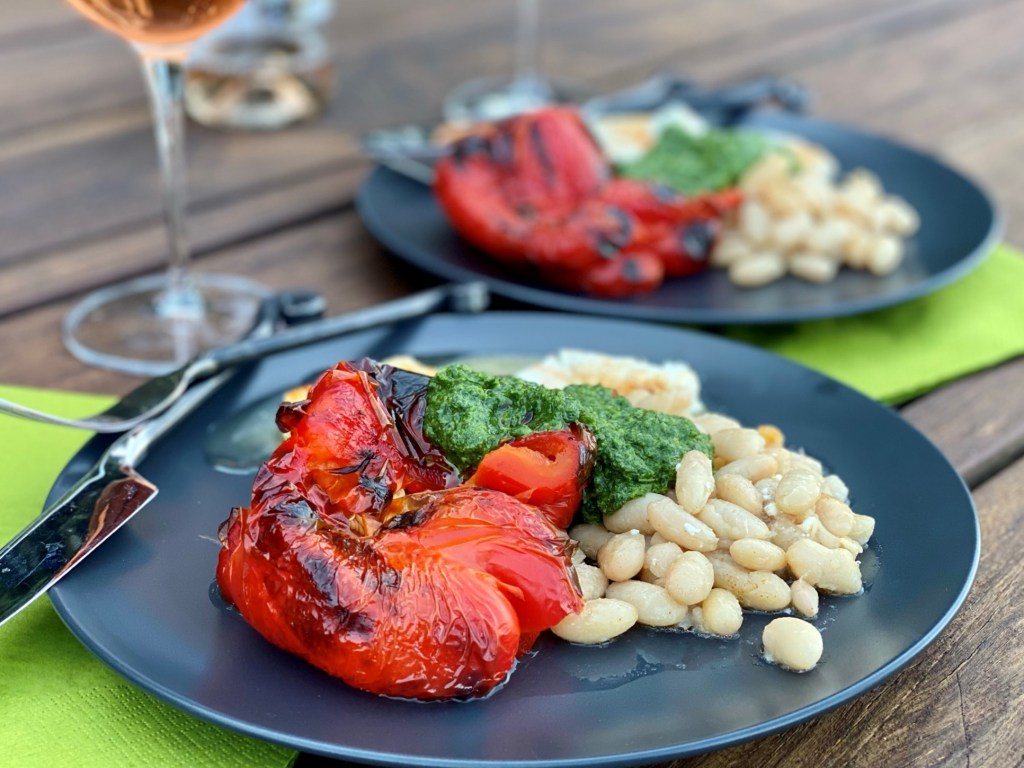
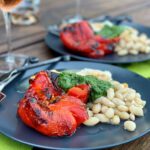
Roasted red peppers, white beans, Feta, and green herb sauce
And more to make sure of:
Eat as many grilled hamburgers, vegetables, and fish as I can.
Enjoy every meal outside. Mornings on the porch are charming. Mid-day snacks in the shade of the trees are refreshing. Dinners looking out at the valley are inspiring. Soon we won't have a choice but to eat inside.
Invite as many outdoor gatherings as we can with friends and family. Nobody knows what's going to happen to our ability to gather come fall, so I will soak up all the community I can now.
Show my appreciation to farmers by visiting as many farmer markets and stands as I can. Farmers are working so hard to bring their beautiful bounty to us. (See the Find a Farmers Market Near You links in the footer of this page for a market near you.)
Roasted Peppers, White Beans, Feta, and Herb Sauce
Using the grill to get quick and easy meals done is another summer joy I can't get enough of. This recipeless recipe is long on gourmet attitude, short on effort to actualize. Eight ingredients, three of which are herbs, and 15 minutes at the grill and, viola, you are a summer foods genius.
What are you doing to make the summer last? What will you miss about summer when it's passed?
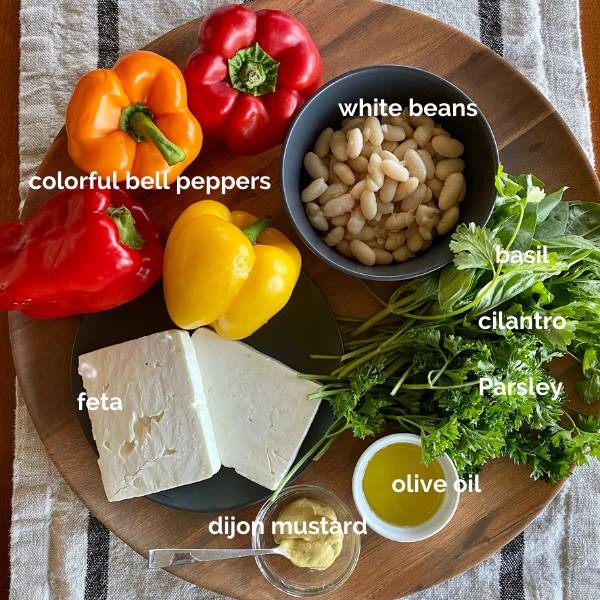
Roasted Red Peppers, White Beans, Feta + Simple Herb Sauce
Long on gourmet attitude, short on effort and time, this recipeless guide makes summer dinner go easy. Eight ingredients, under 30 minutes, and you are a cooking genius! Use the same guide in the autumn using your oven to roast the peppers and warm the Feta and beans.
1cup eachFresh basil, parsley, and cilantro leaves and tender stems, packed and lightly chopped
¼cupExtra virgin olive oil
1tablespoonDijon mustard
Salt and Pepper, to taste
Peppers, White Beans + Feta
1Red, orange, or yellow bell pepperper person
3ouncesFeta, block-styleper person
1cupCannelini or other white beansper person
Smoked paprika, Aleppo pepper, or Espeletteoptional
Instructions
Simple Herb Sauce
Place all sauce ingredients in a food processor or blender. Whiz or whirl them all together with a healthy five-finger pinch or salt and a healthy cracking of black pepper until it is creamy and pesto-like, but not ablsolutely pureed. Add a tablespoon or two of water to loosen the sauce, if desired. It's nicest if it puddles slightly rather than stands at attention. Set aside.
Peppers, White Beans + Feta
Stretch out a double-thick layer of foil big enough to hold the beans and feta in a single layer, folding the edges up to contain juices. If you have a grill basket use it instead, lining it with one layer of foil.
Over medium direct heat on a gas or charcoal grill, roast the peppers. Turn them frequently to char the entire outside. If they are burning at all, move them off the heat to cook indirectly, and back and forth to get a nice roasted exterior. The peppers will puff up a bit, and will eventually collapse into beautiful modern art shapes, full of condensed juices that will deliciously spill out when each diner cuts into them. This should take 10-15 minutes, depending on the heat of your grill.
About half way through cooking the peppers, place the foil or grill basket on the heat. Add the beans and Feta in one layer, drizzling them lightly with olive oil and sprinkling with the paprika, Aleppo, or Espelette, if using. Allow them to warm, and even brown a little if that happens, while the peppers finish.
Move the wrinkly cooked peppers to individual plates or a platter, along with the beans and Feta. Place a big spoonful of simple herb sauce in the center. The peppers will release their warm rich juices into the plate as they are cut into, adding to the sauce. Serve!
Notes
If you are using dried beans, cook according to one of the easy Rancho Gordo methods. If you don't have a grill or make this during cool-weather months, use the same guide with your oven to roast the peppers and warm the beans and Feta.
Scorching record-breaking heat is promised across much of the U.S. this week, and you need cooling solutions, right? You're going to need this-- the best simple yet fancy cooling salad I can think of-- light, fresh and hydrating, and ever so tasty. When you eat it, try to imagine someone nearby fanning you with a palm leaf. Can you feel it?
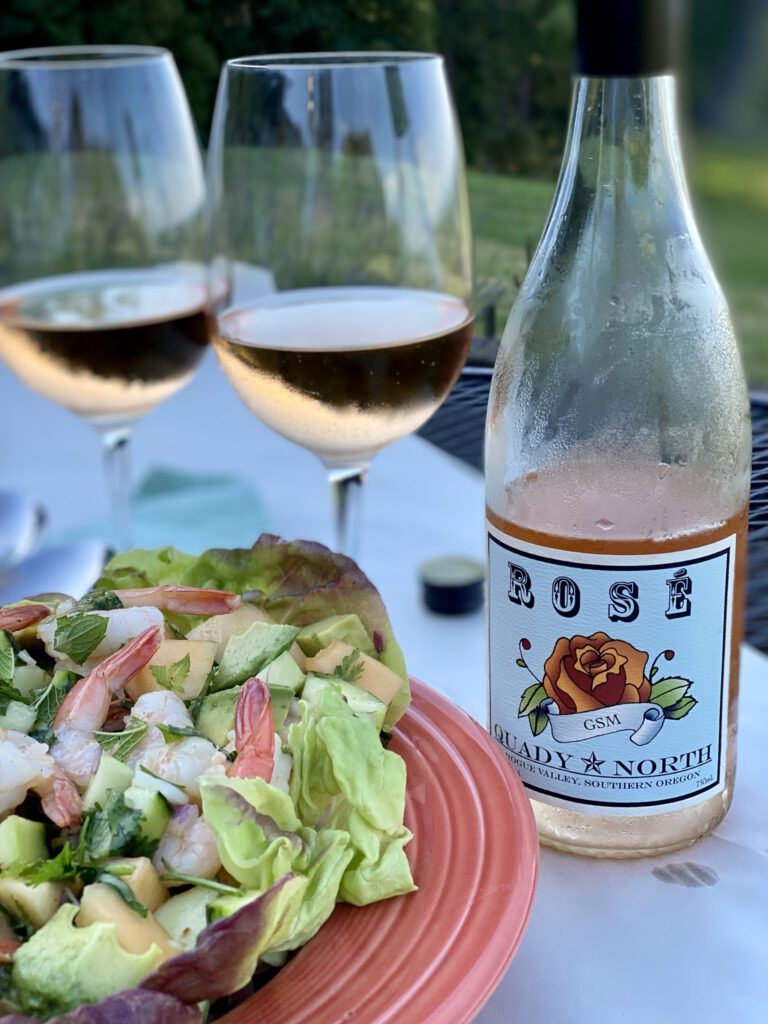
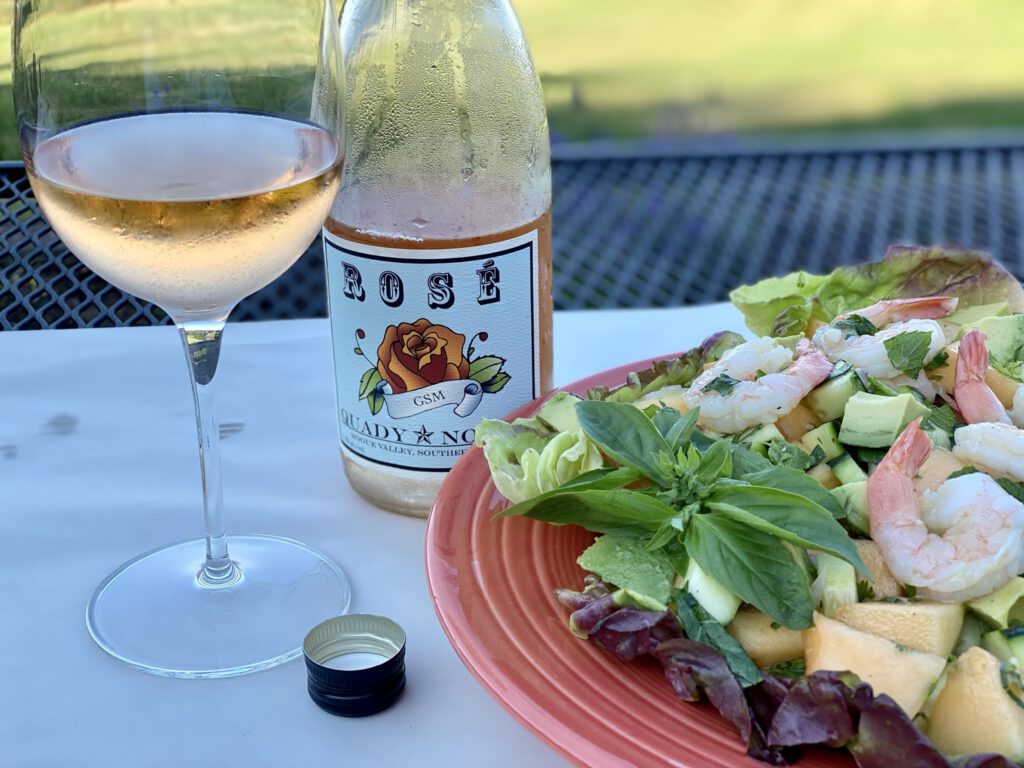
Made with 48% Grenache, 42% Syrah, 9% Mourvedre, and 1% Counoise, it is quite dry and full of the mineral qualities I associate with a Provençal rosed. Its lower alcohol also makes it perfect for summer. You may notice a little orange peel aroma on the nose, and soft fruit and rain water filling out the mid-palate.
Quady North is organically farmed and LIVE certified for its sustainable winegrowing practices. Quady focuses on "small lot Loire-ish and Rogue Rhone releases". There we go talking about France again!
Screwtop equals picnic friendly!
He would not remember me, but years ago I met Quady North's fearless leader, Herb Quady, at a wine symposium. I knew I'd like him when he told of how people choose their favorite wines. He said something like, "It is the one you had that night under the stars with friends, someone was playing your favorite song on a guitar, and maybe you were falling a little in love." And, well, their labels are fantastic-- The tattoos I'll never have.
One last thing about Quady wines. At least for now, if you order two bottles shipping is free, and if you purchase a case you receive a 10% discount on this already quite affordable wine. Value added! (This is not a sponsored promotion.)
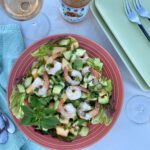
The Sweet + Spicy Shrimp Melon Salad
Even boiling water for pasta or standing at the grill sounds a bit exhausting in heat like this. Sweet + Spicy Shrimp Melon Salad is a no-cook endeavor if you buy your shrimp already cooked, and please do! After a few chops of a knife and a few shakes of a jar you'll be made in the shade.
For a vegan option, sizzle bite-sized cubes of pressed tofu in hot oil until they brown, allow them to cool, and treat them the same as you would the shrimp.
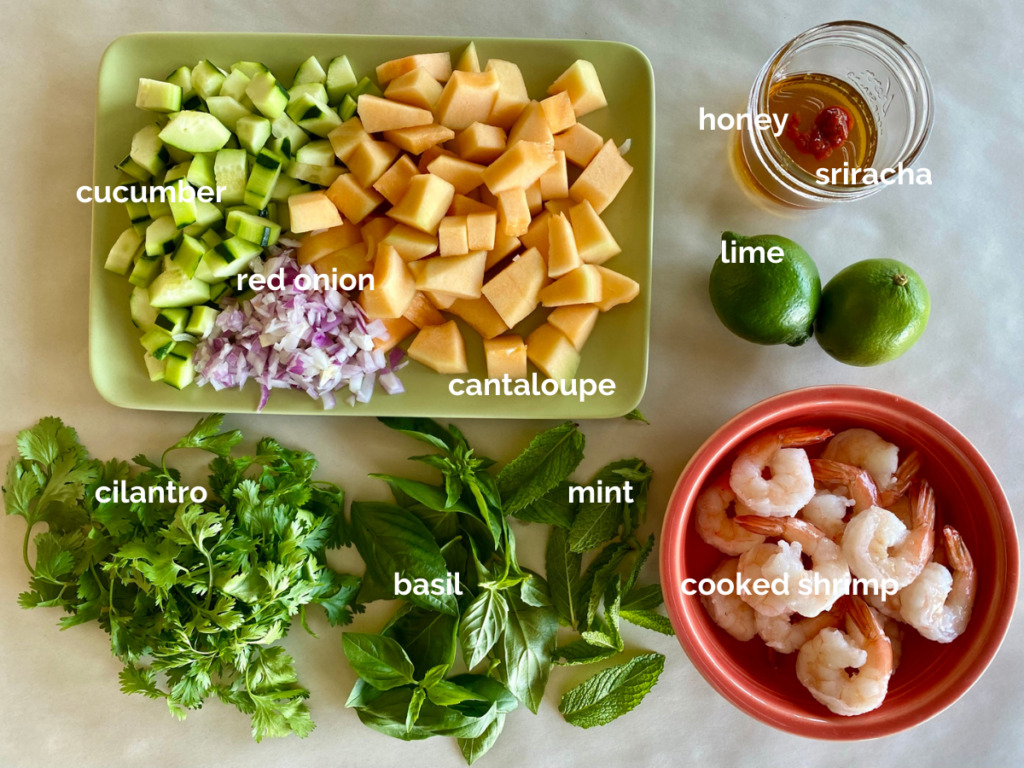
Avocado-- a last minute addition-- and olive oil are other ingredients you'll need
Sweet + Spicy Shrimp and Melon Salad
Course: Main Dish, Quick + Easy, Salad
Season: Evergreen (April - July)
Dietary: Dairy-Free, Egg-Free, Gluten-Free
Preparation: Fast + Easy
Prep Time: 15 minutesminutes
Total Time: 15 minutesminutes
Servings: 2main course or 4 as a side
Perfect for the hottest days of summer, this simple yet fancy cooling salad is light, fresh and hydrating. . . and ever so tasty. No-cook and made in minutes, you'll be sitting in the shade in no time.
6-8per personcooked chilled shrimp, preferably shelled and tail-on
¾averagecantaloupe, chilled and diced
1longcucumber, chilled and diced
½cuppurple onion, scallion, or sweet onion
1largeavocado, diced
2cupscilantro, basil, mint, and chives, chopped and lightly packed in any combination or alone
¼ - ½cupSweet + Spicy Dressing, below
Sweet + Spicy Dressing
¼cuphoney
2 limes, juiced
1Tbsp.Sriracha, or to taste
1tablespoonolive or vegetable oil
Salt and pepper to taste
Instructions
Gently toss all ingredients except avocado in a large bowl. Top the salad with the cubed avocado tucked here and there. (This keeps the avocado from being squished!) Serve.
Sweet + Spicy Dressing
Place all ingredients in a screwtop jar. Shake until the honey and salt are dissolved. Store any leftovers in the refrigerator for use on other summer fruit-based salads.
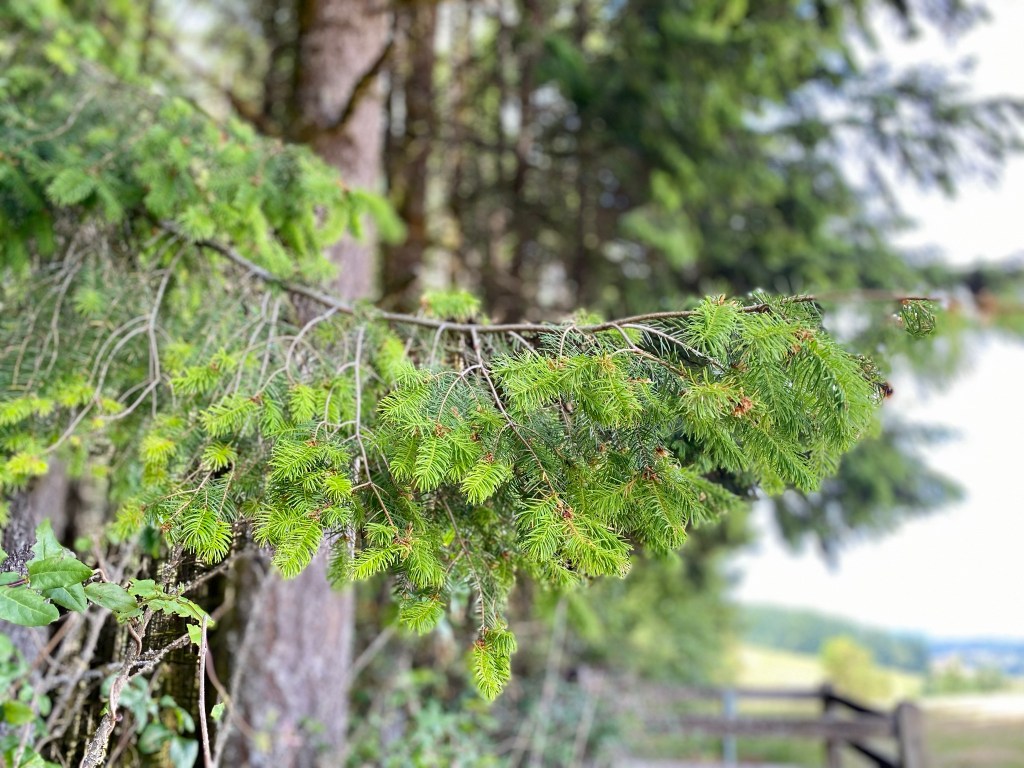
Three years ago my beloved and I bought our forever home. We'd come together later in life and it took us a while to figure out where and how to live in a way that meets both of our needs. For ten years we searched to find this place we both love and have made our home.
Our sweet forever home visually melts into the backdrop of a 260+ acre forest that also backs the properties of our two neighbors. We have loved the forest for all it gives. Birdsong, shade, the ever-present rustling of the treetops, the pure fresh earthy scent that's especially noticeable in the early mornings, and the creaks and howls that call from it after dark.
Beginning Tuesday, as happens in Oregon, the crop of timber-- the entire forest-- will be harvested. By September what once was a Douglas Fir forest will be three new homesites. We knew this would happen one day. We just liked to think that one day was 20 years from now.
I am heartbroken.
My husband, who has had something grumbly to say about every clear-cut we've ever driven by, has nobly risen to reframe the situation as our "view expansion and sunset enhancement opportunity." His forward lean and courage is beautiful.
I fleetingly think of changing my name to Butterfly and chaining myself to a tree. Instead I just weep.
Our dear neighbors with whom we have shared the glories of this forest gathered this weekend to pay homage to the lush, oxygen-scrubbing, interconnected organism we've enjoyed and appreciated. A wake of sorts. Poetry was recited, a tear or two was shed, and we laughed and shared community lore. My hurting heart considered serving Funeral Potatoes but I refrained.
What does one serve on the occasion of a forest being cut down?
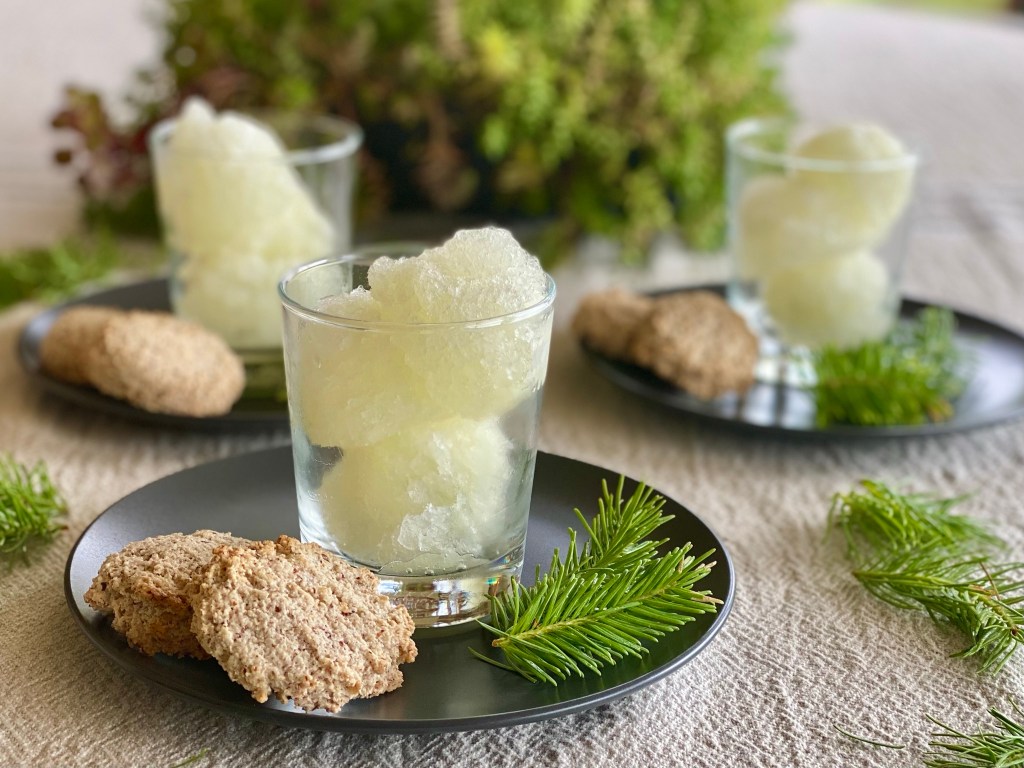
We ate from the forest, that's what we did.
Douglas Fir Tip Sorbet or Granita
Course: Dessert
Cuisine: Pacific Northwest
Season: Evergreen (April - July)
Dietary: Dairy-Free, Egg-Free, Gluten-Free, Vegan
Prep Time: 35 minutesminutes
Chill Time: 2 hourshours
Total Time: 2 hourshours35 minutesminutes
Servings: 12
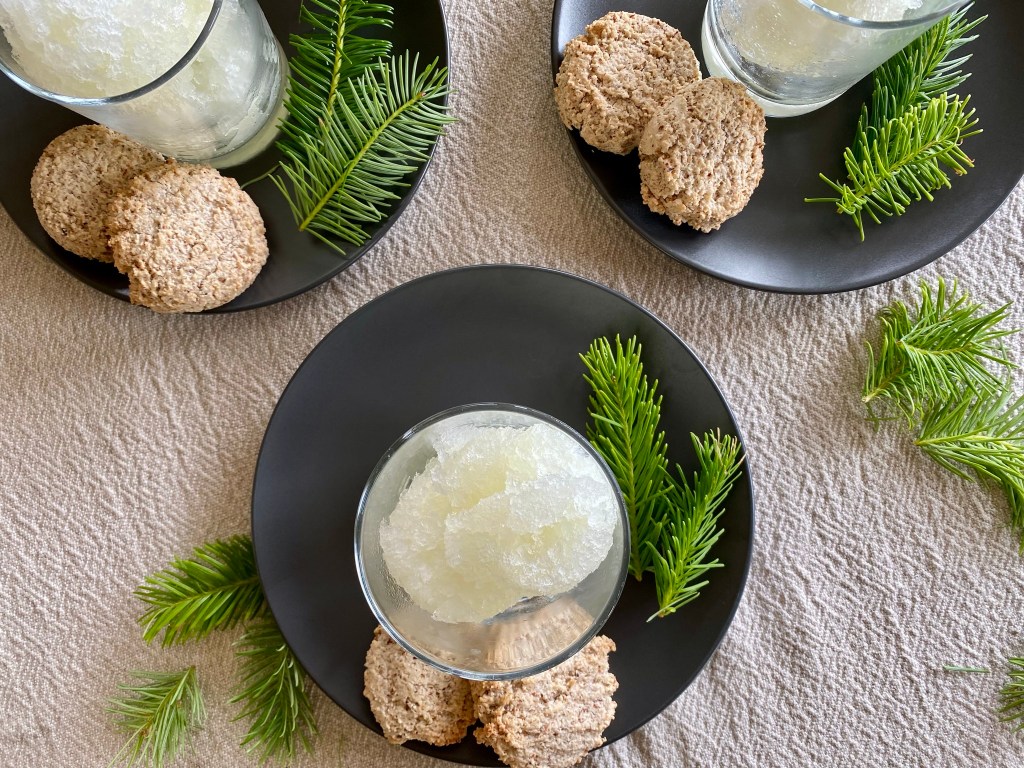
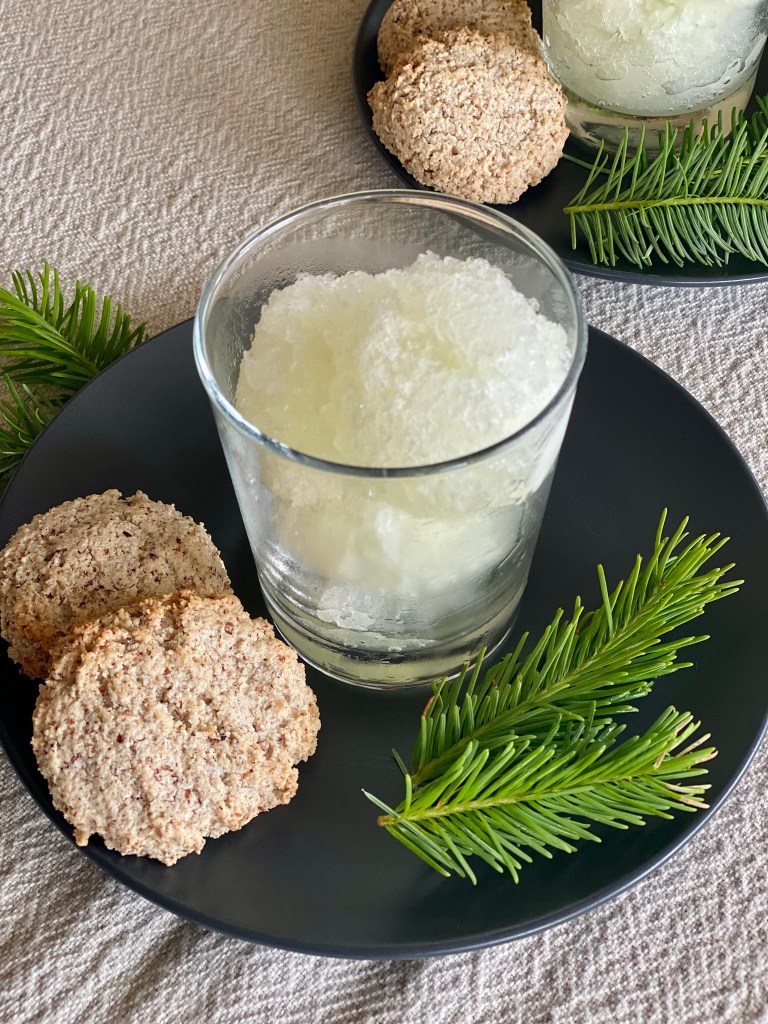
How does one eat a forest? One little bite of fir tip sorbet at a time! A little resiny and a little limey, this refreshing sorbet or granita makes a wonderful dessert with a hazelnut cookie, or a fantastic palate cleanser between courses. Forage away!
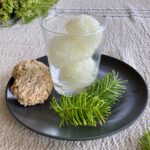
In a small saucepan combine 2 cups of water, sugar, zest of ½ lime, packed fir tips. Heat, stirring frequently, until the sugar is completely dissolved. Put a lid on the pan and remove from heat. Allow the mixture to sit for 30 minutes. Strain the mixture into an 8-cup measuring cup or mixing bowl.
Squeeze the lime and lemon juices. Add the remaining 2½ cups of water and the juices to the strained sugar mixture. Stir in the Douglas Fir brandy, champagne, or vodka. Cover, and chill in the refrigerator 2 hours or overnight.**
For sorbet, freeze according to ice cream maker manufacturers instructions. Serve immediately for slushier soft-serve, or harden in the freezer for two hours for scoopable sorbet.
Notes
*If you make the icy granita version, increase the brandy, champagne, or vodka to 4 Tablespoons.**If you are making icy granita, skip the chilling step and pour the mixture into a large flat plastic container with lid and place in the freezer. Freeze for at least four hours, scraping every hour or so with a fork to break up chunks and create the fluffy "snow-cone" texture. To serve, rake through the frozen mixture again with a fork to create the fluffy icy texture and serve.
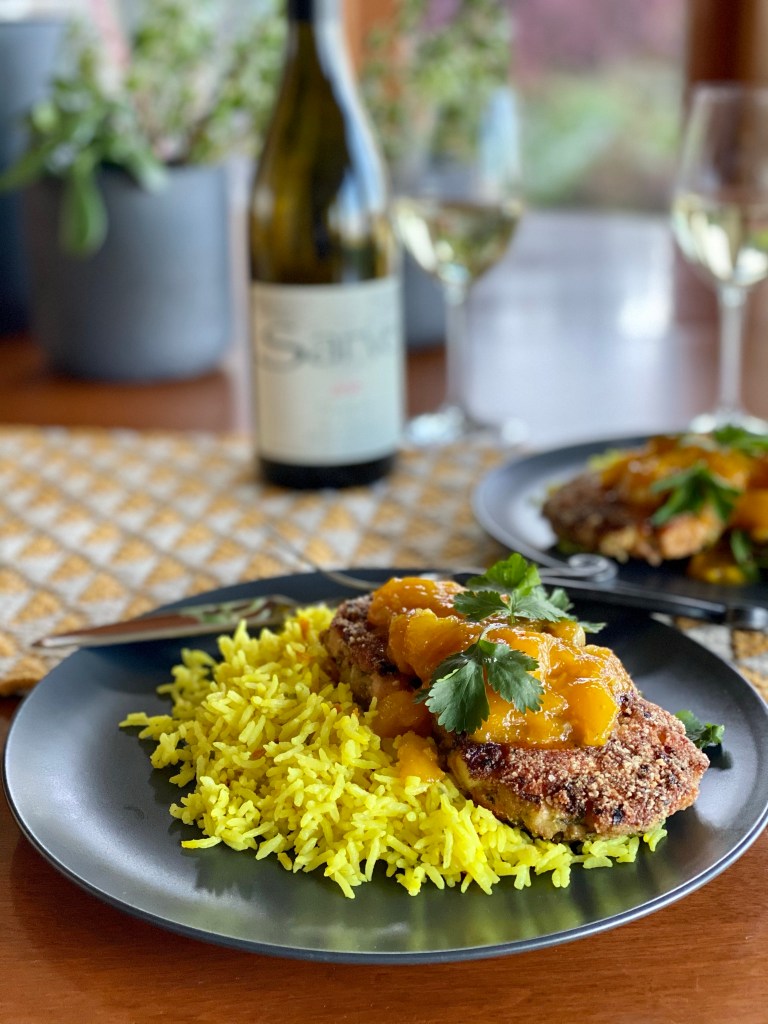
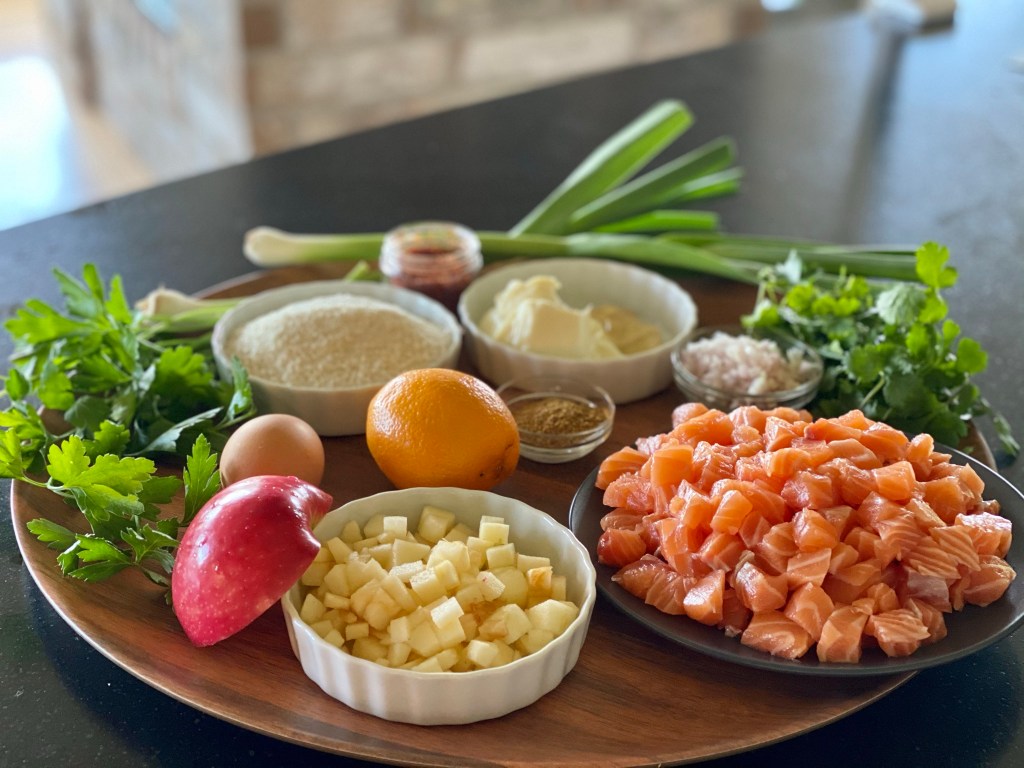
I consider Curried Salmon Cakes with Mango Chutney and Coconut Rice my springtime signature dish. Do you have a show-stopping dish in your cooking bag of tricks?
You'll know the recipe. People lean forward over their plates to inhale its aroma and turn their focus to their fork or spoon. A hush falls over the table. An eater's brow becomes furrowed in concentrated curiosity, quiet little sighs or hums bubble up as a delicate soundtrack to the moment. Time becomes momentarily suspended.
All of a sudden, that focused calm breaks into cheery chatter and conviviality brighter than before. Life goes on with this one subtle experience tucked into it. And this is when you know.
Credit for this curried salmon cake recipe goes to our friend Larry Deck. He once served it as a late-night New Year's Eve dinner and I was transfixed. The brightness of the homemade chutney and light curry notes in the salmon cakes was a sunny counterpoint to that dark winter night.
It highly likely that I let out a long, deep hhhmmmmmmmm that night.
This recipe was also a super-fun contest winner for me. See more about that here. (And thank you again, King Estate, for the lovely experience!)
Wine Pairing for Curried Salmon Cakes + Mango Chutney
Curried Salmon Cakes, Mango Chutney, and Coconut Rice is a heavenly match with any of King Estate's Pinot Gris. I am especially fond of their Domaine Pinot Gris with its pear, tangerine and Meyer lemon peel aromas and flavors, clean minerality, and silky texture. My husband and I featured the Domaine Pinot Gris at our wedding day brunch.
Just like today's recipe trio, this wine is full of happy memories.
The salmon cakes, chutney, and rice make an all-season dish, but I most often make it in late spring when the market is flush with fresh ripe mangoes and Copper River salmon are making their first run. The gingery coconut rice got added over the years and creates a truly perfect flavor and texture triad.
Good to note is that the mango chutney is fantastic with roasted pork and on a cheese platter, and the chartreuse-colored rice will make its way into your rotation apart from the salmon cake and chutney elements.
Any type of salmon you can access is just right for this dish. You're really in luck if your fish market sells salmon trimmings by the bag at a discount, which are perfect since a filet gets chopped anyway. With all of the flavorful ingredients added, the subtleties among salmon varieties can be lost. Go with what you've got.
There is nothing technically challenging about producing this meal. I suggest, however, that you plan it on a long afternoon devoted to zenning out in your kitchen, or when you have a pal available to help with the chopping. All three meal components need quite a bit of chopping!
What is your show-stopping signature dish? If you yet don't yet have one, what would you like it to be?
Other Signature Dish-Worthy Recipes You'll Love
Roasted Chicken + Autumn Bread Salad (adaptable to all seasons): Get recipe here. Mediterranean Chicken + Artichokes: Get recipe here. Sweet + Spicy Salmon Bowls: Get recipe here.
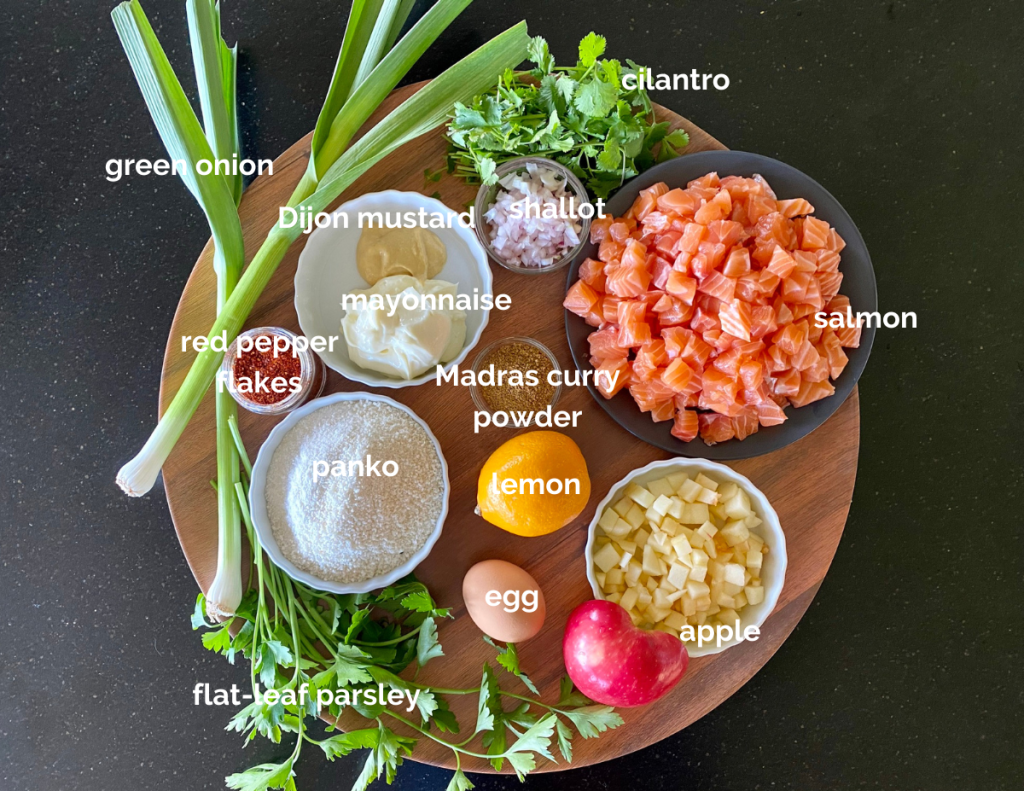
An all-season Pacific Northwest/Southern Indian fusion full of tropical flavors. The ingredient list looks long, but this is an easy make-ahead dish that wows family and guests alike. Make your cakes small for a great appetizer version! This recipe pairs perfectly with Oregon Pinot Gris and other dry white wines.
1cuppanko or gluten-free panko crumbs, divided(½ cup for the salmon mixture, the rest to coat the uncooked cakes)
½ - 1tsp.salt to taste
¼cupcanola or olive oil, for cooking
Coconut Rice
1¼cupsBasmati rice
1 13.5 oz. canlight coconut milk
1-2tsp.fresh gingerroot, peeled and minced (optional)
1-2tsp.fresh turmeric, peeled and minced (optional) ORFind this at an Indian or Asian grocer, and at places like Whole Foods in your area.
½tsp.ground turmeric (the dried spice)If fresh turmeric isn't available where you live.
1smallserrano chili, seeded and minced (optional)
Instructions
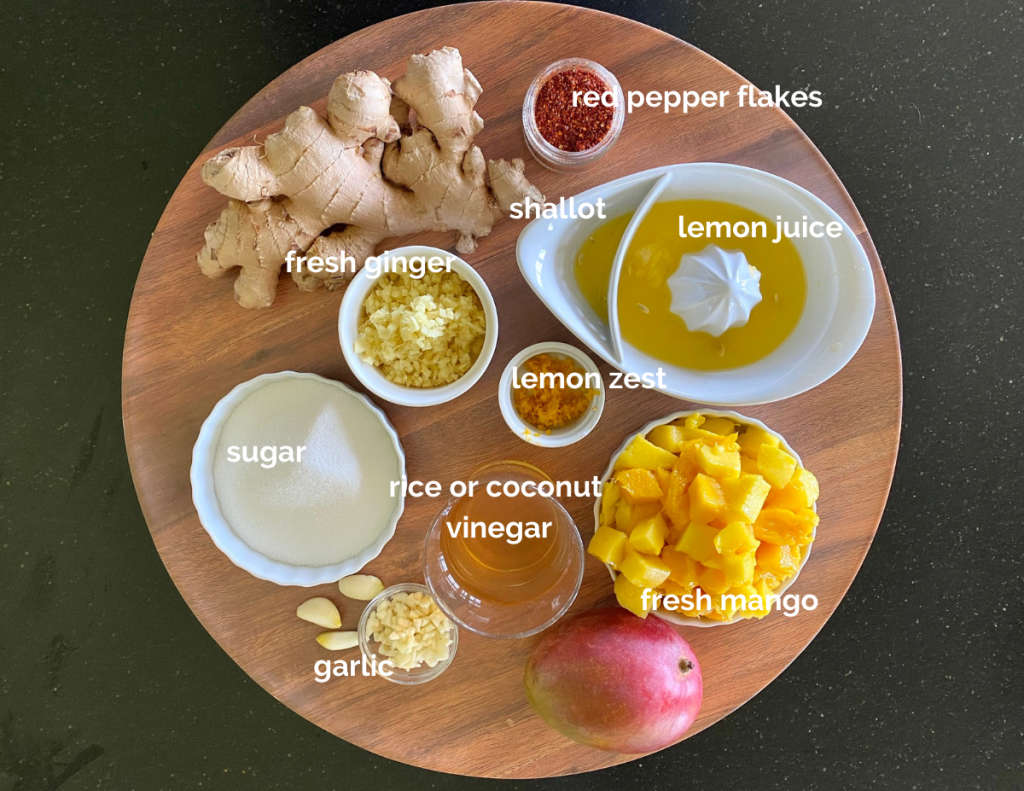
Start with the Mango Chutney
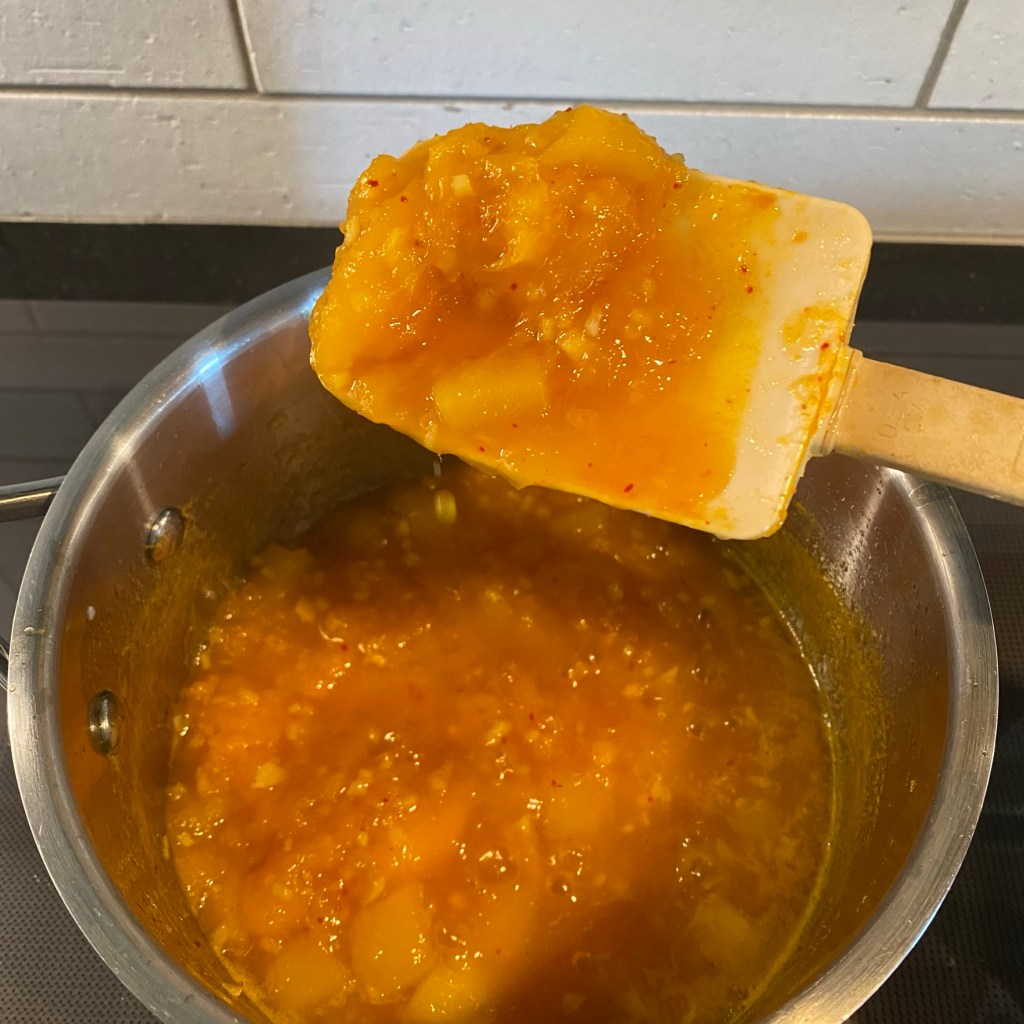
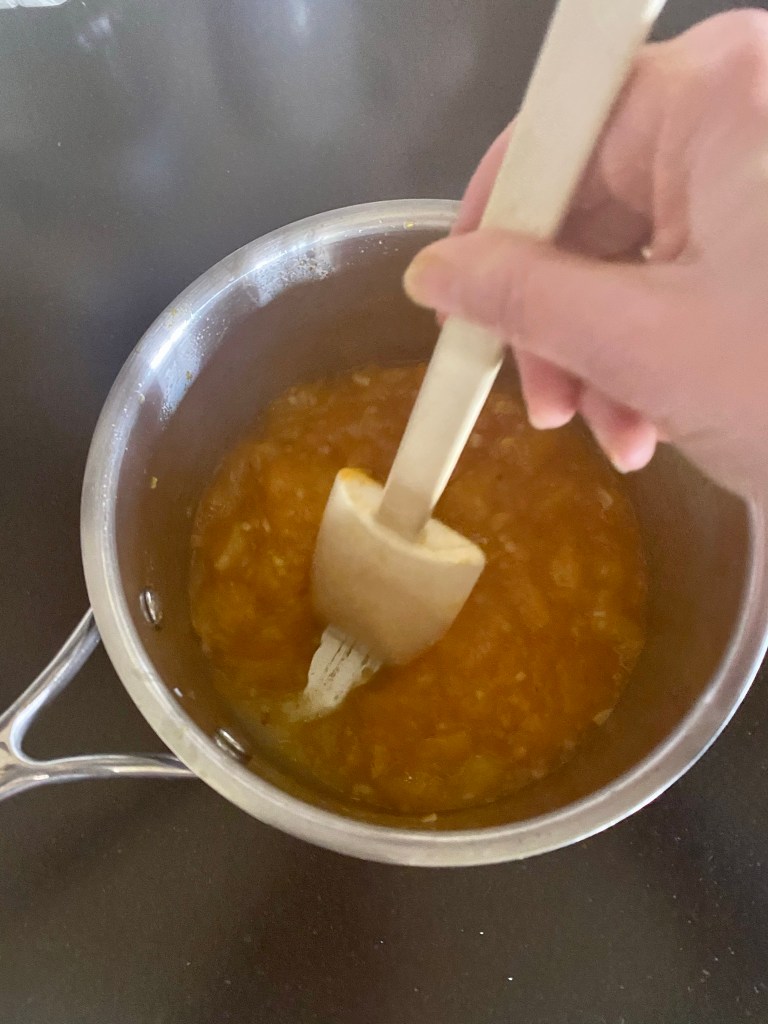
Bring all ingredients to a boil in a non-aluminum saucepan over medium heat. The aroma will be vinegary-pungent at first, then will turn sweet and gingery. Turn the heat down and simmer until the liquid condenses and becomes thick and syrupy, stirring frequently, approximately 30-40 minutes.
The chutney thickens as it cools, and keeps in the refrigerator for 2-3 weeks. Makes 2½ cups.
Now the Curried Salmon Cakes
Gently combine all ingredients EXCEPT ½ cup of the panko. Allow mixture to rest five minutes. (While you're waiting, now is a good time to start the rice!)
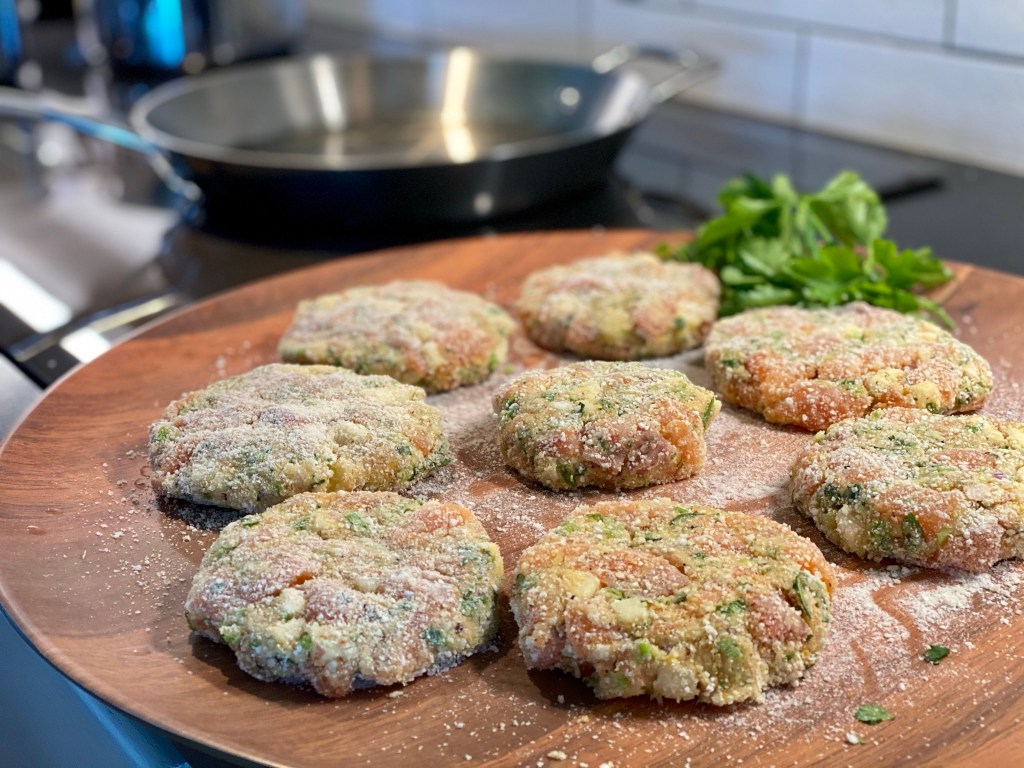
Place the remaining ½ cup panko onto a plate or shallow dish. Scoop up ½ cup of the salmon mixture and form into 3" cakes. Carefully coat each cake in panko crumbs. Allow the cakes to rest another five minutes. (The resting steps help the panko absorb to hold the cakes together/stick to the cakes and make them much easier to handle.)
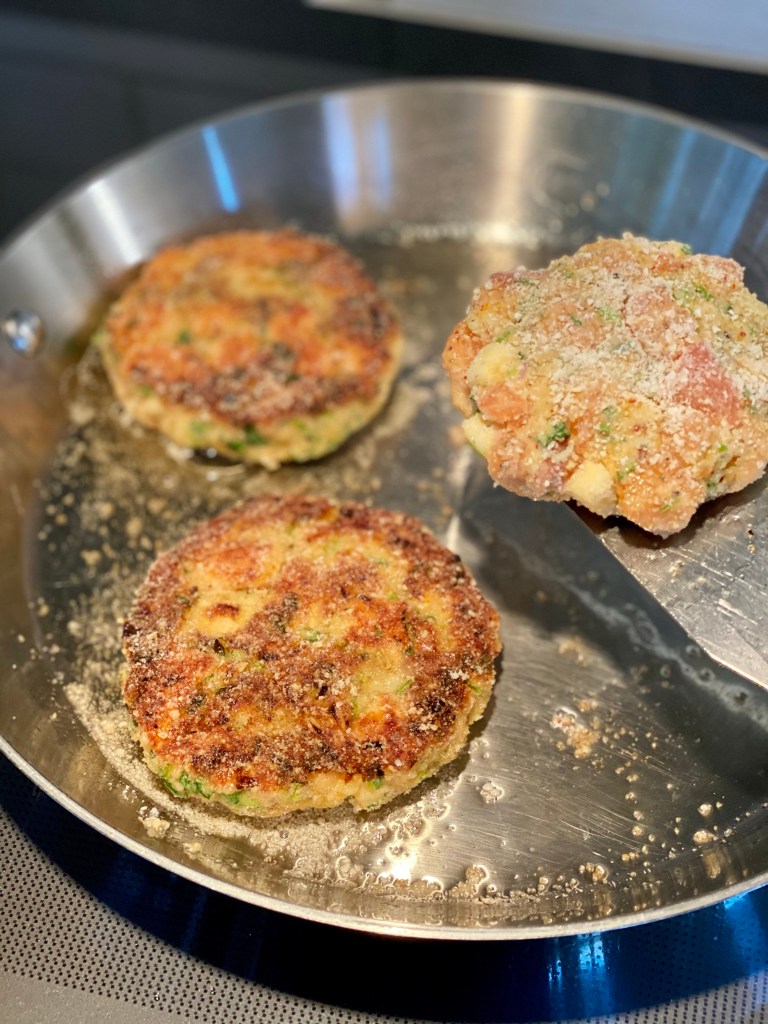
Heat oil in skillet over medium-high heat until just starting to shimmer. Place salmon cakes, a few at a time to avoid crowding, in the skillet and cook without moving until golden brown, about 3 minutes. Carefully flip cakes and cook without moving until the second side is golden brown, about another 3 minutes. (You should have eight cakes, or enough to serve four people.)
Make the Coconut Rice
Over the sink, rinse the rice in a fine-mesh strainer with cold water, stirring the rice with your fingers until the water runs clear. Put the rice in a medium saucepan.
Add the coconut milk, ginger, turmeric (fresh or dried), and serrano* to the saucepan (if using.) Bring to a full boil over high heat. cover, reduce heat and simmer for 20 minutes. Keep the lid on, and set the rice aside.
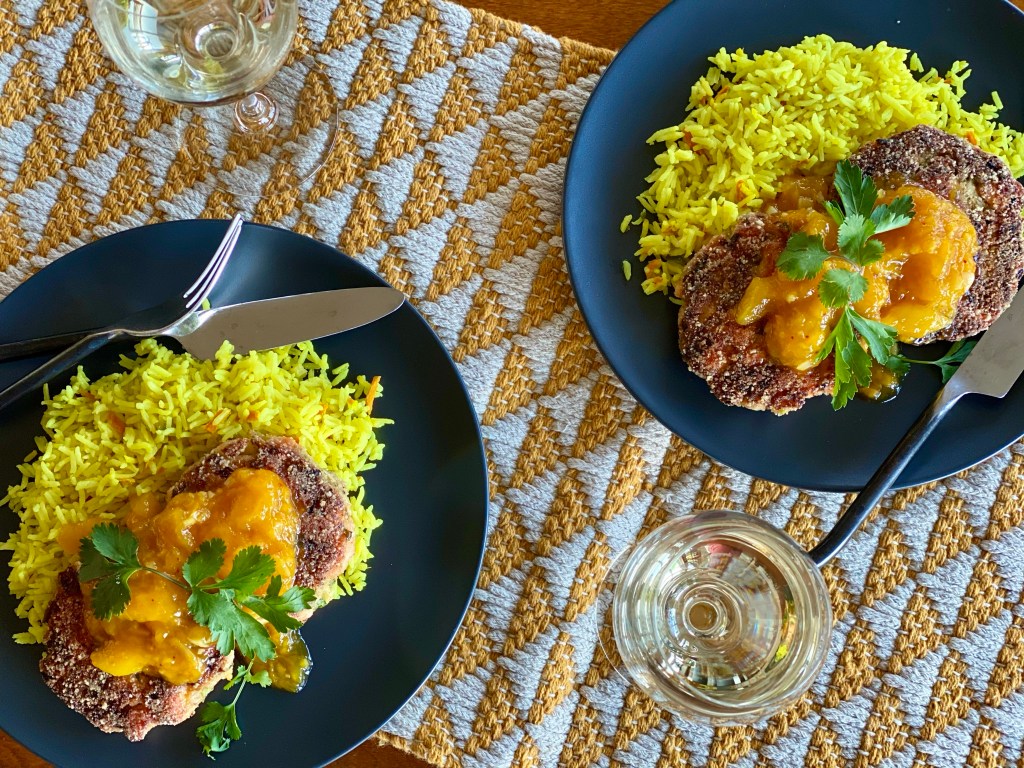
To Serve
Lay down a bed of rice in the center of each plate. Place two cakes on the rice. Top with generous spoonsful of warm mango chutney, and garnish with cilantro, if desired.
Notes
The salmon cakes and mango chutney are perfect with Oregon Pinot Gris and other dry white wines, and sparkling whites. All components can be made ahead-- perfect for entertaining. Rewarm the salmon cakes in a hot oven for a few minutes. Warm the rice and the chutney in lidded saucepans over medium-low heat. This, of course, works well for any leftovers, too.Experiment using halibut or other white fish in place of the salmon.*I suggest a pretty wide range of quantity for the ginger, turmeric, and serrano for the rice, as well as an option for dried ground turmeric if you can't find fresh. This rice is stellar with all of these added, but you have the freedom to choose to omit, increase, or reduce the quantity to suit your taste. We like it with its full-flavor, all-in, maxxed out goodness. The rice can be made with full-fat coconut milk, but it will of course have a heavier, oilier feel. If full-fat is what you have, please use it, but to try it once with light coconut milk.
Follow Me
Welcome!
You’re in the right place! I’m Pam Spettel, home cooking expert and guide, and I’m here to show you how to break up with cooking and hospitality anxiety, learn how to use recipes as guides rather than strict rules, and let your cooking intuition and confidence soar.
Superpower: Dreaming up recipes that work, serving them to my friends and family, and writing little stories about how cooking them well is the same as loving well.
Inspiration: Ingredients! The fresh, colorful, fragrant, local, seasonal ingredients found in the Pacific Northwest are my creative medium.
Heroes: Local food and wine producers– the people who keep me, my family, and our community nourished and happy.
We use cookies on our website to give you the most relevant experience by remembering your preferences and repeat visits. By clicking “Accept”, you consent to the use of ALL the cookies.
This website uses cookies to improve your experience while you navigate through the website. Out of these, the cookies that are categorized as necessary are stored on your browser as they are essential for the working of basic functionalities of the website. We also use third-party cookies that help us analyze and understand how you use this website. These cookies will be stored in your browser only with your consent. You also have the option to opt-out of these cookies. But opting out of some of these cookies may affect your browsing experience.
Necessary cookies are absolutely essential for the website to function properly. These cookies ensure basic functionalities and security features of the website, anonymously.
Cookie
Duration
Description
cookielawinfo-checkbox-analytics
11 months
This cookie is set by GDPR Cookie Consent plugin. The cookie is used to store the user consent for the cookies in the category "Analytics".
cookielawinfo-checkbox-functional
11 months
The cookie is set by GDPR cookie consent to record the user consent for the cookies in the category "Functional".
cookielawinfo-checkbox-necessary
11 months
This cookie is set by GDPR Cookie Consent plugin. The cookies is used to store the user consent for the cookies in the category "Necessary".
cookielawinfo-checkbox-others
11 months
This cookie is set by GDPR Cookie Consent plugin. The cookie is used to store the user consent for the cookies in the category "Other.
cookielawinfo-checkbox-performance
11 months
This cookie is set by GDPR Cookie Consent plugin. The cookie is used to store the user consent for the cookies in the category "Performance".
viewed_cookie_policy
11 months
The cookie is set by the GDPR Cookie Consent plugin and is used to store whether or not user has consented to the use of cookies. It does not store any personal data.
Functional cookies help to perform certain functionalities like sharing the content of the website on social media platforms, collect feedbacks, and other third-party features.
Performance cookies are used to understand and analyze the key performance indexes of the website which helps in delivering a better user experience for the visitors.
Analytical cookies are used to understand how visitors interact with the website. These cookies help provide information on metrics the number of visitors, bounce rate, traffic source, etc.
Advertisement cookies are used to provide visitors with relevant ads and marketing campaigns. These cookies track visitors across websites and collect information to provide customized ads.