Even though school busses are rolling again, a blanket has been tossed on top of the summer sheets, and my favorite sweater has been brought out against the morning and evening chill, it is my first annual batch of Caraway Rye Black Bread that makes the welcome of autumn official at our house.
This black bread recipe originates with Dan Lepard's phenomenal 2011 cookbook, Short & Sweet. My adaptations reduce a little sugar, simplify the process, and make it completely dairy-free/vegan. But the texture, flavor profile, and proportions are singularly Dan's.
How to Use the Caraway Rye Black Bread
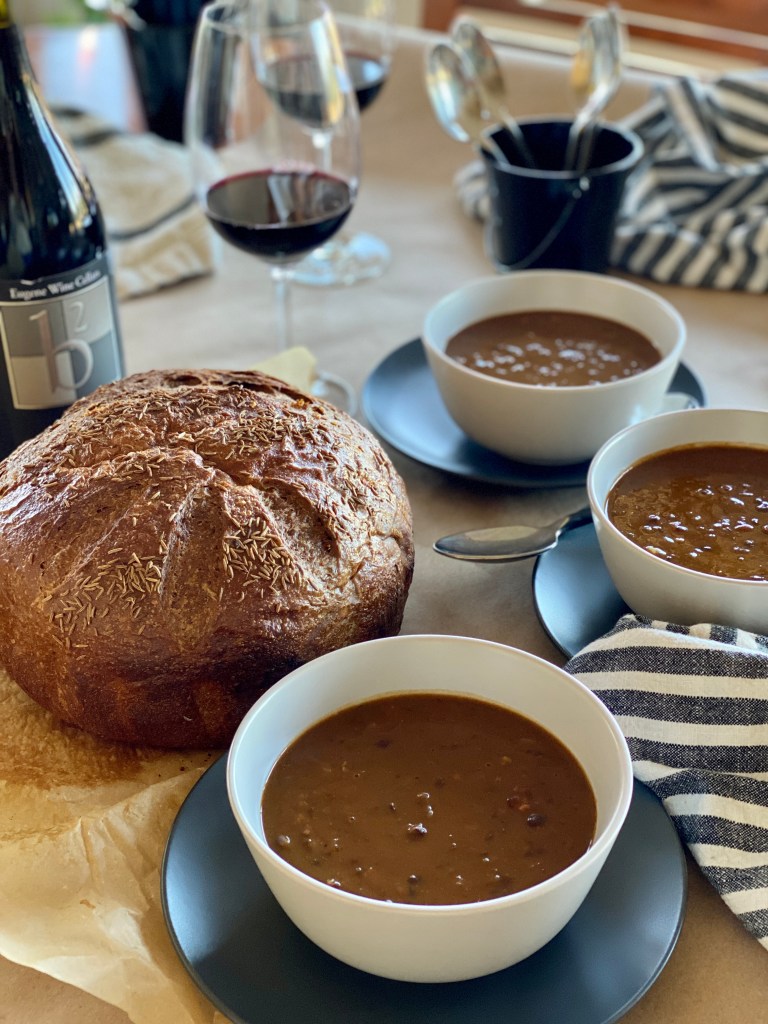
This glorious rye bread is perfect for dunking into a thick bean or vegetable soup like this for Halloween supper. Or try two slices filled with your favorite cheese, thinly sliced apple, and grainy mustard and grilled in a hot skillet or panini maker as an after leaf-raking treat. Or chunked up as a fondue dipper and served with a Grüner Veltliner or Riesling, it wins a lot of points in the stay-at-home romance category.
But here is my personal favorite-- A thick slice toasted, buttered, and with a generous schmear of butter or ghee and orange marmalade alongside a cup of hot coffee sings O Happy Day for breakfast.
About the Bread
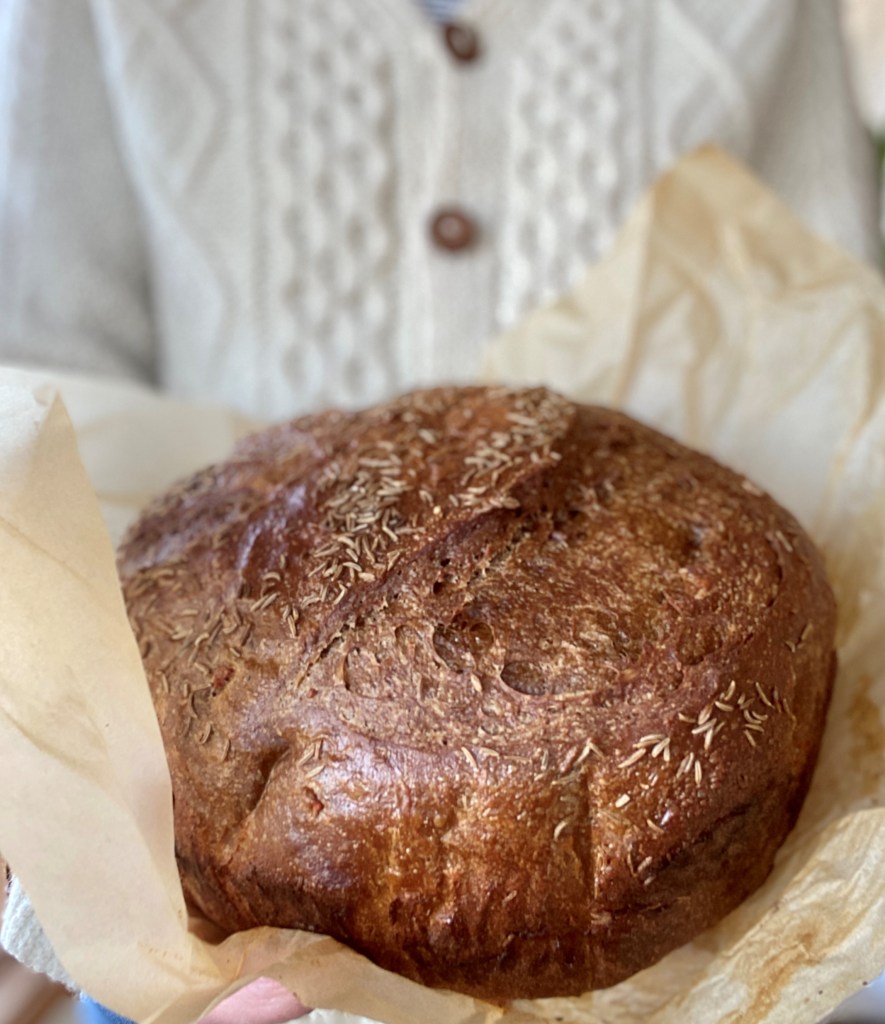
Caraway Rye Black Bread is the lovechild of deli rye and pumpernickel. Deep dark richness comes from molasses, cocoa powder, and ground coffee beans or instant espresso powder. The unmistakable sweet warmth comes from a generous amount of caraway seeds typically found in a lighter rye bread.
The loaf is gorgeous and huge-- HUGE-- at nearly three pounds. Is that more bread than your household came consume at once? There's the solution for that! The dough is easily divided into two smaller loaves baked either in boules as directed or in standard loaf pans. The dough also makes fantastic dinner or sandwich rolls, so you could make one loaf along with a pan of those. Well wrapped, the baked bread freezes beautifully for up to three months.
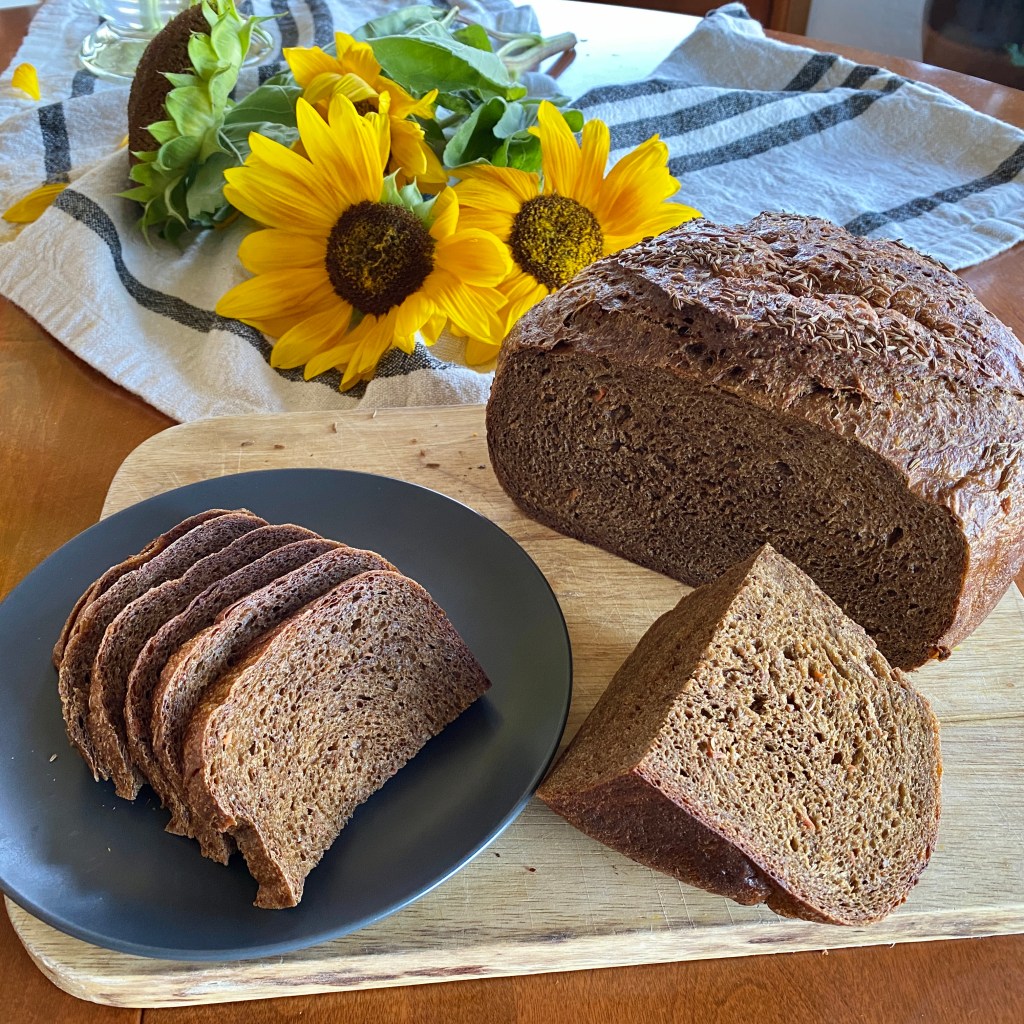
The Caraway Rye Black Bread recipe creates a silky dough that bakes up into a springy fine crumb. Its soft moisture comes from grated carrot, which I routinely swap for peeled winter squash such as butternut.
I've worked to simplify the steps, none of which are difficult. The hands-on time is fairly short. As your Saturday or Sunday self-care project, there is plenty of time to relax with a book or watch movies while the dough is rising.
I hope this heavenly bread recipe will become your welcome to autumn tradition.
If a pumpernickel and a deli-style caraway rye had a baby, it would be this loaf. A fine-crumbed pumpernickel-style loaf flecked with carrot and caraway just right for cool weather soup dipping, panini, cheese plates, fondue dipping and good old sandwiches. This vegan/dairy-free version makes one 3-pound loaf, two typically sized loaves, or great dinner rolls.
1 ½cupsrye or dark rye flourCamas Country Schoolhouse Dark Northern Rye is my favorite.
2¼teaspoonsinstant dry yeastSAF brand is my go-to.
2Tablespoonscocoa powder
2Tablespoonsinstant espresso powder or very finely ground coffee or espresso beans
1 - 1½Tablespoonscaraway seeds
2teaspoons kosher or sea salt
1 ½cupswarm water (110°-115°) and more as needed
¼cupmolasses, dark or blackstrap
3Tablespoonsolive, avocado, or safflower oil
2cupscarrot or winter squash such as butternut, peeled and grateda fine grate will make the carrot to disappear into the dough- a course grate will make pretty orange flecks in the dough, your choice.
Instructions
Combine the dry ingredients (all-purpose flour through salt) in the bowl of a stand mixer fitted with the dough hook. Alternatively, do this by hand in a very large mixing bowl.
Measure the warm water into a 2-cup measure. Add molasses and oil, and stir to thoroughly combine.
With the mixer on low speed, add the water mixture gradually to the dry ingredients. Scrape down the sides of the bowl. Add the carrots and increase the speed to medium. Knead for about five minutes, scraping the sides of the bowl occasionally. Aim for a dough that is smooth, moist, and tacky, but pulls away from the bow. leaving just a few moist streaks on the bowl. If your dough is too soft, add additional AP or rye flour a tablespoon at a time. If it is too dry, add water a tablespoon at a time, allowing time for the flour to absorb it before adding more.
Oil a large lowl. With oiled hands, shape the dough into a ball and place it in the bowl. Flip it over a time or two to lightly coat it in oil. Leave it seam side down, covered with a dishcloth, to rest in a warm place for 1 -2 hours until the dough has just doubled in size.
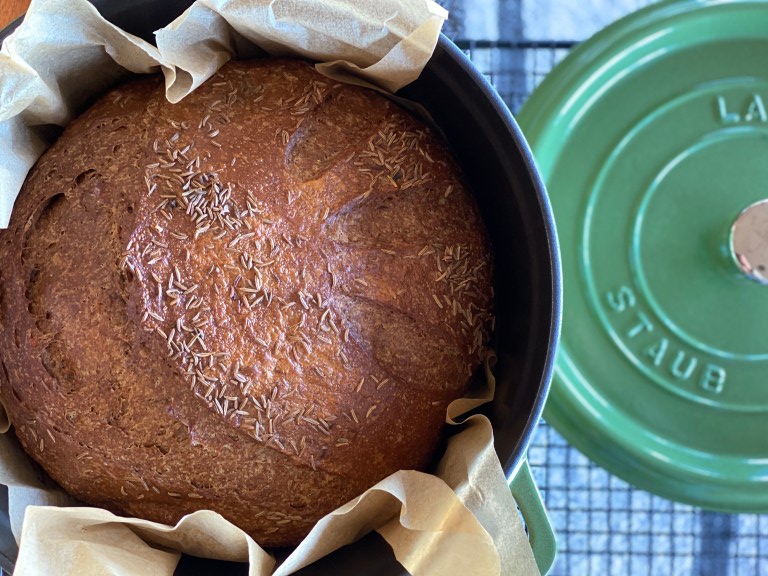
After the first rise, gently press down on the dough. On a lightly oiled surface and with oiled hands, fold the edges of the dough into the center and press down. Do this again (twice total) to shape the dough into a tight, smooth ball. If you are baking it on a baking sheet, lightly oil the baking sheet and place the dough seam side down on the baking sheet. If you are baking your loaf in a Dutch oven (5-6 qt. is best) first place the dough on a sheet of parchment tucked into a small skillet or pan about the width of your Dutch oven, and place your Dutch oven into your oven. (This allows the dough to rise while your Dutch oven is preheating.) With either baking method, cover the dough with a dishcloth for its final rise in a warm place for one hour.
Preheat the oven to 425°/ 220C. Brush the top of the loaf with water and scatter another 1 teaspoon of caraway seed on top, if desired. With a very sharp knife and without deflating the dough, cut an "X", a line down the center, a half moon, or wheat-shaped dashes into the top. Or leave it to make its own fough gash as it expands in the oven. If you are baking the loaf in a Dutch oven, use the parchment corners to gently lift the dough into the hot Dutch oven. If you are baking it on a baking sheet, place the sheet in the oven.
Bake for 20 minutes at 425°/ 220C. Reduce the oven temperature to 350°/ 180C and bake for another 20-25 minutes. (Reduce the time if you've divided the dough into smaller loaves or rolls.) The loaf will be ready when it has a very well browned bottom crust and sounds hollow (like a drum) when you firmly pat it. Don't be afraid to give it more time in 5-minute increments-- you definitely don't want it underdone.
Remove the loaf to a cooling rack. Allow the load to cool to the touch completely before cutting into it. Slicing into a hot loaf of bread turns it into a compressed gooey mess, so be patient for this most excellent reward.
It is an odd little kid who prefers observing adults above hanging out with other kids, but that is how I was issued. With the focus of Jane Goodall and the sofa as my cover, I studied grown-ups and all forms of their behavior; language, cultural and social norms, and how curiously their developed biology drove their actions. Kids I found to be mostly mean, addled, and ridiculous.
It will not surprise you, then, to know I hated peanut butter and jelly sandwiches. The basic components were good, I thought. But jelly seeping through the bread, the gluey palate-sticking nature of the thing, and the whole sandwich mangled by the smacking of a thermos inside the lunchbox of a girl with a purposeful stride? Thank you, but no.
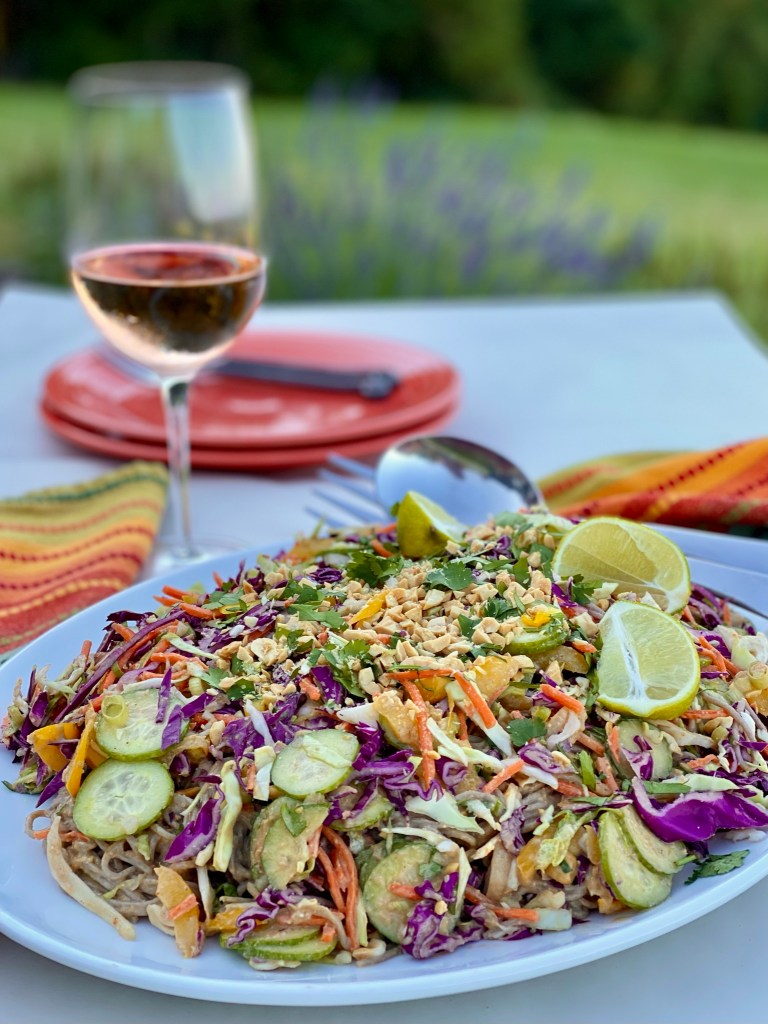
If Crunchy Cold Buckwheat Noodles in Peanut Sauce had been popular among suburban moms so long ago, it would have been my absolute lunchbox preference. A tangle of chewy buckwheat noodles and colorful crunchy vegetables draped in a velvet cloak of spicy, gingery peanut sauce is arguably the best use of peanut butter. It would have had me daydreaming about girls in Indonesian -- where peanut sauce originates-- wondering if they liked math any better than me, if their parents fought, and whether they moved a lot or got to live in one house their whole life. I would have wished the Weekly Reader to do a story on them so I could know.
This recipe is for my grandchildren should they want something other than jelly and bread with the peanut butter in their lunchboxes.
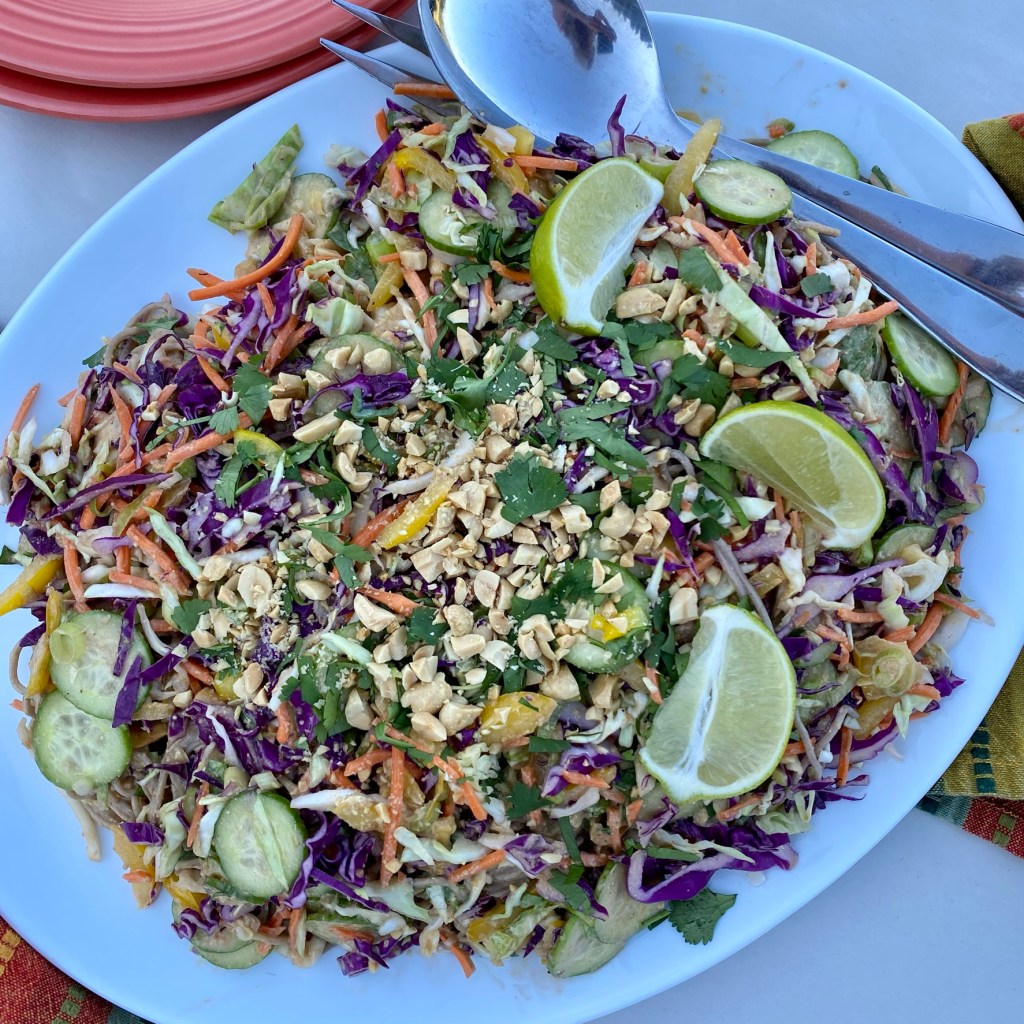
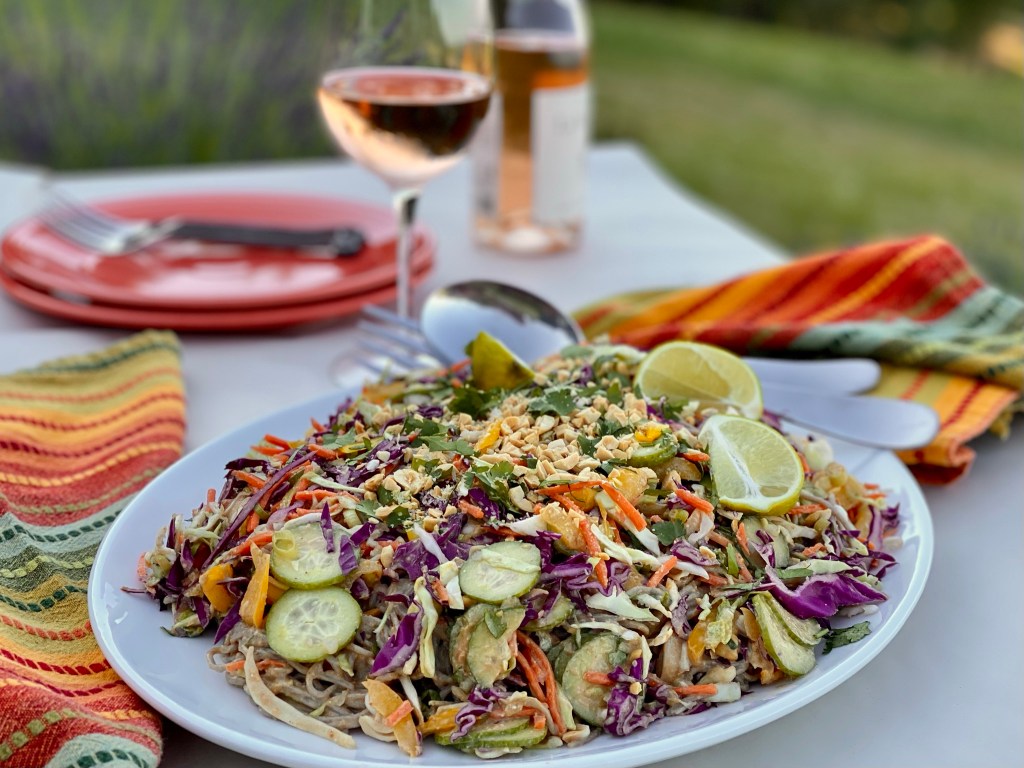
Chewy soba noodles and crackly-fresh vegetables are draped in a velvety, gingery peanut sauce. Make it in less than 20 minutes for a speedy dinner, but be sure to make extra-- it holds well for tomorrow's lunches or picnics. Easily halved or doubled, this all-ages people pleaser will be a welcome addition to your meal rotation.
3Tbsp.fresh squeezed lime juice or rice wine vinegar
2Tbsp.sugar, brown sugar, honey, or maple syrup
2Tbsp.toasted sesame oilalso called dark sesame oil
1 tsp. -1 Tbsp.Sriracha or hot chili garlic sauce to taste
1Tbsp.grated fresh ginger and its juice
1-2 grated garlic cloves
Noodle Salad
10 oz.soba (buckwheat) noodlesudon, ramen, or rice noodles or even spaghetti are also good choices. Use gluten free noodles if you'd like
6 cupsfresh crunchy raw vegetables (see list below to mix and match*)chopped , coarsely grated, or thinly sliced
3-4green onions, sliced
1bunchcilantro, coarsely chopped
¼ cuppeanuts, coarsely chopped (optional)
Peanut Sauce (above)
1lime, cut in wedges for serving
Instructions
In a medium bowl that allows room for whisking, whisk peanut butter to loosen it. Add each ingredient one at a time, whisking thoroughly after each addition. (You are making an emulsion, and adding the liquids slowly in batches prevents a sloshy mess from forming. It will actually go faster this way, and will minimize cleanup.)
Whisk in warm water, one tablespoon at a time, until the sauce thickly drips from the whisk. You want the sauce to be thin enough to easily coat the nooks and crannies of the vegetables and noodles, but to retain some body. Depending on the thickness of your peanut butter and the room temperature, you will add between 1 Tablespoon and ¼ cup of water. Taste and make any adjustments of sweetener, lime juice, spicy heat, or perhaps salt. Set the peanut sauce aside.
Place a pot of salted water on to boil. Cook soba noodles according to package directions. When done, rinse in cold water until the noodles are completely cold.
While the water is heating and the noodles are cooking, prep your vegetables including the green onions. Aim for small dice, or thin matchstick pieces so that you can fork up a mix of vegetables and noodles in each bite. Place all the vegetables in a large bowl..
Coarsely chop the cilantro and peanuts. Keep a few tablespoons of each aside for garnish, and place the rest in the bowl. When the noodles are cooked, rinsed, and drained, add them to the bowl. Give everything a gentle toss.
Add about ½ cup of the peanut sauce to the bowl, and give everything a gentle but thorough toss, until all ingredients are evenly coated with peanut sauce. Add more sauce, tablespoon by tablespoon, until the salad is dressed to your liking.
Plate the salad individually or transfer it to a serving bowl or platter. Sprinkle cilantro, peanuts, and sesame seed on top. Serve with a lime wedge.
Refrigerate any leftovers in an airtight container. Will keep nicely for a day.
Notes
*Fresh crunchy vegetable options. Use what the garden or farmers market gives you, or what you have in your crisper:
cucumber*
green and/or purple cabbage
red or yellow bell pepper
snow or sugar-snap peas
carrot
radish
kohlrabi
white turnips
green or yellow summer squash*
*Best added only if you'll consume the entire recipe right away, as they go soft and watery overnight. I don't mind this, but you might!
Three years ago my beloved and I bought our forever home. We'd come together later in life and it took us a while to figure out where and how to live in a way that meets both of our needs. For ten years we searched to find this place we both love and have made our home.
Our sweet forever home visually melts into the backdrop of a 260+ acre forest that also backs the properties of our two neighbors. We have loved the forest for all it gives. Birdsong, shade, the ever-present rustling of the treetops, the pure fresh earthy scent that's especially noticeable in the early mornings, and the creaks and howls that call from it after dark.
Beginning Tuesday, as happens in Oregon, the crop of timber-- the entire forest-- will be harvested. By September what once was a Douglas Fir forest will be three new homesites. We knew this would happen one day. We just liked to think that one day was 20 years from now.
I am heartbroken.
My husband, who has had something grumbly to say about every clear-cut we've ever driven by, has nobly risen to reframe the situation as our "view expansion and sunset enhancement opportunity." His forward lean and courage is beautiful.
I fleetingly think of changing my name to Butterfly and chaining myself to a tree. Instead I just weep.
Our dear neighbors with whom we have shared the glories of this forest gathered this weekend to pay homage to the lush, oxygen-scrubbing, interconnected organism we've enjoyed and appreciated. A wake of sorts. Poetry was recited, a tear or two was shed, and we laughed and shared community lore. My hurting heart considered serving Funeral Potatoes but I refrained.
What does one serve on the occasion of a forest being cut down?
We ate from the forest, that's what we did.
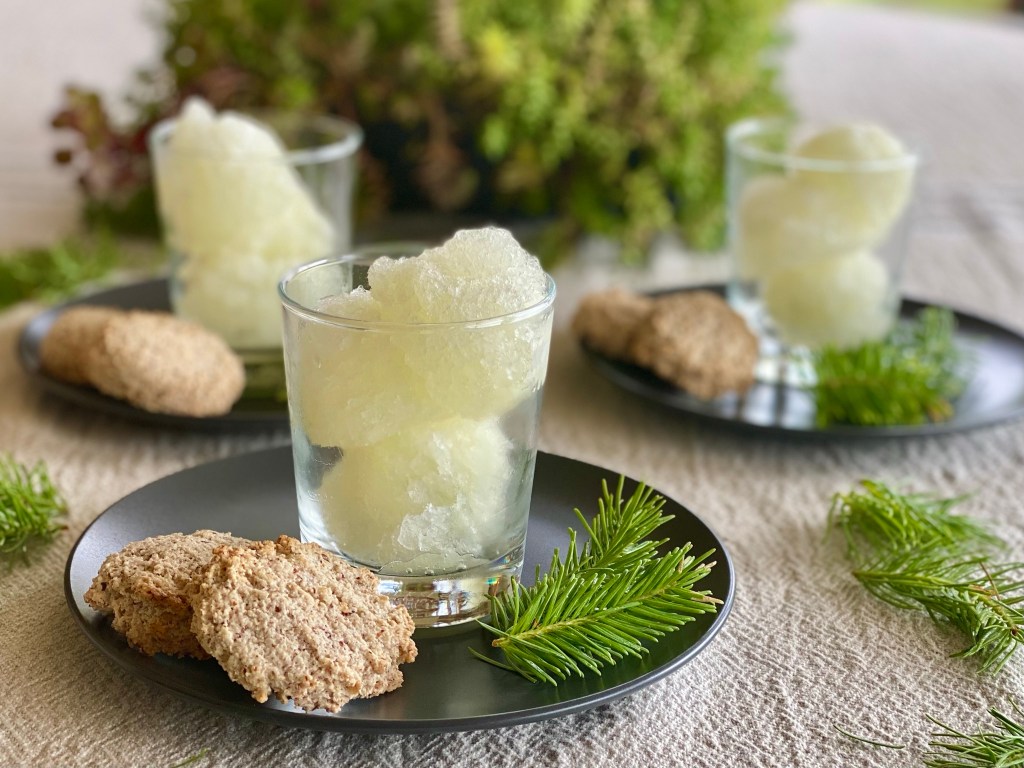
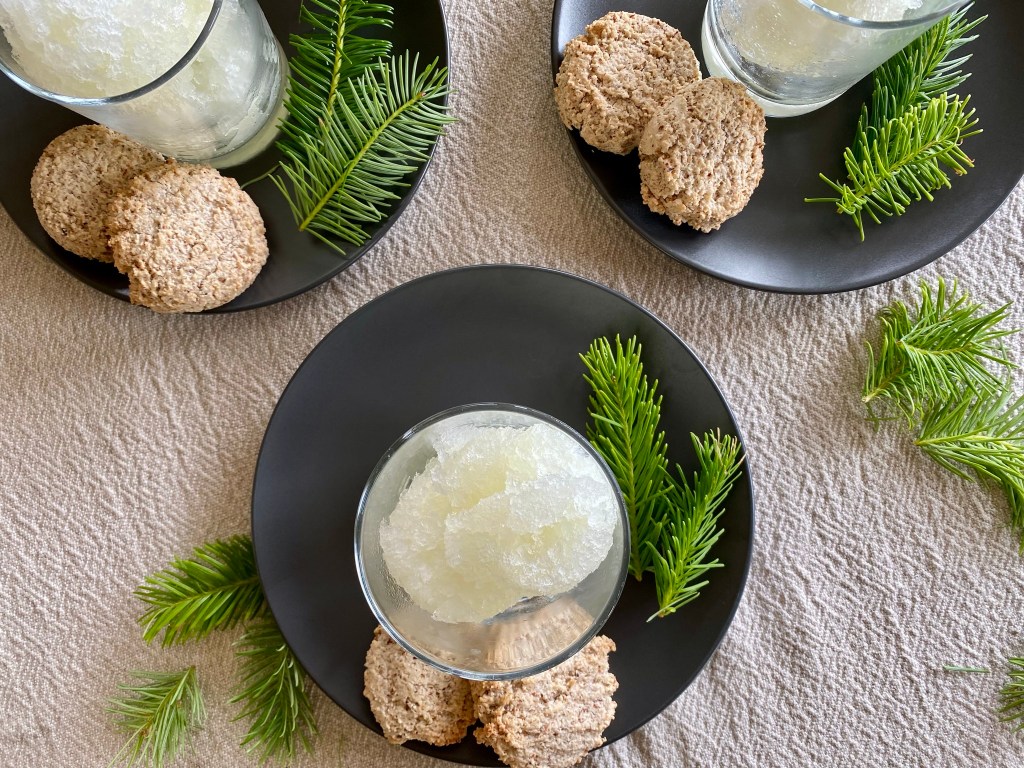
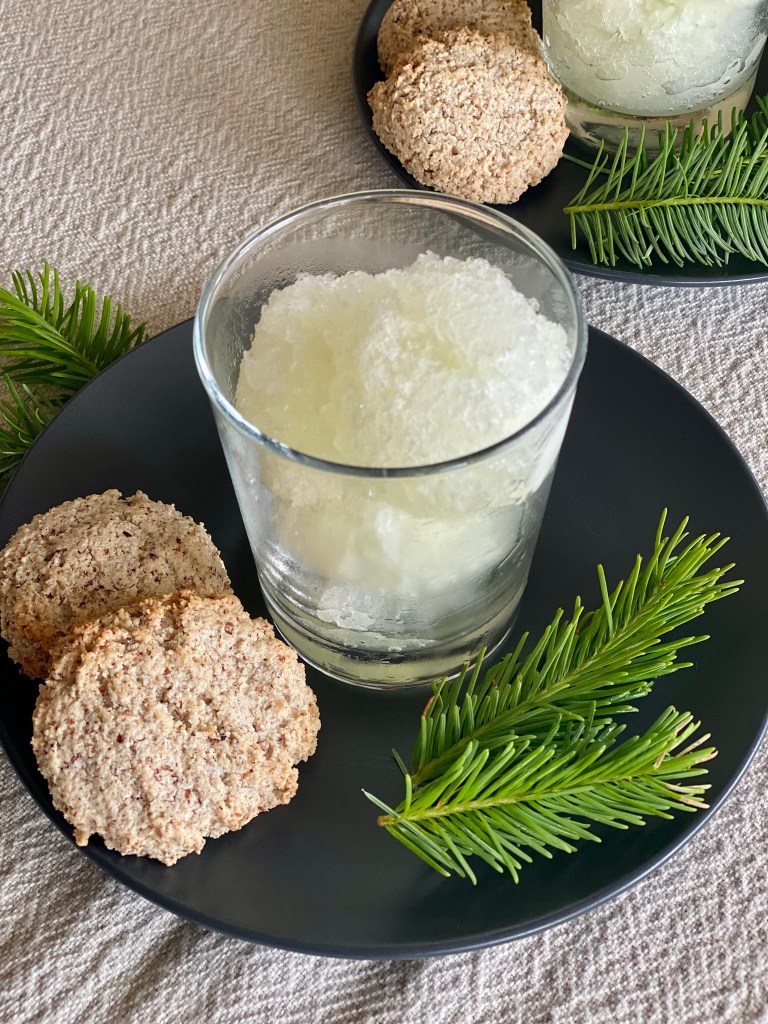
Douglas Fir Tip Sorbet or Granita
Course: Dessert
Cuisine: Pacific Northwest
Season: Evergreen (April - July)
Dietary: Dairy-Free, Egg-Free, Gluten-Free, Vegan
Prep Time: 35 minutesminutes
Chill Time: 2 hourshours
Total Time: 2 hourshours35 minutesminutes
Servings: 12
How does one eat a forest? One little bite of fir tip sorbet at a time! A little resiny and a little limey, this refreshing sorbet or granita makes a wonderful dessert with a hazelnut cookie, or a fantastic palate cleanser between courses. Forage away!
In a small saucepan combine 2 cups of water, sugar, zest of ½ lime, packed fir tips. Heat, stirring frequently, until the sugar is completely dissolved. Put a lid on the pan and remove from heat. Allow the mixture to sit for 30 minutes. Strain the mixture into an 8-cup measuring cup or mixing bowl.
Squeeze the lime and lemon juices. Add the remaining 2½ cups of water and the juices to the strained sugar mixture. Stir in the Douglas Fir brandy, champagne, or vodka. Cover, and chill in the refrigerator 2 hours or overnight.**
For sorbet, freeze according to ice cream maker manufacturers instructions. Serve immediately for slushier soft-serve, or harden in the freezer for two hours for scoopable sorbet.
Notes
*If you make the icy granita version, increase the brandy, champagne, or vodka to 4 Tablespoons.**If you are making icy granita, skip the chilling step and pour the mixture into a large flat plastic container with lid and place in the freezer. Freeze for at least four hours, scraping every hour or so with a fork to break up chunks and create the fluffy "snow-cone" texture. To serve, rake through the frozen mixture again with a fork to create the fluffy icy texture and serve.
The process of preparing and eating citrus makes me happy. I never get tired of the bright cheery colors; the way the skin's oils pop when peeled, exploding the most uplifting scents; and how a little lemon, lime, or orange can enliven an otherwise drab dish.
In my fridge, one veggie bin is dedicated to citrus; two or three orange varieties, one or two lemon varieties, limes, kumquats and limequats, and sometimes grapefruit. Then there's the basket full of easy-peel tangerines on our counter for quick snacking. It isn't unusual for three or four of them to disappear in a day. Citruses are one of my most favorite food flavor families.
April and May wrap up the season for most US-grown citrus varieties, and now is the use-it-or-lose-it window for the freshest citrus.
No, citrus is generally not grown within my 101-mile gathering radius. Some people grow lemon trees in pots, but here on the 44th parallel citrus is not grown as a crop. This is a perfect example of exceptions to my rule.
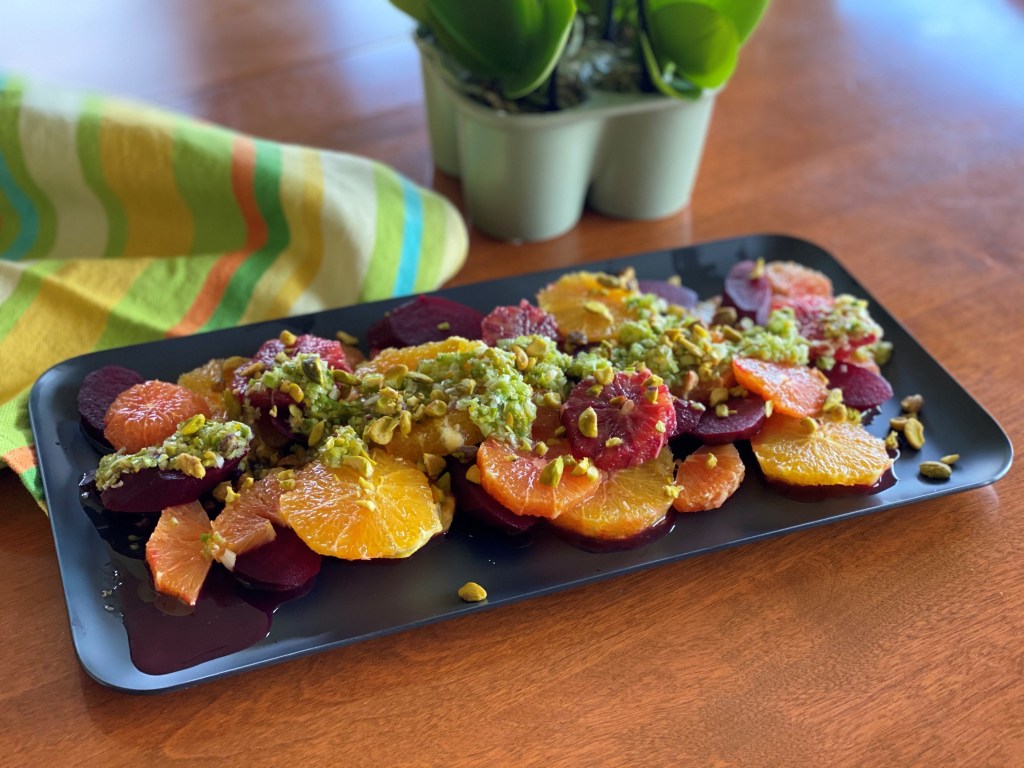
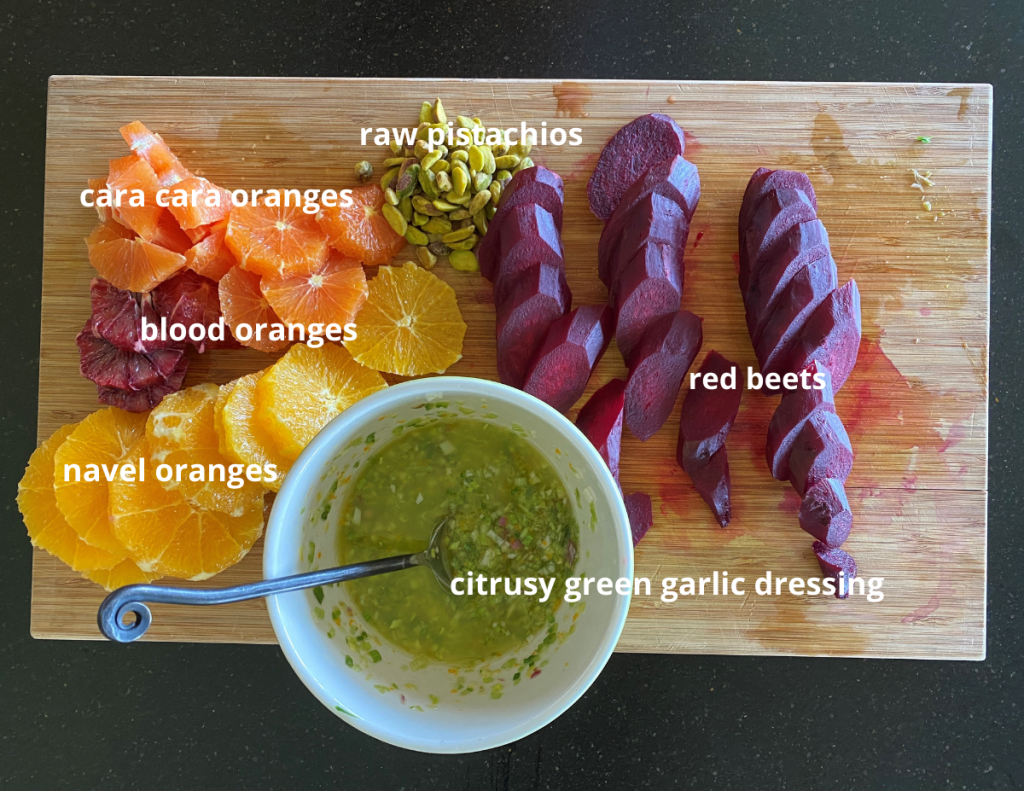
Red beets, also in peak season during these months, give earthy substance to the lively oranges. The dressing for this salad is the same as this three-ingredient sauce, with the addition of the zest and juice of a half orange.
If dairy is a part of your diet, topping this salad off with pieces of creamy burrata would be pretty amazing.
This beet-orange salad works in Oregon's seasons of Mist (November through March) and into the early part of Evergreen season (April-July.) It makes a visually gorgeous platter of color, and is perfect for your spring table.
Place the beets in a small saucepan fitted with a steamer basket if you have one, with ¾ inch of water. Put lid on the saucepan and bring to a boil. Reduce heat and allow beets to simmer until fork-tender, about 20 minutes depending on the size of the beets. Allow to cool until they can be handled.
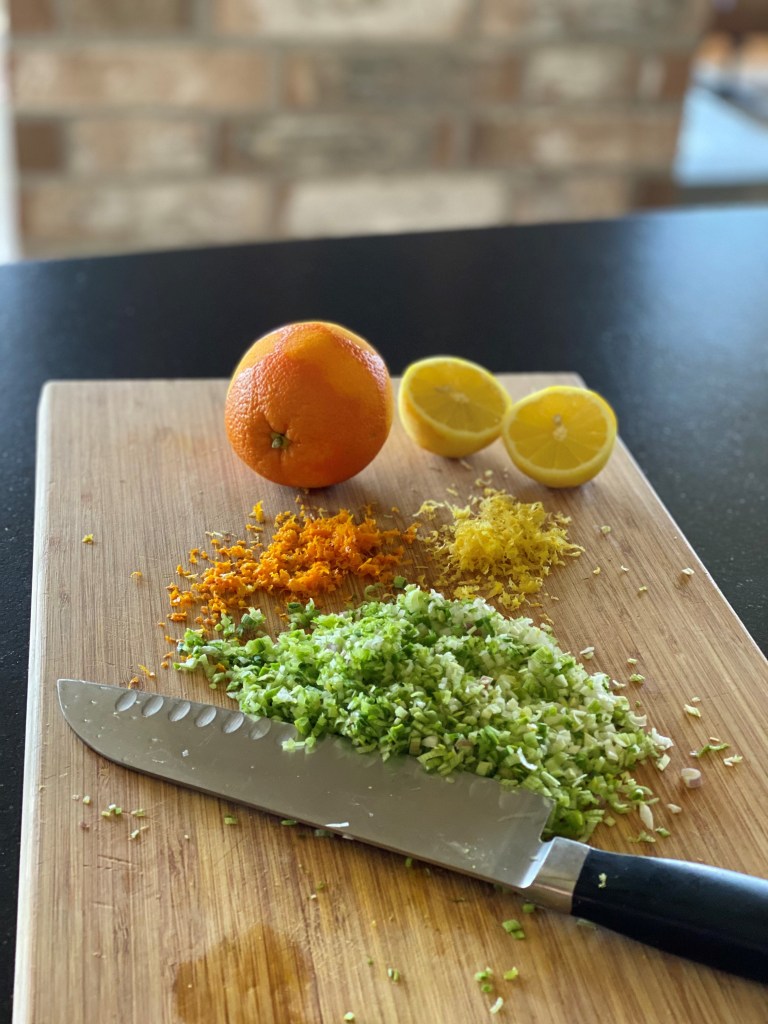
While the beets are cooking, prep the remaining ingredients: Make the citrusy green garlic dressing according to this recipe, adding the juice and zest of the ½ navel orange. Set aside.
Use a knife to peel and slice the citrus: Cut the top and bottom off each one. Stand the orange upright on its flat bottom and with your knife follow the curve of the orange from top to bottom, removing the peel and all the white pith. Cut into 1/4" slices.
When the beets are cool enough to handle, peel them. The skins should slip off rather easily with your fingers, but if they don't gently scrape them away with a paring knife. Cut into ¼" slices.
Arrange the beet and orange slices on a platter, layering them into a pretty color design. Sprinkle the oranges and beets with salt to taste. Spoon the green garlic dressing down the center. If you're using the optional burrata, break it into rough pieces and lay over the top. Scatter the chopped pistachios across the top.
Notes
This salad is good served chilled, but is even better served room-temperature.Make It Your Own:Change the type of nuts you use-- walnuts and hazelnuts are both good options. If you don't have a mix of oranges available, don't let that stop you from making this delicious salad. Experiment with yellow, Chiogga, and other beet varieties, depending on what is available to you. When green garlic isn't in season, substitute flat-leave parsley and/or other herbs such as cilantro, dill and tarragon.
The Oregon season of mist is starting to pull back and make way for our evergreen season. It is uplifting to feel how just three more minutes of sunlight a day warms ones bones. The daffodils and crocus, a little late this year, are poking up their cheery heads. Even the dog beginning to shed in never-ending tufts is a welcome sign of spring. The one true sign it is time to shift from winter foods is when the grasses turn intense chlorophyll green.
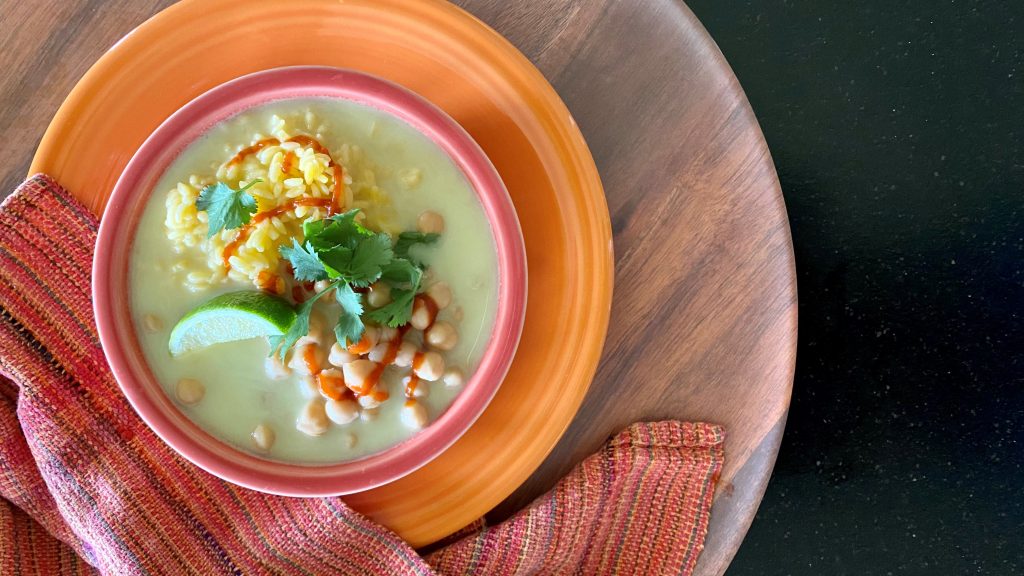
Still, mornings are cold and the mist is more present than not. Something lighter than a dense soup or stew but still hot and nourishing just sounds right. Honor the shift in cravings you may have as the grasses and clover green up brightly. This Healing Chickpea + Orzo Bowl in Ginger Broth couldn't be an easier solution. Be sure to check out the Make It Your Own options in the recipe, as this one has a lot of ways to make it work for whatever it is you need.
When you're feeling under the weather-- be it a little (or worldwide proportioned) virus, heartache or disappointment, this bowl is a perfect year-round healer and cheer-giver. The simple ginger-turmeric tea and coconut milk broth is as easy as boiling water, and would make a nutritious snack all on it's own. The whole thing comes together with zero fuss in under 20 minutes. The gingery goodness and light but complete protein will have you feeling as sprightly as a bright yellow daffodil in no time.
1 ½tspAsian fish saucefor vegan option use coconut aminos
1tspsea salt
215 oz. canschickpeas (garbanzo beans)drained and rinsed
1 lb.GF or traditional orzo, cooked, or see rice Make it Your Own option
½bunchcilantrochopped
Sriracha or spicy Asian chili sauce
Instructions
In a small saucepan, bring water to a boil and add teabags. After they are fully immersed, add coconut milk, put a lid on the pot, and leave to steep for 10 minutes. Remove tea bags.
Stir lime juice, fish sauce, and salt into the tea/coconut milk broth. Keep at a low simmer.
In a blender, blend together one cup of the garbanzos and a few ladlesful of the broth. Once it is blended smooth, add it back to the broth and stir.
Pile garbanzos and orzo into shallow bowls. Ladle broth around them.
Garnish generously with chopped cilantro and Sriracha to taste. Serve with lime wedges.
Notes
Make It Your Own:For a warm restorative to coming in from the cold, forget the garbanzos and orzo. Ladle the hot broth (with or without blended chickpeas) into a cup. Use the cup to warm your hands while the broth warms your soul.Replace the orzo with jasmine rice and replace the garbanzos with tiny cubes of silken tofu.For a non-vegetarian meal, add 4-6 peeled shrimp per person to the broth and simmer 4 minutes until just cooked through. Experiment with various Asian chili sauces to kick up the heat. Add to or substitute thinly sliced spinach whiskers for the cilantro.Makes excellent breakfast or lunch leftovers. Store any remaining broth, garbanzos, and orzo in a jar. Gently simmer to reheat.
Happy New Year 2021 to every living soul on earth. Congratulations for making it through the myriad of 2020 curveballs. Many of us are hurting, have suffered illness, loss, and financial distress, confusion, disenfranchisement, or have waited long generations for justice. Yet here we are. That is something to celebrate.
Today is a good day to renew our courage and strength. Keeping ourselves and others sustained, encouraged, warm, fed and filled with good humor is no small task, but it is ours. Are you up for it?
A hot bowl of soup sends a message: I'm Ok. Are you Ok? I'm here. Together we'll keep our chins up. You are important. I am glad for you in my life. Take nourishment.
Yes, all this in a simple bowl of soup.
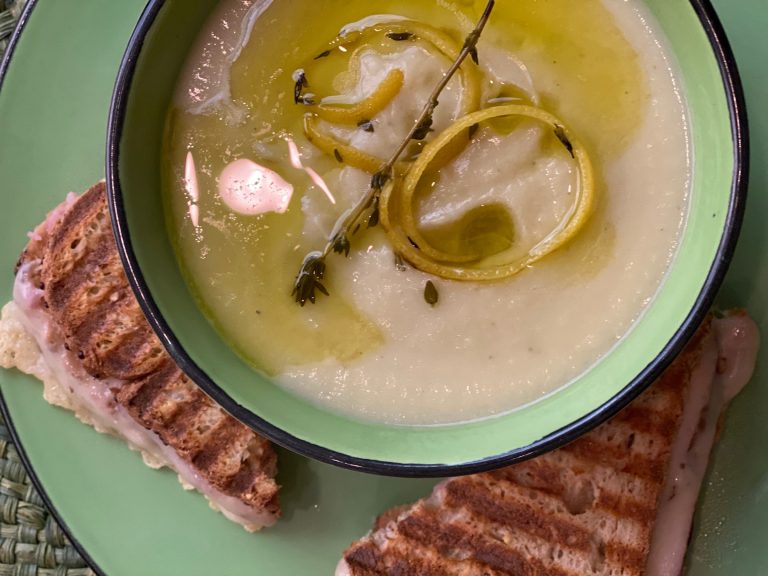
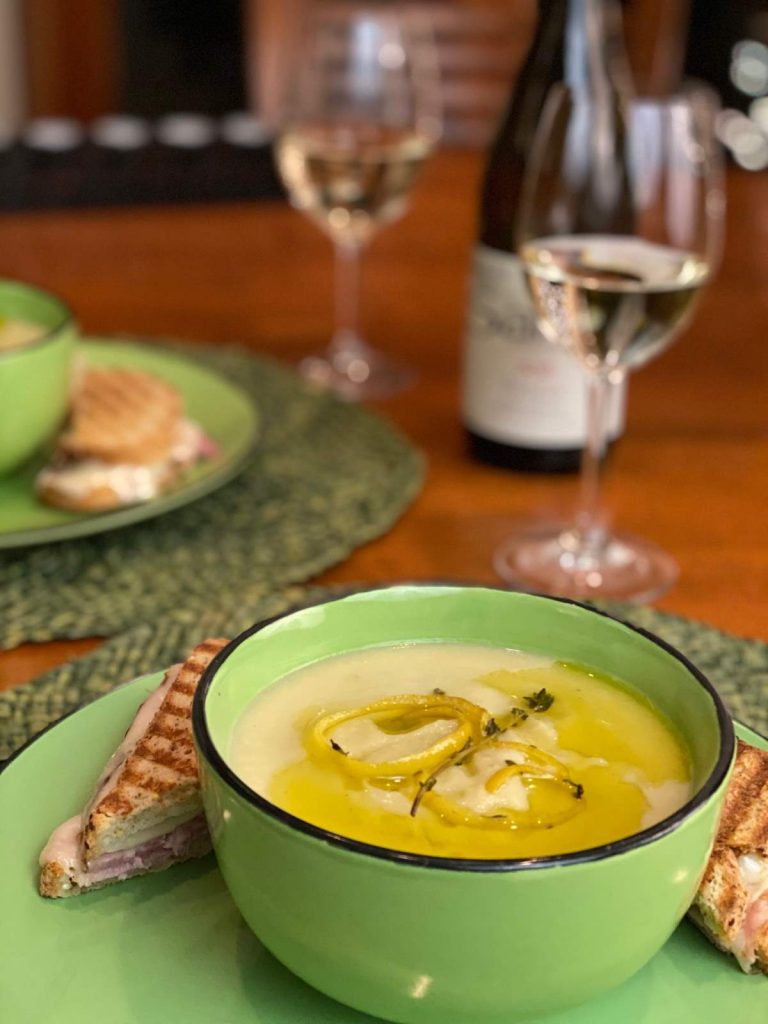
This elegant looking white soup simply used a bunch of white and palest green use-it-or-lose-it vegetables in my fridge. The guidelines you're about to read will work for nearly any vegetable or combination of vegetables for a flood of delicious soup options. Following these simple rules of thumb, you can have a creamy but cream-less pureed soup once a week all winter long and never grow bored. The same goes for the herbal drizzle. This really is a choose-your-own-adventure bowl of goodness.
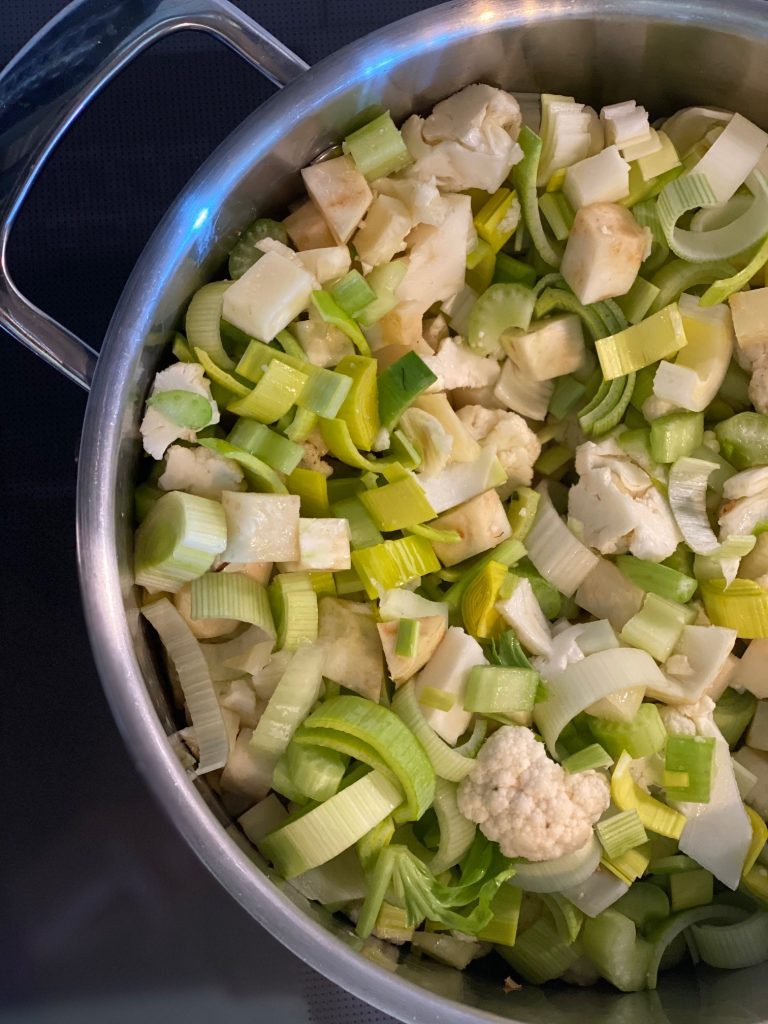
Step One: Gather, clean and roughly chop a bunch of vegetables from your bin. This is a great time to use up those that have been languishing. Choices include, but are not limited too:
roots like carrot, beet, turnip, parsnip, rutabaga, ginger, fresh turmeric
celery, fennel, celeriac (celery root)
onion, leek, shallot, garlic
potato, sweet potato
fresh or frozen peas or corn
peppers
winter squashes, like butternut and pumpkin
summer squashes
greens like kale, chard, mustard, spinach, collards, cress, etc.
fresh or canned tomatoes
brassicas like cauliflower, broccoli, cabbages, Brussels sprouts, kohlrabi, etc.
The featured soup used a small head of cauliflower, one celeriac, one fennel bulb, four stalks of celery with leaves, and about a cup of leftover mashed potatoes added during the simmer.
Your soup can be all one vegetable, a triad (corn, poblanos, and potato is amazing!) or a mélange like this winter white soup-- cauliflower, leek, celeriac, celery, and potato in the form of leftover mashers. Use your imagination and what you have on hand. There are no rules. (Except, purple veggies tend to turn an unappetizing gray when cooked this way. You may want to avoid purple carrots and cabbage.)
Quantity doesn't matter; you're going to be working in loose ratios. If you use a lot of vegetables, you'll make a bigger pot of soup. It's as simple as that.
Step Two: Plop your prepped veggies into a pot and give them a brief sauté in your favorite cooking oil or fat. Some choices are:
OVOO (extra virgin olive oil)
Ghee or butter
Reserved bacon fat (adds a smoky quality to the soup.)
Coconut oil
Add salt as you are sautéing, and pepper too. Layering in salt makes finished dishes so much better than waiting until the end. Vegetables demand salt, so give them what they want!
What size pan? If you have a small amount of vegetables, a three-quart saucepan may be just right. If you're aiming to feed a crowd or to have leftovers for lunches, think in terms of a six or eight quart, or even larger, stockpot. Give yourself some headspace if you'll be blending right in the pot, see below.
How much fat do you want to add? Good question! Don't be shy. Fats are highly maligned yet essential. Fats are what make your vegetable-based soup filling and satisfying. And here's the big secret for this soup-- it's a fair amount of fat that gives your blended soup a creamy texture, mouthfeel, and look.
To get more specific, make sure that the bottom of your pan is well-coated with your choice of oil or fat. An eighth-inch or so will be great. You can always add more for flavor or creaminess later.
How long, and at what heat? Sauté the veggies over medium heat until they are beginning to soften. Since you are using a deep pot, they will actually steam as much as sauté. This is perfect-- steaming begins to break down the cell walls, and the veggies will begin to sweat. Keep at this, stirring occasionally, until they are just beginning to become tender. This will be 10 minutes or so for a small pan; up to 20 minutes for a large one.
Step Three: Barely cover the vegetables with cooking liquid, cover, and simmer. Add liquid to just come to the top of the vegetables. If in doubt, use a little less-- you will adjust the thickness of your soup later. Here are some good choices for cooking liquid:
Water (So many recipes like this call for stock. Nothing wrong with that, but I love the pure vegetable flavor to shine out. I use water 90% of the time when I'm making these pureed soups, and reserve precious stock for other types of soups and stews.)
Stock (see above.)
A can of coconut milk, along with enough water to just cover the vegetables. (This is especially good with winter squashes and a spoonful of Thai curry paste, garam masala, or madras curry powder.)
A little wine, red or white, in addition to one of the above.
With certain vegetable choices, tomato juice will work, too.
Step Four: Simmer, stirring every five minutes or so, until the vegetables are fully tender and a fork can be somewhat easily inserted. If I'm using hard vegetables like turnips, parsnips, and celeriac I give this up to 30 minutes, less time for the tender ones.
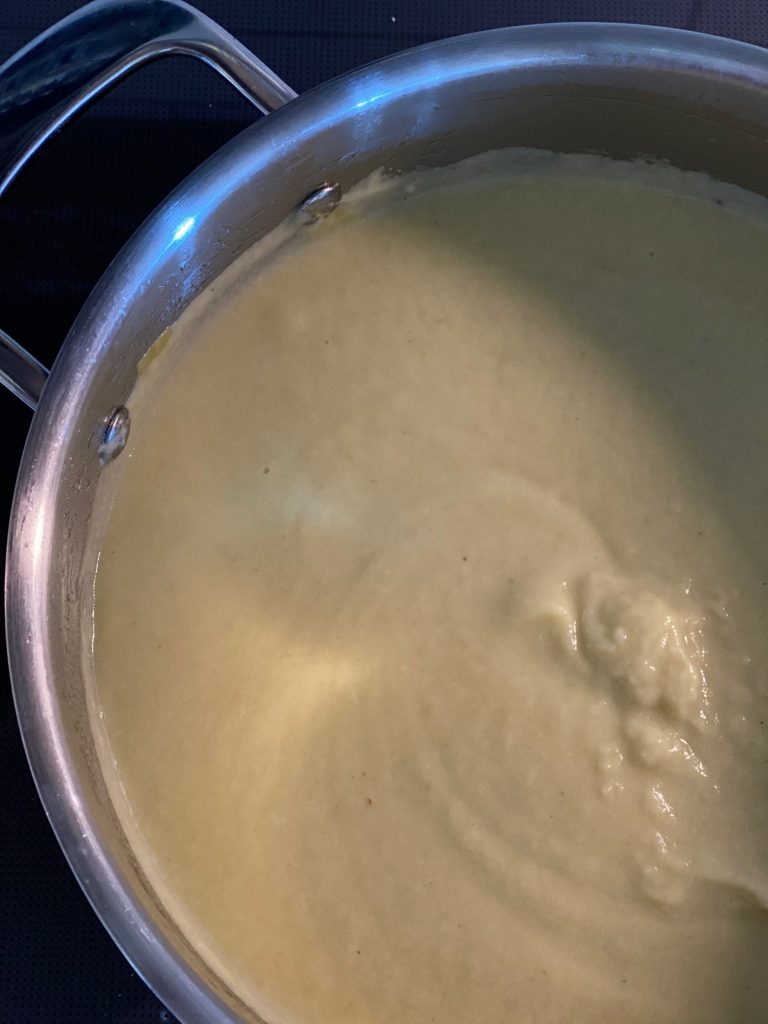
Step Five: Blend the vegetables with an immersion blender (my favorite,) or in a blender or food processor until completely smooth and no lumps remain. An immersion (stick) blender makes this fast, easy, safer, and with less clean up. If you love this type of soup like I do, you will want to get one if you don't already have one.
You’re going for a consistency slightly thicker than heavy cream. Add more of your cooking liquid or water in small amounts until it gets there. Without enough liquid, you'll have difficulty getting your soup smooth and lumpless. On the other hand, if your soup seems too thin let it continue to simmer and reduce at medium-low heat, stirring very often-- the pureed soup spews bubbles all over your stovetop as it heats, so stir ever one minute or so-- until it thickens up.
Now is a good time to taste for salt and pepper and make adjustments.
For the Lemon Thyme Drizzle, and other fun ways to jazz up a pureed vegetable soup:
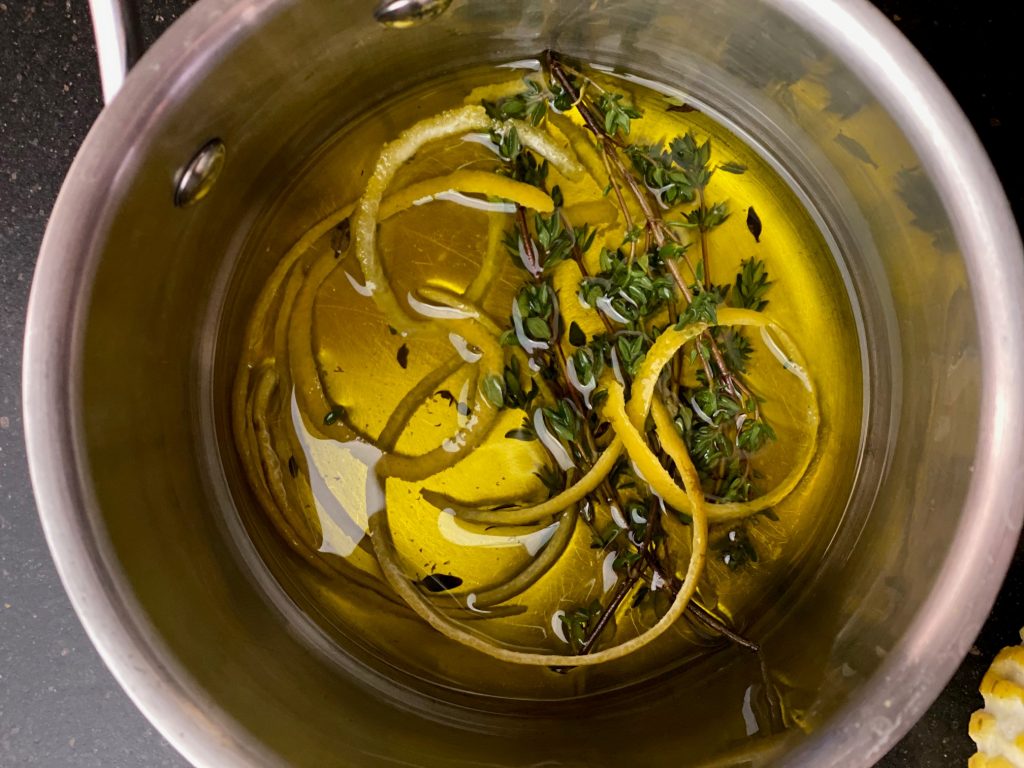
Step One: While your vegetables are sautéing and simmering, in a small saucepan pour 1/4 cup EVOO. Add your choice of fresh herbs. My favorites are:
thyme
rosemary
basil
tarragon
dill
Add some citrus strips or grated zest. Lemon, orange, and lime all are great, depending on the vegetables you use. The citrus adds a bright lift to the finished dish.
Step Two: On very low heat and stirring occasionally, let this gently steep while the soup is coming together. Right before serving, strain it, reserving pieces of zest and any whole herbs that look pretty as a garnish.
Use any leftover fancy oil in salad dressings or sautes. No need to waste a single drop of this flavor booster.
Other great ways to dress up a pureed soup:
A handful of roughly chopped nuts-- hazelnut, almond, walnut are especially good.
A dab of sour cream or creme fraiche.
A handful of croutons made from day-old bread tossed in a little oil and garlic and/or herbs as toasted in the oven for 5-8 minutes.
Or just a scattering of fresh minced herbs and a swirl of olive oil.
Plate up your soup while it is hot, and garnish away. Enjoy experimenting with various vegetables, herbs, oils, and toppings. Trust your intuition!
Blessings on your 2021. Be well, brave, and strong. Get plenty of sleep. Find ways to renew your courage. Take time out. Reach out. Make soup.
Like a warm cashmere blanket. Use these simple guidelines to make an infinite variety of interesting and flavorful pureed soups. Don't let the length scare you-- I just chat you through the steps!
roots like carrot, beet, turnip, parsnip, rutabaga, ginger, fresh turmeric
celery, fennel, celeriac (celery root)
onion, leek, shallot, garlic
potato, sweet potato
fresh or frozen peas or corn
peppers of any kind
winter squashes, like butternut and pumpkin
summer squashes
greens like kale, chard, mustard, spinach, collards, cress, etc.
brassicas like cauliflower, broccoli, cabbages, Brussels sprouts, kohlrabi, etc.
Make It Your Own Cooking Liquid Choices
vegetable, mushroom, chicken or beef stock, or
water
coconut milk +water
Choose Your Own Aromatics Adventure
fresh or dried herbs of your choice
Thai curry paste or curry spice blends, such as Madras or Ras el Hanout
Instructions
Gather, clean and roughly chop a bunch of vegetables from your bin. This is a great time to use up those that have been languishing. Your soup can be all one vegetable, a triad (corn, poblanos, and potato is amazing!) or a mélange like this winter white soup made from cauliflower, leek, celeriac, celery, and potato in the form of leftover mashers. Use your imagination and what you have on hand. There are no rules. (Except, purple veggies tend to turn an unappetizing gray when cooked this way. You may want to avoid purple carrots and cabbage.) Quantity doesn't matter; you're going to be working in loose ratios. If you use a lot of vegetables, you will make a bigger pot of soup. It is as simple as that.
Plop your prepped veggies into a pot and give them a brief sauté in your favorite cooking oil or fat. Add salt as you are sautéing, and grind in some black or white pepper too. Layering in seasoning makes finished dishes so much better than waiting until the end. Vegetables demand salt, so give them what they want!What size pan? If you have a small amount of vegetables, a three-quart saucepan may be just right. If you are aiming to feed a crowd or to have leftovers for lunches, think in terms of a six or eight quart, or even larger, stockpot. Give yourself some headspace if you'll be blending right in the pot, see below.How much fat do you want to add? Good question! Don't be shy. Fats are highly maligned yet essential. Fats are what make your vegetable-based soup filling and satisfying. And here is the big secret for this soup: It is a fair amount of fat that gives your blended soup a creamy texture, mouthfeel, and look. To get more specific, make sure that the bottom of your pan is well-coated with your choice of oil or fat. An eighth-inch or so will be great. You can always add more for flavor or creaminess later.How long, and at what heat? Sauté the veggies over medium heat until they are beginning to soften. Since you are using a deep pot, they will actually steam as much as sauté. This is perfect, as steaming begins to break down the cell walls, and the veggies will begin to sweat. Keep at this, stirring occasionally, until they are just beginning to become tender. This will be 10 minutes or so for a small pan; up to 20 minutes for a large one.
Barely cover the vegetables with your choice of cooking liquid, cover, and simmer. Add liquid to just come to the top of the vegetables. If in doubt, use a little less– you will adjust the thickness of your soup later. Here are some good choices for cooking liquid:Water (So many recipes like this call for stock. Nothing wrong with that, but I love the pure vegetable flavor to shine out. I use water 90% of the time when I’m making these pureed soups, and reserve precious stock for other types of soups and stews.)Stock (see above.)A can of coconut milk, long with enough water to just cover the vegetables is especially good with winter squashes and a spoonful of Thai curry paste, garam masala, or madras curry powder.A little wine, red or white, in addition to one of the above.With certain vegetable choices, tomato juice will work, too.
Simmer, stirring every five minutes or so, until the vegetables are fully tender and a fork can be somewhat easily inserted. If I’m using hard vegetables like turnips, parsnips, and celeriac I give this up to 30 minutes, less time for the tender ones.
Blend the vegetables with an immersion blender (my favorite) or in a blender or food processor until completely smooth and no lumps remain. You are looking for a consistency slightly thicker than heavy cream. Add more of your cooking liquid or water in small amounts until it gets there. Without enough liquid, you will have difficulty getting your soup smooth and lumpless. On the other hand, if your soup seems too thin let it continue to simmer and reduce at medium-low heat, stirring very often. The pureed soup spews bubbles all over your stovetop as it heats, so stir ever one minute or so until it thickens up.Now is a good time to taste for salt and pepper and make adjustments. Plate up your soup while it is hot, and garnish With the following drizzle.
Choose Your Own Adventure Drizzle
While your vegetables are sauteding and simmering, in a small saucepan pour 1/4 cup EVOO. Add your choice of fresh herbs. My favorites are:thymerosemarybasiltarragondillAdd some citrus strips or grated zest. Lemon, orange, and lime all are great, depending on the vegetables you use. The citrus adds a bright lift to the finished dish.
On very low heat and stirring occasionally, let this gently steep while the soup is coming together. Right before serving, strain it, reserving pieces of zest and any whole herbs that look pretty as a garnish.
Notes
If the drizzle is not your style, try garnishing with a bit of chopped fresh herb and a swirl of olive oil.Enjoy experimenting with various vegetables, herbs, oils, and toppings. Trust your intuition!
Follow Me
Welcome!
You’re in the right place! I’m Pam Spettel, home cooking expert and guide, and I’m here to show you how to break up with cooking and hospitality anxiety, learn how to use recipes as guides rather than strict rules, and let your cooking intuition and confidence soar.
Superpower: Dreaming up recipes that work, serving them to my friends and family, and writing little stories about how cooking them well is the same as loving well.
Inspiration: Ingredients! The fresh, colorful, fragrant, local, seasonal ingredients found in the Pacific Northwest are my creative medium.
Heroes: Local food and wine producers– the people who keep me, my family, and our community nourished and happy.
We use cookies on our website to give you the most relevant experience by remembering your preferences and repeat visits. By clicking “Accept”, you consent to the use of ALL the cookies.
This website uses cookies to improve your experience while you navigate through the website. Out of these, the cookies that are categorized as necessary are stored on your browser as they are essential for the working of basic functionalities of the website. We also use third-party cookies that help us analyze and understand how you use this website. These cookies will be stored in your browser only with your consent. You also have the option to opt-out of these cookies. But opting out of some of these cookies may affect your browsing experience.
Necessary cookies are absolutely essential for the website to function properly. These cookies ensure basic functionalities and security features of the website, anonymously.
Cookie
Duration
Description
cookielawinfo-checkbox-analytics
11 months
This cookie is set by GDPR Cookie Consent plugin. The cookie is used to store the user consent for the cookies in the category "Analytics".
cookielawinfo-checkbox-functional
11 months
The cookie is set by GDPR cookie consent to record the user consent for the cookies in the category "Functional".
cookielawinfo-checkbox-necessary
11 months
This cookie is set by GDPR Cookie Consent plugin. The cookies is used to store the user consent for the cookies in the category "Necessary".
cookielawinfo-checkbox-others
11 months
This cookie is set by GDPR Cookie Consent plugin. The cookie is used to store the user consent for the cookies in the category "Other.
cookielawinfo-checkbox-performance
11 months
This cookie is set by GDPR Cookie Consent plugin. The cookie is used to store the user consent for the cookies in the category "Performance".
viewed_cookie_policy
11 months
The cookie is set by the GDPR Cookie Consent plugin and is used to store whether or not user has consented to the use of cookies. It does not store any personal data.
Functional cookies help to perform certain functionalities like sharing the content of the website on social media platforms, collect feedbacks, and other third-party features.
Performance cookies are used to understand and analyze the key performance indexes of the website which helps in delivering a better user experience for the visitors.
Analytical cookies are used to understand how visitors interact with the website. These cookies help provide information on metrics the number of visitors, bounce rate, traffic source, etc.
Advertisement cookies are used to provide visitors with relevant ads and marketing campaigns. These cookies track visitors across websites and collect information to provide customized ads.