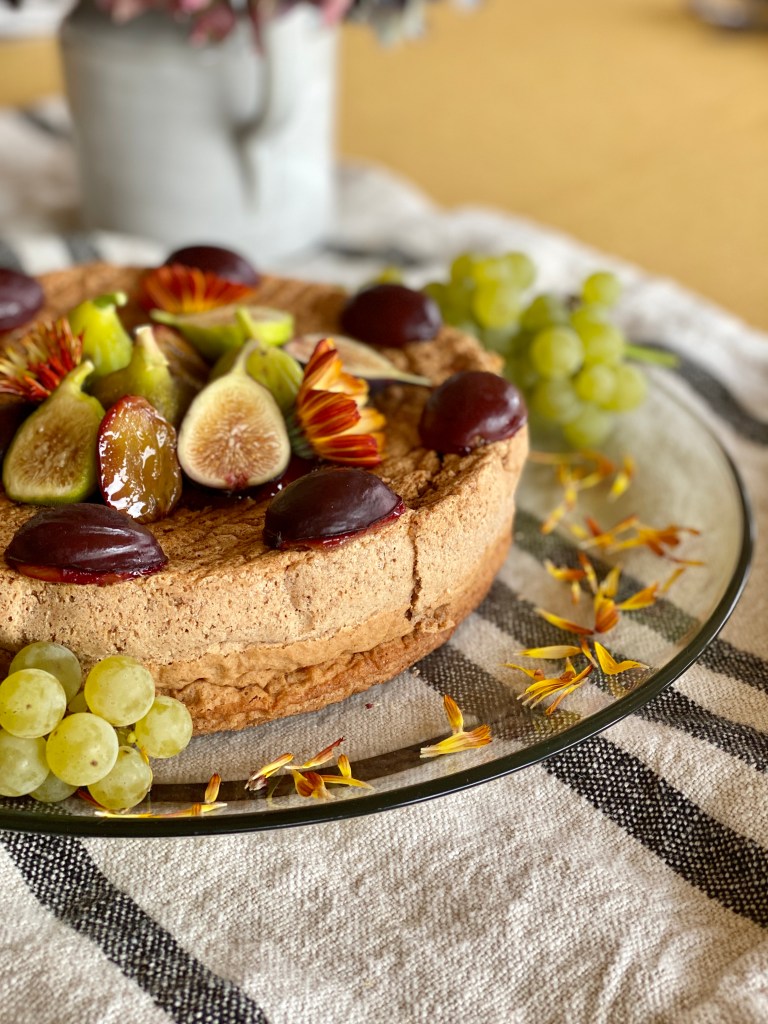
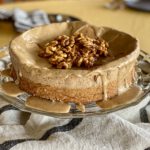
Flourless Walnut Spice Cake with Fall Fruits and Flowers
Rustic Cake at Its Very Best
In my calculus, a rustic cake has a short list of ingredients, an interesting texture, and most importantly is adorned very plainly-- a straightforward glaze, scoop of ice cream or whipped cream, a smatter of nuts or seasonal fruit is all it takes. This Flourless Walnut Cake and its coffee or spice versions deliver on a promise of simplicity.
What a cake like this misses in complexity is made up with a certain honesty. It's like the fresh rosy-cheeked girl in a calico dress that smells of clothesline sunshine.
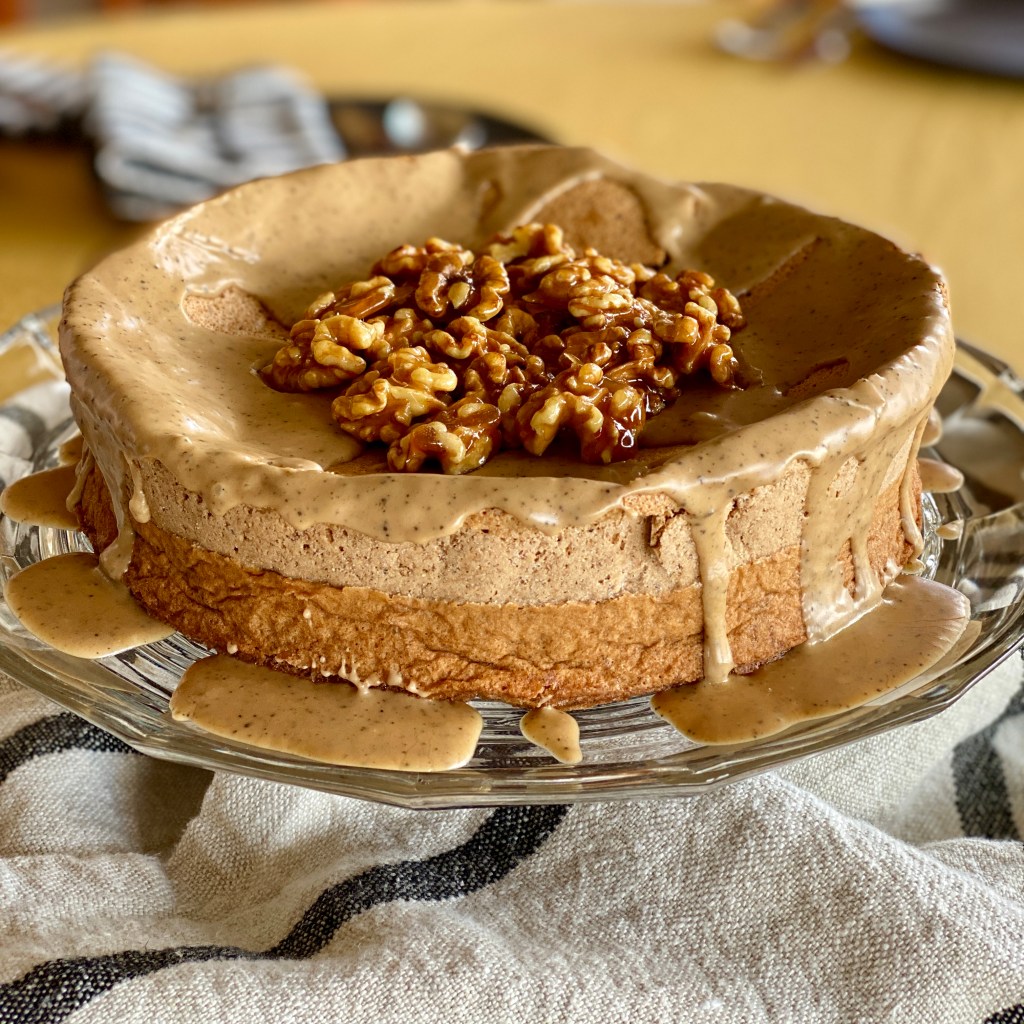
Flourless Coffee-Walnut Cake with Coffee Glaze and Candied Walnuts
Or, our flourless walnut cake is like filtering your way through a crowded party, and meeting a gentle-souled person standing in the corner with whom to while the evening away.
Uncomplicated joy.
Multi-tiered, colorful swooped, swirled, and filagree-frosted cakes sometimes disappoint on the part that really matters-- flavor. With flourless walnut cake or its coffee or spice versions, what you see is what you get. The beauty is natural, not forced.
Making the Flourless Walnut Cake
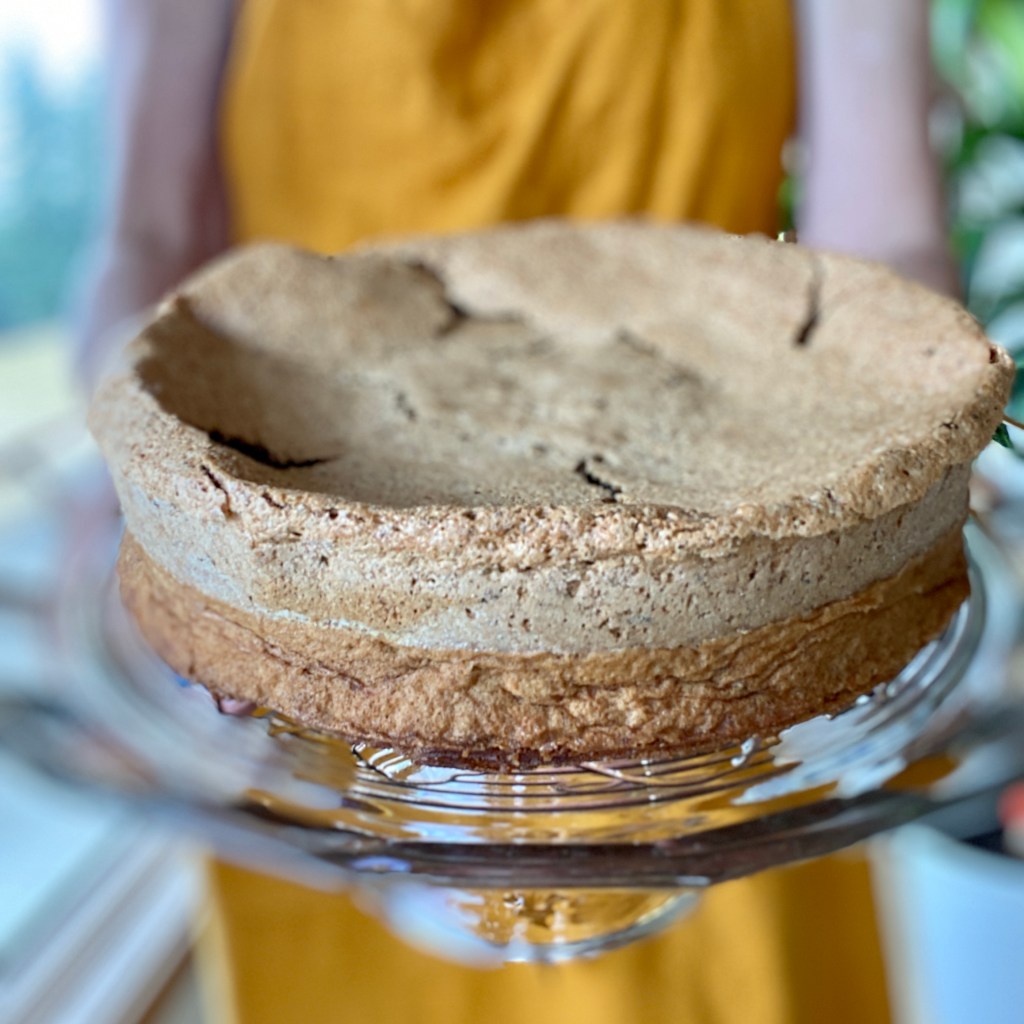
Flourless Coffee-Walnut Cake, fresh from the oven.
Starting with room temperature eggs, like with most baking, is imperative to the success of this recipe. Sugar simply cannot dissolve into cold yolks. Cold whites don't whip to their lofty heights. Here you spend a good deal of time building structure by dissolving sugar into yolks and stiffening the whites, so give yourself a guaranteed win by setting your eggs out in advance. (When I forget, I help the eggs warm up by placing them on a bowl of lukewarm water, changing it for more when it goes cold. Never try this with hot water or you make crack open a semi-cooked egg!)
Traditional recipes for this type of cake ask you to whip all of the whites into firm peaks at once. Here, I have you whip them to medium peaks at first, then add only a third of them to the yolk/sugar/nut mixture to lighten the batter. Then, you'll go back and whip the remaining two-thirds of the whites into firm stand-up-at-attention peaks before gently folding them into the batter. I have found this greatly increases the structure of the cake, resulting in a taller cake with less shrinkage when it comes out of the oven. Even though our dear little flourless walnut cakes are humble, they still like to make a good first impression.
If you chose, top either version with a pile of candied walnut halves, made the same way Sarah at Sustainable Cooks makes her pecans. The only difference is that I add 1 tablespoon water to the skillet along with the sugar. Make extra! Candied walnuts are great in salads or on a cheese platter, too.
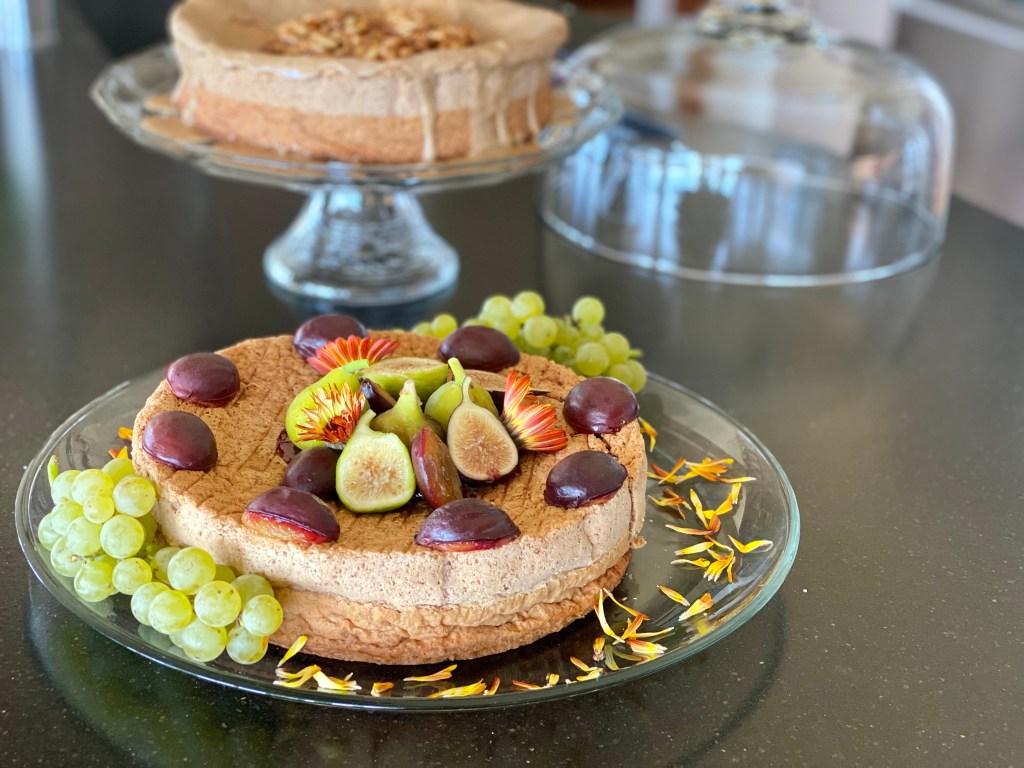
Choose plain walnut, walnut spice or coffee-walnut variations with this one simple recipe.
Flourless Walnut cake is tender and delicious just as written, but the addition of coffee or baking spices takes it next level-- One recipe with three variations-- plain, Coffee, or Spice-- to suit your mood. Three primary ingredients, a few simple steps, and you'll have beautiful dessert cakes all winter.
2tablespoonsfinely ground coffee beans, plus 1 teaspoon for optional glaze
Coffee Glaze, Optional
3cupsconfectioners sugar
1teaspoonfinely ground coffee beans
5tablespoonswarm or hot strong brewed coffee
½teaspoonpure vanilla extract
Instructions
Flourless Walnut Cake
Preheat oven to 350°. Generously butter and flour (or use very finely ground walnuts) a 9-inch springform pan. Wrap the bottom of the pan with foil to catch any butter that melts out in the oven.
In a food processor, finely grind the walnuts. This will likely take only 8 -10 pulses. Stop just as they begin to clump. (Any further and you'll make walnut butter, not quite what we are after). Set the ground walnuts aside.
Separate the eggs, placing the yolks in the bowl of a stand mixer with the whip attachment. Beat the yolks with the sugar and salt 6-8 minutes until the mixture is fluffy and pale yellow. (You'll be glad you let your eggs come to room temperature for this-- the sugar more readily dissolves in eggs that are not cold.)
If you are making a plain flourless walnut cake, move on to step five. If you are making either a walnut-spice cake or a coffee flavored cake, add the spice mix or the finely ground coffee beans now and mix in thoroughly.
Remove the mixing bowl from the stand mixer and with a silicone or rubber spatula, fold the ground walnuts into the yolk mixture.
In a separate clean bowl free of any oils or grease, whip the egg whites, cream of tartar, and vanilla to medium peaks. (The cream of tartar helps stabilize the whipped egg whites.) Gently fold about a third of the egg whites into the walnut mixture. Then, whip the remaining egg whites once again until they just reach firm peaks. Fold them gently into the walnut mixture in two batches, folding until no more white streaks remain.
Place the cake batter into the prepared pan. Place the pan on a baking sheet. Bake for 40-50 minutes, or until the cake is puffed, set (not jiggly) in the middle, and a cake tester (I use a bamboo skewer for this) inserted in the middle comes out clean.
Allow the cake to cool in the pan about 20 minutes before removing the springform ring. The cake will have sunk in the center and formed charming cracks and crags, perfectly normal for this rustic meringue-style cake.
Decorate with seasonal fruits, a dusting a powdered sugar, or the coffee glaze below. Seve with whipped cream.
Coffee Glaze
Place the sugar in a medium mixing bowl. Add the vanilla and coffee, tablespoon at a time, and whisk until a glaze forms. It should cling to the whisk and drip off in thick long ribbons. Adjust by adding more powdered sugar or water to make it thicker or thinner. Drizzle the glaze from the whisk around the edges of the cake, allowing some to flow toward the center of the cake and some to drip off the edges. Allow the glaze to set for an hour before covering or serving.
Notes
To make the Coffee Glaze a Spice Glaze, replace the ground coffee with one teaspoon of the same spice blend you use in the cake, and replace the brewed coffee with warm or hot water.Garnish the spice cake with fresh fig halves, lightly roasted (6 minutes at 350, just to soften) plum prunes, tiny grape clusters, and/or unsprayed organic food-safe flowers or flower petals.
Back in the '80s we thought we were so cool to make fajitas at home. Tex-Mex was a new rage and it became a fun new party food. Back in those days, we made fajitas with a thick London broil, sliced and then marinated, each slice grilled individually. The peppers (only green bells were readily available in those days) and onion were flash-sauted on the stovetop. What did we know?
Thinking of fajitas immediately brings back the scents of onions and peppers cooking, the sounds of laughter with friends, little kids running around everywhere. It's clearly time to revisit fajita making and zhoosh it up a little.
The Marinade and the Meat
Swapping bavette steak (also called sirloin flap) for the London broil is a nice improvement from the way-back machine version. Bavette comes from the bottom of the sirloin section of a beef near the flank and has a texture very similar to flank or skirt steak. Its nice marbling offers a wonderful flavor, and it is infinitely more tender than the good ol' London broil ever hoped to be.
To highlight the texture of the meat and ensure it's tenderness, but sure to slice it thinly and against its grain. The dotted lines in this diagram show the inherent grain of the meat. The knife shows the direction the blade should cut through it to go against the grain. This way, it becomes much more enjoyable to chew.
Bavette lends itself to a good bath in a marinade, absorbing its flavors well which this marinade delivers. Four easy ingredients-- fresh lime juice, a handful of cilantro, garlic, salt, and a quick whiz in a food processor are all you need.
A very hot grill lets you achieve a flavorful sear without overcooking. The wind was blowing hard the day I photographed this and my grill grates just couldn't get hot enough to lay down those gorgeous char lines. Such is the life of a home cook.
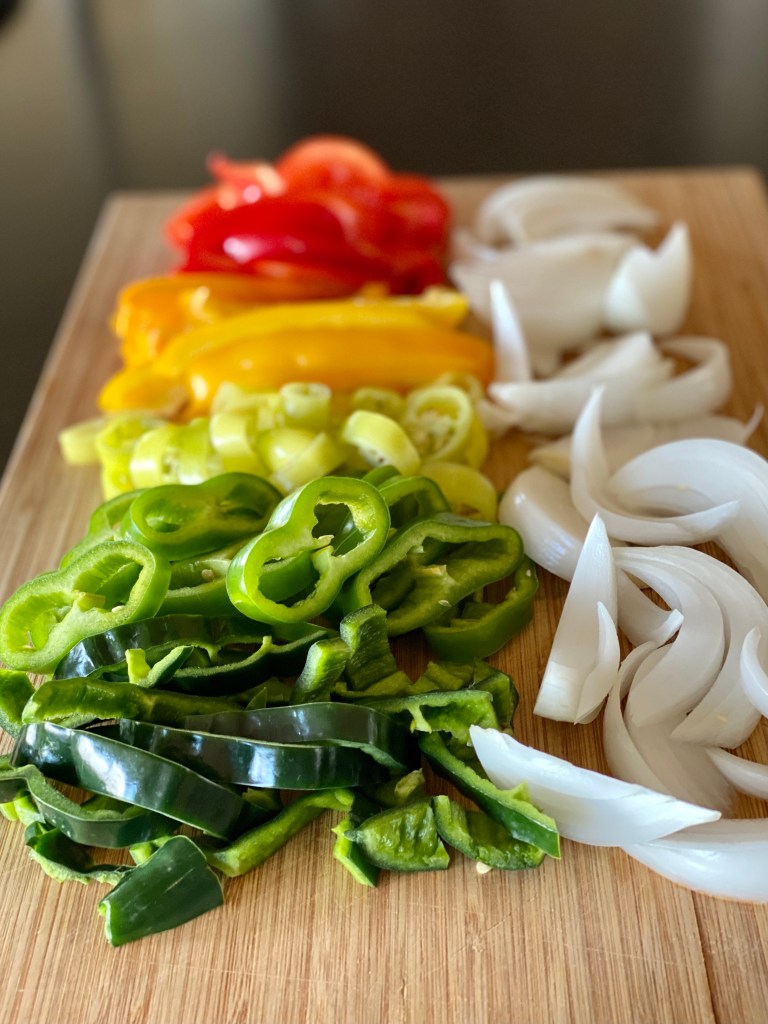
The Peppers and Onion
Use a good mix of peppers for a flavor, texture, and color explosion!
The updated version goes way beyond green bell peppers. The end-of-summer treasure trove of colorful peppers makes it easy to stuff your fajitas with a balance of flavor and color. Use all the colors! Reds, oranges, yellows, chartreuse, grassy greens and deep greens mixes means you'll be including the array of sweet, hot, mild, earthy, bright flavors.
The onions should be white. Period. Clean and crisp is best here.
Now is the time to invest in a grill pan if you don't already have one, as they should be on end-of-season sales. Cut your vegetables to size-- a mix of strips and rings is fun and beautiful-- and toss them into a pre-heated grill pan that has first been sprayed with a cooking oil spray. Blast them with a good amount of heat-- you want them to begin to char without overcooking. Char for flavor, but still with some good crunch for texture.
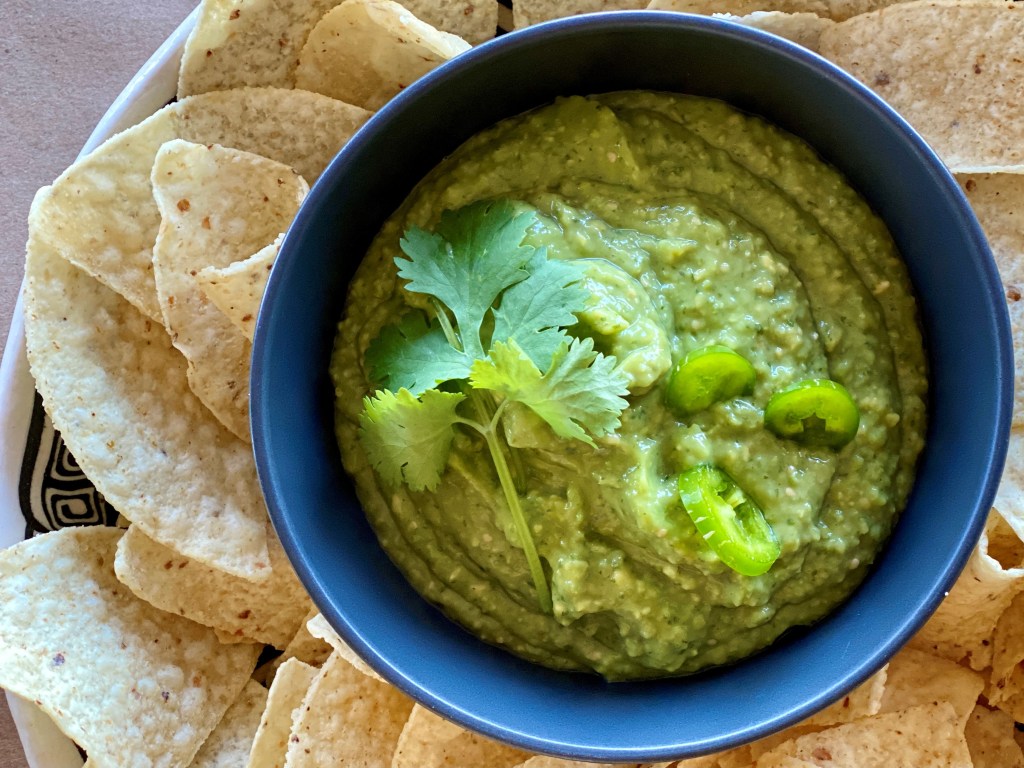
The Avocado Tomatillo Salsa
Avocado-Tomatillo Salsa
Let's straighten this out right away: This is not guacamole. One bite and you will see the difference. This simple element could easily be the star of the show. Avocado, tomatillo, and little cilantro if you want, garlic, and salt gets quickly pureed in the food processor happens in minutes start to finish. Because the base ingredients are the same, you don't even have to wash the food processor bowl out first.
You'll want to add this four-ingredient salsa to your go-to list. It is so good on everything. Everything. Rice bowls, snacking with chips, tacos, mixed with some chopped cooked chicken and a few crunchy vegetables for a new chicken salad, potatoes, eggs; you name it.
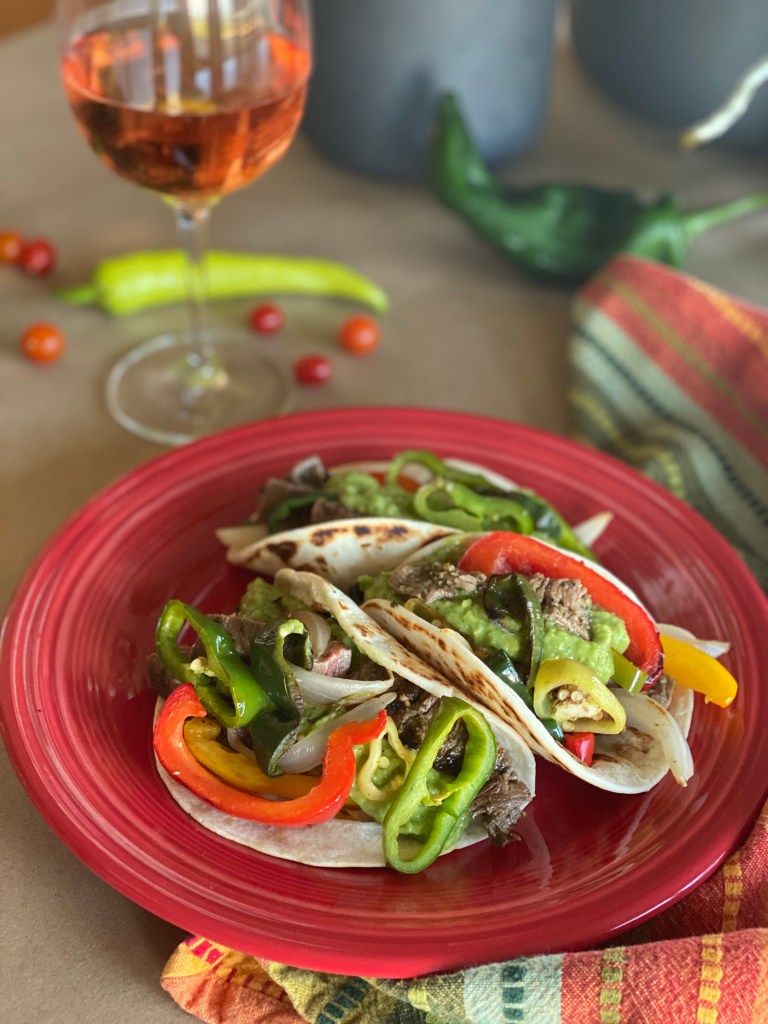
I'm so happy to have rediscovered homemade fajitas. A few ingredient additions, and grilling the peppers and onions fills the air with that unmistakable fajita scent. I'll definitely make this new and improved '20s version for gatherings coming up.
Sizzling grilled beef and the aroma of grilled peppers topped with the best of salsas you will want to add to your repertoire. This zhooshed-up version of the '80s classic is easy to scale for gatherings, family meals, or just yourself.
1½poundsBavette (sirloin flap) steak, or skirt steak
1½poundsmixed peppers (red, yellow and orange bells, Hatch, poblano, Hungarian, banana, etc.)Use what the garden or farmers market is offering!
2mediumwhite onions
12taco-sized flour tortillas
Avocado-Tomatillo Salsa
3avocados, ripe
1 poundtomatillos, papery husks removed and washed
2clovesfresh garlic, peeled
½bunchfresh cilantro (optional)
½-1jalapeno, roughly chopped
salt to taste
Instructions
For the Marinade
Add the first four ingredients to the bowl of a food processor. Whirl, scraping down the sides of the bowl, until well blended and the cilantro is just shy of smooth. Place the Bavette steak in a one-gallon zip-lock bag and pour in the marinade. Place in the refrigerator and allow to marinate at least one and not more than four hours, turning and smooshing the bag occasionally to distribute the marinade.
Prep the peppers and onions and set aside until time to grill.
Heat a gas grill to high (about 500°) and let the grates get very hot. For a charcoal grill, build a bed of charcoal large enough to cook your grill pan of vegetables and the steak over hot direct heat. Place the grill pan on the grates while the grill heats.
Start the vegetables first: Spray your hot grill pan with cooking spray (stand back and be very careful to avoid flames) and scoot all the vegetables into it. Do not disturb the vegetables for 2-3 minutes to allow some charring before turning them. Do this several times throughout the cooking to get a nice char without overcooking the vegetables. depending on the heat of your grill, the size of your grill pan, and the amount of vegetables, this can take 10-20 minutes.
When the vegetables are about 5 minutes from being ready, spray the grates where the meat will cook, and place the meat on the grill. Again, do not disturb the meat to allow for great charring. After 2-3 minutes, check for char and flip. Repeat on the second side. It is very easy to overcook this thinner cut of meat, which may render it tough, so again, err on the side of caution.
While the meat is resting, heat a skillet to medium-high. Toast the tortillas until they are warm, soft, and beginning to blister, flipping once, about a total of 1 minute each. Slice the steak thinly across the grain. Pile peppers and onions and sliced steak into the tortillas and top with the avocado-tomatillo salsa. Serve!
For the Avocado-Tomatillo Salsa
Toss all ingredients into the bowl of your food processor. Pulse at first until the ingredients start moving freely, then whirl until a creamy pureed consistency. Refrigerate until serving. Don't be afraid to make a double batch, as this creamy/tangy salsa is divine on so many things. It keeps well for about three days in your fridge, if it lasts that long.
Beautiful Black Beluga Lentil, Grilled Nectarine + Burrata Salad
I've been experimenting with the design Rule of Threes in my cooking. Used in graphic design, interior design, and fashion-- really anywhere design concepts are applied-- the principle is that things arranged in groups of three are more appealing, evocative, and satisfying.
Long ago, it is said, Nordstrom sales associates were required to dress this way-- skirt, blouse, sweater; slacks, shirt, vest; dress, boots, scarf, etc. Accessories were the grace notes added to the rule of threes formula. I've begun to think this is true for the food on a plate as well.
Not only does this method of cooking work from a taste and visual point of view, but it is actually pretty easy to pull together a dynamic dish using this concept.
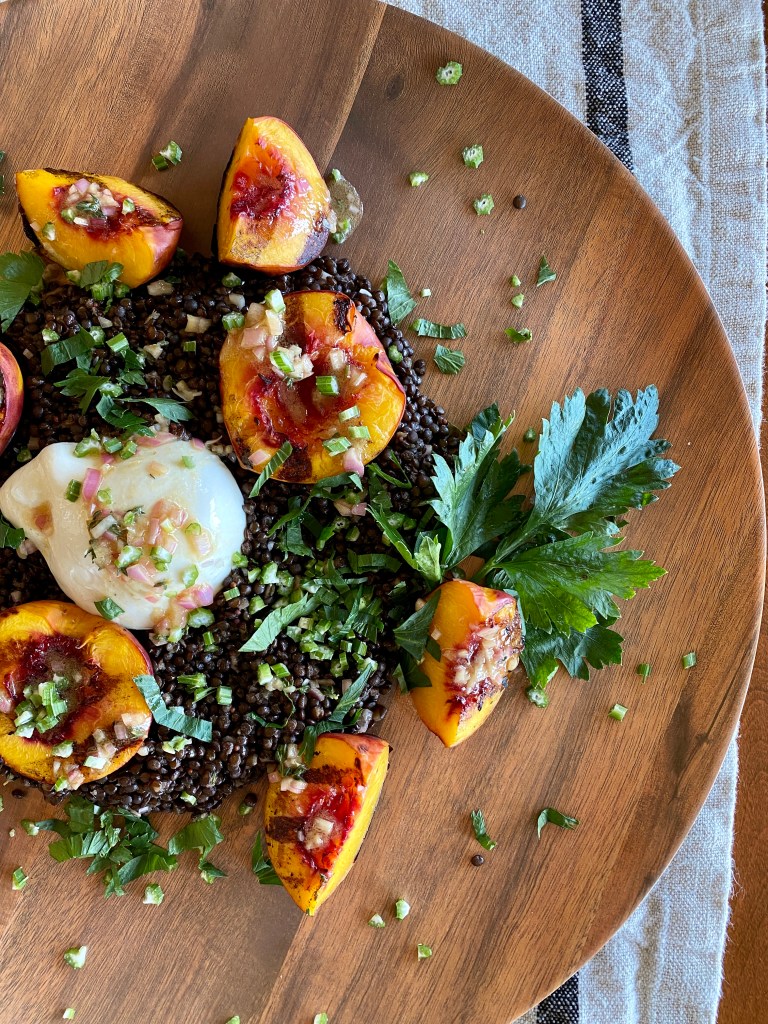
Beluga Lentil, Grilled Nectarine + Burrata Salad
In this 30-minute dish the triad of warm earthy lentils, smoky-sweet nectarines, and cool creamy burrata is more than the sum of its parts. Each of the parts requires very little or no preparation. The simple vinaigrette acts like the jewelry that ties the whole ensemble together.
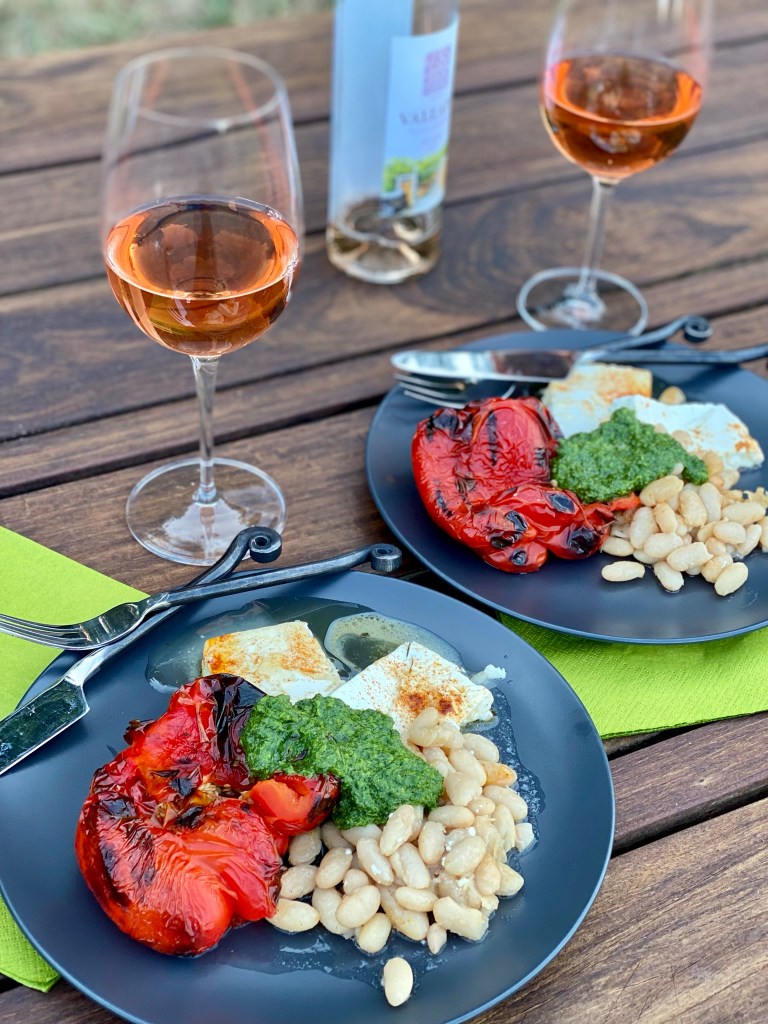
The rule of threes concept worked perfectly in this recent red pepper, white bean, and feta recipe, too. The smoky bright red peppers, the earthy light white beans, and sharp tangy feta create a synergy that is tied together with a crown of herb sauce. Magnificent, yet simple.
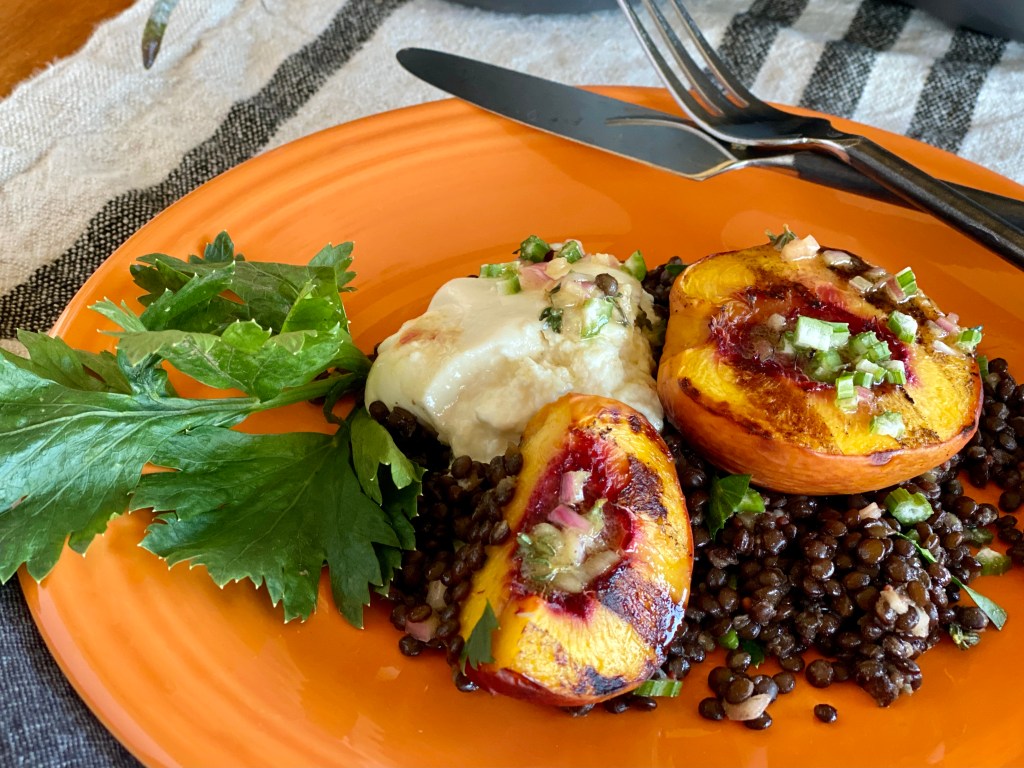
It only looks challenging! Make Beluga Lentil, Grilled Nectarine + Burrata Salad soon for an ever so delicious, beautiful, fancy-fast-easy brunch, lunch, or dinner. Make it vegan by omitting the burrata, and it is still delicious. Serve it alongside meat, or enjoy it as a vegetarian main course.
How can you use this Rule of Threes concept in your cooking and meal planning? I'd love to hear about your ideas and experiments!
Beluga Lentil, Grilled Nectarine + Burrata Salad
Course: Breakfast + Brunch, Main Dish, Quick + Easy, Salad, Side Dish
This triad of earthy lentils, smoky-sweet nectarines, and creamy burrata is more than the sum of its parts. Quick to make but ever so delicious and versatile, make this soon for a fancy-easy brunch, lunch, or dinner. Make it vegan by omitting the burrata, and it's still delicious.
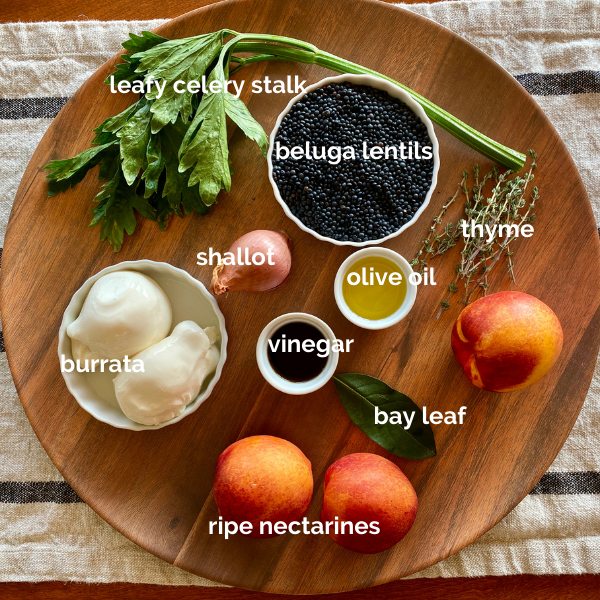
In a small jar with a tight-fitting lid, place the minced shallot and Dijon mustard. Stir gently. Add about half of the thyme leaves stripped from the stems, salt and pepper. Cover the shallot mixture with the vinegar of your choice. Eyeballing it, add enough olive oil to double the volume in the jar, or about the same in height to the shallots and vinegar. Shake until the salt is mostly dissolved and the mustard is thoroughly incorporated. Set aside.
Now Make the Beluga Lentil, Grilled Nectarines + Burrata
Light or preheat your grill for a hot, direct fire/heat.
In a medium saucepan, place the lentils, bay leaf, a pinch of salt, and 3 1/2 cups water. Bring lentils to a boil, then reduce heat to a low simmer. Cook uncovered, stirring every 5 minutes or so, for about 20 minutes or until the lentils are al dente, but not mushy and broken. Begin chcking their doneness at the 15 minute mark.
While the lentils are cooking, place the halved nectarines on a preheated grill over direct heat. Oil the grates first, and place the nectarine halves cut side down. Do not move them until the 3 minute mark, and check for rich grill marks. They may need another minute or so to become deeply marked. Flip them and grill another 3 minutes until the skins have grill marks, for a total of 6-7 minutes. Don't let the nectarines overcook-- you just want them warmed through and kissed with flavor from the grill.
When the lentils are done, drain off any remaining liquid. Sitr in the diced celery and leaves, reserving some of the leaves for garnish. Mound this onto plates or a serving platter.
Arrange the nectarines on to mounded lentils. You may chose to halve some of them.
Place the burrata on top of the lentils. Sprinkle the remaining thyme and celery leaves over the top and serve.
Notes
This recipe serves three people as a main course, or six people as a side dish.This salad is especially luxurious served warm, but equally delightful served chilled, especially if you need to make the components ahead of time.Peaches would be just as lovely in this dish as the nectarines. Use what you have or prefer.Recipe star ratings are very welcome and appreciated. Thank you for taking the time to provide your feedback this way.
Hello there, and how are you? Are you getting enough summer joy?
I've been thinking about all I want to soak up before summer is over. Here is what I am inspired to do before the season changes:
Eat all the canteloupes. I'm always sad when there are no more for the year.
Read a book in the hammock, start to finish. Not in one day, but over a few, maybe napping between pages.
Star gaze. The Perseids meteor shower peaks this week. Check out SkyView Lite, a free app that makes the constellations and planets come alive. When observing the night sky I feel very small, at once frightening and comforting.
Make more summer fruit sorbet, like this one, and this one. We've had chocolate, apricot, blueberry, and blackberry sorbets this year, too, and I'll share those recipes with you, next summer.
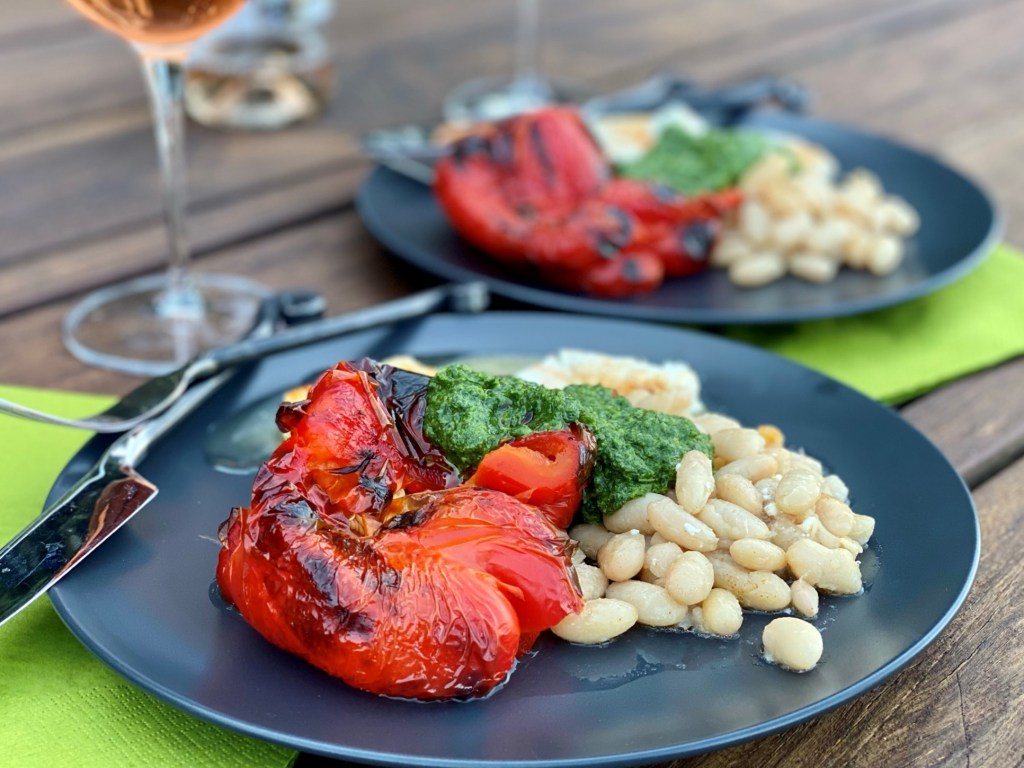
Roasted red peppers, white beans, Feta, and green herb sauce
And more to make sure of:
Eat as many grilled hamburgers, vegetables, and fish as I can.
Enjoy every meal outside. Mornings on the porch are charming. Mid-day snacks in the shade of the trees are refreshing. Dinners looking out at the valley are inspiring. Soon we won't have a choice but to eat inside.
Invite as many outdoor gatherings as we can with friends and family. Nobody knows what's going to happen to our ability to gather come fall, so I will soak up all the community I can now.
Show my appreciation to farmers by visiting as many farmer markets and stands as I can. Farmers are working so hard to bring their beautiful bounty to us. (See the Find a Farmers Market Near You links in the footer of this page for a market near you.)
Roasted Peppers, White Beans, Feta, and Herb Sauce
Using the grill to get quick and easy meals done is another summer joy I can't get enough of. This recipeless recipe is long on gourmet attitude, short on effort to actualize. Eight ingredients, three of which are herbs, and 15 minutes at the grill and, viola, you are a summer foods genius.
What are you doing to make the summer last? What will you miss about summer when it's passed?
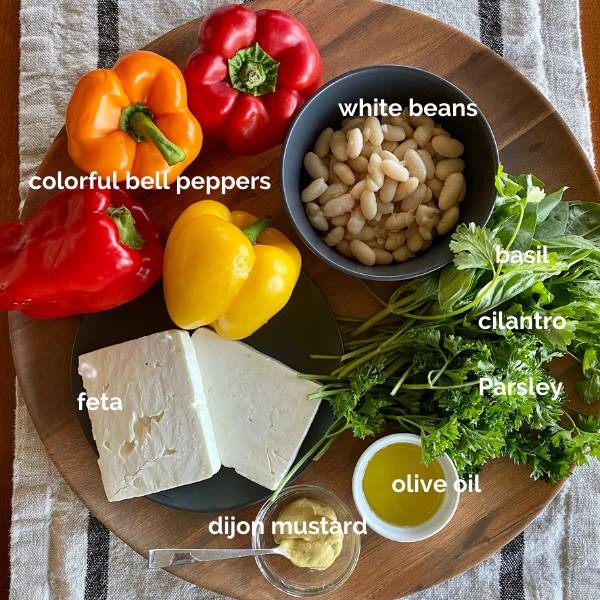
Roasted Red Peppers, White Beans, Feta + Simple Herb Sauce
Long on gourmet attitude, short on effort and time, this recipeless guide makes summer dinner go easy. Eight ingredients, under 30 minutes, and you are a cooking genius! Use the same guide in the autumn using your oven to roast the peppers and warm the Feta and beans.
1cup eachFresh basil, parsley, and cilantro leaves and tender stems, packed and lightly chopped
¼cupExtra virgin olive oil
1tablespoonDijon mustard
Salt and Pepper, to taste
Peppers, White Beans + Feta
1Red, orange, or yellow bell pepperper person
3ouncesFeta, block-styleper person
1cupCannelini or other white beansper person
Smoked paprika, Aleppo pepper, or Espeletteoptional
Instructions
Simple Herb Sauce
Place all sauce ingredients in a food processor or blender. Whiz or whirl them all together with a healthy five-finger pinch or salt and a healthy cracking of black pepper until it is creamy and pesto-like, but not ablsolutely pureed. Add a tablespoon or two of water to loosen the sauce, if desired. It's nicest if it puddles slightly rather than stands at attention. Set aside.
Peppers, White Beans + Feta
Stretch out a double-thick layer of foil big enough to hold the beans and feta in a single layer, folding the edges up to contain juices. If you have a grill basket use it instead, lining it with one layer of foil.
Over medium direct heat on a gas or charcoal grill, roast the peppers. Turn them frequently to char the entire outside. If they are burning at all, move them off the heat to cook indirectly, and back and forth to get a nice roasted exterior. The peppers will puff up a bit, and will eventually collapse into beautiful modern art shapes, full of condensed juices that will deliciously spill out when each diner cuts into them. This should take 10-15 minutes, depending on the heat of your grill.
About half way through cooking the peppers, place the foil or grill basket on the heat. Add the beans and Feta in one layer, drizzling them lightly with olive oil and sprinkling with the paprika, Aleppo, or Espelette, if using. Allow them to warm, and even brown a little if that happens, while the peppers finish.
Move the wrinkly cooked peppers to individual plates or a platter, along with the beans and Feta. Place a big spoonful of simple herb sauce in the center. The peppers will release their warm rich juices into the plate as they are cut into, adding to the sauce. Serve!
Notes
If you are using dried beans, cook according to one of the easy Rancho Gordo methods. If you don't have a grill or make this during cool-weather months, use the same guide with your oven to roast the peppers and warm the beans and Feta.
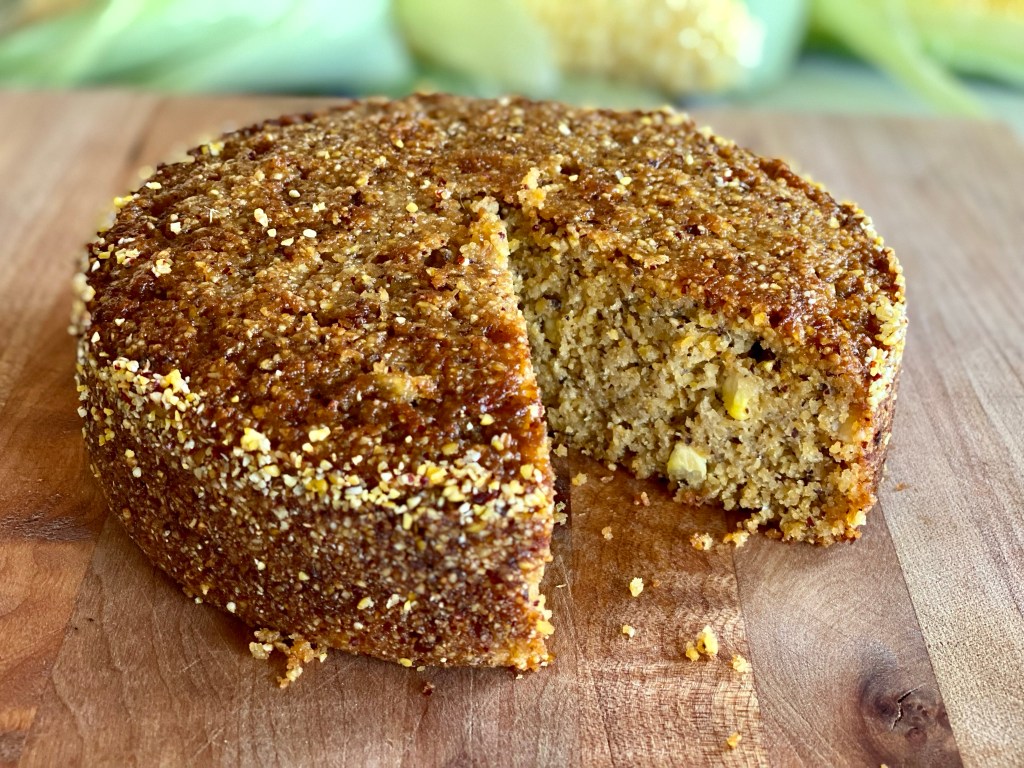
The first cake on 101-Mile Kitchen is like a country summer day on a plate. It is rustic in nature-- meaning it has textural interest and isn't overly sweet or elaborate. It is unfussy. It is flourless, therefore can be served to our gluten-sensitive beloveds. And most of all it uses fresh, seasonal, local ingredients.
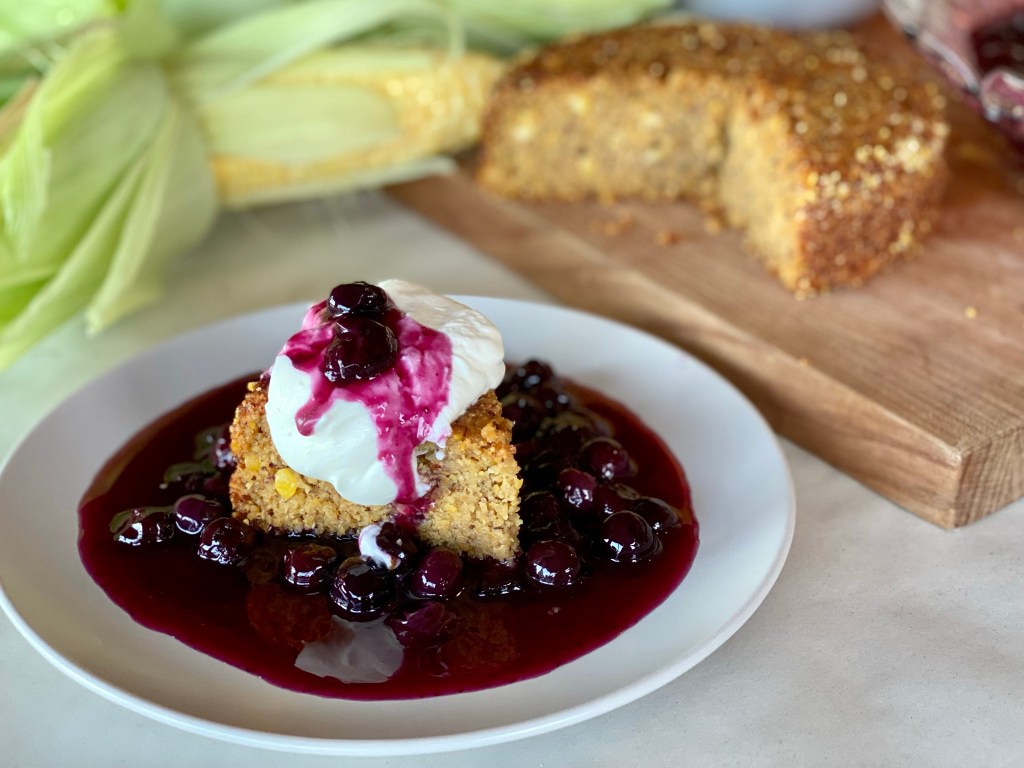
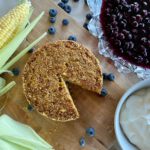
Sweet Corn Buttermilk Cake in a puddle of blueberry compote, with a tuft of lightly whipped cream atop.
A decade ago I played with and wrote about the magical flavor triad of sweet corn, blueberries, and buttermilk. I had two inspirations at the time. First by Claudia Fleming's sweet corn ice cream recipe from her famous out-of-print book, The Last Course, from her time as the innovative pastry chef at Grammercy Tavern in the 1990's. Tim Mazurak of the delicious blog Lottie + Doof created a blueberry galette in a cornmeal crust and served it with the same sweet corn ice cream. Swoon.
My addition of buttermilk to the corn and blueberries brought bucolic thoughts of summer full circle. I promptly forgot about this happy flavor song until now.
The Sweet Corn Buttermilk Cake
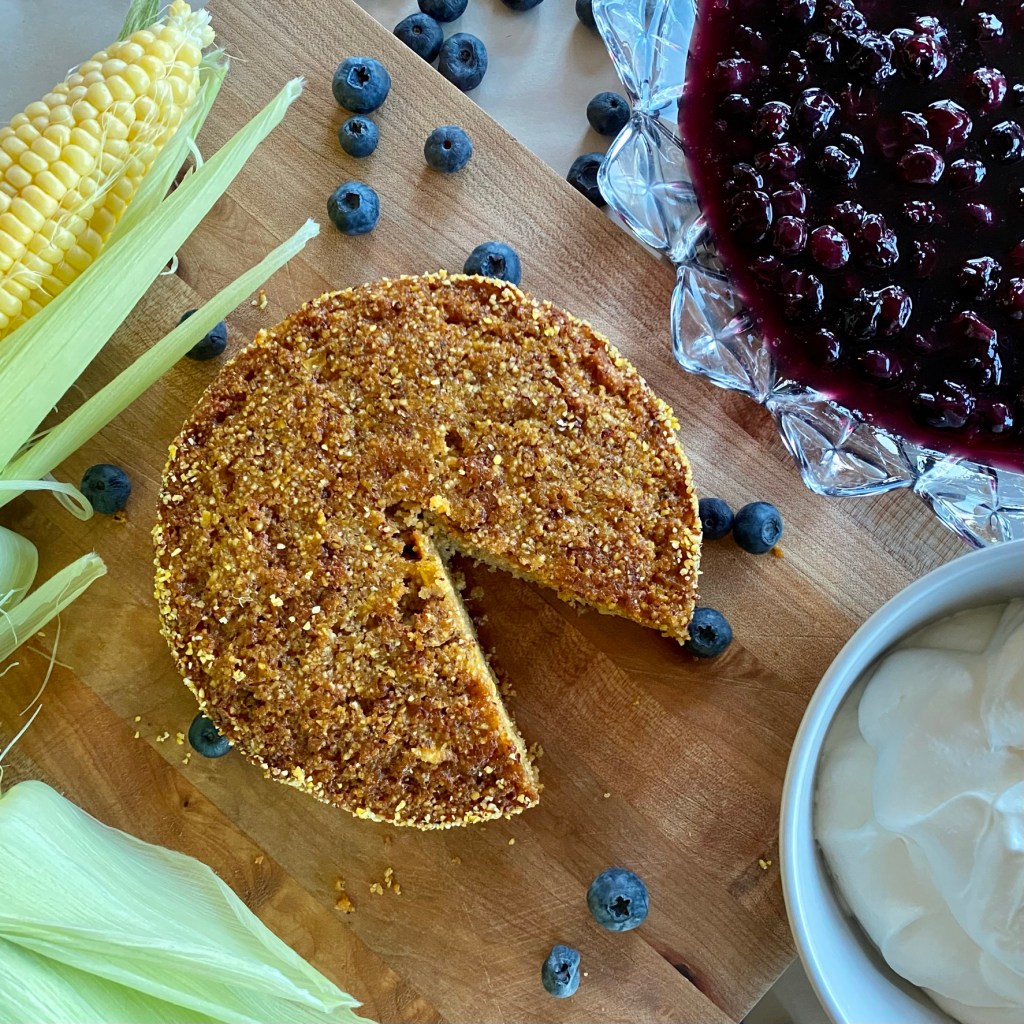
The Sweet Corn Buttermilk Cake is made with Floriani Red Flint stone-ground cornmeal from a local company, Camas Country Mill. This fantastic cornmeal and other flours, grains, and beans can be purchased at the charming Camas Country Schoolhouse Bakery and Store outside of Junction City, Oregon. Whatever brand you use, a stone-ground version is what gives this cake its particular toothsome texture.
Flourless, moist, and tender Sweet Corn Buttermilk Cake, studded with kernels of corn, and a little cornmeal crunch
This simple cake has ingredients from the farm. Before you scoff at the idea of sweet corn in your dessert, remember that peak-season fresh sweet corn is much sweeter than zucchini, an ingredient that commonly makes its way into cakes and sweet breads.
As an aside, this flourless cake will be gluten free if your cornmeal is certified that way. The generous dose of buttermilk makes it moist, tender, and subliminally tangy.
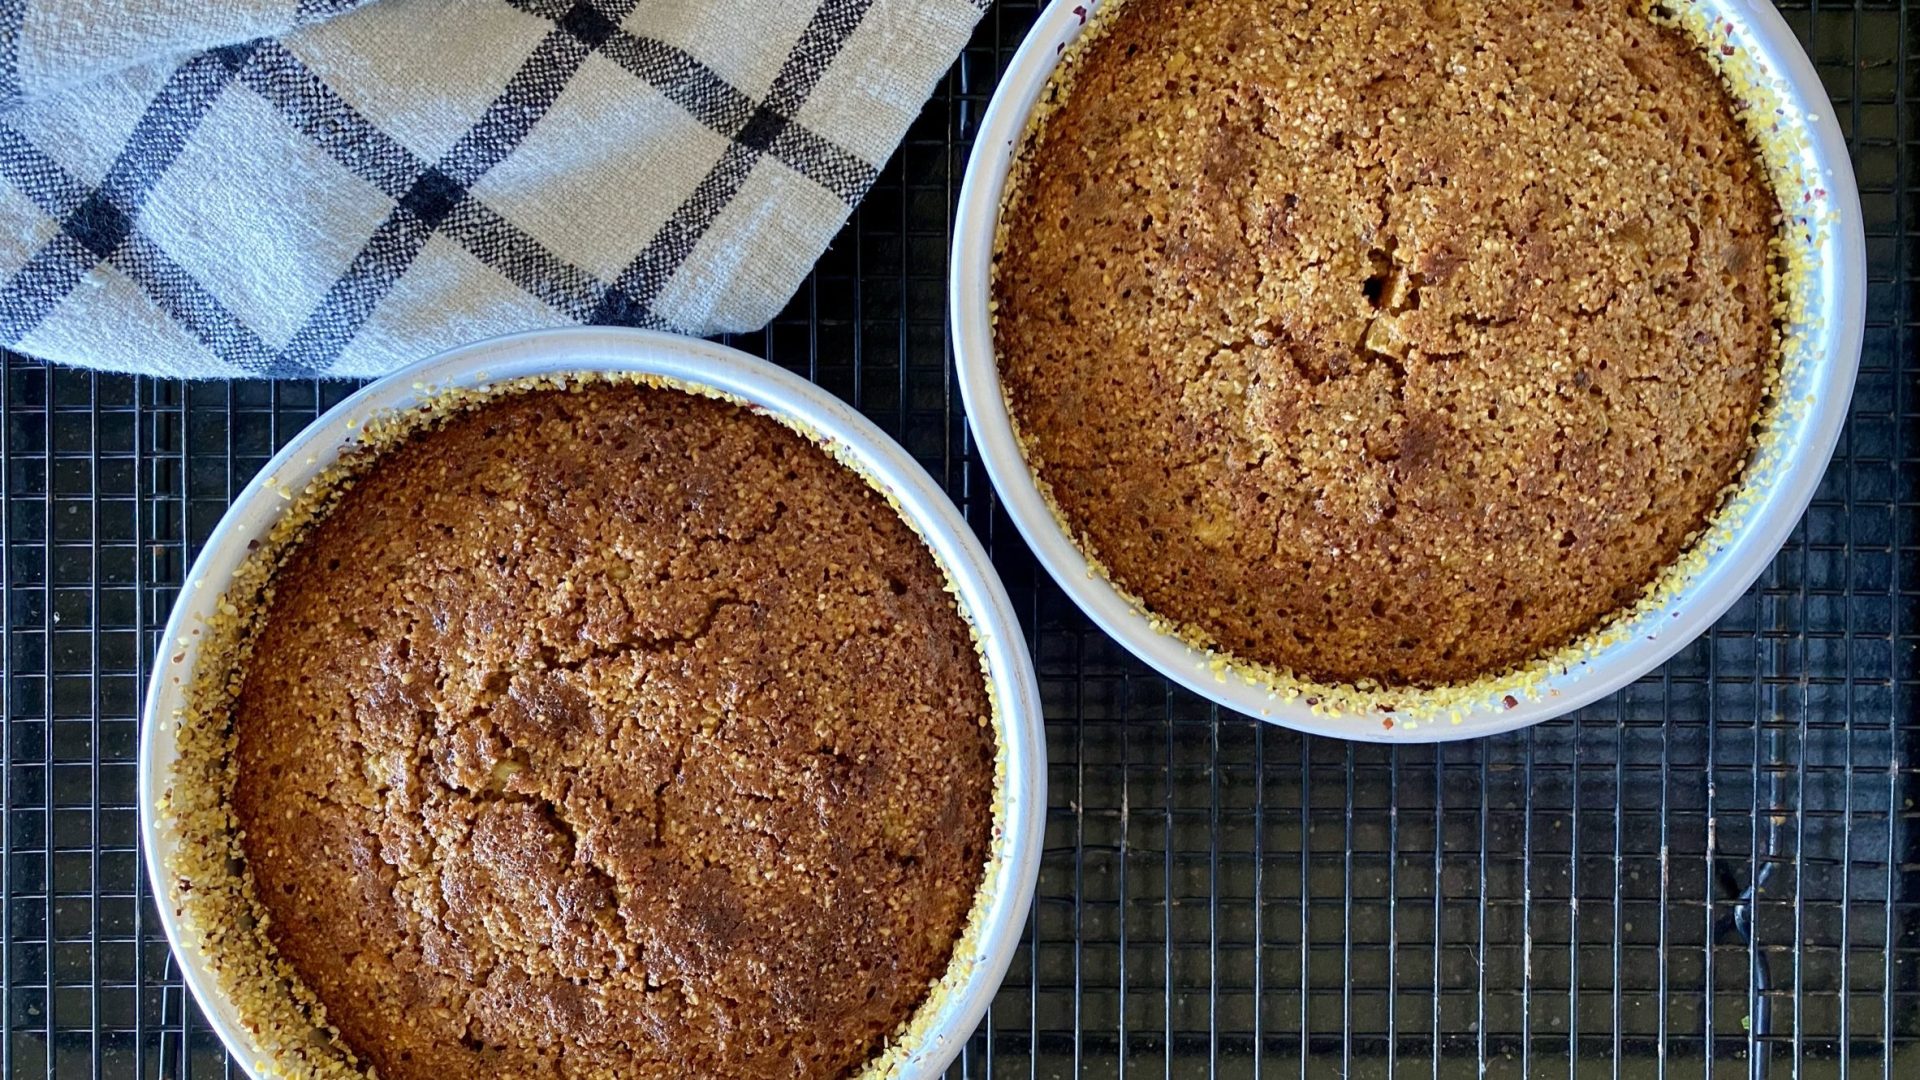
The recipe makes enough batter for one 8" round or 8" square cake. The former will result in a taller cake, the latter a shorter cake that will bake more quickly. It also makes two perfectly tall 6" round cakes. As a household of two, six-inchers are my frequent choice. One for now, the other to be tightly wrapped and popped into the freezer for impromptu company or when the dessert mood strikes.
Sweet Corn Buttermilk Cakes, ready to be tipped out of their pans.
About homemade cakes in general: Please take the time to bring butter, eggs, and milk or buttermilk to room temperature. This is critical to achieving a good emulsion. If you've ever made a cake batter that turned curdly part way through, it is because cold ingredients just cannot emulsify. Your butter may get nice and fluffy, but plop a cold egg into it and it will seize back up into tiny bits rather than become one with the egg. The same goes for the milk or buttermilk you may add. Temperature matters!
The Blueberry Compote
Blueberry Compote
One fanciful learning I've had this summer is to use berry-flavored vinegar in place of lemon juice in berry desserts. Berries often need a little acid to brighten them up and to balance their sweetness. The typical remedy is lemon juice. In several trials I've found that replacing lemon juice with berry vinegar gives the same lift while amplifying the berry flavor. Either works just fine in this recipe. Use what you have.
This Blueberry Compote recipe makes a lot. It can easily be halved, but it is so wonderful on pancakes, waffles, and vanilla (or sweet corn) ice cream. Don't cut yourself short.
The magical trio-- sweet corn, blueberries, and buttermilk-- come together in this summery dessert. Rustic yet special, it makes a great summer gathering dessert and an indulgent breakfast the next morning.
Preheat the oven to 350°. Generously butter two 6" round cake pans or one 8" round cakepan, and generously dust the pans with cornmeal.
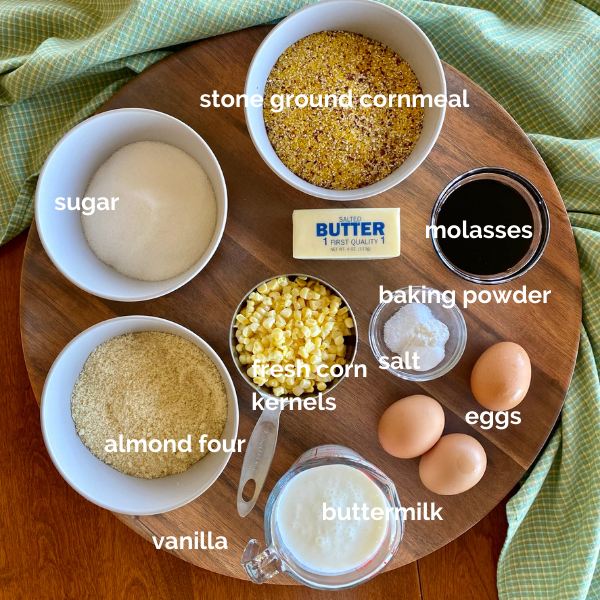
In a medium bowl, mix the stone ground cornmeal, almond flour, baking powder, and salt. Set aside.
Using a stand or handheld mixer, beat butter to smooth it out. Gradually add the sugar, ¼ cup at a time, and continue beating until the mixture as paled in color and is light and fluffy. Add the molasses and beat until thoroughly incorporated into the butter mixture. Scrape down the sides of your mixing bowl several times during this step.
Add the eggs, one at a time and beating well after each one. Add the vanilla. Gradually add the buttermilk a little at a time to avoid it splashing out, and to keep the mixture emulsified. If the mixture breaks/curdles during this step, stop adding ingredients and turn your mixer to high speed for a minute or two. If the ingredients are room temperature, that should bring it back together. Scrape down the sides of your mixing bowl several times during this step.
Gently add the dry ingredients, again scraping down the sides of your mixing bowl several times during this step, until the cake batter is well combined.
If you are using two 6" pans, evenly divide the batter between them, or if you are using the 8" pan fill it with all the batter. Bake 20-25 minutes, until the center is set and a knife point or bamboo stick cake tester comes out almost clean. The center will feel puffy and springy when lightly tapped.
Allow the cake to cool in the pans for 15-20 minutes before removing the cake from the pans, and allow them to cool completely on a cooling rack.
Serve individual slices on a puddle of Blueberry Compote and a top with a tuft of lightly whipped cream, or if using the cake all at once, place the cake on a serving plate atop a puddle of Blueberry Sauce, top with a billow of lightly whipped cream, and pass a bowl of Blueberry Compote to your guests to serve themselves more.
Blueberry Compote
Place blueberries, sugar, and 1/4 cup water in a medium saucepan.
Bring to a boil, and reduce heat to medium low. Cook for 3-4 minutes, stirring frequently, until the berries have turned from dusky blue to deep purple, and some of them have started to pop open.
Combine the cornstarch and 2Tbsp. water in a small bowl. While constantly stirring, quickly and thoroughly stir the cornstarch mixture into the blueberries. Return to a boil for one minute.
Stir in the lemon juice or berry vinegar. Allow to cool.
Store in the refrigerator until using. You can easily cut this recipe in half, but you'll love having extra sauce for pancakes, waffles, and ice cream!
It is an odd little kid who prefers observing adults above hanging out with other kids, but that is how I was issued. With the focus of Jane Goodall and the sofa as my cover, I studied grown-ups and all forms of their behavior; language, cultural and social norms, and how curiously their developed biology drove their actions. Kids I found to be mostly mean, addled, and ridiculous.
It will not surprise you, then, to know I hated peanut butter and jelly sandwiches. The basic components were good, I thought. But jelly seeping through the bread, the gluey palate-sticking nature of the thing, and the whole sandwich mangled by the smacking of a thermos inside the lunchbox of a girl with a purposeful stride? Thank you, but no.
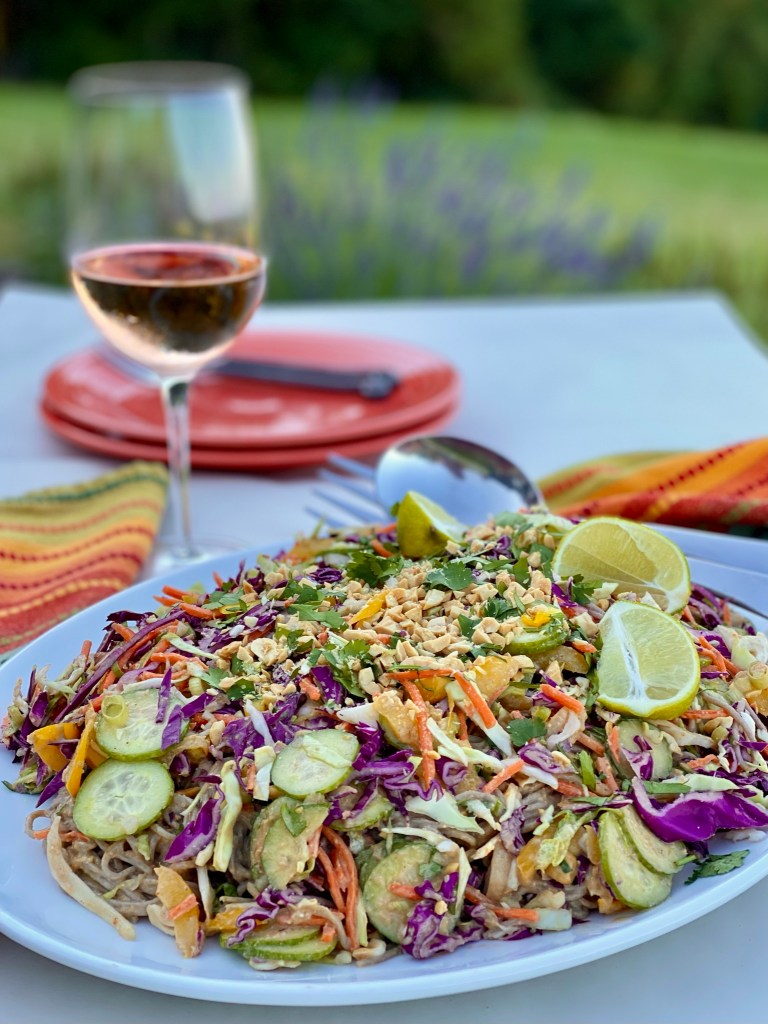
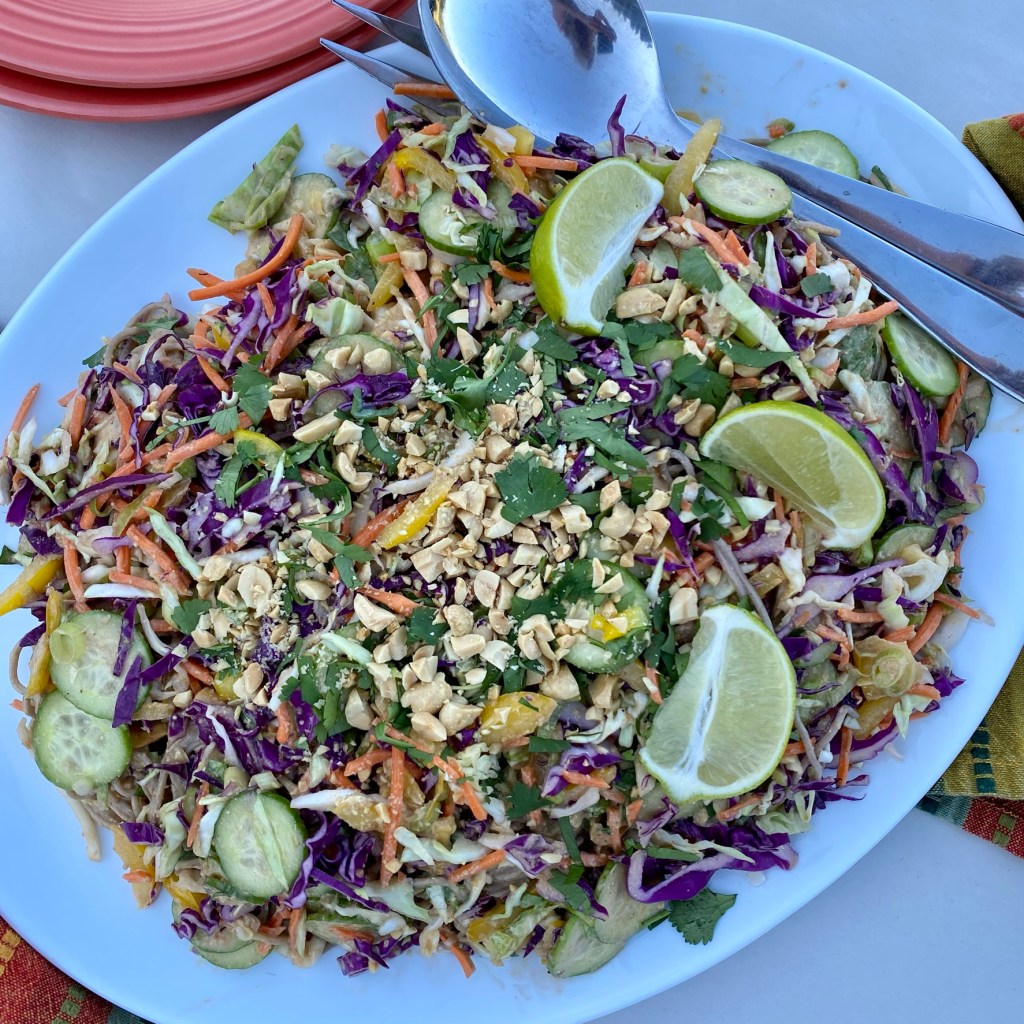
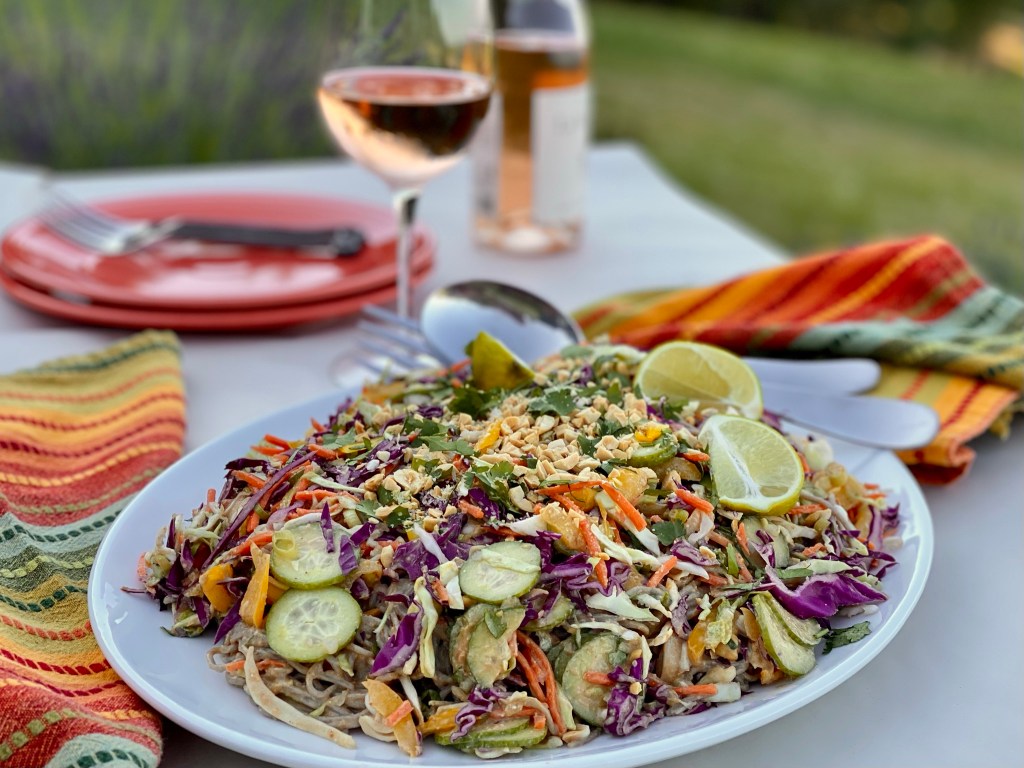
If Crunchy Cold Buckwheat Noodles in Peanut Sauce had been popular among suburban moms so long ago, it would have been my absolute lunchbox preference. A tangle of chewy buckwheat noodles and colorful crunchy vegetables draped in a velvet cloak of spicy, gingery peanut sauce is arguably the best use of peanut butter. It would have had me daydreaming about girls in Indonesian -- where peanut sauce originates-- wondering if they liked math any better than me, if their parents fought, and whether they moved a lot or got to live in one house their whole life. I would have wished the Weekly Reader to do a story on them so I could know.
This recipe is for my grandchildren should they want something other than jelly and bread with the peanut butter in their lunchboxes.
Chewy soba noodles and crackly-fresh vegetables are draped in a velvety, gingery peanut sauce. Make it in less than 20 minutes for a speedy dinner, but be sure to make extra-- it holds well for tomorrow's lunches or picnics. Easily halved or doubled, this all-ages people pleaser will be a welcome addition to your meal rotation.
3Tbsp.fresh squeezed lime juice or rice wine vinegar
2Tbsp.sugar, brown sugar, honey, or maple syrup
2Tbsp.toasted sesame oilalso called dark sesame oil
1 tsp. -1 Tbsp.Sriracha or hot chili garlic sauce to taste
1Tbsp.grated fresh ginger and its juice
1-2 grated garlic cloves
Noodle Salad
10 oz.soba (buckwheat) noodlesudon, ramen, or rice noodles or even spaghetti are also good choices. Use gluten free noodles if you'd like
6 cupsfresh crunchy raw vegetables (see list below to mix and match*)chopped , coarsely grated, or thinly sliced
3-4green onions, sliced
1bunchcilantro, coarsely chopped
¼ cuppeanuts, coarsely chopped (optional)
Peanut Sauce (above)
1lime, cut in wedges for serving
Instructions
In a medium bowl that allows room for whisking, whisk peanut butter to loosen it. Add each ingredient one at a time, whisking thoroughly after each addition. (You are making an emulsion, and adding the liquids slowly in batches prevents a sloshy mess from forming. It will actually go faster this way, and will minimize cleanup.)
Whisk in warm water, one tablespoon at a time, until the sauce thickly drips from the whisk. You want the sauce to be thin enough to easily coat the nooks and crannies of the vegetables and noodles, but to retain some body. Depending on the thickness of your peanut butter and the room temperature, you will add between 1 Tablespoon and ¼ cup of water. Taste and make any adjustments of sweetener, lime juice, spicy heat, or perhaps salt. Set the peanut sauce aside.
Place a pot of salted water on to boil. Cook soba noodles according to package directions. When done, rinse in cold water until the noodles are completely cold.
While the water is heating and the noodles are cooking, prep your vegetables including the green onions. Aim for small dice, or thin matchstick pieces so that you can fork up a mix of vegetables and noodles in each bite. Place all the vegetables in a large bowl..
Coarsely chop the cilantro and peanuts. Keep a few tablespoons of each aside for garnish, and place the rest in the bowl. When the noodles are cooked, rinsed, and drained, add them to the bowl. Give everything a gentle toss.
Add about ½ cup of the peanut sauce to the bowl, and give everything a gentle but thorough toss, until all ingredients are evenly coated with peanut sauce. Add more sauce, tablespoon by tablespoon, until the salad is dressed to your liking.
Plate the salad individually or transfer it to a serving bowl or platter. Sprinkle cilantro, peanuts, and sesame seed on top. Serve with a lime wedge.
Refrigerate any leftovers in an airtight container. Will keep nicely for a day.
Notes
*Fresh crunchy vegetable options. Use what the garden or farmers market gives you, or what you have in your crisper:
cucumber*
green and/or purple cabbage
red or yellow bell pepper
snow or sugar-snap peas
carrot
radish
kohlrabi
white turnips
green or yellow summer squash*
*Best added only if you'll consume the entire recipe right away, as they go soft and watery overnight. I don't mind this, but you might!
Three years ago my beloved and I bought our forever home. We'd come together later in life and it took us a while to figure out where and how to live in a way that meets both of our needs. For ten years we searched to find this place we both love and have made our home.
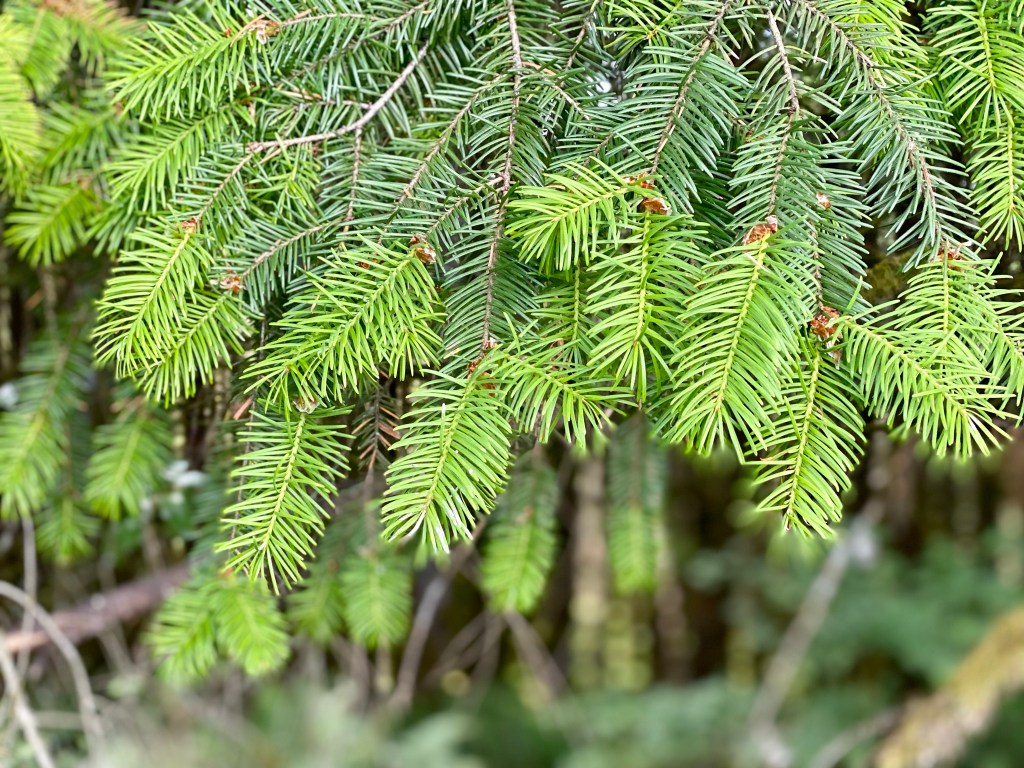
Our sweet forever home visually melts into the backdrop of a 260+ acre forest that also backs the properties of our two neighbors. We have loved the forest for all it gives. Birdsong, shade, the ever-present rustling of the treetops, the pure fresh earthy scent that's especially noticeable in the early mornings, and the creaks and howls that call from it after dark.
Beginning Tuesday, as happens in Oregon, the crop of timber-- the entire forest-- will be harvested. By September what once was a Douglas Fir forest will be three new homesites. We knew this would happen one day. We just liked to think that one day was 20 years from now.
I am heartbroken.
My husband, who has had something grumbly to say about every clear-cut we've ever driven by, has nobly risen to reframe the situation as our "view expansion and sunset enhancement opportunity." His forward lean and courage is beautiful.
I fleetingly think of changing my name to Butterfly and chaining myself to a tree. Instead I just weep.
Our dear neighbors with whom we have shared the glories of this forest gathered this weekend to pay homage to the lush, oxygen-scrubbing, interconnected organism we've enjoyed and appreciated. A wake of sorts. Poetry was recited, a tear or two was shed, and we laughed and shared community lore. My hurting heart considered serving Funeral Potatoes but I refrained.
What does one serve on the occasion of a forest being cut down?
We ate from the forest, that's what we did.
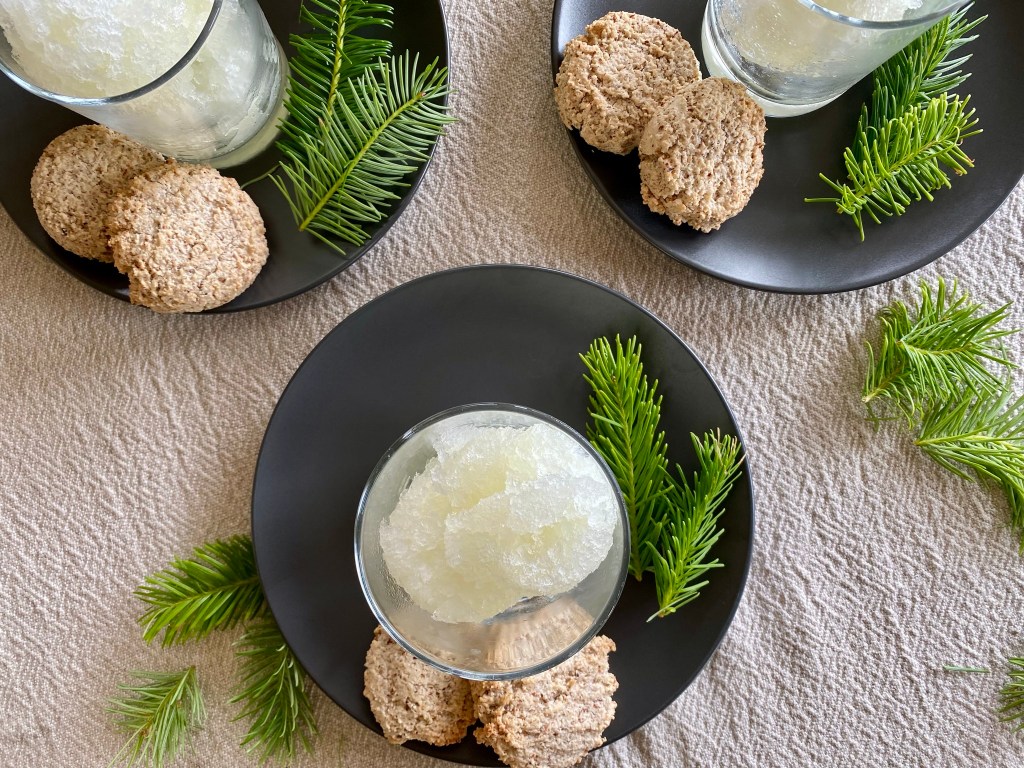
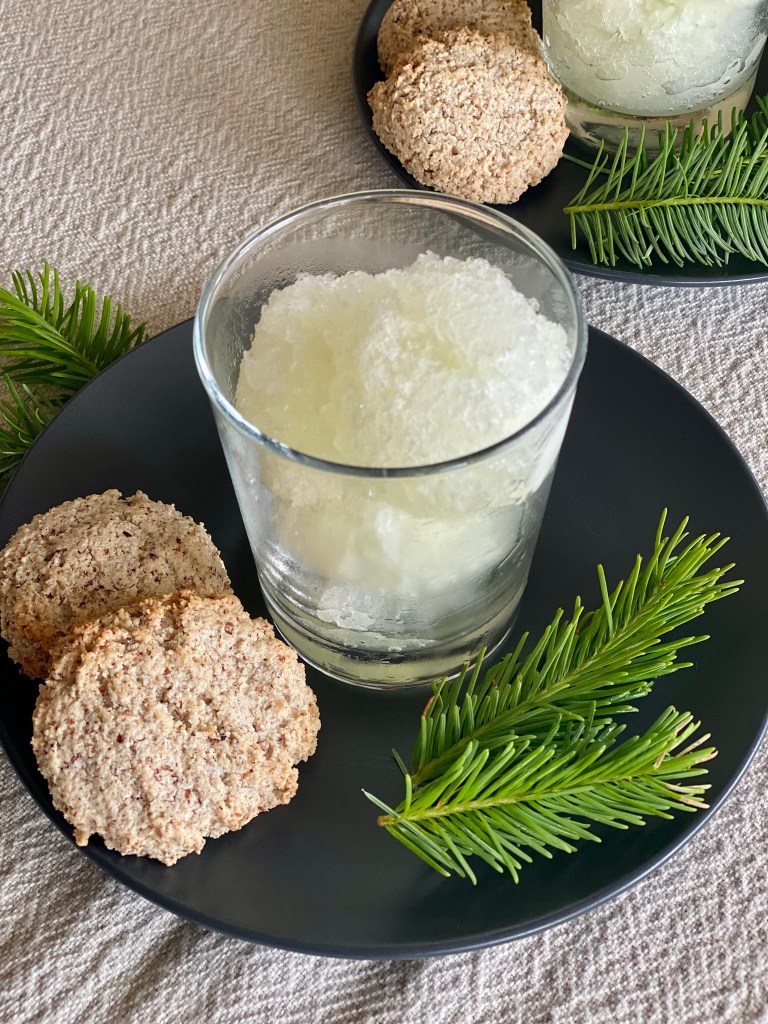
Douglas Fir Tip Sorbet or Granita
Course: Dessert
Cuisine: Pacific Northwest
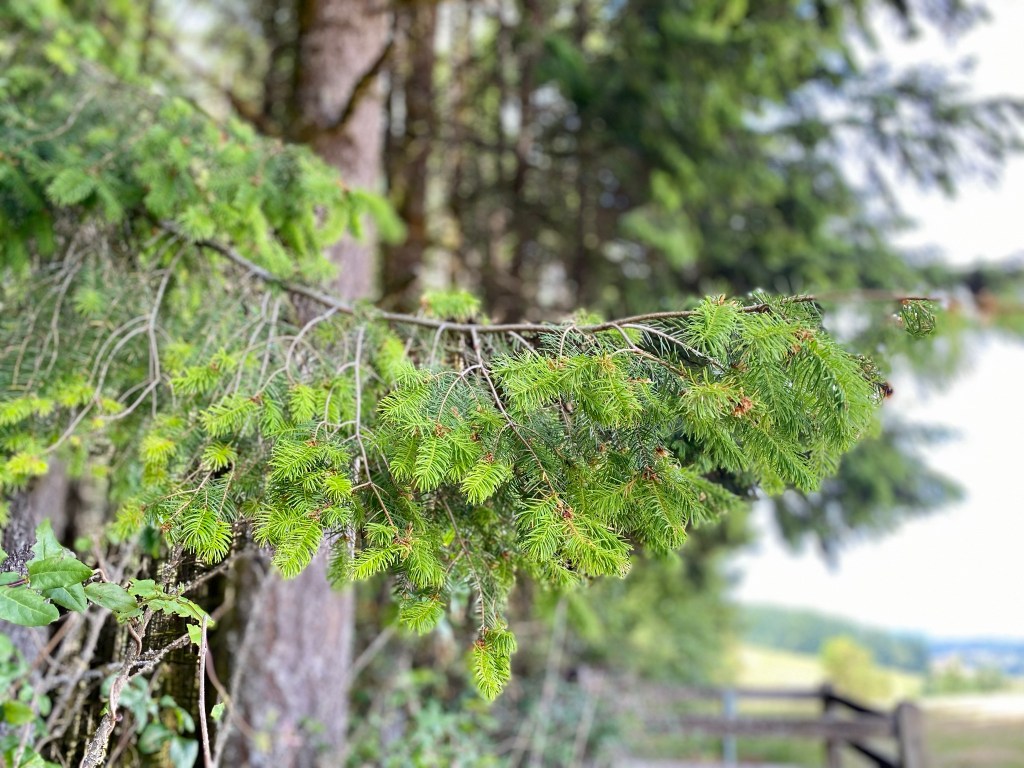
Season: Evergreen (April - July)
Dietary: Dairy-Free, Egg-Free, Gluten-Free, Vegan
Prep Time: 35 minutesminutes
Chill Time: 2 hourshours
Total Time: 2 hourshours35 minutesminutes
Servings: 12
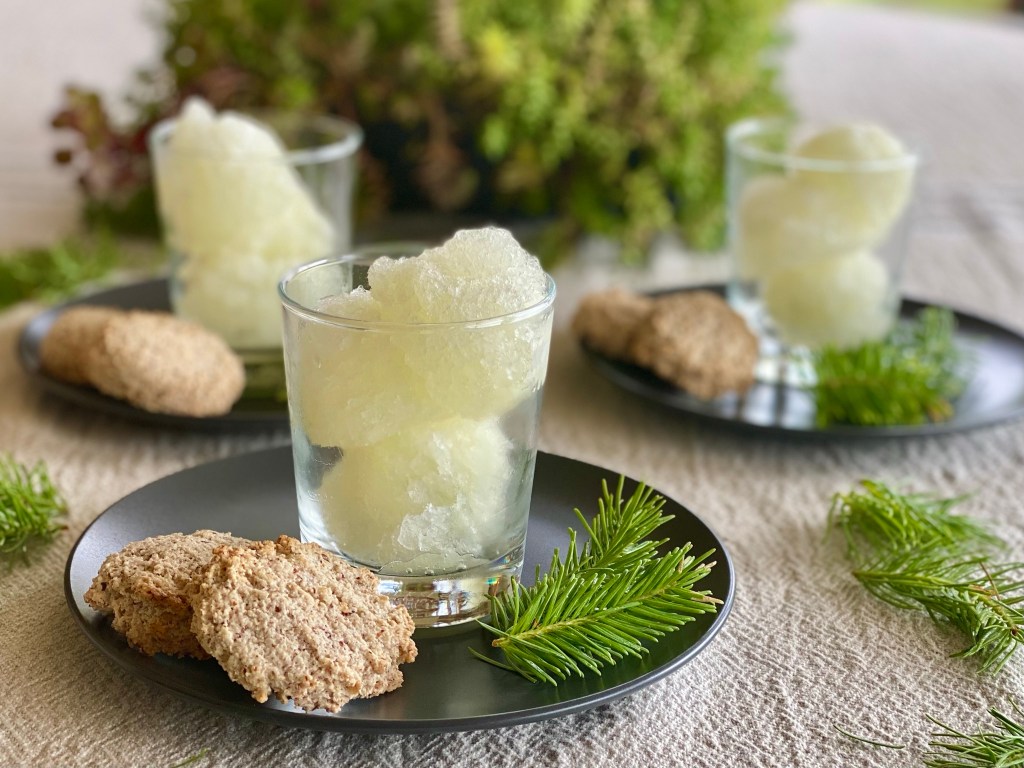
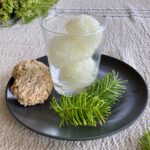
How does one eat a forest? One little bite of fir tip sorbet at a time! A little resiny and a little limey, this refreshing sorbet or granita makes a wonderful dessert with a hazelnut cookie, or a fantastic palate cleanser between courses. Forage away!
In a small saucepan combine 2 cups of water, sugar, zest of ½ lime, packed fir tips. Heat, stirring frequently, until the sugar is completely dissolved. Put a lid on the pan and remove from heat. Allow the mixture to sit for 30 minutes. Strain the mixture into an 8-cup measuring cup or mixing bowl.
Squeeze the lime and lemon juices. Add the remaining 2½ cups of water and the juices to the strained sugar mixture. Stir in the Douglas Fir brandy, champagne, or vodka. Cover, and chill in the refrigerator 2 hours or overnight.**
For sorbet, freeze according to ice cream maker manufacturers instructions. Serve immediately for slushier soft-serve, or harden in the freezer for two hours for scoopable sorbet.
Notes
*If you make the icy granita version, increase the brandy, champagne, or vodka to 4 Tablespoons.**If you are making icy granita, skip the chilling step and pour the mixture into a large flat plastic container with lid and place in the freezer. Freeze for at least four hours, scraping every hour or so with a fork to break up chunks and create the fluffy "snow-cone" texture. To serve, rake through the frozen mixture again with a fork to create the fluffy icy texture and serve.
I have a strong difference of opinion with myself. Brightly colored vibrant foods are my first choices. The more colors in the market basket or on a plate the better. The oranges and greens, reds and purples, and occasional black foods make me salivate just to look at.
Yet when it comes to desserts, I'm drawn to the modest beiges, creamy whites, and browns of all shades. My affinity is for rustic, crumbly sweets that out-perform their appearances. There is a place for sprinkles and colorful frosting and fancy flourishes, but for day-to-day desserts the homier the better.
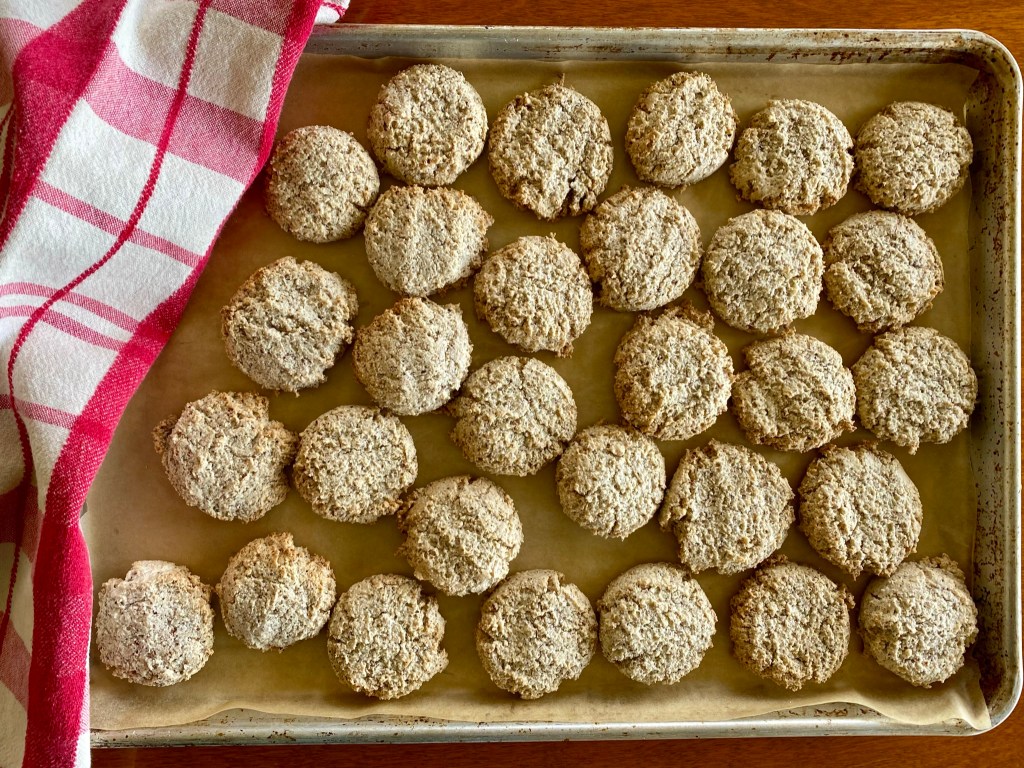
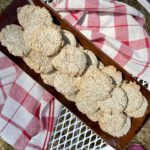
Nutty meringue cookies have been around for decades. The difference here is that I've developed this recipe to feature as much hazelnut flavor and texture as the egg white meringue will hold. Don't let this quiet beige cookie fool you-- they pack in a lot of hazelnut along with their very pleasant crispy and chewy texture.
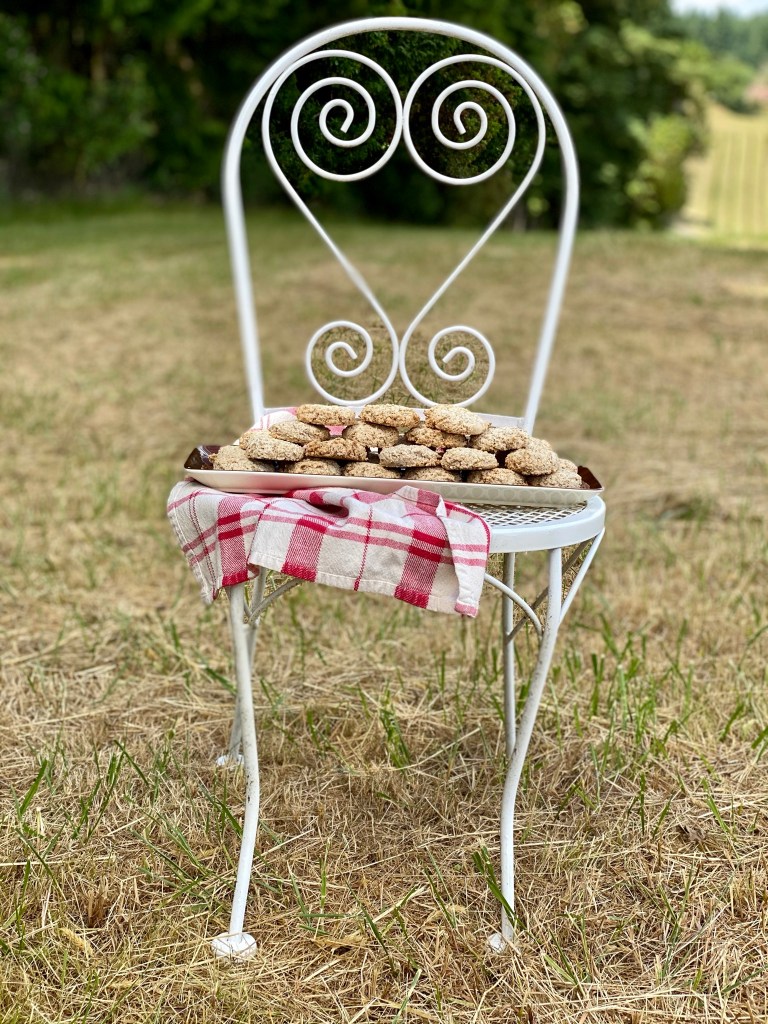
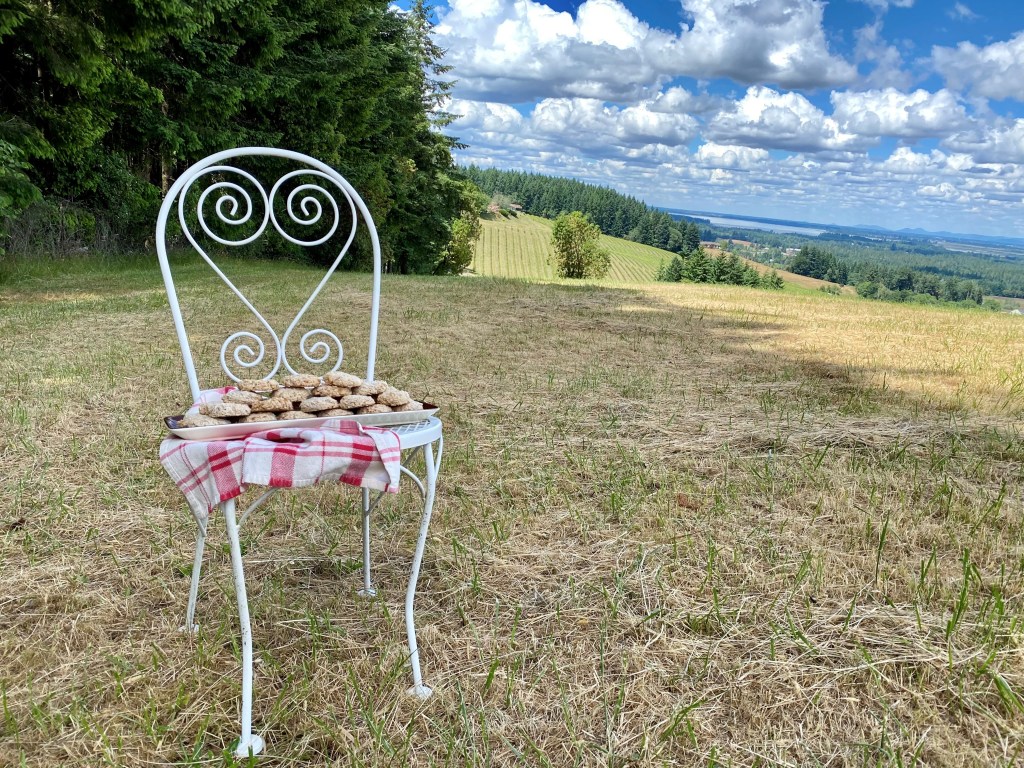
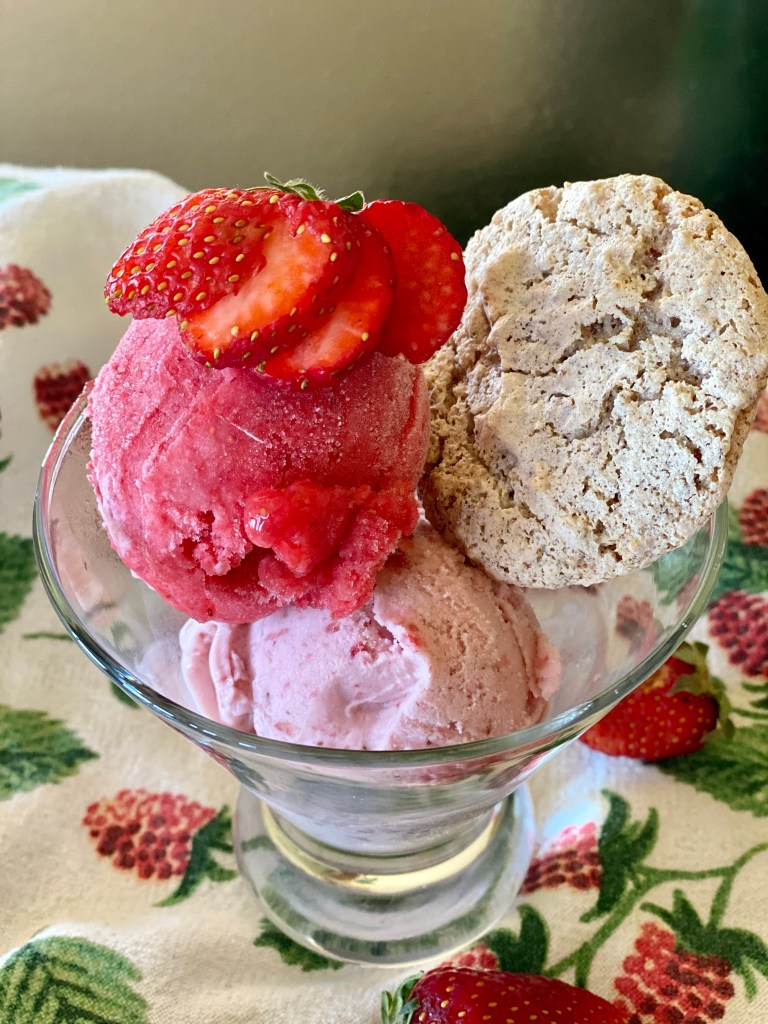
Hazelnut Meringue Cookies are terrific served with summer fruit platters, any kind of fruit, chocolate, or caramel ice creams or sorbets, (like my Strawberry Sorbet and DF Ice Cream duo!) They are also delicious as a coffee or tea break treat.
The recipe contains no gluten, no grain, and no additional fat besides that which is natural to the nuts.
If you like this and other 101-Mile Kitchen posts, please share on Facebook and Instagram!
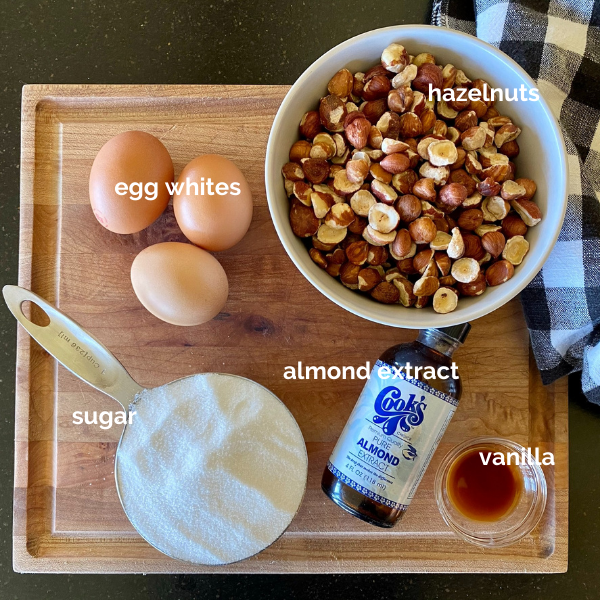
Five handy ingredients come together fast and easy for these delicious chewy cookies. Perfect with coffee or tea, and especially nice alongside a dish of your favorite ice cream for a simple dessert.
½tsp.almond extract (optional)this magnifies the nutty flavor but use only a little!
½tsp.salt
Instructions
Preheat oven to 350°. Line two baking sheets with parchment or non-stick baking mats.
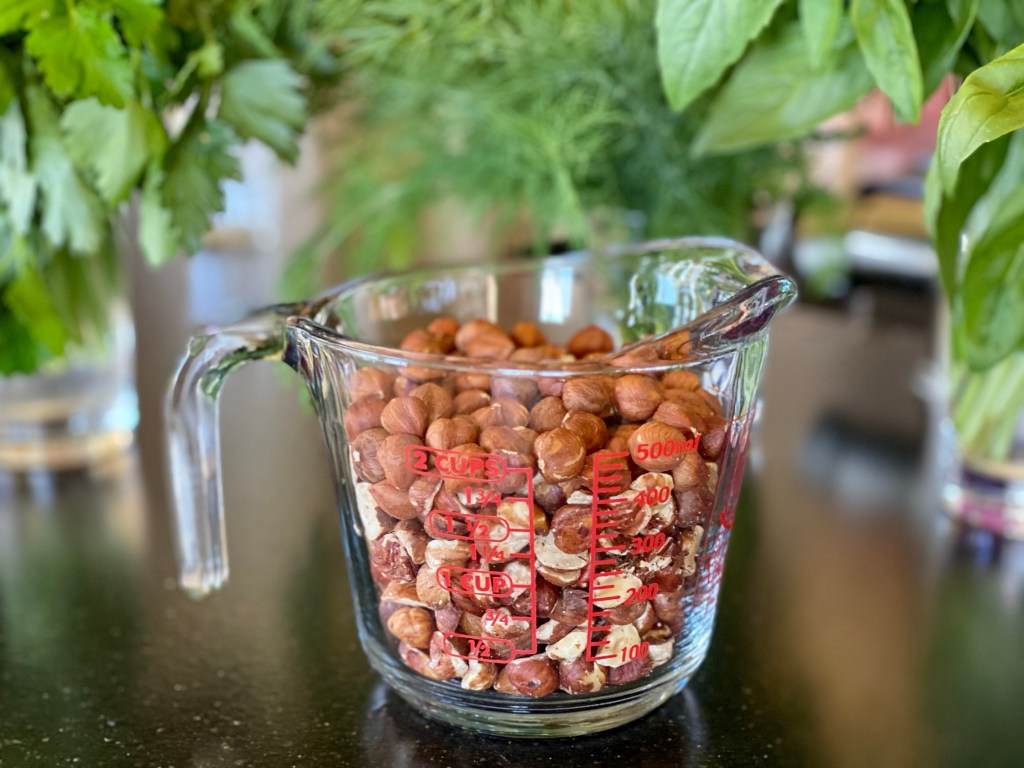
Finely chop hazelnuts in a food processor or by hand, if using whole. Set aside.
In an upright mixer or using a hand mixer, begin whipping egg whites on medium speed. As they begin to get bubbly and foamy, add in the extracts and salt. Increase mixer speed to high and continue beating until eggs white turn solid white. Begin adding sugar in, one Tablespoon at a time in fairly quick succession, until all the sugar is added.
Continue whipping egg whites until they are very stiff and hold stiff peaks, and the sugar is completely dissolved into them. (Rub a little of the mixture between your fingers to feel if the sugar is dissolved.
Using a spatula, gently but thoroughly fold the hazelnuts into the egg whites in three batches. The mixture will become a little stiff at the end-- that's OK.
Using a one Tablespoon scoop or spoon, drop the batter into the baking sheets. With lightly damp fingers, gently pat the tops of the cookies down. (They will not spread as they bake.) Bake for 12-15 minutes until golden around the edges and on the bottom. Cool on baking sheets.
These will keep in a sealed container for several days, and freeze well.
Notes
Make It Your Own:This recipe works well with chopped walnuts and almond, too!If you like your cookie a bit chewier, add 1/4 cup less nuts to the whipped egg whites.
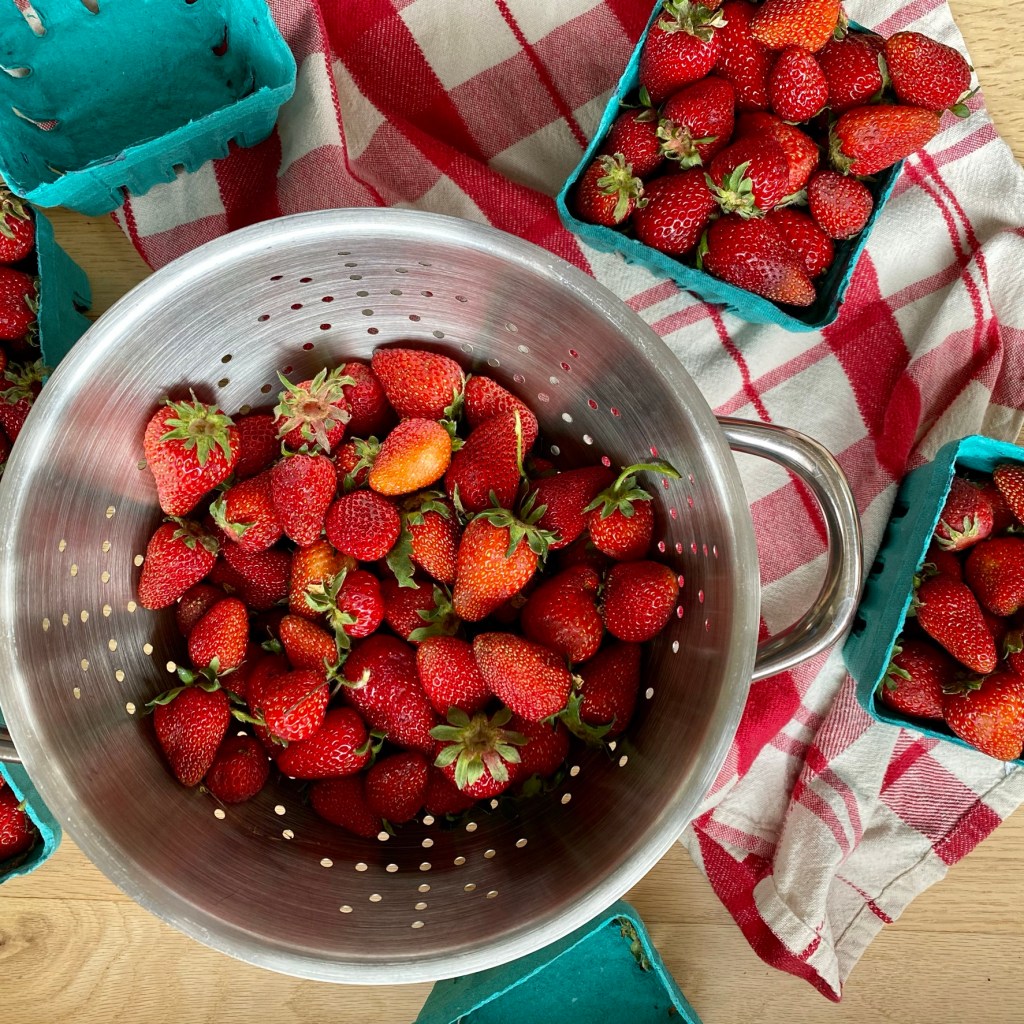
It was May, just as the strawberry fields were beginning to ripen, when my family and I moved to rural Oregon from the desert southwest. A big hand-painted plywood sign announcing "U-Pick Strawberries" near our new house beckoned. As motivation and reward I promised my then nine, seven, and three-year-old kids we would go as soon as we were unpacked and settled in.
Having grown up in cities, this "U-Pick" idea was just the best thing I'd ever heard of. Farmers actually let people onto their property to pick their produce? I had no idea I was expected to bring our own buckets or bowls, and we showed up that first day empty-handed and wearing inappropriate shoes for farm work.
Farmers, in general, are really nice people, and they had met our kind before. Spare grocery sacks were handed out, and we skipped off to our assigned rows.
The four of us had never tasted strawberries before. Yes, we'd had the trucked-in grocery store variety a lot of times, but the color, aroma, and taste of these field-ripened berries was like Dorothy entering the technicolor Land of Oz.
The kids and I laughed and stopped to look at the loamy earth, the bugs, and the whiskery leaves of the strawberry plants growing in mounds. We raced to see who could pick the most berries. There was no way to hide my then three-year-old's strawberry-stained face, hands, and belly, and truth be told all of us had eaten our fair share in the field. I offered to pay for what we'd eaten, and the clerk made me a customer for life when she laughed and said it was all part of the experience.
There are no words to describe how alive I felt that day.
It was then I realized what a sheltered life I'd lived in the big city. It was then that I developed my sustained mad crush on local farms, farm stands, farmers, and the generosity of Oregon itself. That day goes down as one of the best in my life, and it changed me forever.
As the summer moved along and for many summers afterward we U-picked cherries, raspberries, blueberries, and Oregon's famous Marionberries. Wonder-filled memories were made through the years, from the gathering of the berries to the lovely things we made and ate from them.
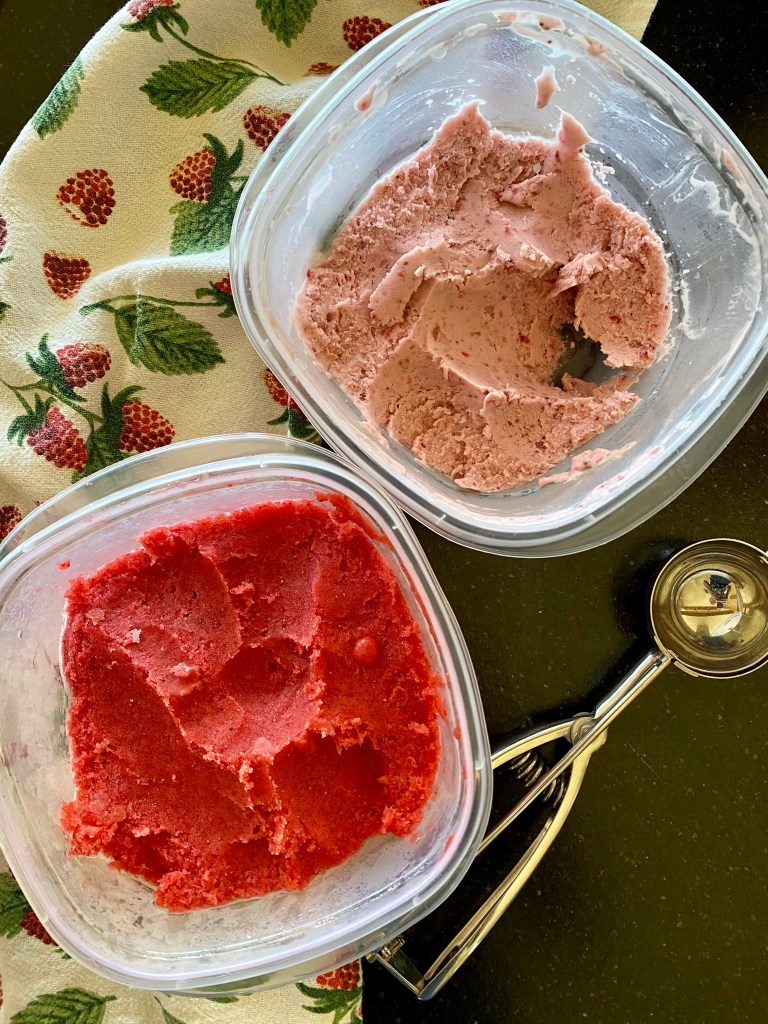
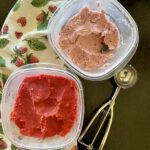
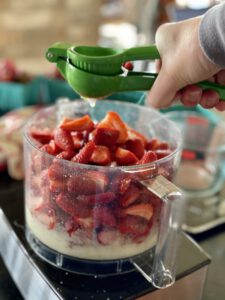
Fun Dessert Duo: Strawberry Sorbet + Strawberry Ice Cream
Start with 2 pounds of hulled and quartered strawberries; whirl the sugar with 1/2 small lemon, peel and all until finely ground; add the berries, lemon juice, and a pinch of salt; chill, then freeze in an ice cream maker.
The only thing better than ice cream for dessert is ice cream and sorbet for dessert! Making them with the same fruit makes a beautifully balanced contrast of color, tanginess, sweetness, creaminess and frostiness.
This type of dessert duo is one of my entertaining go-to's. The frozen desserts can be made in advance-- a big win for any host! There is something show-stopping about serving the two this way.
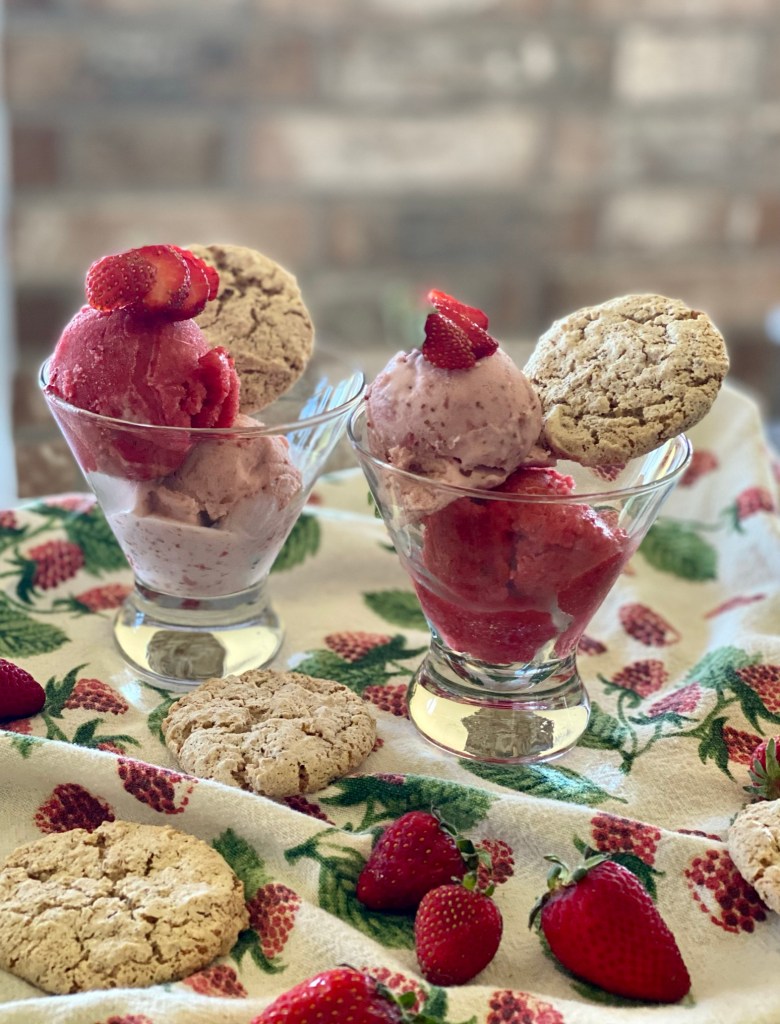
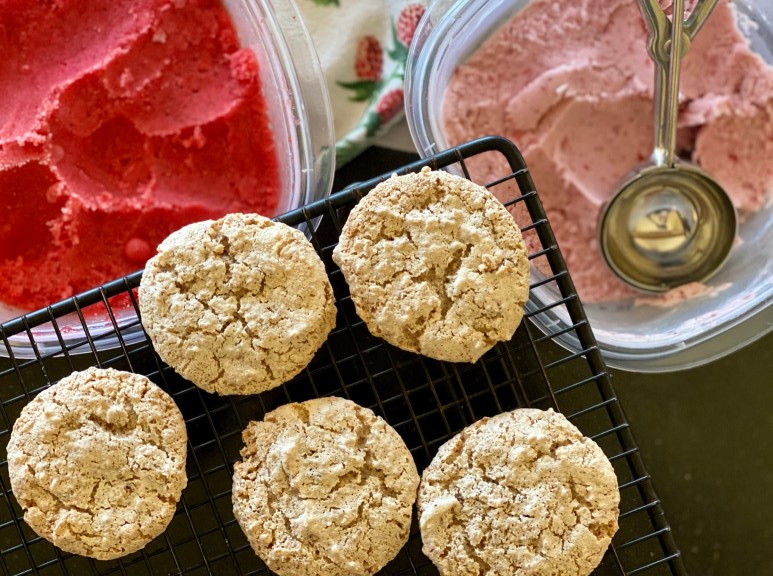
Frozen strawberry treats with hazelnut meringue cookies
Strawberry Sorbet and Strawberry Ice Cream Duo (Dairy-Free)
Course: Dessert
Cuisine: Pacific Northwest
Season: Evergreen (April - July)
Dietary: Dairy-Free, Egg-Free, Gluten-Free
Prep Time: 30 minutesminutes
30 minutesminutes
Total Time: 1 hourhour
Servings: 8
The only thing better than ice cream for dessert is ice cream and sorbet for dessert! Making them with the same fruit makes a beautifully balanced contrast of color, tanginess, sweetness, creaminess and frostiness. This type of frozen dessert duo is one of my entertaining go-to's. The frozen desserts can be made in advance-- a big win for the host! There is something show-stopping about serving it this way.
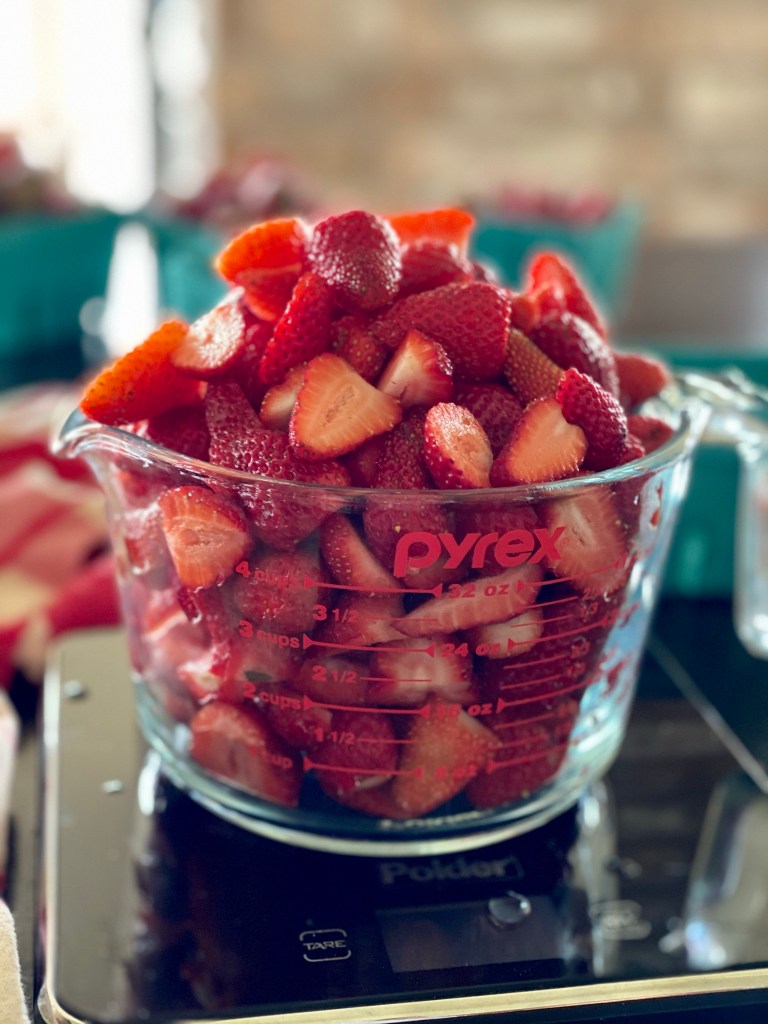
2lbs.strawberries, hulled and quartered(about 5 ½ cups)
2small lemons, divided
¾ - 1cupsugardepending on the ripeness of the berries)
1pinchsalt
Dairy-Free Strawberry Ice Cream Ingredients
10oz.strawberries, hulled and quartered, divided(about 2 ½ cups)
113.6 oz. canfull-fat coconut milk
? - ½cuphoneydepending the the ripeness of the berries
½tsp.xanthan gum
1tsp.pure vanilla extract
3dropsalmond extract (optional)
2tsp.lemon juice
Instructions
Strawberry Sorbet Instructions
Prepare (hull and quarter) strawberries and set aside.
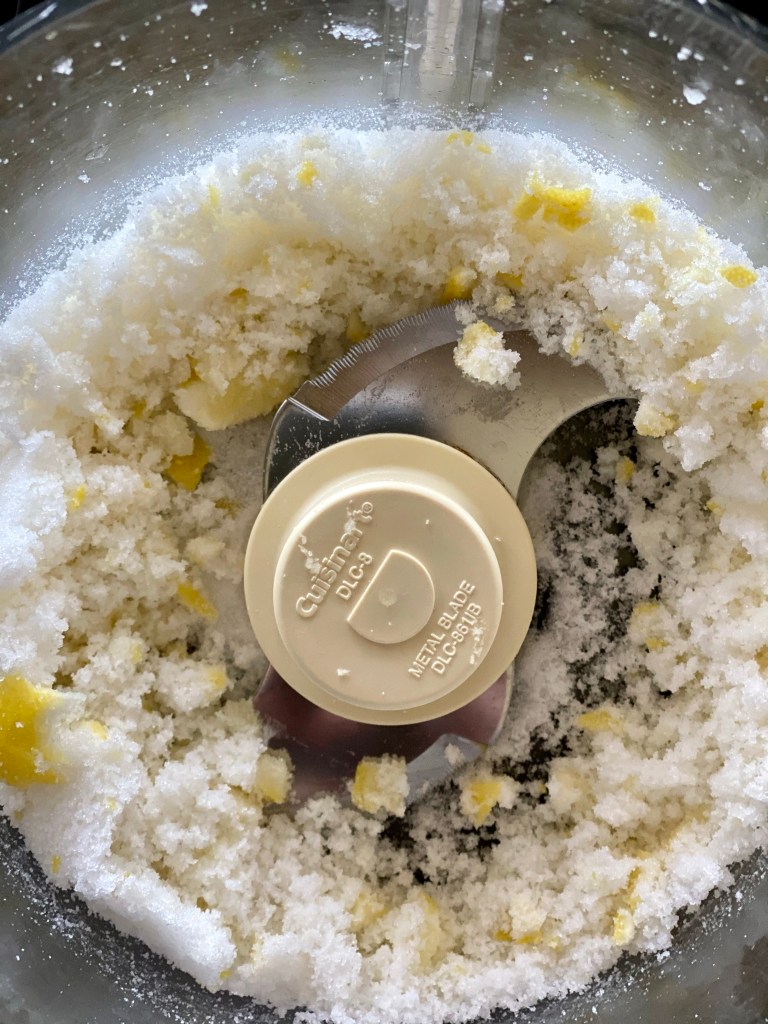
In a food processor, process ½ small lemon with sugar, pulsing and whirring until the lemon is in tiny even bits and fully incorporated into the sugar.
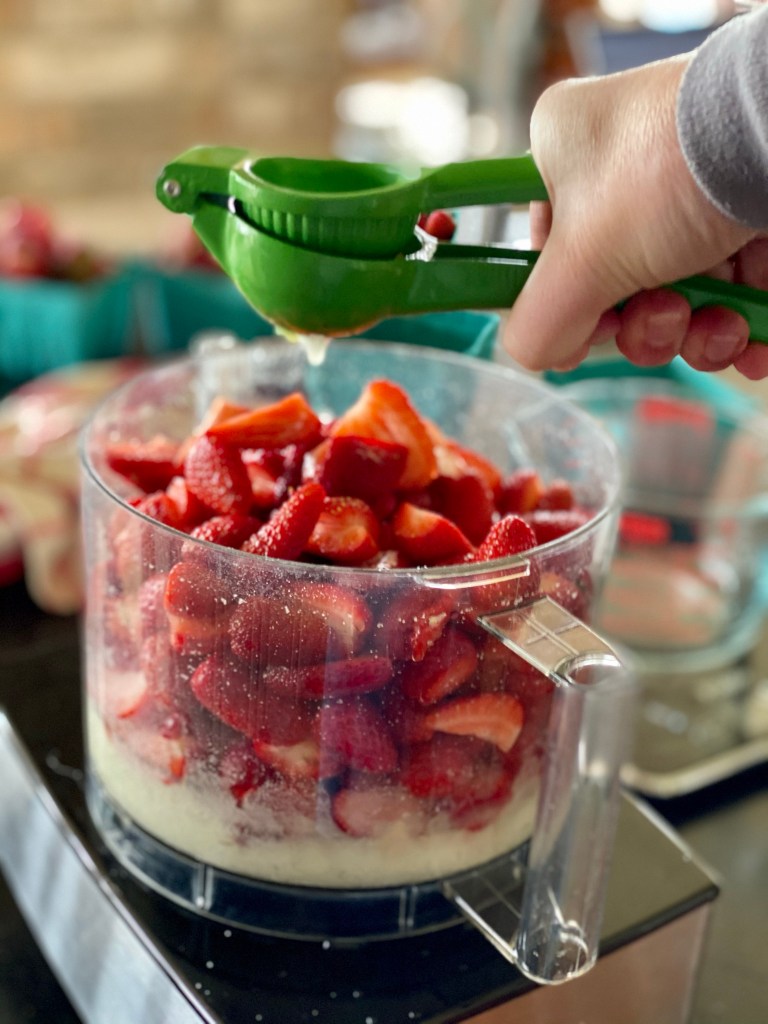
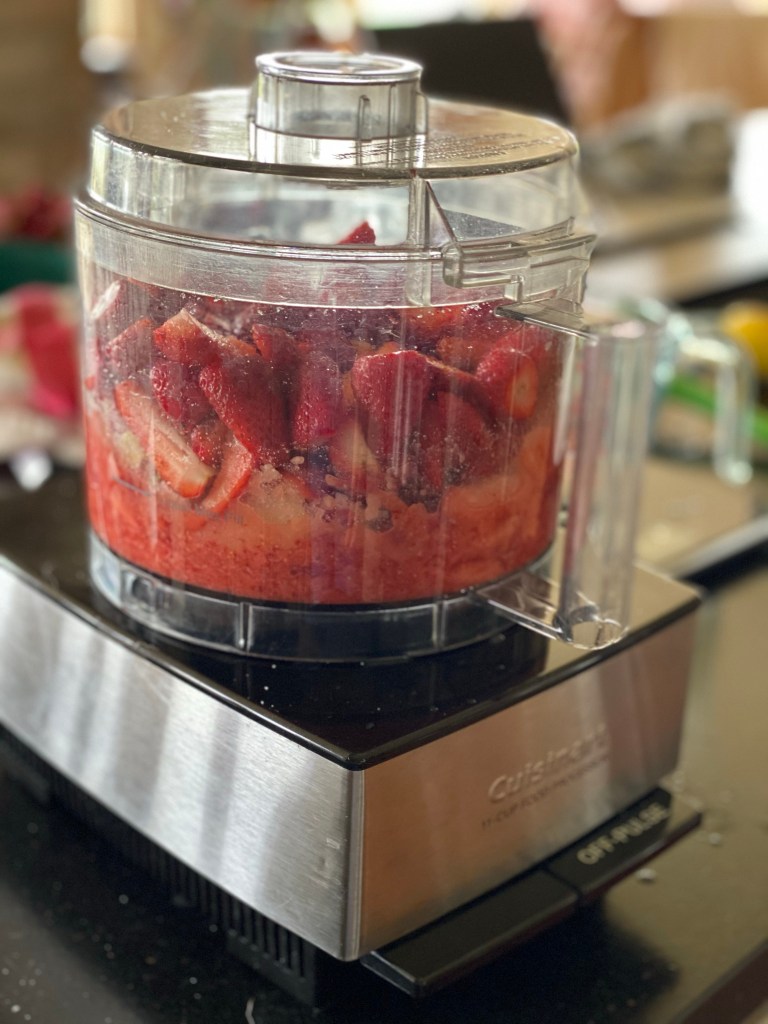
Add the strawberries, the juice of 1 ½ lemons, and the salt. Process until the strawberries are completely pureed, stopping to scrape the sides a few times to incorporate all of the sugar mixture.
For best results, chill the sorbet mixture at least one hour or up to overnight. (It will freeze better in an ice cream maker if it is chilled, or you can make it ahead to this step and freeze the mixture the next day.) Freeze according to your ice cream maker directions. For soft-serve, serve right away. For a firmer scoop, store in the freezer for an hour before serving.
Dairy-Free Strawberry Ice Cream Instructions
Reserve about 1/2“ of the hulled and quartered strawberries. Add all remaining ingredients (1/2 of the berries through lemon juice) to a food processor and process until smooth.
Add the reserved 1/2“ strawberries to the mixture in the processor, and pulse a few times to break them up into bits and chunks.
For best results, chill the ice cream mixture at least one hour or up to overnight. (It will freeze better in an ice cream maker if it is chilled, or you can make it ahead to this step and freeze the mixture the next day.) Freeze according to your ice cream maker directions. For soft-serve, serve right away. For a firmer scoop, store in the freezer for an hour before serving.
Notes
Plan ahead if you are making these both at once. If you are using a Cuisinart-style tabletop ice cream maker you will either need two freezer inserts or you will need time to refreeze your insert.
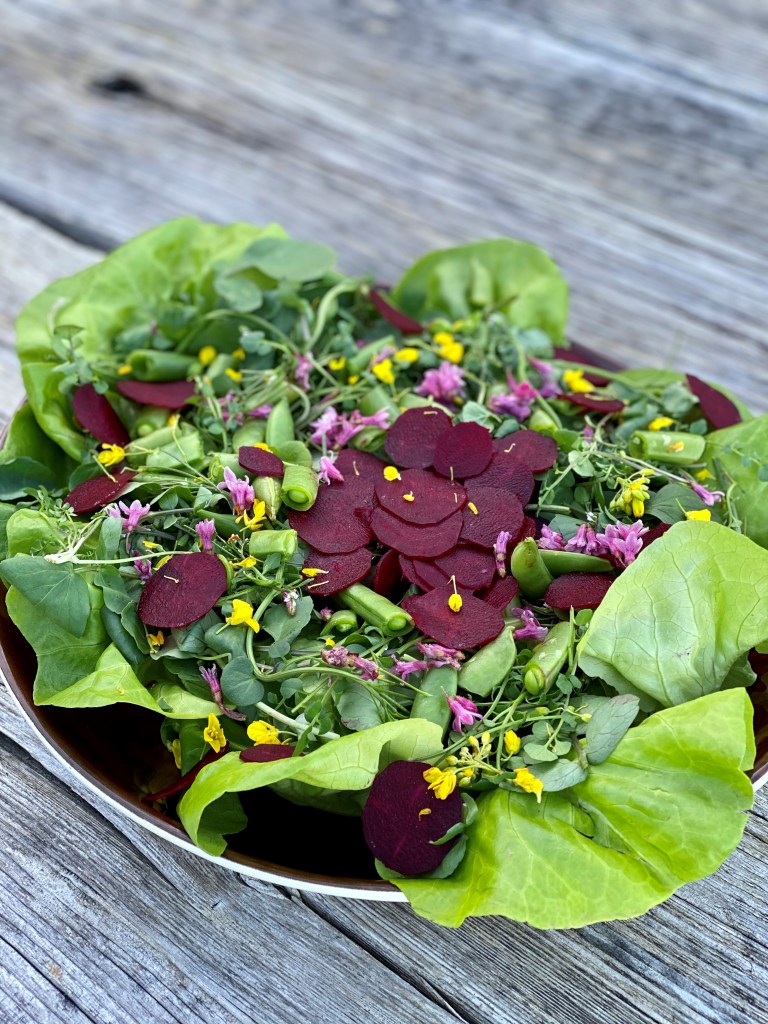
Spring lettuces with snap peas, thinly sliced raw beets, and foraged flowers with Classic French Vinaigrette
Have you ever had a restaurant salad that just took your breath away? One where everything is in balance, it's not gasping for life under a soggy dressing, and the lettuce is crackly-crisp and tender as angel wings? You can do that at home, too.
Here are three easy steps to rescue your salads from being sad and pathetic, including a fast and easy no-measure Classic French Vinaigrette. You'll see how fun and easy it is to take that basic ratio and create an infinite variety of vinaigrette options.
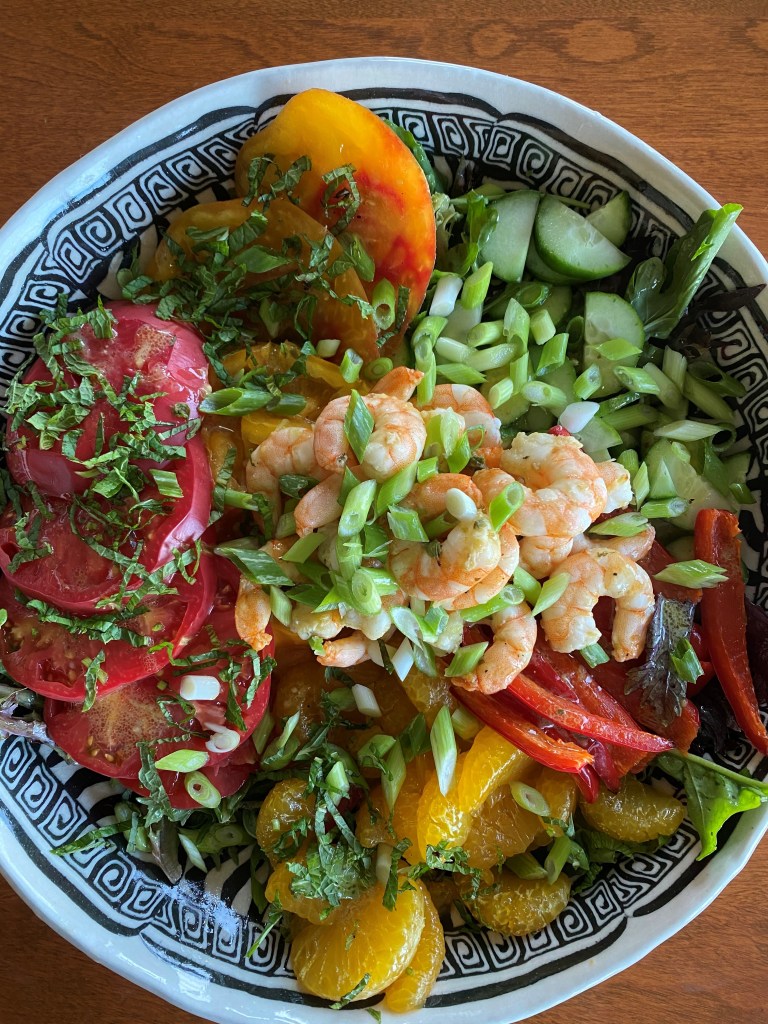
A summer mish-mash of heirloom tomatoes, canned mandarins, red peppers, cukes, steamed shrimp and basil
Dry Leaves for a Crisp Salad
Whether you wash your lettuce leaves or use pre-washed, thoroughly drying them will help make your salad restaurant-quality. I pile my washed greens into the center of a thin dish towel, fold the long edges over the leaves, gather the corners into my fist and walk outside.
Classic French Vinaigrette and variations tutorial
Here's where it gets weird. I stand in the grass swinging the dishtowel of lettuce around and around in huge arm circles like we did in grade-school calisthenics. The centrifugal force is enough to make and water fly out, but not harsh enough to maul the leaves. My neighbors think I'm a total nut. This is the price I pay for perfect salad.
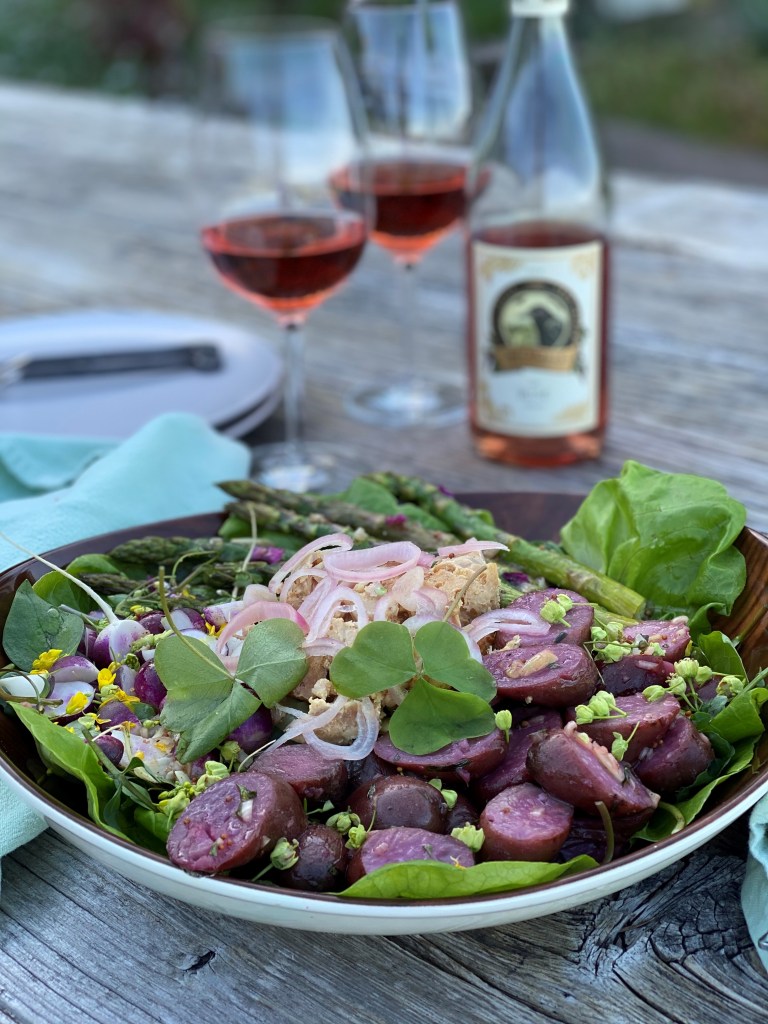
Spring greens with gently steamed baby purple potatoes and asparagus with a basic lemony vinaigrette
Dry leaves accept a light coating of vinaigrette, and the salad will go to the table with its crisp crunch that won't fade through the meal.
Dry lettuce makes an amazing difference. And, hey, you get in a little exercise.
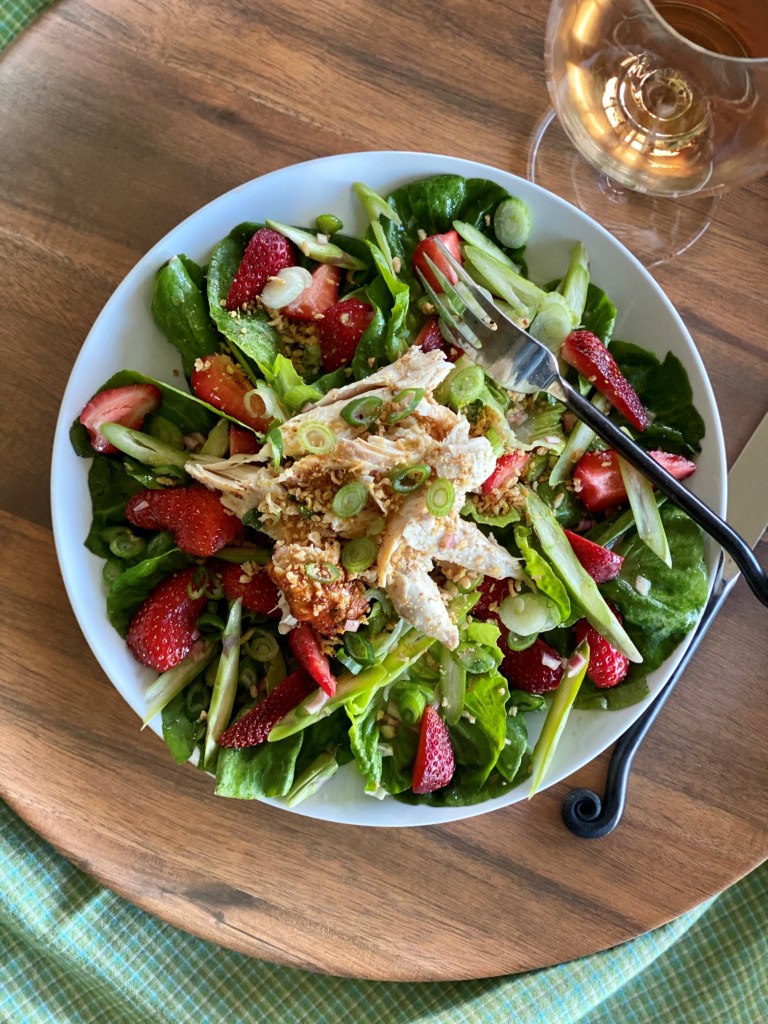
Little Gems lettuce with fresh strawberries, raw asparagus, and rotisserie chicken in a berry-vinegar vinaigrette
Dress and Toss For Success
Yes, your homemade vinaigrette makes an enormous difference, but the quantity you use is just as critical to a memorable salad.
With a great big bowl of lettuce-based salad and a nice homemade Classic French Vinaigrette, you likely need only one or two Tablespoons of dressing. This is true.
You won't believe it until you start tossing. And tossing, and tossing. Using two large spoons, gently turn your leaves over and over and over. In a minute, you'll see the dressing not dripping and puddling in the bowl-- it will be evenly clinging ever-so-gently on all the surfaces of the lettuce without bogging it down.
Lightly-dressed, your salad becomes a fresh and bouncy salad that is softly flavored with the lovely vinaigrette, as perfect salad was made to be.
A little bit of great vinaigrette, a lot of tossing. Try it!
Go Easy on Add-Ins
I love a salad that's loaded with vegetables, fruits, cheeses, nuts, croutons, and the works, but that can put a lot of pressure on your tender lettuce. There are a few ways you can remedy this.
One way is to simply go lighter with your added ingredients, as in the salad below.
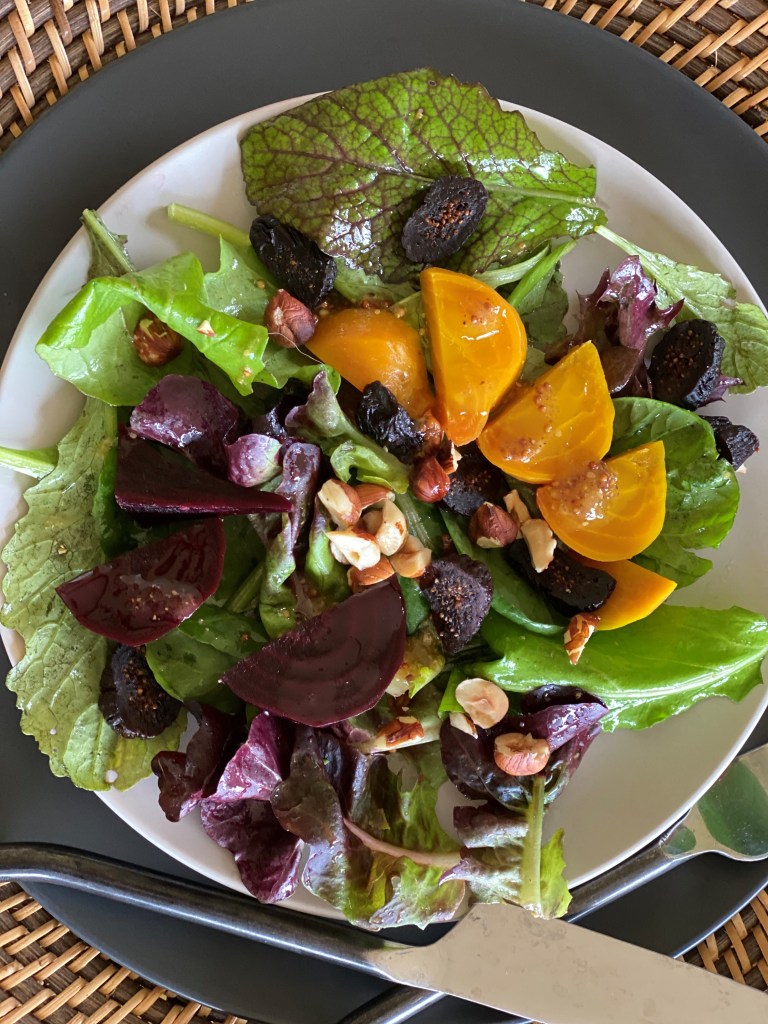
Mixed lettuces with golden and red beets, sliced dried figs, chopped hazelnuts, and Mustard Fig Vinaigrette
Secondly, if you plan to toss the salad before serving, put heavy add-ins in the bottom of your bowl, then top with the lettuces and dressing, tossing the lettuce without spooning down to the other ingredients. In the last toss or two, scoop down to bring the heavier ingredients up to the top, and serve with dispatch.
Thirdly, toss your lettuce with your fantastic homemade vinaigrette and arrange it on a platter. Now place your other vegetables and ingredients into the bowl, add a little dressing, and toss them separately before gently placing them on the lettuce. Once again, serve right away.
Lastly, my favorite way to keep heavy ingredients from collapsing the life out of the lettuce is especially nice if you need to make the salad a little ahead of serving. Toss the lettuce and dressing and place on a serving platter. Mound each separate ingredient on your cutting board and drizzle each one with a few drops of dressing and toss it with your hands before moving on the the next. Take each separate pile of goodies and make a little space between the leaves and place it there. Be an artist and arrange these colorful piles around the lettuce.
This last method is perfect for gatherings and parties. Create some gorgeous salad-as-a-meal platters that present beautifully, and either toss it together tableside, or allow your fellow diners to select and build their own plates from your creation.
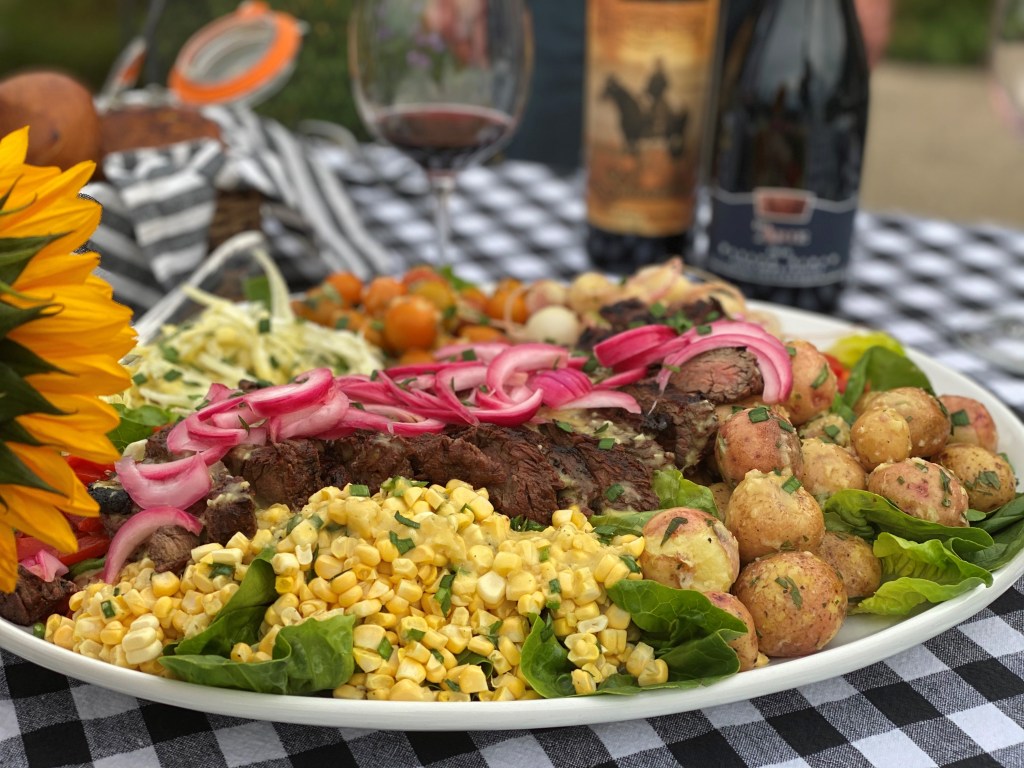
Another summer salad of steamed new potatoes, raw corn, cherry tomatoes, cukes, grilled steak and quick-pickled red onion with Balsamic Herb Vinaigrette
One Set of Ratios, Infinite Options
This no-measure recipe offers you a few measurements as guidance to get you started, but soon you'll just grab a spoon, a jar and a knife and whip dressings and marinades out like you're the garde-manger of your favorite French restaurant.
Classic French Vinaigrette and Infinite Variations
Use no-measure easy ratios and flavorful vinegars, oils, aromatics, herbs, sweeteners, and emulsifiers to create a world of your own customized vinaigrettes and marinades. Taking your salads from boring, limp, and soggy to exciting, crisp and refreshing couldn't be easier.
For each of the three variations and all of your own creations:
In the bottom of the jar, put all of the ingredients except the vinegar and olive oil. Be generous with the salt-- it's the only salt all your salad vegetables will get!
Eyeballing it, pour vinegar into the jar until is about half full.
Eyeballing it again, pour in about the same amount of the olive oil as vinegar and other ingredients until the jar is 1/2 full. Screw the lid on tightly (very important!) and shake like heck.
Viola! You've made a fabulous vinaigrette!
A word about proportions: We're working in equal proportions of vinegar + aromatics/sweeteners to olive oil. To make less vinaigrette, fill the jar with fewer aromatic ingredients and vinegar. Then just match the height of olive oil in the jar to the height of the things in the bottom of the jar. (If your aromatics and vinegar come ¼ of the way up the jar, add about that same amount of oil to make the jar only half full. Sometimes I only want a tiny bit of vinaigrette for just one salad, and I may only put ¼" of flavorful ingredients and vinegar in the bottom of the jar, topped off with ¼" of olive oil. It's all a matter of ratios, not a matter of strict measurements!
Notes
Make it Your Own:Aromatics, singular or in combination:
any mustard, except yellow
any chopped fresh or dried herbs
smashed strawberries, blackberries, or blueberries
garlic
shallot
lemongrass
green onion
Sweeteners:
honey
jam or jelly
date syrup
rice syrup
maple syrup
a touch of sugar
Vinegars/acid base:
any kind of citrus juice
almost any kind of vinegar
red wine, white wine, sherry or champagne
apple cider
fruit and berry varieties
coconut
rice and rice wine
balsamic and white balsamic
Oils
high quality olive oil
neutral-flavored vegetable or canola oil
a few drops of sesame oil in addition to one of the above
Follow Me
Welcome!
You’re in the right place! I’m Pam Spettel, home cooking expert and guide, and I’m here to show you how to break up with cooking and hospitality anxiety, learn how to use recipes as guides rather than strict rules, and let your cooking intuition and confidence soar.
Superpower: Dreaming up recipes that work, serving them to my friends and family, and writing little stories about how cooking them well is the same as loving well.
Inspiration: Ingredients! The fresh, colorful, fragrant, local, seasonal ingredients found in the Pacific Northwest are my creative medium.
Heroes: Local food and wine producers– the people who keep me, my family, and our community nourished and happy.
We use cookies on our website to give you the most relevant experience by remembering your preferences and repeat visits. By clicking “Accept”, you consent to the use of ALL the cookies.
This website uses cookies to improve your experience while you navigate through the website. Out of these, the cookies that are categorized as necessary are stored on your browser as they are essential for the working of basic functionalities of the website. We also use third-party cookies that help us analyze and understand how you use this website. These cookies will be stored in your browser only with your consent. You also have the option to opt-out of these cookies. But opting out of some of these cookies may affect your browsing experience.
Necessary cookies are absolutely essential for the website to function properly. These cookies ensure basic functionalities and security features of the website, anonymously.
Cookie
Duration
Description
cookielawinfo-checkbox-analytics
11 months
This cookie is set by GDPR Cookie Consent plugin. The cookie is used to store the user consent for the cookies in the category "Analytics".
cookielawinfo-checkbox-functional
11 months
The cookie is set by GDPR cookie consent to record the user consent for the cookies in the category "Functional".
cookielawinfo-checkbox-necessary
11 months
This cookie is set by GDPR Cookie Consent plugin. The cookies is used to store the user consent for the cookies in the category "Necessary".
cookielawinfo-checkbox-others
11 months
This cookie is set by GDPR Cookie Consent plugin. The cookie is used to store the user consent for the cookies in the category "Other.
cookielawinfo-checkbox-performance
11 months
This cookie is set by GDPR Cookie Consent plugin. The cookie is used to store the user consent for the cookies in the category "Performance".
viewed_cookie_policy
11 months
The cookie is set by the GDPR Cookie Consent plugin and is used to store whether or not user has consented to the use of cookies. It does not store any personal data.
Functional cookies help to perform certain functionalities like sharing the content of the website on social media platforms, collect feedbacks, and other third-party features.
Performance cookies are used to understand and analyze the key performance indexes of the website which helps in delivering a better user experience for the visitors.
Analytical cookies are used to understand how visitors interact with the website. These cookies help provide information on metrics the number of visitors, bounce rate, traffic source, etc.
Advertisement cookies are used to provide visitors with relevant ads and marketing campaigns. These cookies track visitors across websites and collect information to provide customized ads.