101-Mile Kitchen logo- green bar
A platter of roasted chicken and autumn bread salad.

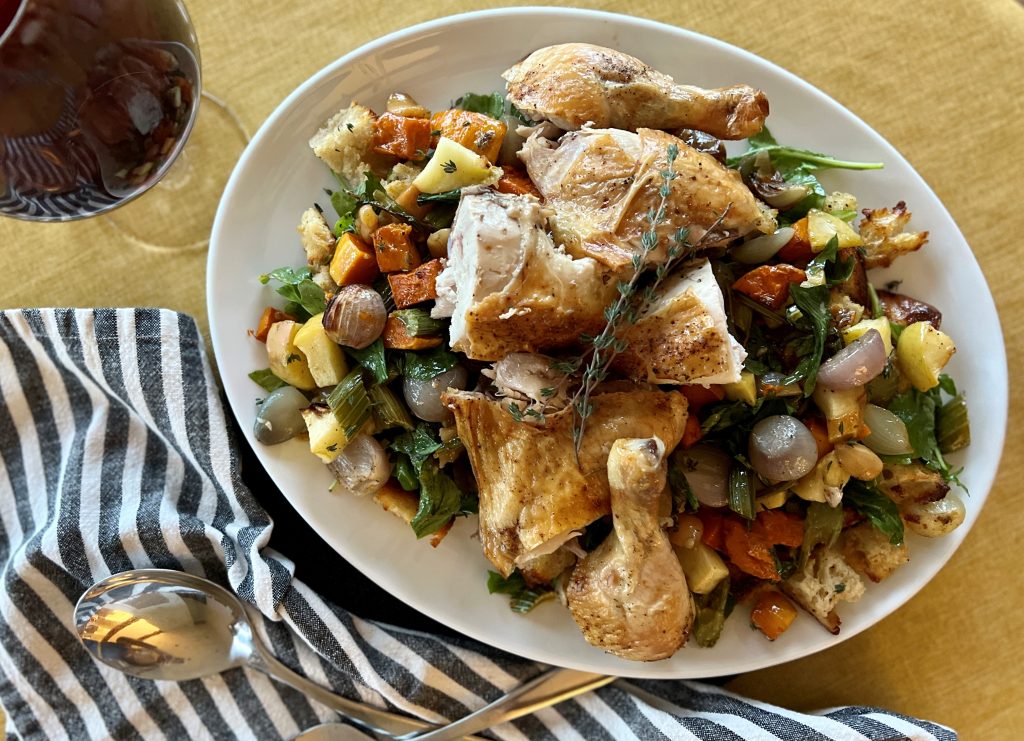
Here's a recipe I'm quite proud of: Roasted Chicken + Autumn Bread Salad. A quickly-roasted chicken delivers its juices to butternut squash, whole sweet shallots, and tart apples roasting beside it on a sheet pan. Peppery arugula in a light dressing mix with vinegar-soaked golden raisins and crispy-chewy toasted bread chunks make a lovely autumn panzanella-style salad that make a bed for the chicken and deeply flavored vegetables. It's all you need on one platter. I can't think of a better Saturday night or Sunday afternoon cool-weather dinner.

This roasted chicken and autumn bread salad borrows inspiration from the late Judy Rodgers, generous traditionalist and exemplary restaurateur. And golly, is it good.

a platter of rosted chicken and autumn bread salad with a bottle of wine.

The Inspiration for Roasted Chicken + Autumn Bread Salad

First let me tell you about the chicken Ms. Rodgers made famous at the Zuni Cafe in San Francisco. At Zuni, whole, small chickens are roasted in a wood-fired brick oven. The juicy, crackly-skinned chicken is served with a warm bread salad. At Zuni, chunks of hand-torn toasted bread, scallions, garlic, bitter greens, dried currants, and pine nuts are tossed in a light vinaigrette. When you experience this dish, it becomes the gold standard for all roasted chicken. And the craveable bread salad is just as good.

Until now, my go-to method of roasting chicken has been the Zuni Cafe way. Ms. Rodger's way. I pat the chicken dry and give it a dry rub of salt and pepper. Then, I loosely wrap it and put in the fridge for two days before roasting. The chicken skin dries in the refrigerated air, setting it up for crispness. Then on roasting day I set into a hot skillet and rush into a very hot oven. A series of flips mid-roast, and viola! The most crispy-skinned and juicy chicken ever. Put this roasted chicken together with a seasonal bread salad-- oh my!

Sometimes I haven't planned this out well, or don't have the time or energy for these steps but still would love a roasted chicken. Hmmm. What could I do about that?

Ditching the two-day dry brine period and shortening the overall cooking time with our unique preparation method is a great advantage for the home cook. And it still turns out a chicken that is almost as wonderful as the Zuni style.

How Can I Roast a Chicken Without Drying Out the White Meat?

It's easy to end up with dry white meat when roasting a chicken, and yet so easy to prevent it! By separating the breast and wing section from the leg and thigh section, we give the legs and thighs a 15-minute head start in the oven, sparing the white meat from overcooking. I call this a major kitchen coup!

The best tool for working with a whole chicken is kitchen shears. Get yourself a good pair. Poor quality shears need to be replaced frequently, so make this investment up front when you can. This is the pair I recommend for its value. You can spend more, but these are very good and will last.

With this method we use our kitchen shears to easily separate the breast and wing section from the rest of the bird. We start by separating the breast from the legs in two quick "vee" cuts. Then we flip the breast section upwards like a page in a legal pad. From there, it's very simple to separate the front from the back of the bird at the shoulders.

Preparing the chicken for the oven.

Match Your Roasted Chicken and Bread Salad to the Season

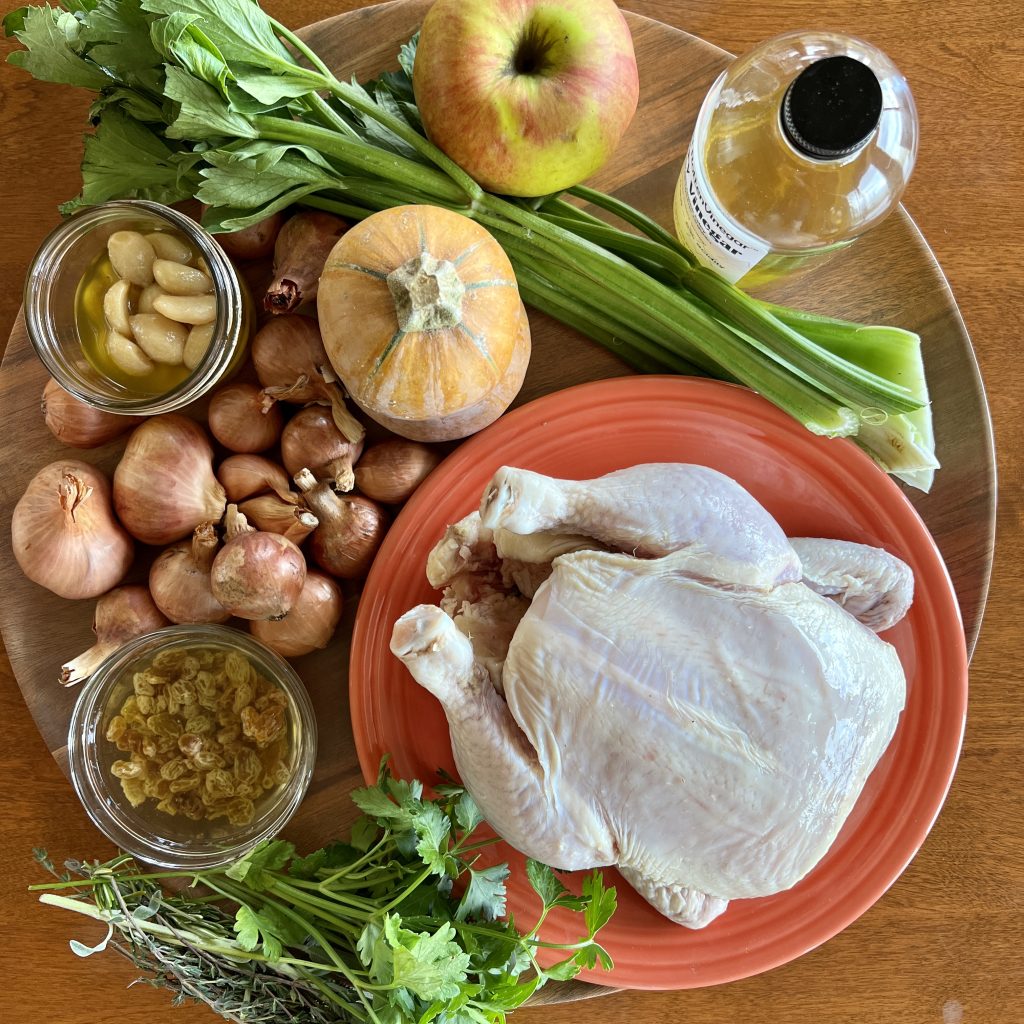
Roasted winter squash, celery, apple, golden raisins, tons of shallot, and arugula make this a fall-into-winter salad. In the spring and summer, swap those things out for fresh peas or sauteed zucchini, blistered cherry tomatoes, lots of fresh herbs, scallions, and torn mustard greens for a lighter taste. Use what is in season, and the rest remains the same. No matter what time of year, be sure to use garlic confit if you can. It's is always in season!

The ingredients necessary tomake roasted chicken and autumn bread salad.
Ingredients. Not pictured, bread and arugula.

Have you joined the 101-Mile Kitchen community? If not, we'd love to have you. You can take care of that right here, and when you do I'll send you my Top Five Tips and Recipes for Cool-Weather Cooking downloadable as a thank you!

This post contains affiliate links. When you use these links to buy something I may earn a commission at no cost to you. Product affiliation helps me to keep this site ad-free while providing you with the content you enjoy. I only promote items that I use, like, and trust, or would invest in myself.

A platter of roasted chicken and autumn bread salad.

Roasted Chicken + Autumn Bread Salad

Course: Main Dish
Cuisine: Italian, Pacific Northwest
Season: Bounty (August - October), Mist (November - March)
Dietary: Dairy-Free, Egg-Free, Nut-Free
Preparation: Roasting, Sheet Pan
Prep Time: 30 minutes
Cook Time: 1 minute
Author: Pam Spettel
Chicken roasted in a way to ensure moist white meat, along with a luscious seasonal bread salad makes an autumnal one-platter meal.
Print Recipe

Ingredients

  • 1 3½-4½ lb. whole fresh chicken
  • fresh thyme, sage, and rosemary
  • 1 lb. winter squash, peeled and cut into 1" cubes like butternut, honeynut, red kuri, kabocha, or pumpkin
  • 1 lb. shallots, peeled, large ones cut in half
  • 4 stalks celery, scrubbed and sliced into ¾" pieces remove and reserve and leafy parts
  • 12 ounces firm baking apple, cut into 1" cubes
  • ½ cup garlic confit, or ½ cup olive oil and 12 cloves garlic, peeled
  • 3 tablespoons golden raisins
  • ½ cup celery, white wine, or sherry vinegar I use Spoiled Rotten Vinegar brand celery vinegar

Instructions

  • Preheat the oven to 425°. Place one oven rack in the upper third of the oven, and one in the lower third. Wipe the chicken dry. Using kitchen shears, and the chicken breast-side up and legs pointed to you, cut along the bottom edges of the breast upwards toward the wing on each side, following the natural "vee" shape. Fold the breast upward (like flipping a page of a legal pad). Press down to flatten the chicken. Use the shears to separate the breast/wing section from the backbone and neck.
  • Sprinkle both bird sections liberally with salt and pepper. Place the leg/thigh section on the baking sheet and put several sprigs of thyme, a sprig of sage, and a sprig of rosemary under it. Place the baking sheet on the lower oven rack for 15 minutes.
  • Prep the vegetables and apple while the legs/thighs are roasting. Place them in a bowl, salt and pepper to taste, and add the garlic confit (or olive oil and garlic cloves) and toss well to coat the vegetables in oil and set it aside.
  • After the first 15 minute roast, place the chicken breast/wing section on the baking sheet with herbs underneath and roast for another 15 minutes. While this is happening, place the golden raisins in a small dish and cover them with the vinegar. Set aside.
  • After the second 15 minute roast, place the prepared vegetable mixture all around the chicken on the baking sheet, distributing them evenly. Place the baking sheet back in the oven for another 15 minutes.
  • During this 15 minute roast, tear the bread into uneven bite-sized chunks onto a small baking sheet. Sprinkle with salt and pepper, and drizzle with olive oil. Toss the bread pieces well. Place the bread pieces in the oven on the upper rack for 6-8 minutes. Remove from the oven and toss, then if necessary, return to the oven for another few minutes. You are looking for a mix of crunch and tender bits, some browning and crispy bits, and some that will be softer. This step is very dependent on your own oven, so please watch carefully to avoid burning!
  • When the chicken reaches 160° at the thickest part of the thigh and breast, it is done. Remove from the oven to rest before cutting it into serving pieces.
  • In a large bowl (I use the same bowl that the vegetables were in) place the toasted bread chunks, arugula, another swirl of olive oil, and the golden raisins and their vinegar. Toss well and spread the bread salad on a platter. Spoon the roasted vegetables and all the pan juices onto the bread salad.
  • Use the kitchen shears to separate the chicken into 2 legs, two thighs, two wings, and two breasts. Use a heavy knife to cut the breast pieces in half, resulting in 4 chicken breast pieces. Arrange the ckien over the vegetables and serve.
Platter of Roasted fig-glazed winter squash

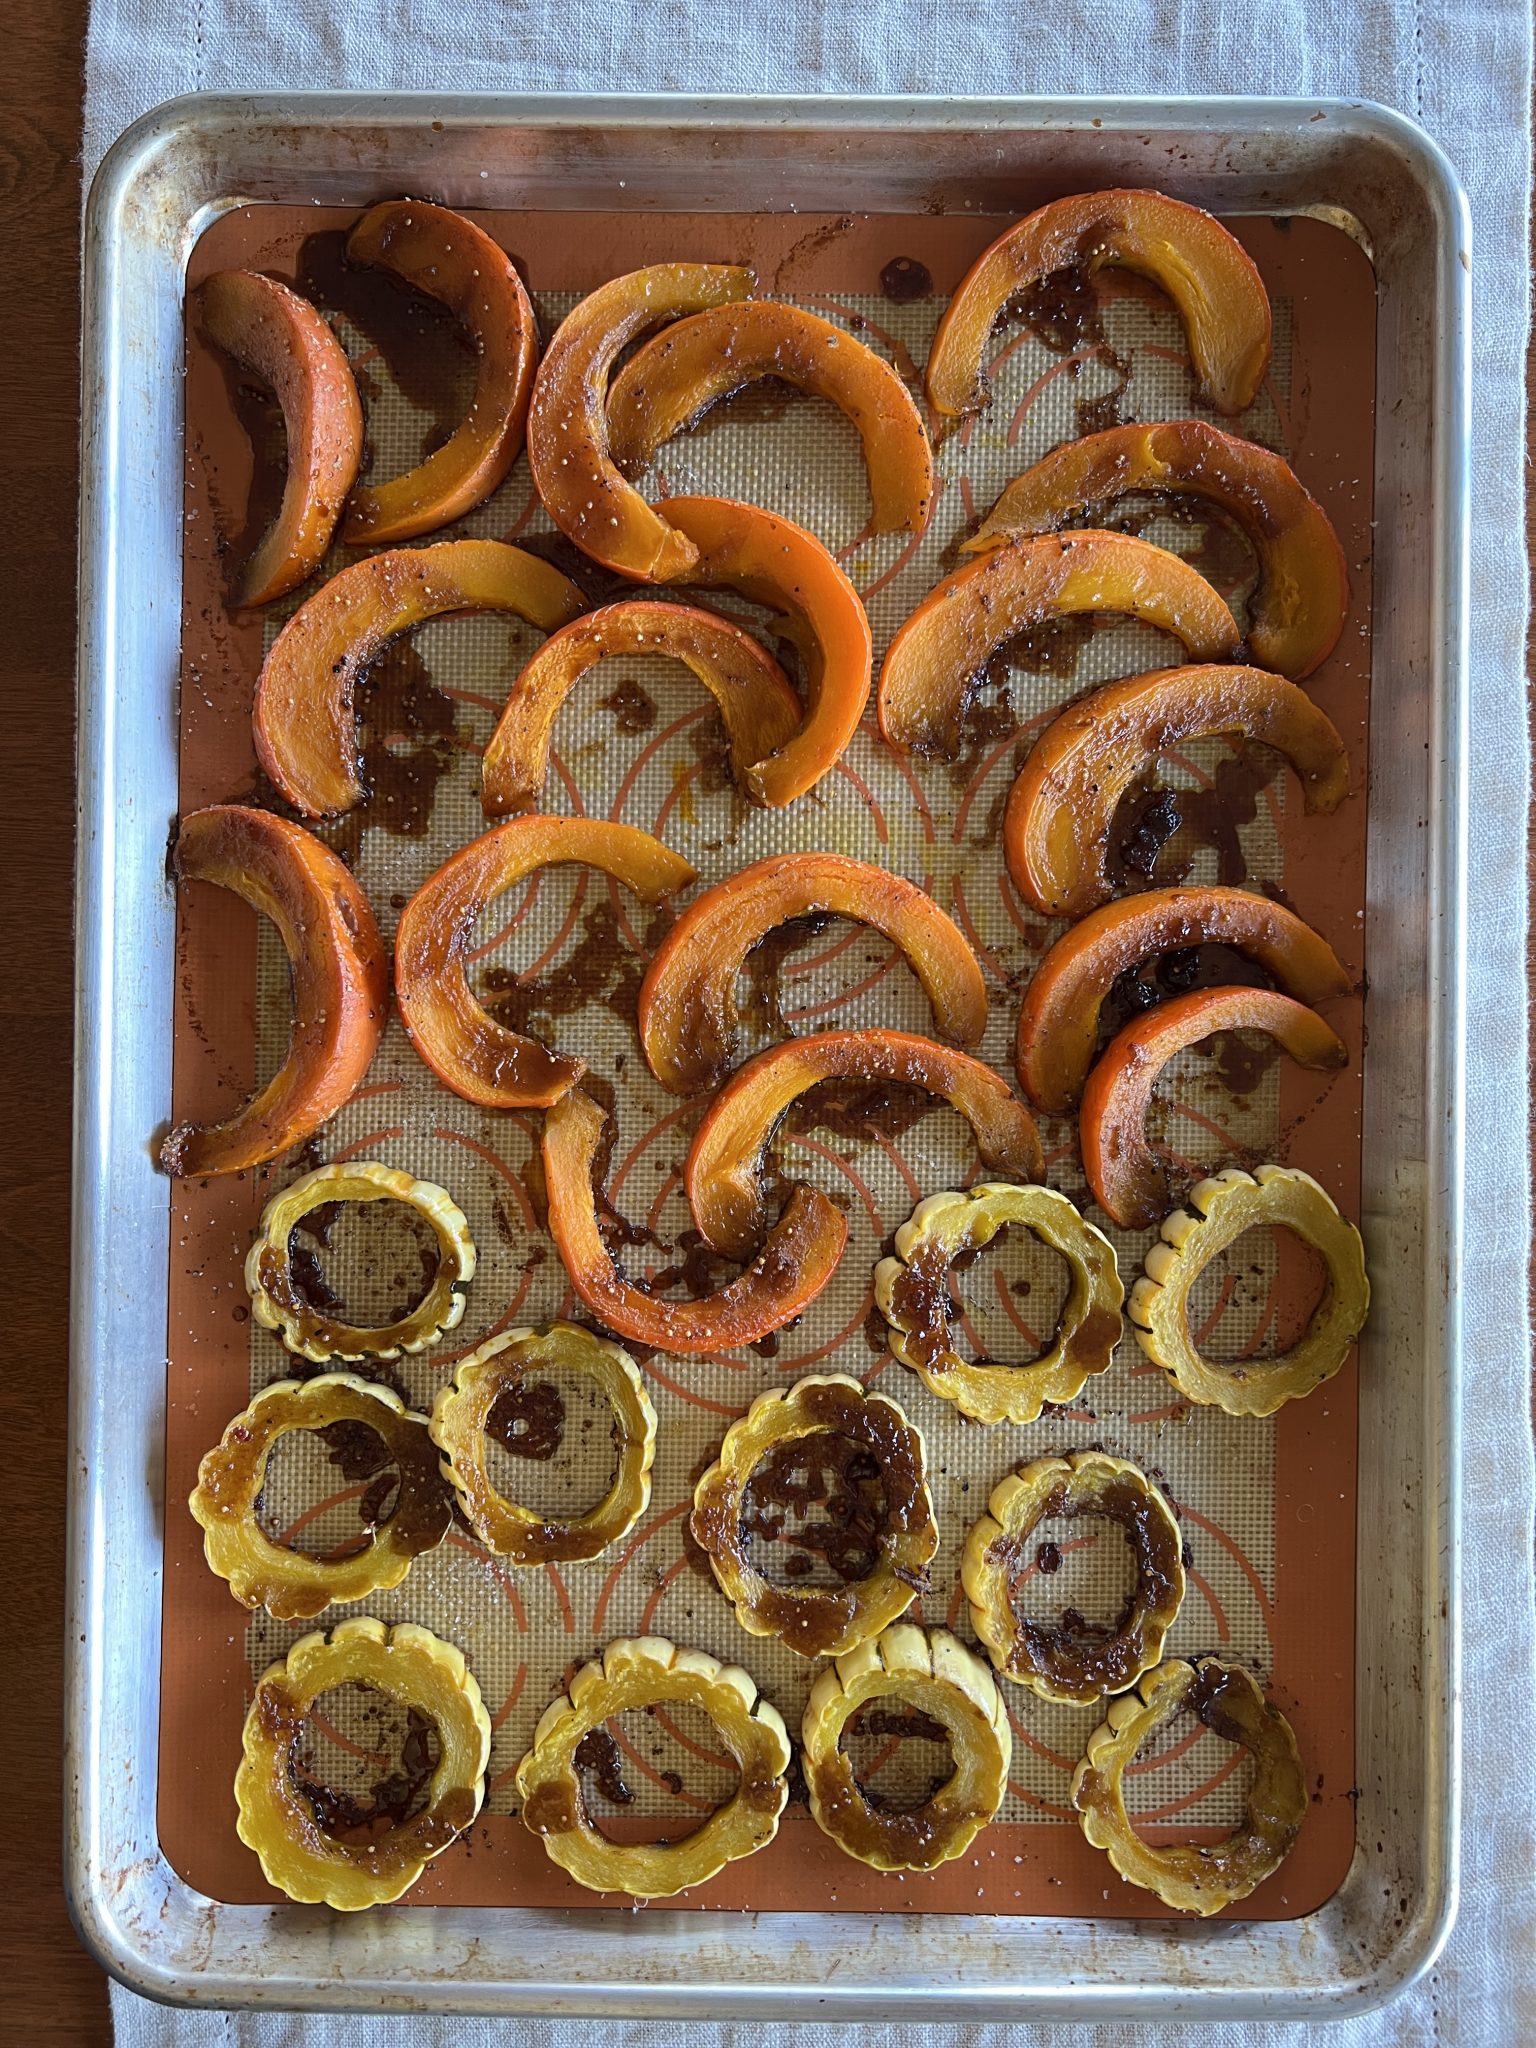
Is it possible to be glum in the presence of orange things, like this autumn sunset-hued roasted fig-glazed winter squash? As autumn comes knocking, this three-ingredient wonder is a cheery and scrumptious welcome to the cool-weather cooking season.

Like an oven being lit, my imaginative cooking fires are lit by trying new ingredients. This little recipe started when I was recently introduced to blackstrap vinegar. At our farmers market, I met Klee and Cherie Wiles-Pearson of Spoiled Rotten Vinegar who make, among other vinegar, the award-winning blackstrap vinegar used in this dish. They appropriately call it "One American's retort to Italy's aged Balsamic." Blackstrap molasses makes it full-bodied, rich, and sweet, and it works in most applications where one would normally reach for Balsamic. One sip of this living food and I am forever hooked.

hand holding bottle of vinegar with horse label

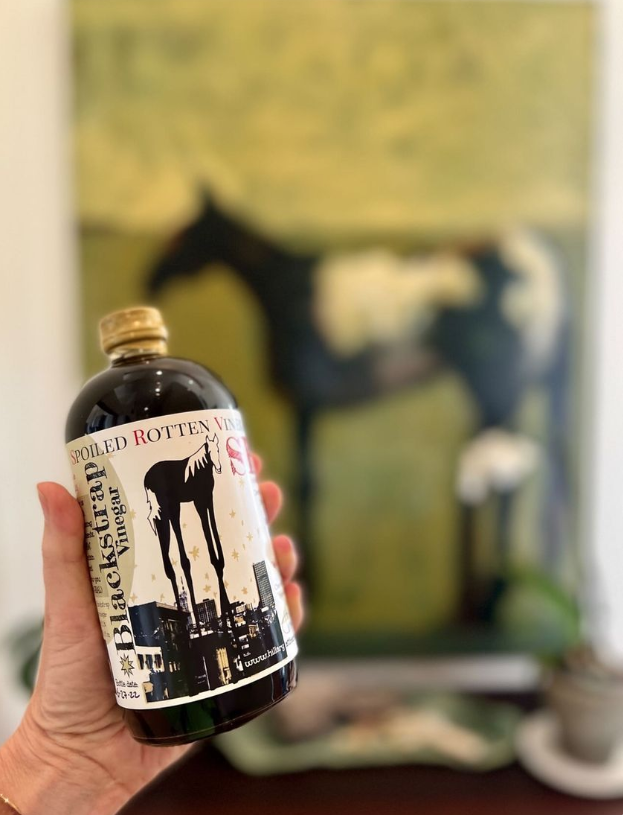
Klee ferments and bottles Spoiled Rotten Vinegar's distinctive vinegars. Cherie designs the beautiful, information-filled labels that highlight the work of local artists. The charming Spoiled Rotten Vinegar bottles are not made to be hidden behind cupboard doors.

Ways to Use Your Fig-Glazed Squash

Besides straight-up out of the oven, here are other some ways to put this fig-glazed winter squash to work from now until spring.

  • Lay the roasted rings over a bed of cooked barley, farro, wild rice, quinoa, etc. that has been mixed with olive-oil-cooked onion and perhaps chopped parsley. Drizzle the whole thing with the glaze.
  • For a salad, put the roasted squash on a bed of slivered kale that has been tossed in a spoonful of the glaze and sprinkle on chopped toasted hazelnuts.
  • Tuck halved or quartered figs in and around the squash for a lovely fall touch.
  • Utilize the heat of your oven and make fig-glazed squash alongside a roasted chicken, turkey breast, pork loin, or pork tenderloin. They are delicious together, and energy efficient this way!
  • Try the glazed squash in a rice bowl, along with some browned tofu or leftover protein.
plate of roasted fig-glazed winter squash

Tips for Preparing Winter Squashes

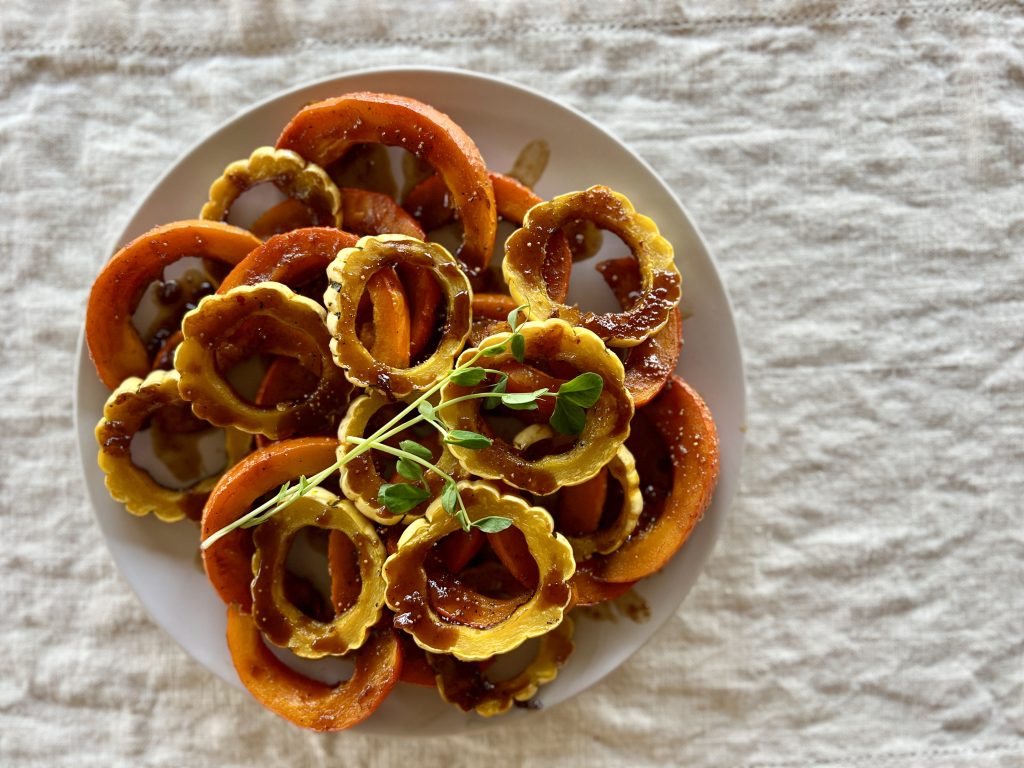
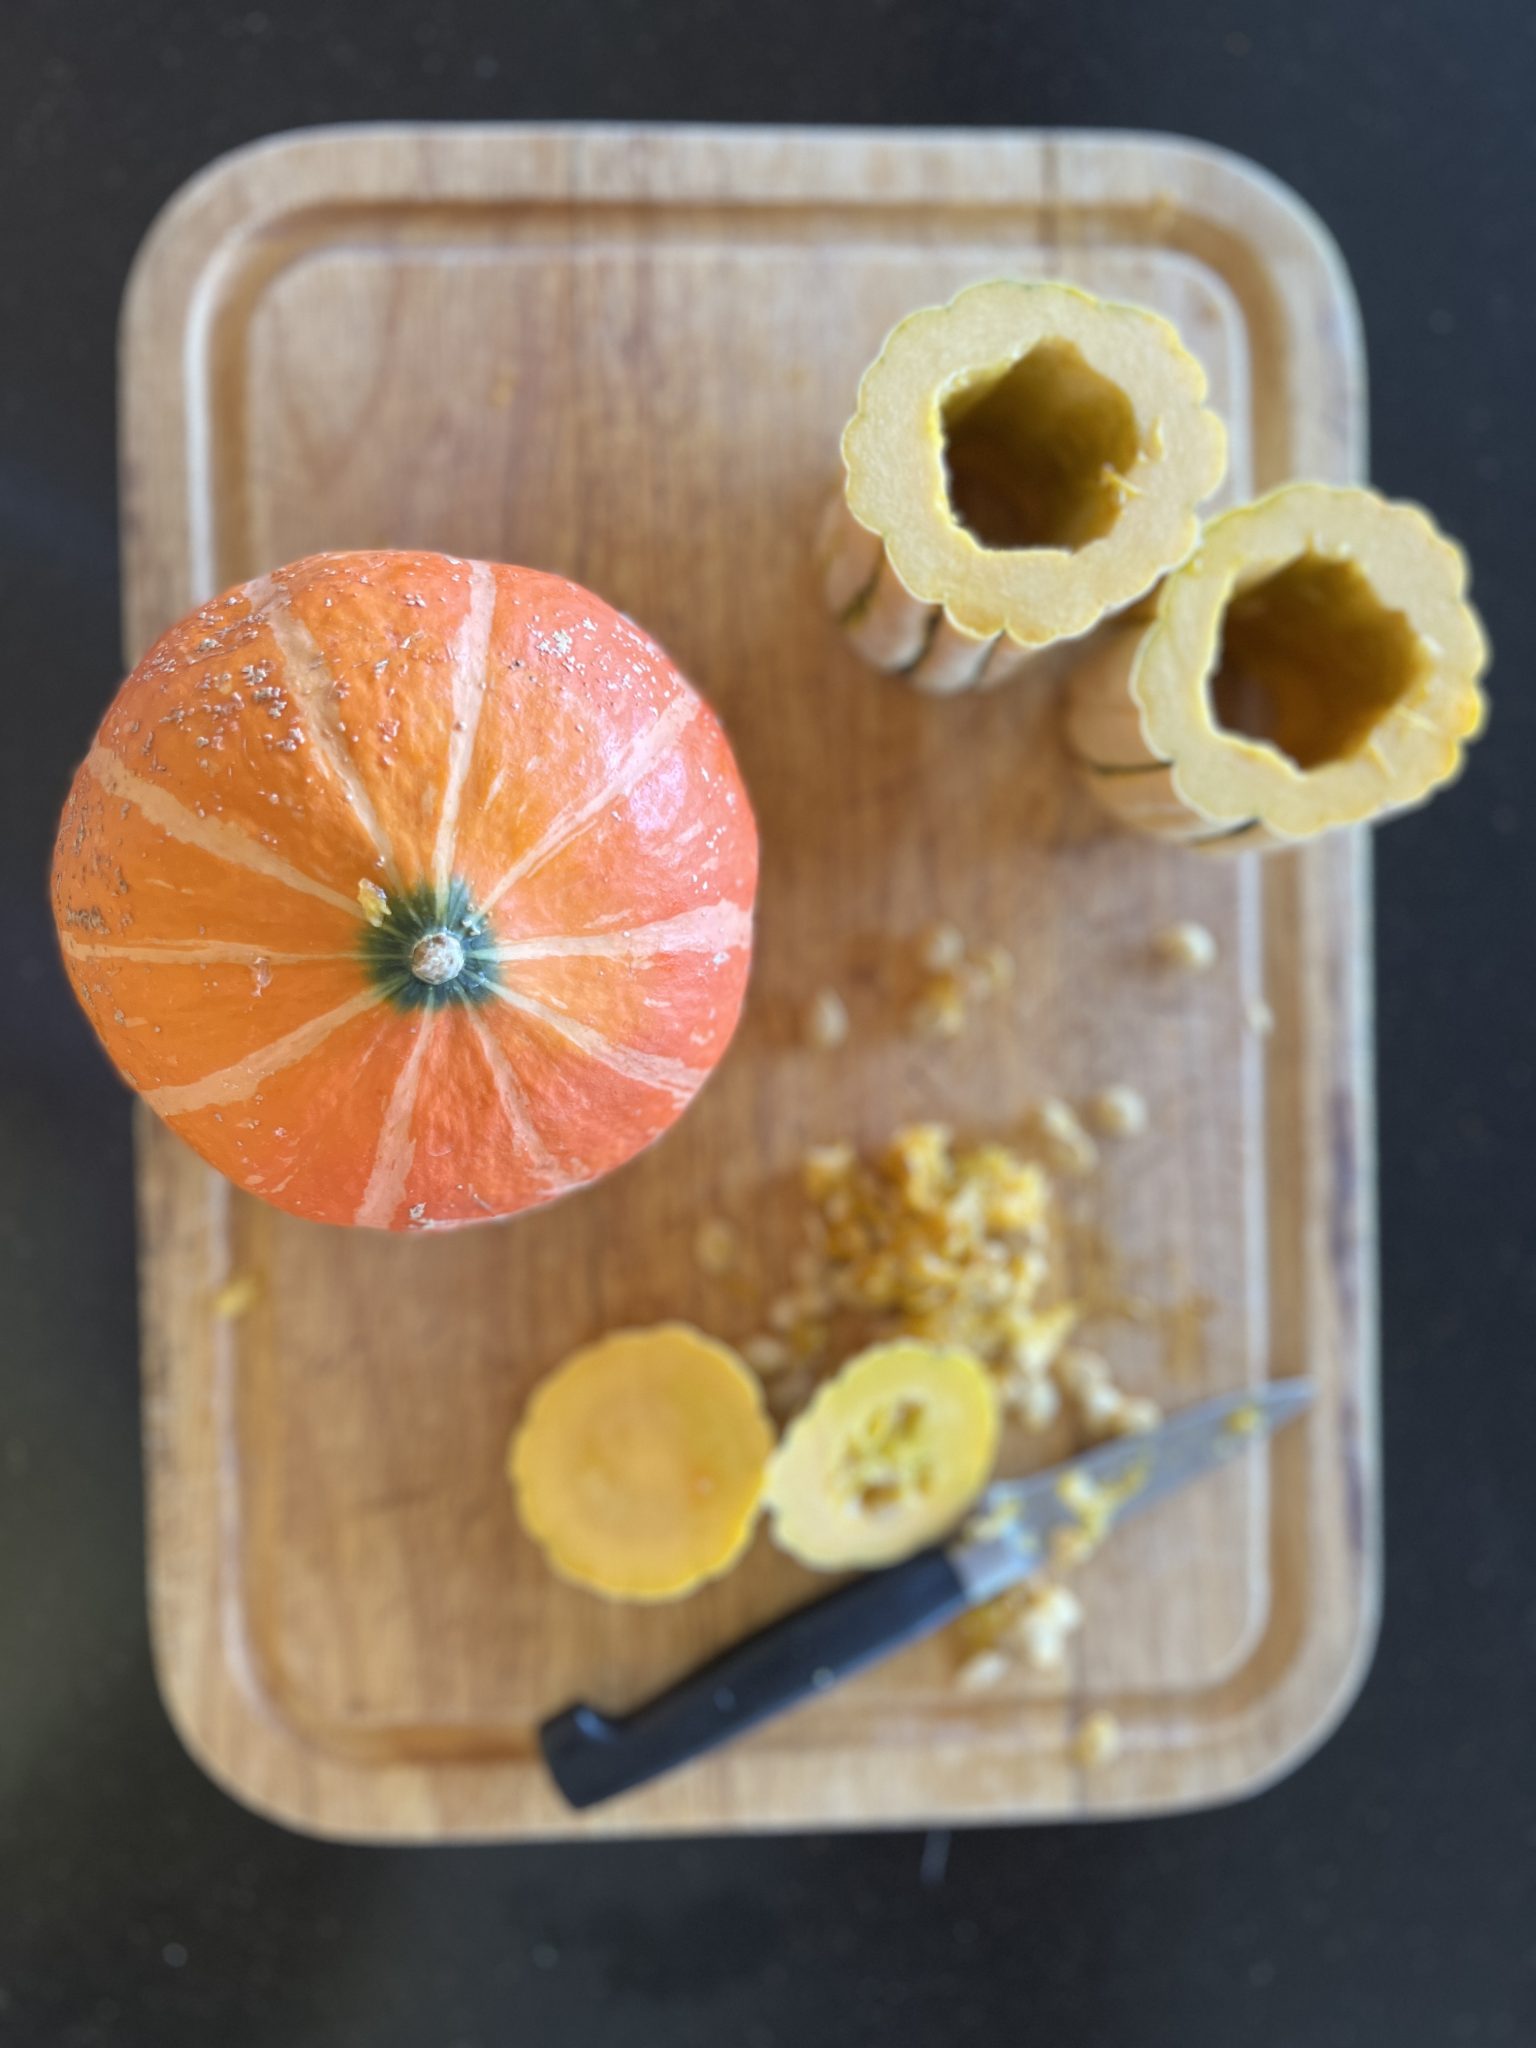
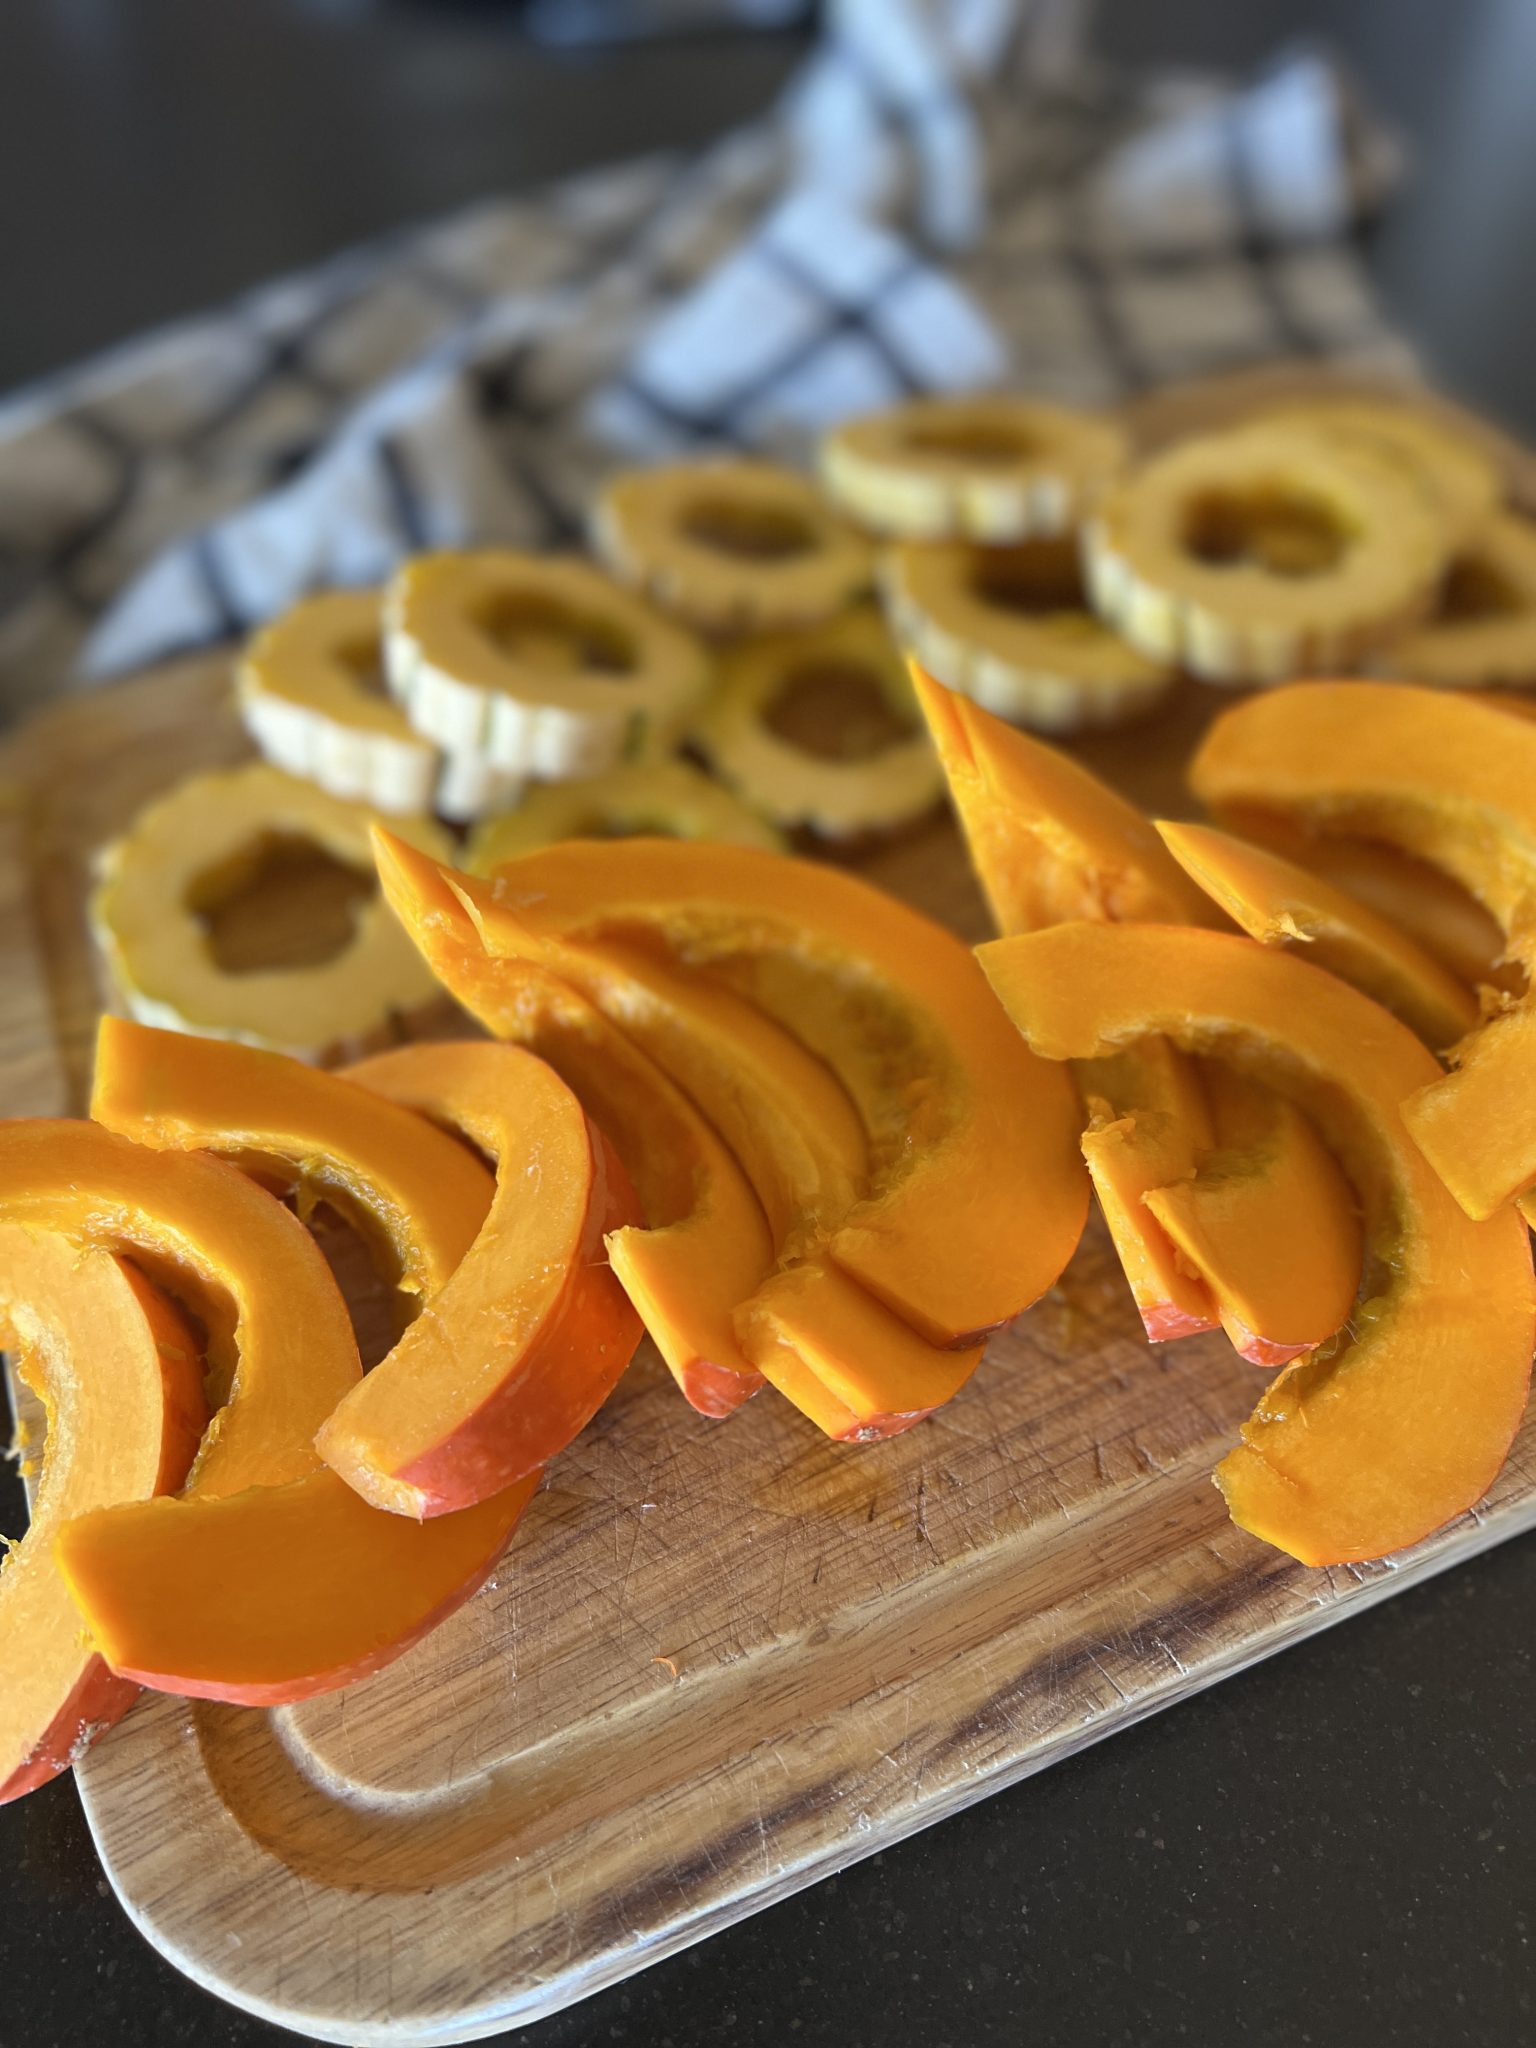
What variety of winter squash wouldn't be lovely in this recipe? I am wildly fond of the Red Kuri variety, not only because of its red-orange luminosity, but also because it cooks to a silky texture without falling apart. Kabocha squash is similar. And don't forget Delicata, which offers a yellow contrast and is a great little squash, too. Except for butternut, none of the varieties listed in the recipe below require peeling. Their skins soften equally to the flesh when roasted.

Scrub winter squash and then microwave it for 2 minutes or so on high power before cutting into it. This allows the knife to slide through the squash more easily. I think it makes scooping the seeds out a little easier, too.

Making the Fig-Glazed Winter Squash

Above all, don't give up on this recipe if you can't find blackstrap vinegar. Dark Balsamic is a worthy substitute.

Where are fig jams, spreads, or butters found? Many grocery stores that have a gourmet-style cheese section carry fig jam, spread, or butter. Ask there. Trader Joe's fig butter is good and is generally the most affordable. I keep a jar or two of it around for cheese boards and cheesy paninis. You may also find it in the jams and jellies section of your grocery. This is the fig spread I'm using at the moment, and it is excellent.

The density of the glaze is dependant on the particular fig jam, spread, or butter you use. If your glaze is so thick that it doesn't drizzle off your mixing spoon, thin it with a tablespoon or so of water. You want it just loose enough to drizzle in a thin ribbon. If you happen to thin it too much, just reduce the fig/vinegar mixture back down in a small saucepan over medium heat for a few minutes.

Save any glaze leftovers and use it in a salad dressing. With a little olive oil added, it is terrific on a leafy salad with apples, chopped dried figs, and some toasted nuts.

Store leftover fig-glazed squash tightly covered in the fridge. Then rewarm it gently in a microwave oven or a toaster oven.

Another Great Recipe Using Winter Squash

Warm Spinach Salad +Pancetta Dressing; recipe here.

This post contains affiliate links, including but not limited to Amazon. As an Amazon Associate I earn from qualifying purchases. When you use these links to buy something I may earn a commission at no cost to you. Product affiliation helps me to keep this site ad-free while providing you with the content you enjoy. I only promote items that I use, like, and trust, or would invest in myself.

platter of roasted fig-glazed winter squash

Roasted Fig-Glazed Winter Squash

Course: Salad, Side Dish
Season: Bounty (August - October), Mist (November - March)
Dietary: Dairy-Free, Gluten-Free, Nut-Free, Vegan
Preparation: Roasting
Prep Time: 10 minutes
Cook Time: 30 minutes
Total Time: 40 minutes
Servings: 4
Author: Pam Spettel
Roasted winter squashes get the royal treatment with a 2-ingredient tangy figgy glaze. Serve warm as a veggie side, or room temp as a winter salad.
Print Recipe

Ingredients

  • 2 pounds winter squash, one variety, or a colorful mix red kuri, delicata, acorn, butternut, kabocha, Hubbard, etc. (this was one medium delicata and one small red kuri)
  • olive oil, a drizzle
  • 3 tablespoons fig jam or spread, prepared
  • 3 tablespoons blackstrap vinegar or dark balsamic vinegar
  • 1 teaspoon kosher salt
  • ¼-½ teaspoon freshly ground black pepper

Instructions

  • Preheat the oven to 400° convection roast. Scrub the squash, cut them in half, and remove the seeds. Slice the squash into ½" slices. In the case of Butternut squash, slice the sold neck pieces in half. Lay the squash slices on a silicone mat-lined or parchment-lined baking sheet. Drizzle about 1 tablespoon olive oil over the squash, and lightly sprinkle with salt and pepper. Roast for 10 minutes.
  • While the squash is beginning to roast, mix the fig jam, blackstrap or balsamic vinegar, salt and pepper in a small bowl. Add up to 1 tablespoon of water to the mix to make it thin enough to drip from the spoon.
  • After the squash has roasted for ten minutes, bring it out of the oven and flip each piece over. Drizzle the slices with about half of the fig glaze mixture. Reduce the oven temperature to 375°, and roast for another 10-12 minutes, until the squash is browned in spots, fork-tender and somewhat translucent in color, and the glaze has thickened. Watch this closely toward the end so the glaze doesn't burn.
  • Arrange the squash rings and/or slices on a serving platter. Drizzle a few more spoonsful of the reserved glaze over the top, and serve. A green garnish (like parsley or microgreens) makes the colors really pop! Leftovers store nicely in a covered container in the refrigerator.
jar of roasted vegetable stock

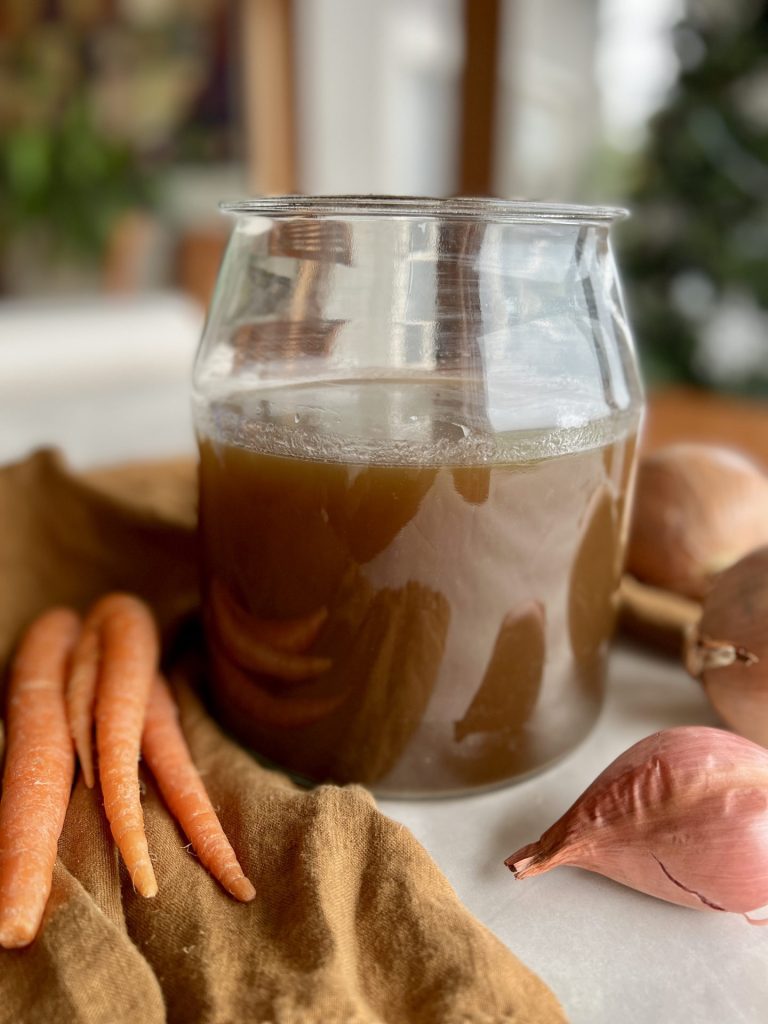
One of the graces of home cooking is that there are no paying customers demanding a dish to be exactly the same visit after visit. Each time you make roasted vegetable stock you use any variety of vegetables, bones, meats, herbs, and spices you happen to have. Each time the stock will have a subtly unique flavor. This may not work well in a restaurant, but is terrific at home.

This post is dedicated to my 1970's junior high school home economics teacher, Mrs. Waetje, who taught that reducing waste is a tenet of home economics-- a wise use of family finances. It is a great feeling to rummage through the fridge for vegetables that may otherwise go to waste and turn them into liquid gold. Thank you, Mrs. Waetje, and if you are still out there, I was paying attention despite my wiggles and perpetual chatter.

Wake up Your Cooking with Aromatic and Delectable Stock

Your roasted vegetable stock will add layers and layers of flavor to the soups and stews you make-- that's a given. Use your liquid gold to make risotto, to cook rice and grains like barley, farro, and buckwheat groats. Use it as a medium in which to simmer your dried beans, and as a base for meaty braises. A ladleful added to just about any ragu or stew will deepen its flavor. And one of my favorite things is to cradle a hot mug of broth first thing in the morning as a gentle winter wake up tonic.

The Difference Between Unroasted and Roasted Vegetable Stock

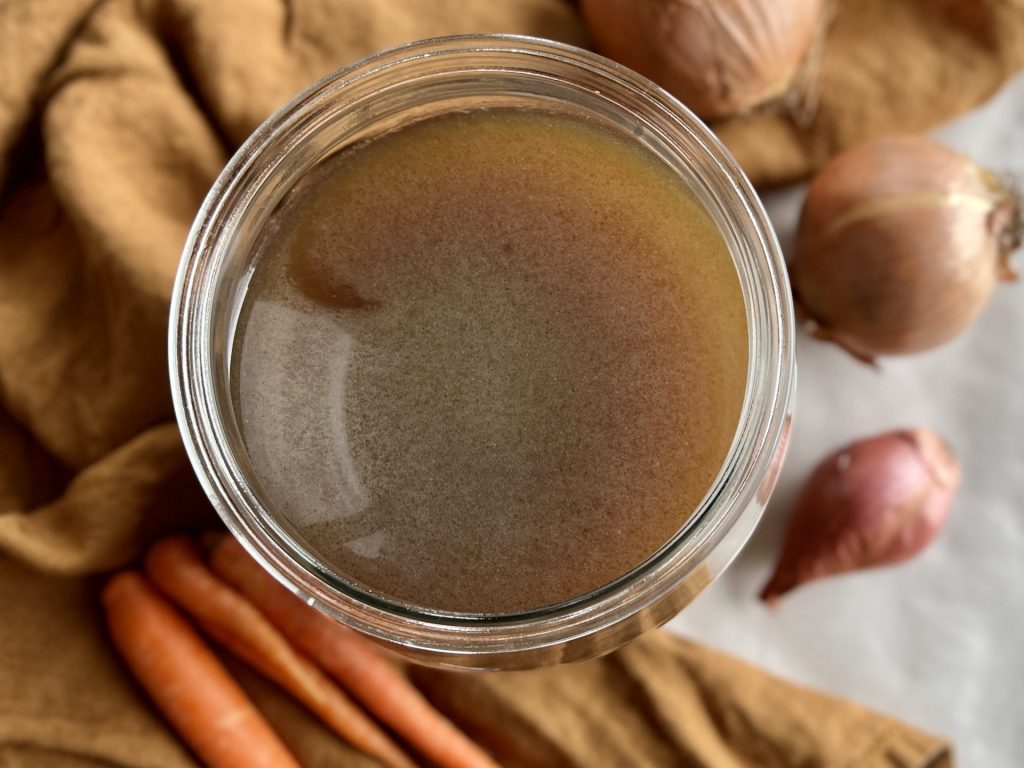
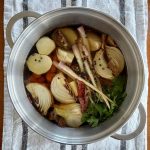
Roasting the vegetables before the simmer produces a deep, richly flavored stock perfect for supporting heartier cool-weather ingredients and recipes. Save the light golden unroasted vegetable stocks for spring and summer cooking. To make a typical light golden broth, simply do not roast the vegetables first, and omit the mushrooms. Follow the remaining directions as they are written.

overhead picture of a jar of roasted vegetable stock.

The Difference Between Stock and Broth

There seems to be a different answer to this question for every person who asks it. Some say that to be called stock it needs to be made with bones, or that broth is something you sip and stock is something you cook with. Another pundit suggests broth is lighter and more flavorful, while stock is thicker. That is questionable, in my opinion, as light broths can be rather wan and flavorless, and thicker stocks can be full of complex flavor.

So, potayto, potahto. Make some, enjoy it, and call it whatever you want. To me, spring and summer cooking seems to lend itself to light broths, autumn and winter to rich, brown stocks. The cooking community seems to agree that the terms are interchangeable. Whatever rolls out of my mouth is the term I'll use!

Vegetable Stock Do's and Don'ts

The very thrifty among us (like Mrs. Waetje, I'm sure) keep a zip-bag in the freezer and stuff clean, vegetable scraps into it. When it's full it is time to make stock.

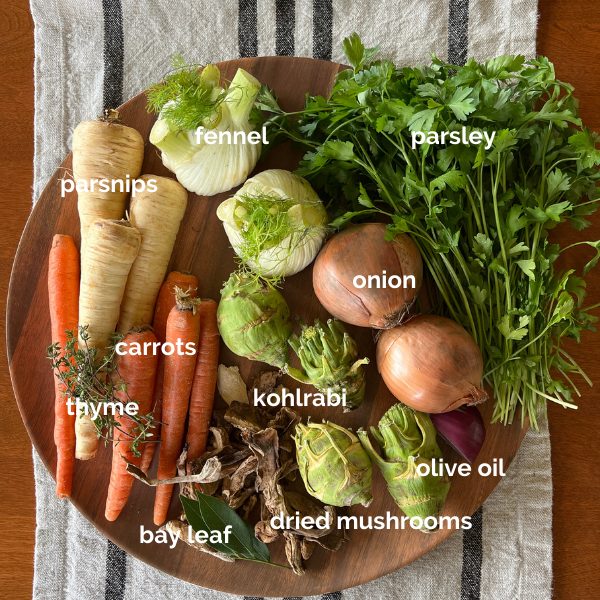
Classic mirepoix-- onion, carrot, and celery are standard issue in stock making. (You will note the absence of celery in the mis en place photo below. I didn't have any, and it is not noticeably missed in the resulting stock.) See the notes section of the recipe for a more comprehensive list of vegetables and optional ingredients that can contribute to great stock.

Most vegetables make a good stock, with a few exceptions; Brussels sprouts, broccoli, cauliflower, asparagus, and artichokes can be overpowering or add off-putting flavor notes, so avoid them for this purpose. Beets, especially red ones, will likely make your stock an odd and unappealing color, so think twice about throwing those into the pot. Potatoes are fine, but I don't use them to keep the stock a little more clear than cloudy, a personal preference.

Mushrooms are lovely in a roasted vegetable stock. Dried mushrooms, even better! Just one ounce of dried mushrooms (don't roast them-- just add them to the pot with the water) intensify the rich flavor and add a deeper color to the stock. They are not required, but do add something nice and grounding.

Limp, wilted, scuffed, and past-their-prime vegetables are all fair game. Just be sure to peel or cut off any parts that have blackened or have signs of mold to keep your broth clean and fresh tasting.

Use Your Roasted Vegetable Stock in These Recipes

To cook the grain in Roasted Mushroom, Grain, and Spinach Salad. Get the Recipe.
In place of the water in Pumpkin Black Bean Soup. Get the recipe.

Last Words

If you like this recipe, please give it rating by clicking into the green stars, and if you have questions about the recipe or other culinary dilemmas, please email me at pam@101milekitchen.com. Your success is important to me. Thank you to each and every one of you who subscribes to 101-Mile Kitchen newsletters. You are appreciated more than you'll ever know!

pot of roasted vegetable stock

Roasted Vegetable Stock

Course: Soup + Stew
Season: Mist (November - March)
Dietary: Dairy-Free, Gluten-Free, Vegan
Preparation: Roasting
Total Time: 2 hours 15 minutes
Servings: 2 quarts
Deep, richly flavored roasted vegetable stock provides perfect support to hearty cool-weather ingredients and recipes.
Print Recipe

Ingredients

  • 4-5 pounds mixed vegetables See notes.
  • 4-6 cloves garlic
  • 2-3 Tablespoons olive oil
  • 1 teaspoon kosher salt, plus more for adjusting at the end
  • 1 teaspoon whole black or mixed peppercorns
  • 1 bunch parsley, flat leaf or curly, stems trimmed
  • assorted fresh herbs of your choice, about one bunch total, OR dried herbs of your choice, up to 2 teaspoons
  • 1 ounce dried mushrooms, any variety, optional
  • 1-2 bay leaf
  • other optional ingredients of your choice. See notes.
  • quarts water

Instructions

  • Preheat oven to 350°, or 325° convection. Line a 13" x 18" baking sheet with foil.
  • Wash the vegetables and trim away any spoiled parts. Cut the vegetables into evenly sized chunks and place them on the foil-lined baking sheet. Sprinkle lightly with salt and a good drizzle of olive oil, up to 3 Tablespoonsful. Mix gently together with your hands. Place the sheet into the oven and roast for about 40 minutes, or until the onions and other vegetables are beginning to take on some roasted color and are quite fragrant, stirring halfway through.
  • Place the roasted vegetables and any browned stuck-on parts and oil that remain into an 8 quart stockpot. Add the salt, peppercorns, fresh or dried herbs, dried mushrooms, if using, bay leaves, and water. Bring the pot to a rapid boil, and immediately reduce heat to maintain a simmer. Cover, and cooking for 1-2 hours, stirring often. Remove the lid for the last half of cooking.
  • Taste the stock and adjust seasoning by adding more salt if necessary. Allow the stock to cook slightly until safe to handle.
  • Strain the stock first through a colander to remove the larger bits, then strain again through a very fine mesh strainer to remove the tiny bits that make it cloudy. Store in the refrigerator for up to 5 days, or freeze for up to three months.

Notes

Vegetable selection:
Classic mirepoix-- onion, carrot, and celery are standard issue. Most vegetables make a good stock. Do use the leaves, peels, skins, and stalks of leeks, garlic, peppers, parsnips, turnips, squashes, fennel, kohlrabi, tomatoes. Corn and corn cobs and celery root, are good additions, too. 
Think twice about using Brussels sprouts, broccoli, cauliflower, asparagus, and artichokes which can add overpowering off-putting flavor notes. Potatoes are fine, but omitting them will keep the stock from becoming too cloudy.
Mushrooms are lovely in a roasted vegetable stock. Dried mushrooms are even better! Just one ounce of dried mushrooms (don't roast them-- just add them to the pot with the water) intensify the rich flavor and deep color to the stock. They are not required, but do add something nice.
Optional additions:
Rinds (not the juicy flesh) of citrus, especially lemon and orange.
Nubs of fresh ginger and/or turmeric.
Dried chilis of any variety. I find a couple small arbols add a very subtle warmth. The larger dried chilis will make a marked flavor difference and would be fantastic as a tortilla soup base, for example. 
Varied fresh herbs. Nearly all herb will make a nice flavor contribution, but do be careful with some of the more overpowering herbs such as rosemary and oregano. A little can go a long way.
Dried herbs are much more condensed in flavor than fresh, so a little goes a long way here, too. But do use them!
Juniper berries are wonderful in a stock. Add up to 1 teaspoonful, gently crushed to release even more of their wintry flavor. 
Platter of Roasted Mushroom, Grain, and Spinach Salad.

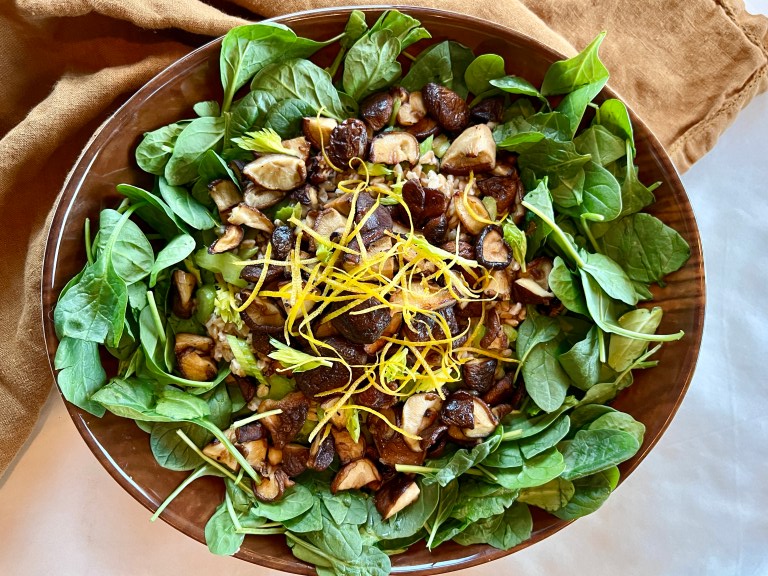
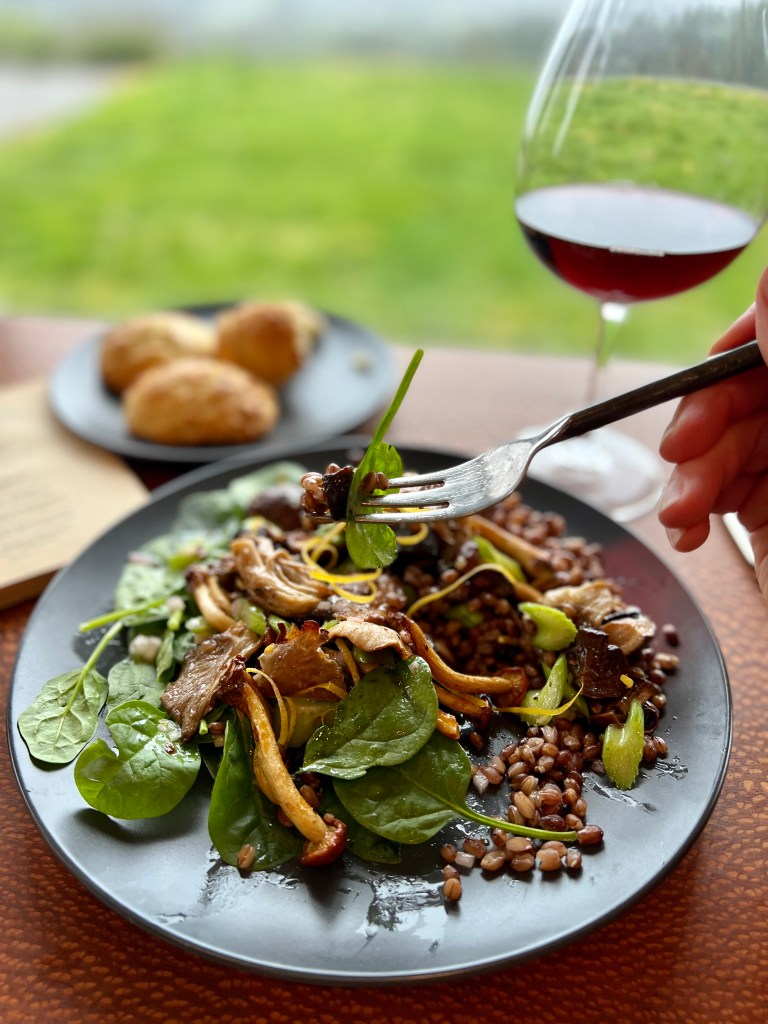
Feasts, cookie platters, cocktail parties, and office holiday goodies, oh my! As fun as it is, it doesn't take long to feel the overwhelm of holiday system overload, just when the mood of the day calls for merry and bright. As a remedy to seasonal splurges, include a salad of roasted mushrooms, warm grains, and baby spinach into your menu this week.

Making the Roasted Mushroom, Grain and Spinach Salad

plate of spinach and mushroom salad with a bite on the fork.

This quick little main-course salad starts with four easy-to-come by ingredients and a light but flavorful lemon vinaigrette. The vinaigrette is made even better by using Meyer lemons, just coming into peak season.

Here I go on about celery again. Celery adds an essential textural crunch to this dish, and a bit of delicious freshness that you will welcome to your winter plate. I view this as this as a subtle necessity.

In the extraordinary Pacific Northwest food playground we have easy access to an array of cultivated and wild mushrooms. One trial of this recipe I used a shiitake-only approach. Another trial used a melange of chestnut, oyster, shiitake, and crimini mushrooms. I loved it both ways. If you can only access white buttons or brown criminis, please use them! Your dish will be as delicious as ever.

You have a lot of running room when it comes to the grain you use in your roasted mushroom salad. I used Purple Valley Barley, an organic product from my local Lonesome Whistle Farm. Lonesome Whistle also carries wheat berries, emmer (a farro) and oat groats that would be perfect. If you are new to this type of thing and eat gluten, I suggest starting with pearled barley, or just jump right in and try one of the above grains. If you eat gluten-free, give buckwheat groats or brown rice a try.

What Wine Should I Serve with Roasted Mushroom, Grain, and Spinach Salad?

2013 Artisanal Wine Cellars Oregon Pinot Noir Dukes Family Vineyards, Eola-Amity Hills.

I started off suggesting a mushroom, warm grain, and spinach salad as a detoxifying healthy choice, so maybe through the holidays consider a tonic of pomegranate juice and sparkling water? Or not! I highly suggest the Artisanal Wine Cellars 2015 Dukes Family Vineyard Pinot Noir. Tom and Patty Feller, and their daughter, Mia, are a family operation dedicated to handcrafted expressive wines. The grapes in this bottle were grown by Pat and Jackie Dukes of Dukes Family Vineyard. We view the Artisanal's Pinot Noirs to be beautiful wines at incredible values.

Other Holiday Self-Care Recipe Ideas

Humble Pasta with Beans + Mushrooms: Get the Recipe
Healing Chickpea + Orzo Bowl in Ginger Broth: Get the Recipe
Deconstructed Borscht Bowl: Get the Recipe

Roasted Mushroom, Grain, and Spinach Salad

Course: Main Dish, Quick + Easy, Salad, Side Dish
Cuisine: Pacific Northwest
Dietary: Dairy-Free, Egg-Free, Gluten-Free, Nut-Free, Vegan
Preparation: Fast + Easy, Roasting
Prep Time: 40 minutes
Servings: 4
Roasted mushrooms, warm chewy grain, and fresh spinach dressed in the best ever lemon vinaigrette. This fantastic fast and easy layered salad is hearty enough for satisfying cool weather meals, light enough to counterbalance seasonal feasts and spurges.
Print Recipe

Ingredients

  • lb. mushrooms of your choice, singularly or in combination crimini, shiitake, chestnut, chanterelle, hedgehog, button, etc.
  • 5 stalks celery, and leaves if your head has them
  • 1 cup whole grain of your choice, prepared according to package directions and kept warm* barley; emmer, spelt, or einkorn farro; wheat berries; oat or buckwheat groats; brown, black, purple, red, or wild rice, etc.
  • 8-10 oz. fresh baby spinach
  • lemon vinaigrette, recipe below
  • zest of 2 lemons, in strips

Best Ever Lemon Vinaigrette

  • ½ cup lemon juice, Meyer lemon preferred, zested first about 2 large lemons
  • 2 cloves garlic, pressed or very finely minced
  • 1 shallot, finely minced
  • tsp. maple syrup
  • salt and pepper to taste

Instructions

  • Preheat the oven to 400° convection. Line a baking sheet with foil and spray it with oil or non-stick spray.
  • Begin cooking your chosen grain according to package directions. (For example, quick-cooking par cooked farro from Trader Joes takes 10 minutes to cook; unhulled barley takes up to 40 minutes.) Once it is cooked, keep it warm while the other steps come together.
  • Prepare the Best Ever Lemon Vinaigrette, recipe below.
  • Wipe mushrooms clean and trim them if necessary. If you are using shiitakes, remove the stems. Leave the small ones whole, cut the medium-sized ones in half, and the largest ones into quarters for similarly sized pieces that will roast at the same rate. Place them in a heap on the prepared baking sheet. Spoon about ¼ of the lemon vinaigrette over the mushrooms. Use your hands to toss the mushrooms in the vinaigrette, coating each piece lightly and evenly. Spread the mushroom pieces out on the pan, and place in the oven. Roast for 12 minutes, remove from the oven and stir. Spread them out again and roast them for another 10 minutes or so until they are deeply colored and their juices have almost evaporated. Don't leave them much longer than this or they will lose their tenderness.
  • While the mushrooms are roasting, thinly slice the celery and set aside. When the grains are cooked and drained, stir in ¼ of the vinaigrette and continue to keep gently warm. Place the spinach on the platter or individual plates.
  • When the mushrooms are done roasting, add the sliced celery and give it a good toss. Spoon the dressed grains in the center of the plate, and top with the mushroom/celery mixture. Drizzle a little more of the vinaigrette over the layered salad.** Garnish with strips of lemon zest, which are not only eye-catching, but add a delicious flavor note. Serve while warm.

Make the Best Ever Lemon Vinaigrette

  • Combine all ingredients on a pint-sized jar with a tight fitting lid. Shake until the salt and maple syrup are dissolved. Shake before each use.

Notes

*I've made this recipe using organic locally-grown barley, with buckwheat groats, and with a package of "10-Minute Farro" sometimes found at Trader Joes. Follow the package directions for any grain you use for both serving size and cooking times. 
**You will have a little of the vinaigrette left over. Don't be sad about this-- use it on your next kale or lettuce salad, on top of baked or broiled fish, or to dress a pan of roasted vegetables. 
When Meyer lemons are in season, be sure to use them. The typical Eureka or Lisbon lemons are wonderful, too, but Meyers offer a step up in flavor.
I recently found that the water that remains when cooking whole-grain barley is delicious as a sipper. Cook the barley "pasta-style" floating freely in a pot of water, and reserve the water. It's as tasty as any stock, and can be used as a soup base or warming cup. 
This recipe is easily halved and easily doubled. If you double it, use two sheet pans to roast the larger amount of mushrooms. 
 
roasted artichokes in baking dish

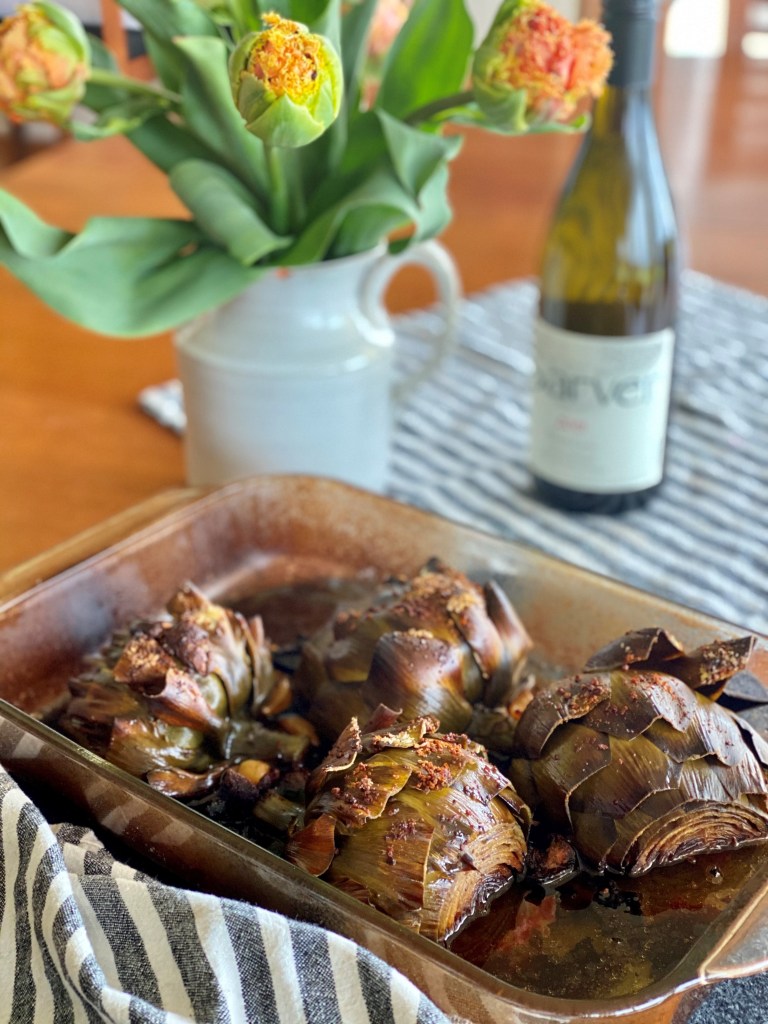
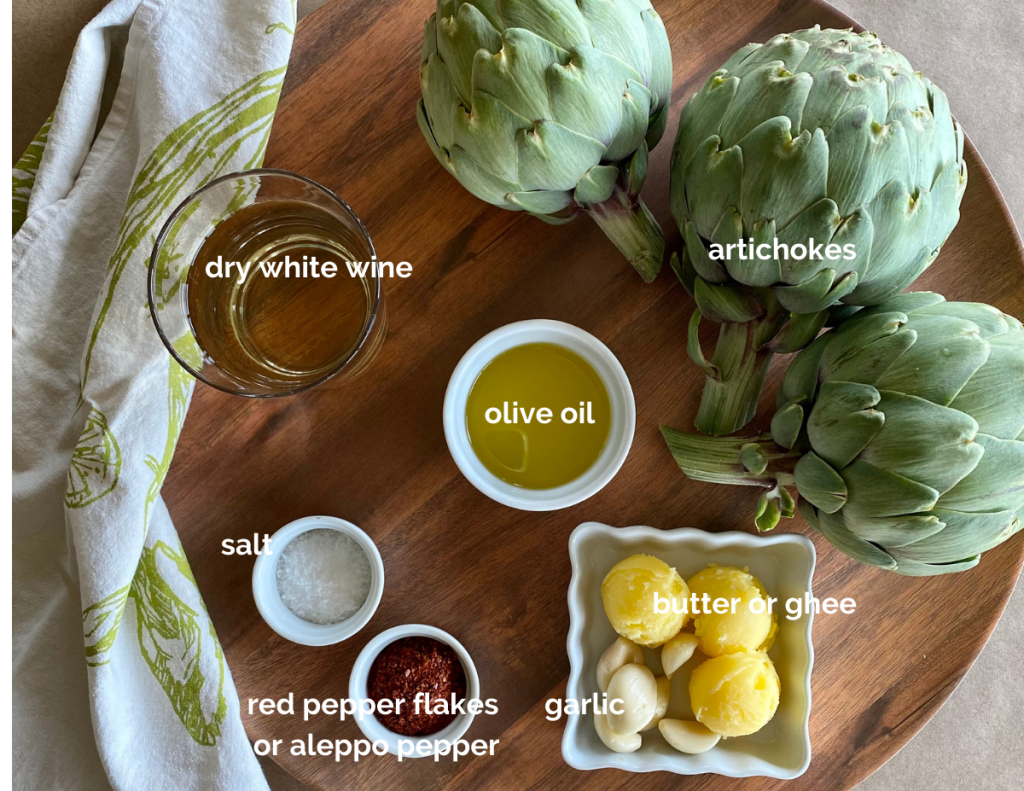
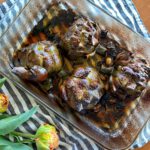
Artichokes are another of the short-season wonders, and we try to eat as many as we can while they are available. This terrific artichoke recipe from Allison Roman's book Nothing Fancy is super easy, and makes the most succulent, juicy, and rich-tasting artichokes ever. It's nice to have a new addition to the 'choke repertoire. 

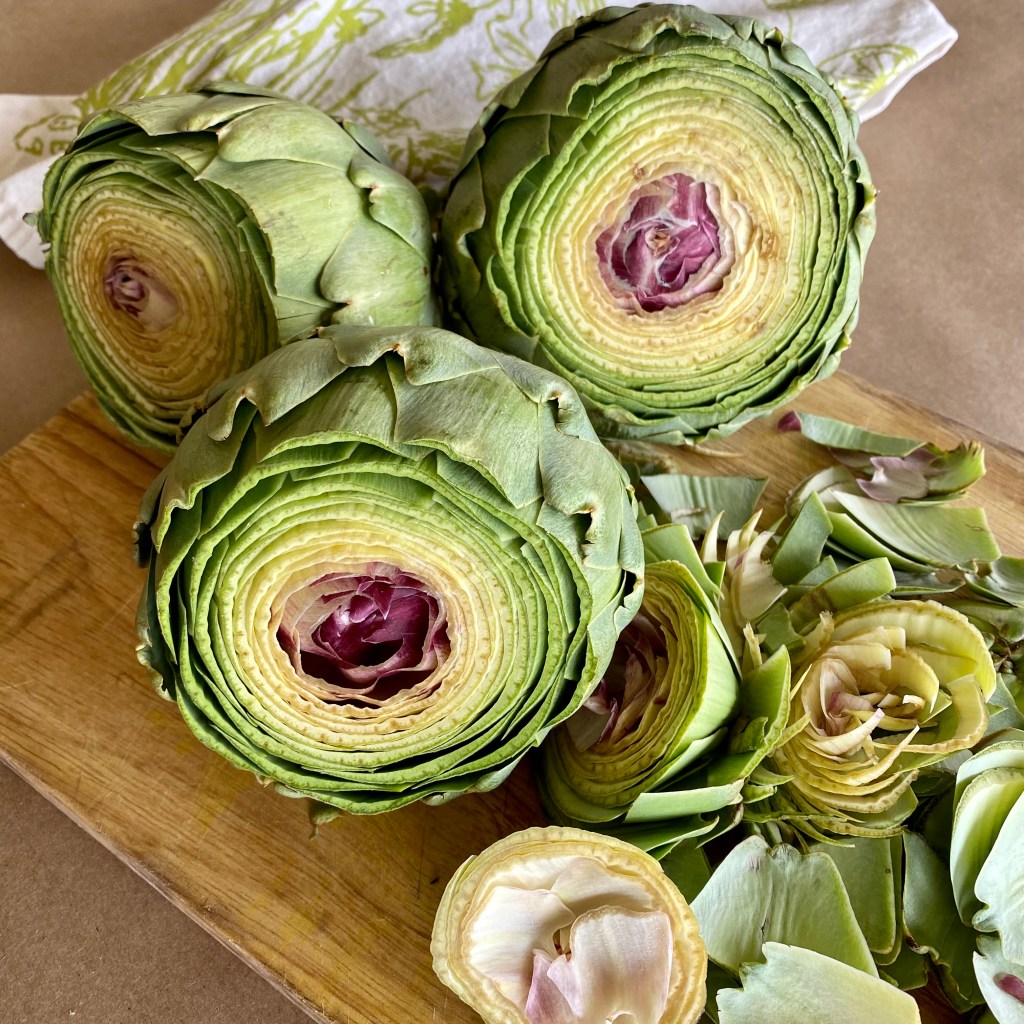
After making this a dozen times or more, I want to encourage you to free yourself from exact measurements, and think instead about ratios. Start with as many artichokes as you plan to serve. I encourage you to make extra while you're at it as they are fantastic cold or warmed up as leftovers.

Making the Wine-Roasted Artichoke Recipe

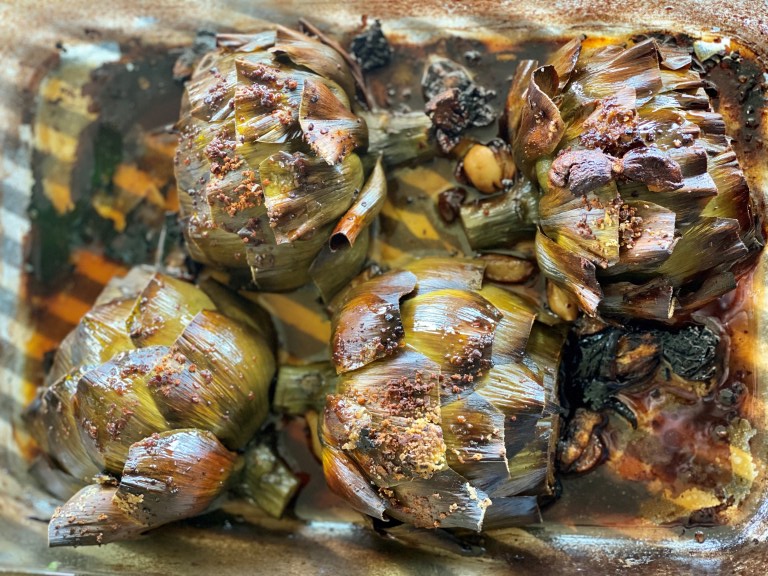
First, think big as far as your baking dish goes. It's surprising how much space the halved artichokes need for their flat surfaces to touch the pan. From there, just think in terms of having about 1/4-inch of wine in the bottom of the pan around the artichokes, to which you'll add another 1/4-inch of water. (I use Sarver Winery Pinot Gris for this-- my favorite from our neighboring winery!) You'll generously drizzle the artichokes with olive oil, and plop in maybe a half-tablespoon or more of butter for each artichoke half in the dish. Crush as many garlic cloves as you like-- we go big on garlic at this house, so perhaps 2 cloves for every artichoke half, and sprinkle the tops of them amply with kosher salt and red pepper flakes, or my favorite Aleppo pepper.

Aside from prepping the artichokes, the hands-on time is just a couple of minutes. Cover it in foil, bake in a 425 degree oven for 45-55 minutes, depending on the size of your artichokes. Remove the foil from the pan, and assess if it needs a little more water-- you don't want the pan to run dry but do want a reduced glaze to form. Then continue to roast them for another 15 minutes until they turn a deep mahogany, and the cooking liquid reduces into a garlicy little sauce you'll want to dip bread into.

roasted artichokes in baking dish

This is the Artichoke Recipe Choice for Part Givers

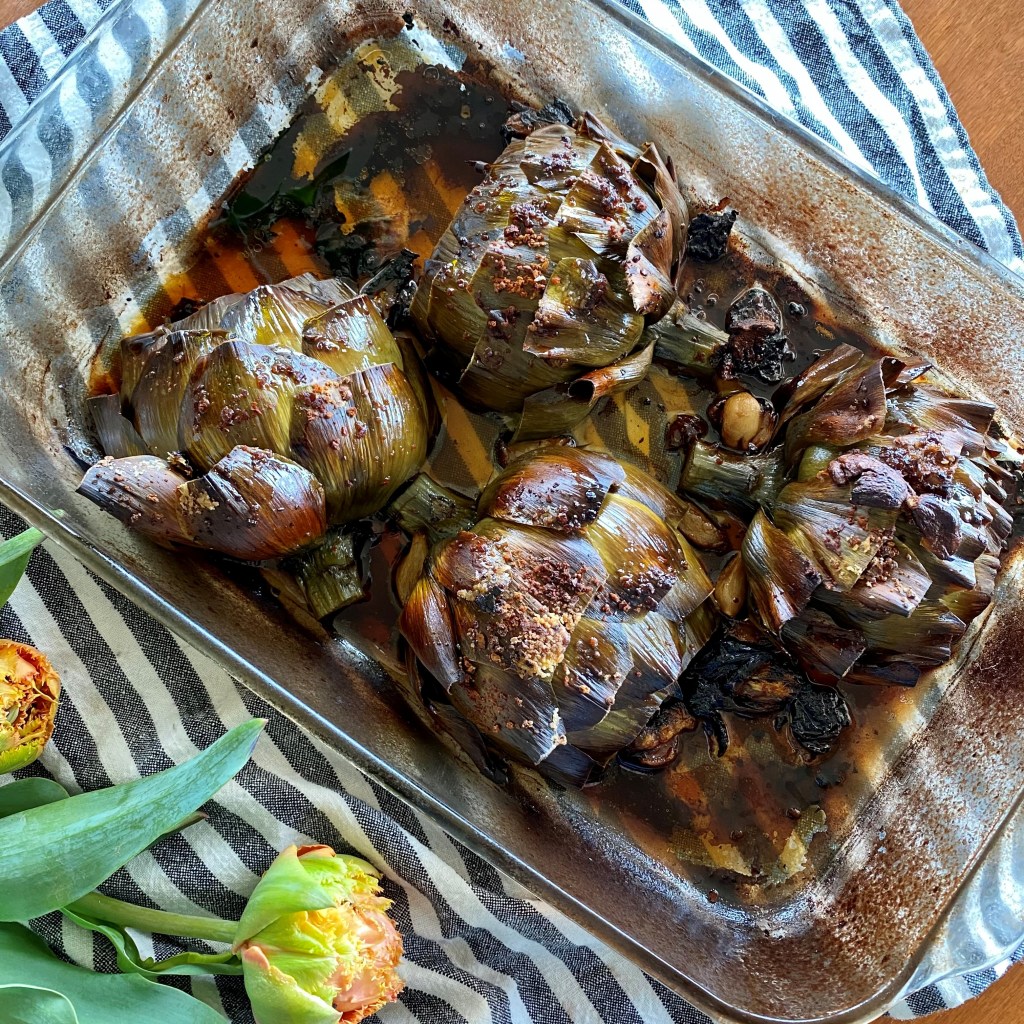
If you're hosting a gathering, this dish is for you! It can be made ahead, either the day of or the day before, and warmed back up at the last minute. The artichokes are equally charming served room temperature for warm-day entertaining. While the artichokes pair perfectly with most white wine varieties, they really shine served with the same Sarver Winery Pinot Gris they are cooked in.

Have you noticed what happens when a crowd of people eat with their fingers? It's a magical way to drop barriers and bring people together. Put a bowl on the table for guests to toss their tooth-scraped outer leaves into.

What shall I serve with Wine-Roasted Artichokes?

This dish makes a lovely first course, if you like stretching the table adventure out for hours like we do. It's also a perfect accompaniment to fish, chicken, or pork tenderloin. It is equally good as part of a vegetarian meal, served with a nutty rice pilaf or lemony pasta.

Guess what?

Wine-roasted fennel

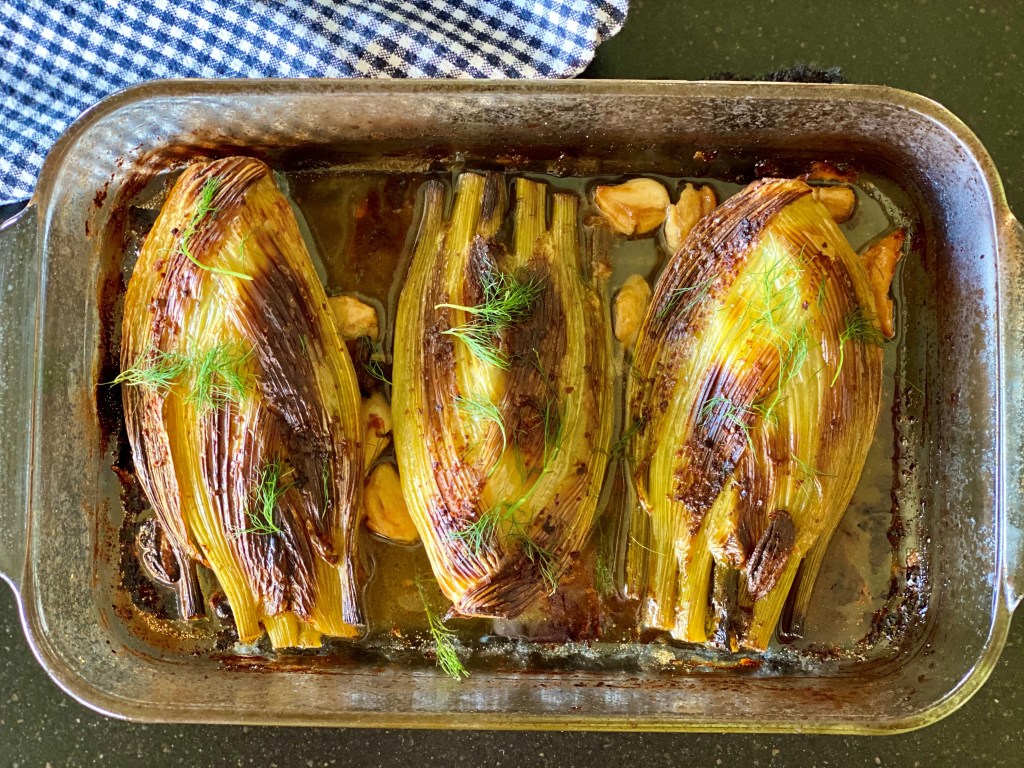
This exact technique works to sweeten and juice-up fennel. Give it a try!

Other Springtime Recipes to Try

24-Karat Carrot Risotto: Get the recipe here.
Modern Pasta Primavera: Get the recipe here.
Lemony Asparagus White Bean Salad: Get the recipe here.

roasted artichokes in baking dish

Blissful Wine-Roasted Artichokes

Course: Appetizer, Main Dish, Side Dish
Cuisine: Pacific Northwest
Season: Evergreen (April - July)
Dietary: Egg-Free, Gluten-Free, Nut-Free, Vegetarian
Preparation: Roasting
Prep Time: 15 minutes
Cook Time: 1 hour
Total Time: 1 hour 15 minutes
Servings: 6 servings
These super easy, garlicky, succulent, juicy, and rich-tasting artichokes are a great make-ahead dish, and are excellent paired with most white wines.
Print Recipe

Ingredients

  • 2-3 artichokes
  • 1 cup dry white wine
  • 1 cup water
  • ¼ cup olive oil
  • 4 Tbsp. butter or ghee
  • 6-8 cloves garlic, crushed with the broad side of a knife
  • pinch red pepper flakes or Aleppo pepper
  • Kosher salt and freshly ground black pepper

Instructions

  • Preheat the over to 425°.
  • Trim the edible artichoke stem of any woody parts, leaving as much of it as you can. Snap off the bottom one or two layers of tough outer leaves. Use kitchen shears to trim the thorny ends of the remaining leaves, if any. With a serrated or chef's knife, cut about 1 ½" from the crown of the artichoke, exposing the yellowish and rosy interior.
  • Cut the artichokes in half lengthwise. Using a spoon, dig out the fuzzy choke of each half, removing all fuzzy bits. Some of the purple-tipped center leaves will come out, too. Place the cut side down into a large baking dish (don't underestimate the size of dish you'll need-- the cut artichokes take up a lot of space!)
  • Pour the wine, water, and olive oil over the artichokes. Add the butter, cut or pinched into pieces, and smashed garlic. Generously sprinkle each half with kosher salt, red pepper flakes or Aleppo pepper, and black pepper. Cover tightly with foil and roast until the artichokes are fork-tender, about 45 minutes, depending on their size.
  • Remove the foil and continue to roast another 15 minutes or so until the liquid is mostly evaporated and the tops are a mahogany brown. Take care that the liquid doesn't entirely evaporate-- add a little water if needed.
  • To serve, scrape up the garlicky oil at the bottom of the baking dish to spoon on top of the artichokes.

Notes

Make it Your Own:
Use the same exact process for whole fennel bulbs. Very tasty! Perhaps experiment with other vegetables such as carrots, parsnips, and turnips, altering the roasting time depending on their tenderness. 
Dairy-free option: substitute olive oil for the butter. 

Follow Me

Welcome!

Photo of 101-Mile Kitchen blog owner.

You’re in the right place!  I’m Pam Spettel, home cooking expert and guide, and I’m here to show you how to break up with cooking and hospitality anxiety, learn how to use recipes as guides rather than strict rules, and let your cooking intuition and confidence soar.

Superpower: Dreaming up recipes that work, serving them to my friends and family, and writing little stories about how cooking them well is the same as loving well.

Inspiration: Ingredients! The fresh, colorful, fragrant, local, seasonal ingredients found in the Pacific Northwest are my creative medium.

Heroes: Local food and wine producers– the people who keep me, my family, and our community nourished and happy.

More . . .

Top