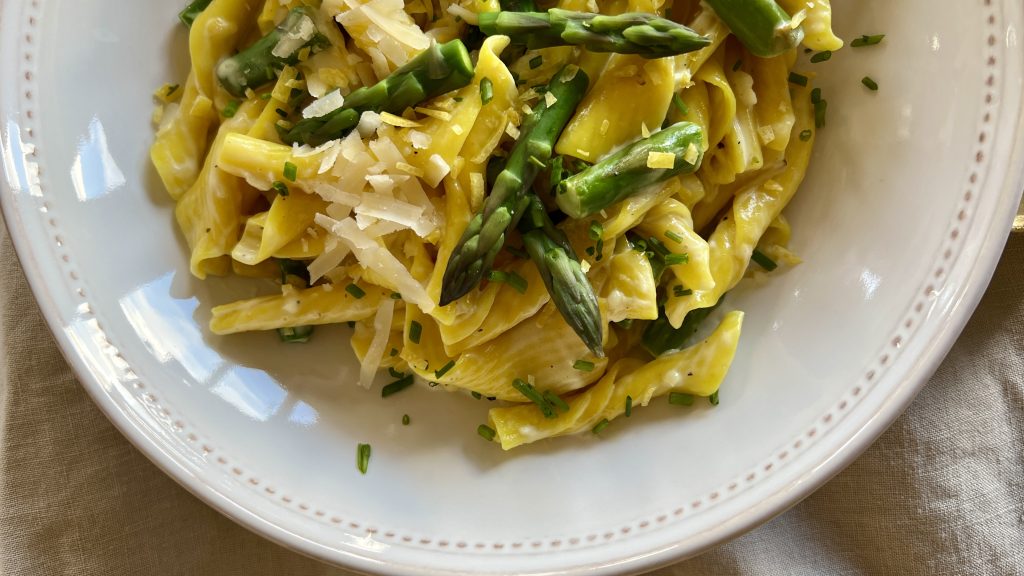
After a loooong winter's nap, I'm back to share with you a most exciting recipe for spring. Creamy Lemon Pasta is the culinary world's daffodil equivalent-- bright sunny lemons, some fresh herbs, and peas or asparagus tips bring good sunny cheer. The creamy sauce works itself out in less time than the pasta needs for cooking. The whole thing from start to finish takes about 20 minutes, a very pleasant hat-tip to spring.
Heap your creamy lemon pasta into a bowl all by itself, or serve it with a salad and or a protein of your choice. Keep it simple, though, to impress yourself with luxury and comfort, all dressed in yellow.
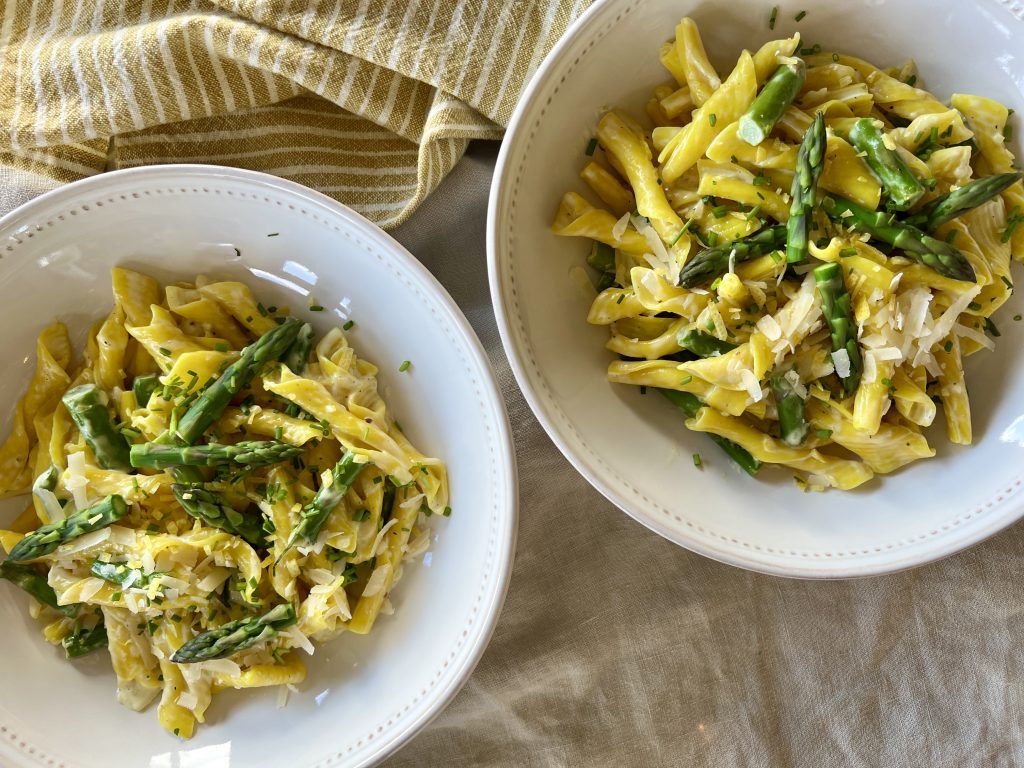
While this recipe is scaled for four servings, if you're a household of one or two you won't regret having leftovers. (It can easily be doubled to serve eight to ten, and is perfect for Easter dinner.) The ingredient list is short. Yay. There is just enough sauce to make the creamy lemon pasta velvety and lush without it being a gut bomb.
The pasta I've used here is a seasonal offering from Trader Joe's-- Lemon Torchietti--infused with lemon flavor that's perfect with this recipe. Grab some if you can find it. TJ's also often carries a lemon pappardelle which is nice, too. But this creamy lemon pasta recipe certainly doesn't require lemon-flavored pasta. Use what you have, use what you love.
Do give this a try. It is in my regular rotation, as it is so versatile and remarkably delicious.
Pasta Primavera: Recipe Here.
Lemony Asparagus-Bean Salad: Recipe Here.

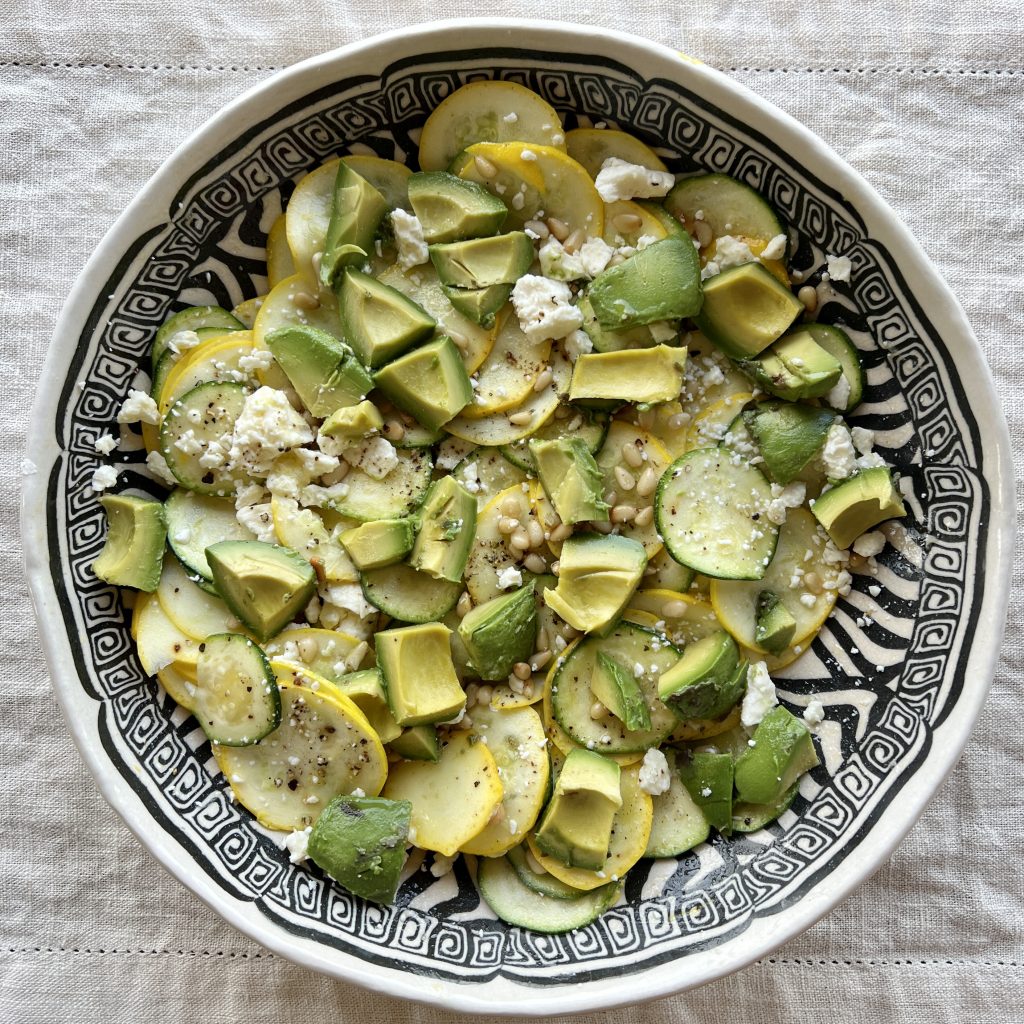
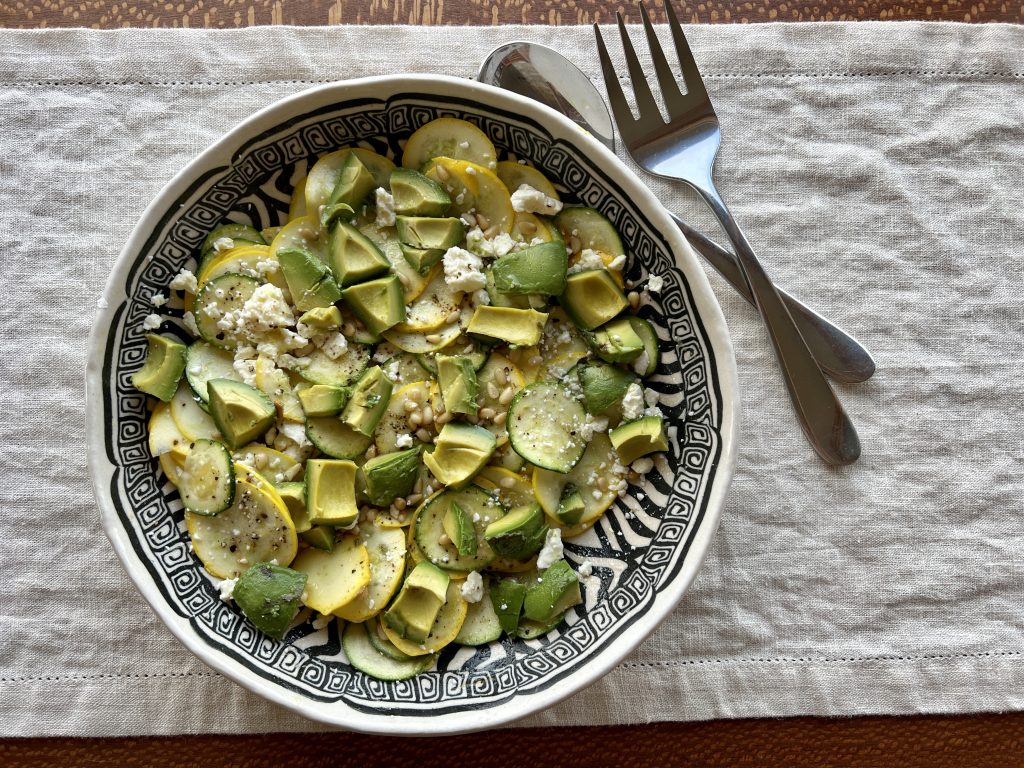
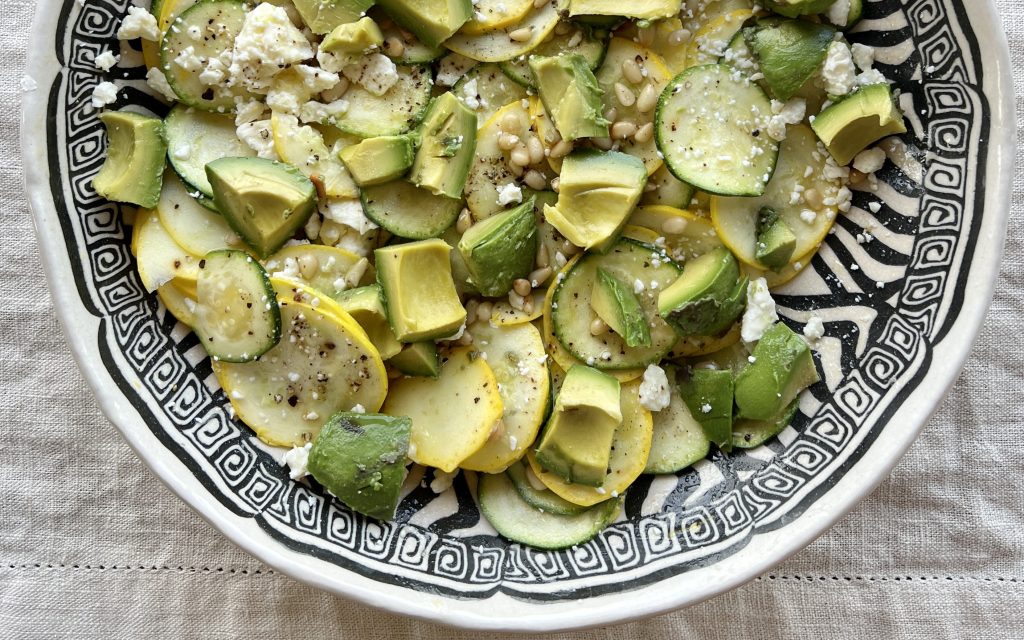
Zucchini has never inspired me much, until this summer, and it is this great one bowl Lemon Feta Zucchini Salad I have to thank for it. It's such a simple salad, but the flavors come together in a big way. Lemon juice and zest offer a bracing acidity and zip, feta adds a salty creaminess, and pine nuts offer a grounding buttery, component. Big cracks of black pepper add a ton of character. Mix it all together in one serving bowl-- so efficient and tidy! This salad is delightful with a multitude of foods, especially anything grilled, or all on its own.
The autumnal equinox is only 16 days away, but zucchini will be with us for yet a while. Nearly all applications (except, maybe, a chocolate cake with zucchini hidden in it) are better with smaller young zucchini. However, don't be afraid to use the big boys of early autumn in this dish. The bigger squashes will need lengthwise halving or quartering and seed removal, but will tenderize nicely with a little marination from the dressing.
Many people tend to get really busy as September gets underway, and this speedy one-bowl lemon feta zucchini salad takes about 15 minutes to make. Snuggle it next to a sliced roasted pork tenderloin for a complete meal in 30 minutes flat. The leftovers will make a nice lunch the next day.
Here's how I'll sequence it: Preheat the oven to 425°. Wipe the tenderloin dry with a paper towel and generously salt and pepper it. In a small bowl, mix two tablespoons Dijon or grainy mustard, 2 tablespoons honey, and 1 teaspoon onion powder, if you have it. Spread half the mixture all over the pork tenderloin, place it in a large cast iron skillet or on small baking sheet, and roast it in the hot oven for 16 to 22 minutes. It should feel firm but with some give when you press it with your finger. The internal temperature should be between 140°-145°. (I remove mine from the oven at 140° to ensure it is juicy, as the temp will raise another 5 degrees while it rests.) Allow the tenderloin to rest under a foil cover for ten minutes. Slice and serve with the remaining half of the mustard sauce.
While the tenderloin is roasting, make the zucchini salad except the garnishes. Set it aside. Once the roast is sliced, give the salad a last toss, top it with the garnishes, and voila! Dinner is served.
The batch you see in these photos uses a mix of yellow and green zucchini, but one or the other delivers the same goodness if that's what you have. Slicing it thinly but not too thinly lets the slices hold up to a stir. A thickness of about 1/8" is your aim. The zucchini will absorb your nice dressing without wilting at this thickness. This is the tool I love to use to get even, quick slices.
A heavy dose of cracked black pepper really makes this dish, so don't hold back. Fresh basil and avocado are optional but delicious additions, but not necessary. If you have them use them; if not, don't worry.
Add the rest of the ingredients directly to the bowl without dirtying a single measuring cup or spoon. This is truly a one-bowl wonder of tidiness!
A note on toasting pine nuts: I wish I had a dollar for every time I've burnt a batch of pine nuts. Kitchen multi-tasking can be a detriment when it comes to nuts. I used to put them on a small baking sheet and pop them into the toaster oven for 6-8 minutes. Sometimes they turned out perfect, other times like mini charcoal briquets. Please take my advice and take the very few minutes it takes to toast them in a small skillet over medium heat. Shake the pan often to let them toast evenly. Stay right there! Notice their change in color and aroma. By all means, do not walk away from the pan. Relax and hang out a minute. Toasting nuts is a definite Be Here Now task.
Turkey Meatball + Roasted Lemon Zucchini Pasta
This post contains affiliate links. When you use these links to buy something I may earn a commission at no cost to you. Product affiliation helps me to keep this site ad-free while providing you with the content you enjoy. I only promote items that I use, like, and trust, or would invest in myself.
Have you joined the 101-Mile Kitchen community? If not, we'd love to have you. You can take care of that right here, and when you do I'll send you a free Taste of Oregon appetizers recipe downloadable as a thank you!

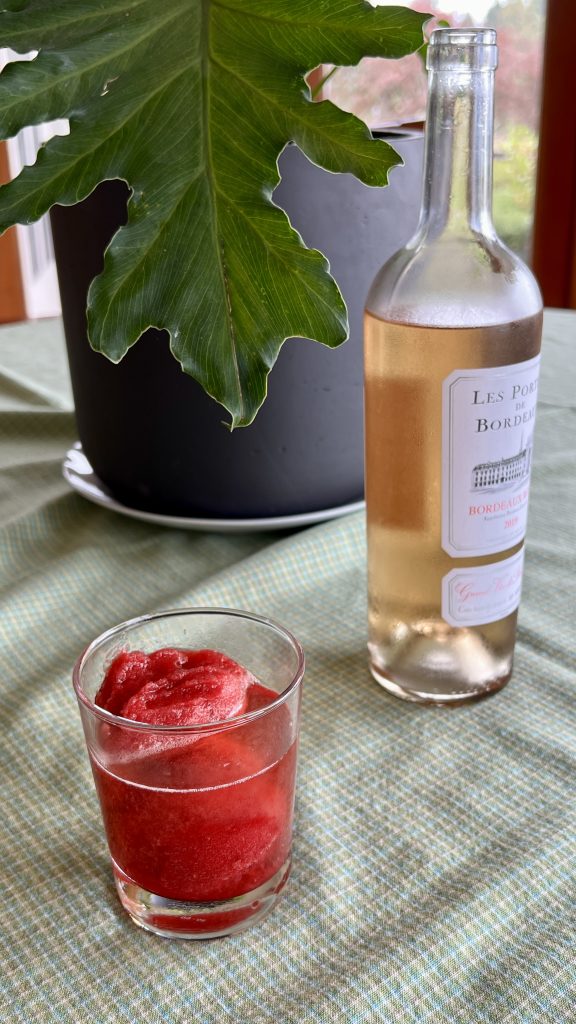
We love to have people in, and we typically bid them welcome with a glass of local Oregon wine. But this summer we're welcoming our guests with simple sorbet-based cocktails. These relaxed ice-cold aperitifs have jazzed up our customary summery chilled white or rosé offerings.
I first discovered this cocktail shortcut with my limey-herbal Douglas Fir Tip Sorbet added to a splash of The Botanist gin. It was a big hit as a way to kick off a fun dinner party. I've included below a recipe for blueberry or blackberry sorbet, and here's last year's strawberry sorbet recipe. When added to your favorite liquor, each of these sorbets make a fancy, pretty cocktail easier than summer itself.
There's nothing quite like capturing fresh, local, perfectly ripe fruits and berries into a sorbet. Of course, if you're not in the mood to make your own sorbet, it's perfectly AOK to grab a tub from the grocery to make a quick cocktail. I don't think anyone will turn it down.

Many cocktails begin with muddled or syruped fruit, and/or a sugar-water simple syrup. What is sorbet if not fruit, sugar, and water? Save a bunch of steps and go straight for the sorbet in your freezer and whatever complimentary hooch you have in your home bar. Think of it as a light, boozy float in construction, and an easy refresher to drink.
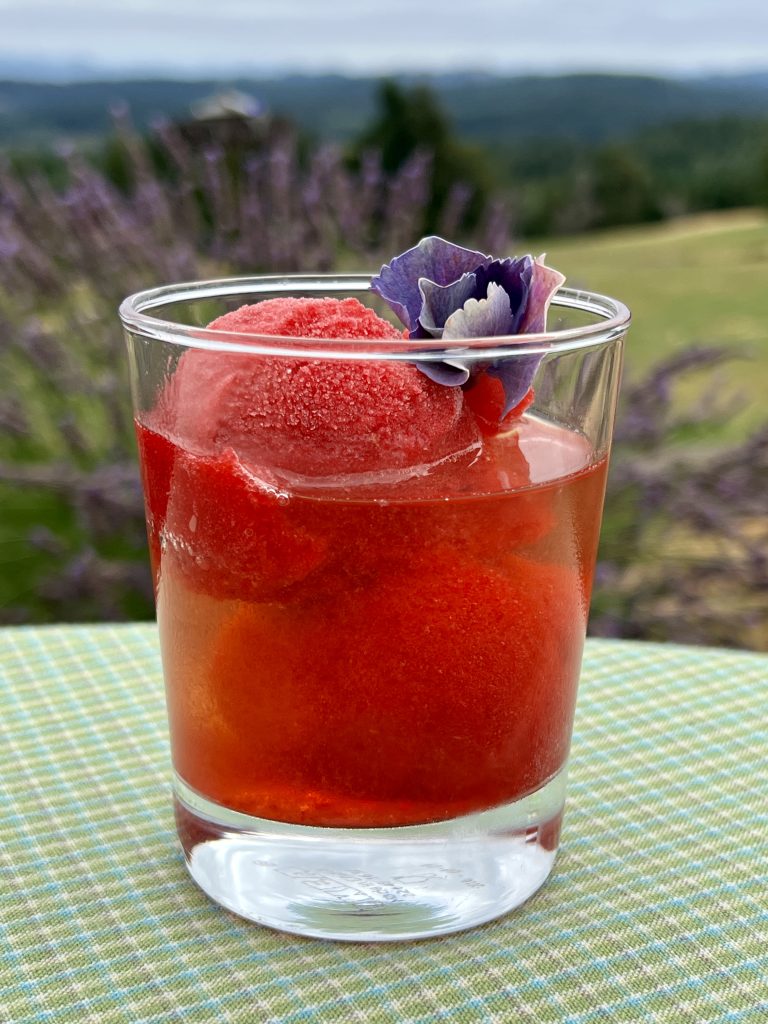
The idea is to put one firm scoop of sorbet and one shot of liquor in a coupe or rocks glass. Easy peasy.
By making your own sorbet, you can use up the summer fruit bounty of your own local area. Here are some sorbet/liquor combinations that make a smashing summer cocktail. But I don't see a thing wrong with using your favorite liquor with your favorite sorbet, whatever they may be. Champagne, prosecco, and cava would be winners in every case, too, for a lower alcohol refresher.
But by all means, experiment and enjoy making your own combinations.
The sorbet cocktail is easy to make a mocktail-- sub in sparkling waters, tonic, or soda water for the liquor.
How do you make your sorbet cocktail really pop? Be sure to use a colorful garnish! Citrus twists, wedges, or wheels; herb leaves or sprigs; an edible flower; or a piece or two of fruit on a skewer all take your presentation up a notch.
Bedazzle your friends by matching your sorbet to your tablecloth, napkins, dishes, and/or flowers. Making your space pretty seems to put people in a festive mood!
We Oregonians are super lucky to have a huge array of summertime berries, both cultivated and wild. In my freezer there are currently four berry varieties of sorbet to mix and match. Such fun.
Berry recipes tend to taste boring and flabby without a little acid balance, which is usually taken care of by adding lemon juice. I've been using berry-flavored vinegar in place of the lemon. If you have berry vinegar on hand, do try it. With berry vinegar, the need for a touch of acidity is met with an amped-up berry flavor to the finished product, be it pie filling, compote, or sorbet.
Some blackberry and blueberry sorbet recipes suggest using the fruit raw. I make strawberry and raspberry sorbets that way, but find that black and blue berry flavors are better with a gently cooking in sugar. The flavors become deeper, smoother, and richer-- just a more lush experience.
However tempting it is to cut back on the sugar in a sorbet, resist the urge. Less sugar makes for a hard block of fruit -flavored ice rather than a creamy-textured scoopable sorbet. This recipe has been tested multiple times with various levels of sugar, with the best results never going below the stated 1/2 cup. If you want less sugar, just consume less sorbet. It's really the only way around the sugar conundrum.
You will need an ice cream maker for this sorbet recipe. I make so much sorbet and ice cream with summer fruits, and consider it one of the best ways to preserve this gift of nature. I've had this Cuisinart model from Sur La Table for many years. It never fails, and is easy to use. I highly recommend it. One of my favorite dinner party desserts is to serve a duo or trio of compatible sorbet flavors with a little cookie, and I have an extra freezer bowl for my ice cream maker to make this really efficient.
Have fun with your sorbets and summery sorbet cocktails, and see what a rainbow you can create!
This post contains affiliate links, including but not limited to Amazon. As an Amazon Associate I earn from qualifying purchases. When you use these links to buy something I may earn a commission at no cost to you. Product affiliation allows me to keep this site ad-free while providing you with the content you enjoy. I only promote items that I use, like, and trust, or would invest in myself.

I hope you'll try summer sorbet cocktails or making your own blackberry or blueberry sorbets. When you do, please share with our 101-Mile Kitchen community! Tell us in the comments, or on Facebook or Instagram, @101milekitchen. Have you joined the community? If not, we'd love to have you. You can take care of that right here, and when you do I'll send you a free Taste of Oregon appetizers recipe downloadable as a thank you!

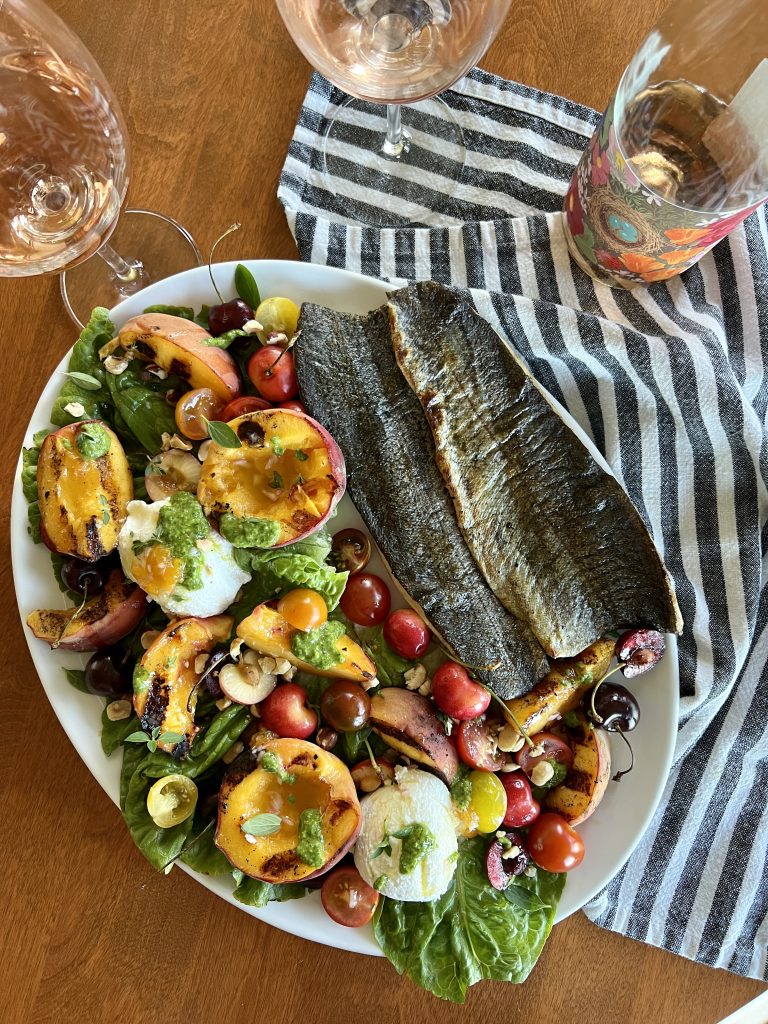
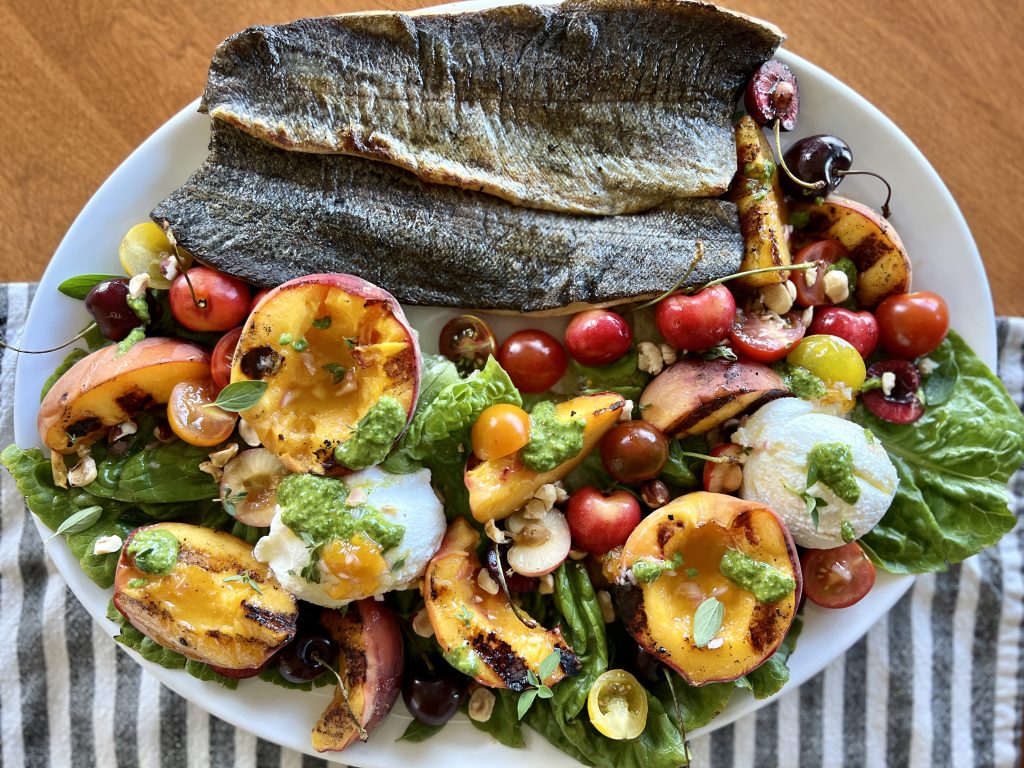
I'm beginning to think that dishes like Grilled Peach + Ricotta Salad are proof that a key purpose of summer is to oust cooking burnout. All we have to do is stand back and let the extravagant array of juicy, colorful ingredients do what they do with nominal human interference. Since the garden and farm stand bounty pretty much does all the work for us, all we have to do is relax, and maybe chop a thing or two.
The flavors in this salad are wonderfully harmonious. First, grill-kissed peaches, lightly caramelized and warmed through, lean savory rather than peach-pie sweet. Then there are tart cherries, tangy tomatoes, and creamy ricotta. Add in savory herbs, and a sweet and unctuous dressing. All this combines to light up all five flavor receptors in your mouth. Dollops of our Summer Basil Sauce add yet one more way to use this essential sauce. And then, there's the color explosion that delights your eyes and soul as each bite is lifted on your fork. Our grilled peach + ricotta salad as dinner simply matches the exuberance and joy of the season.
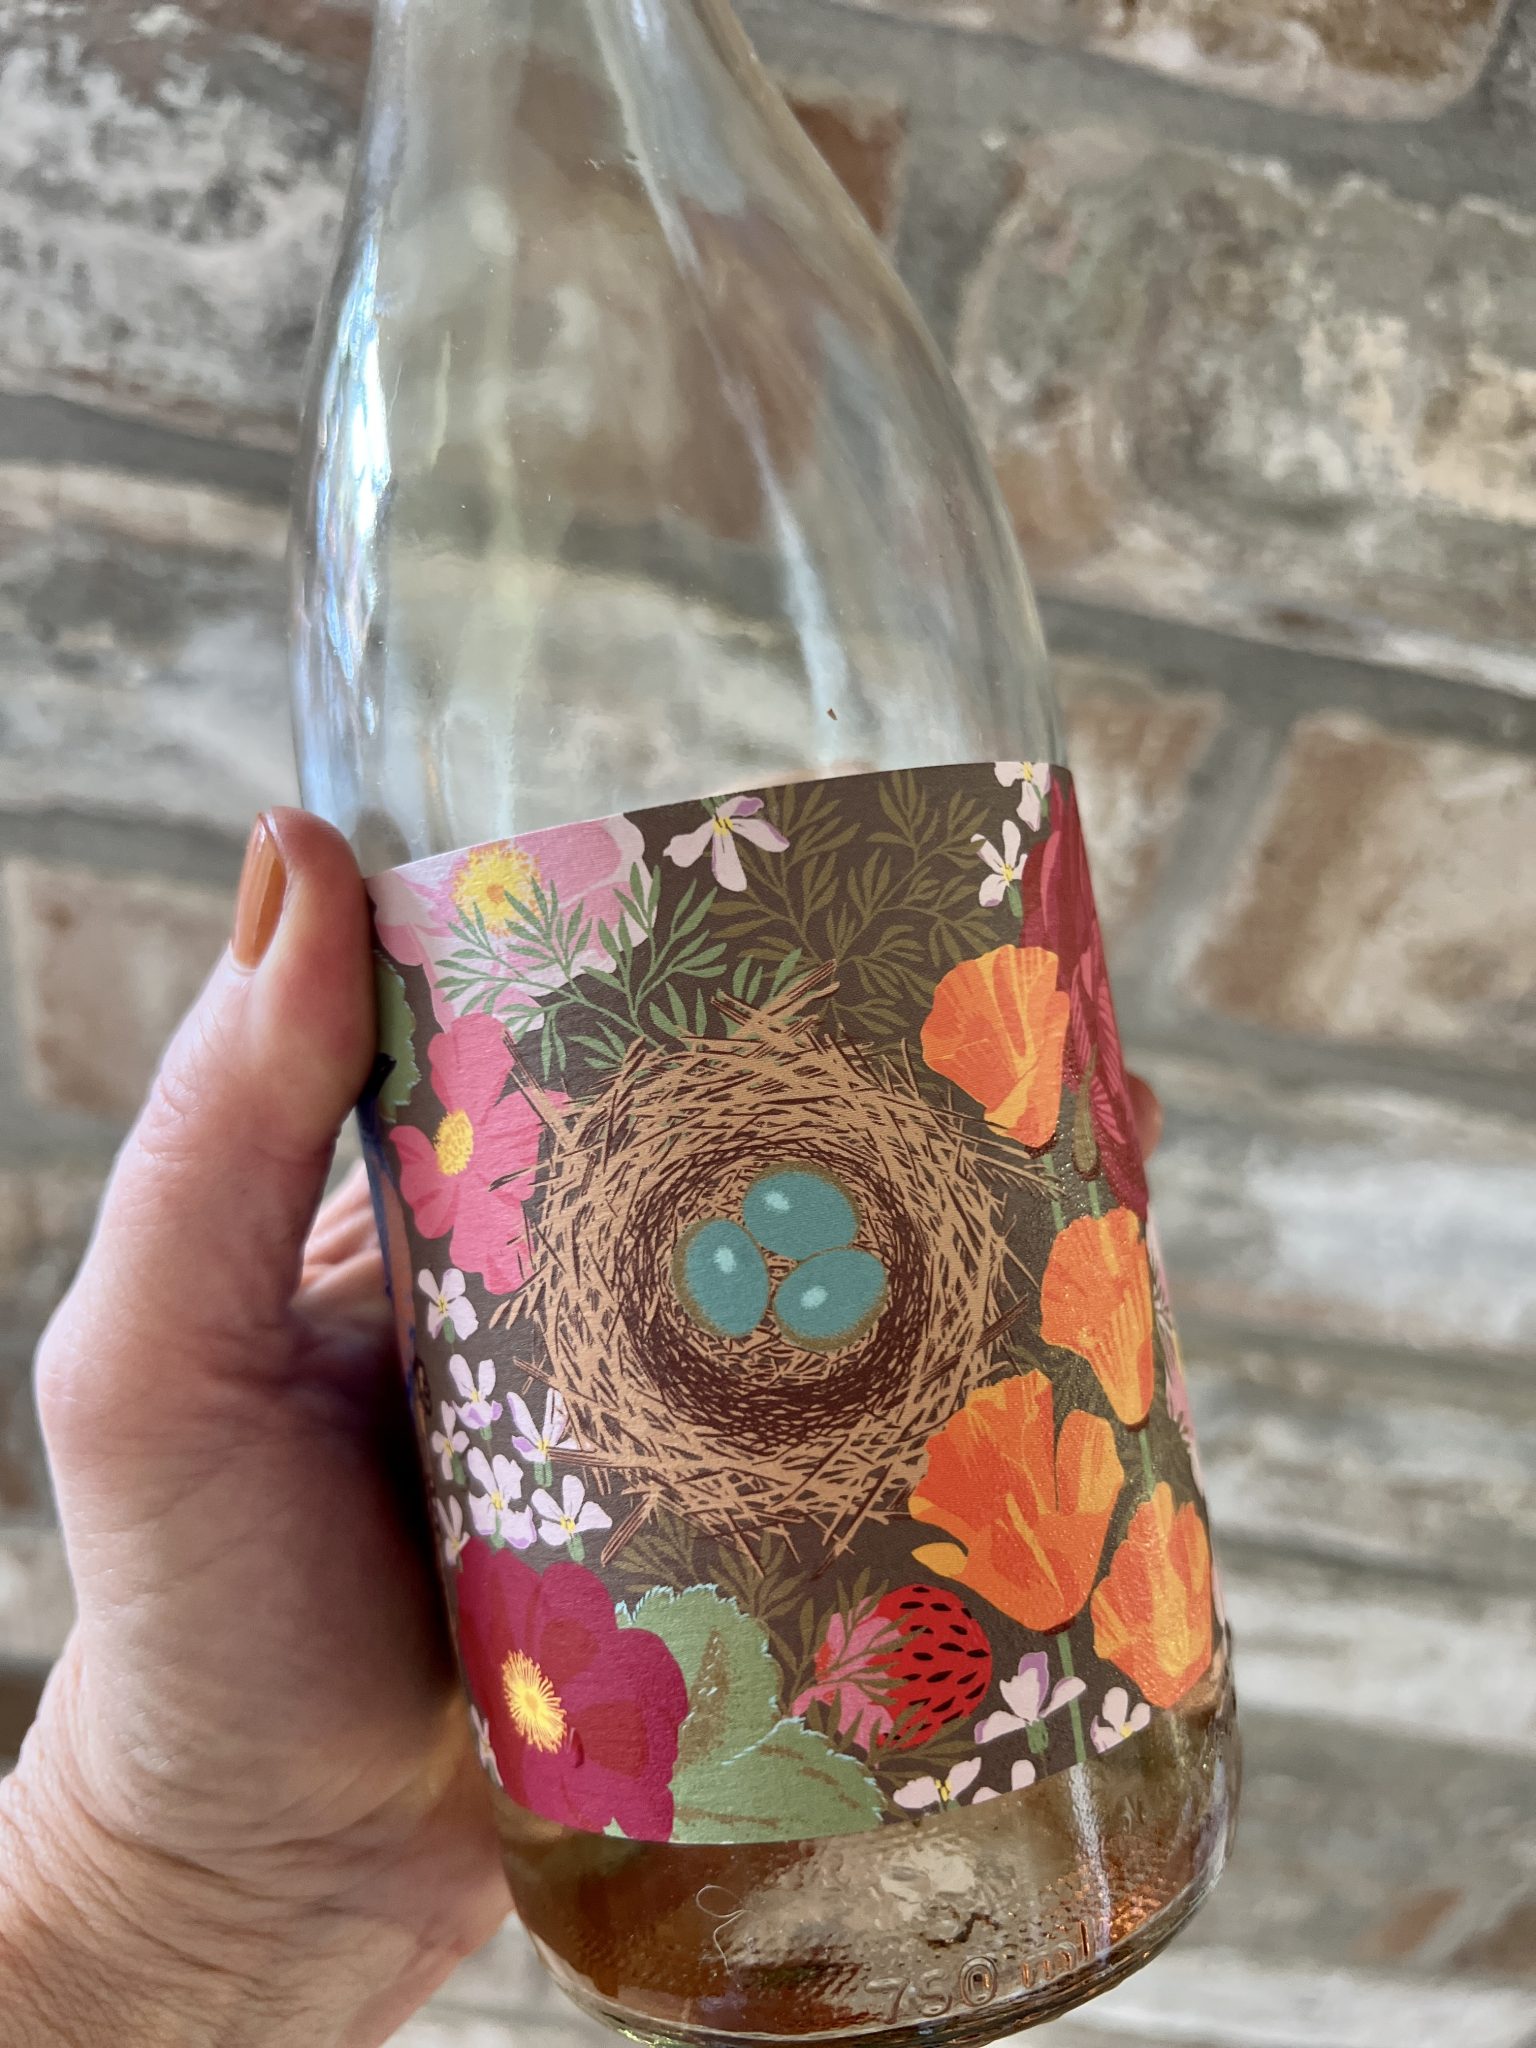
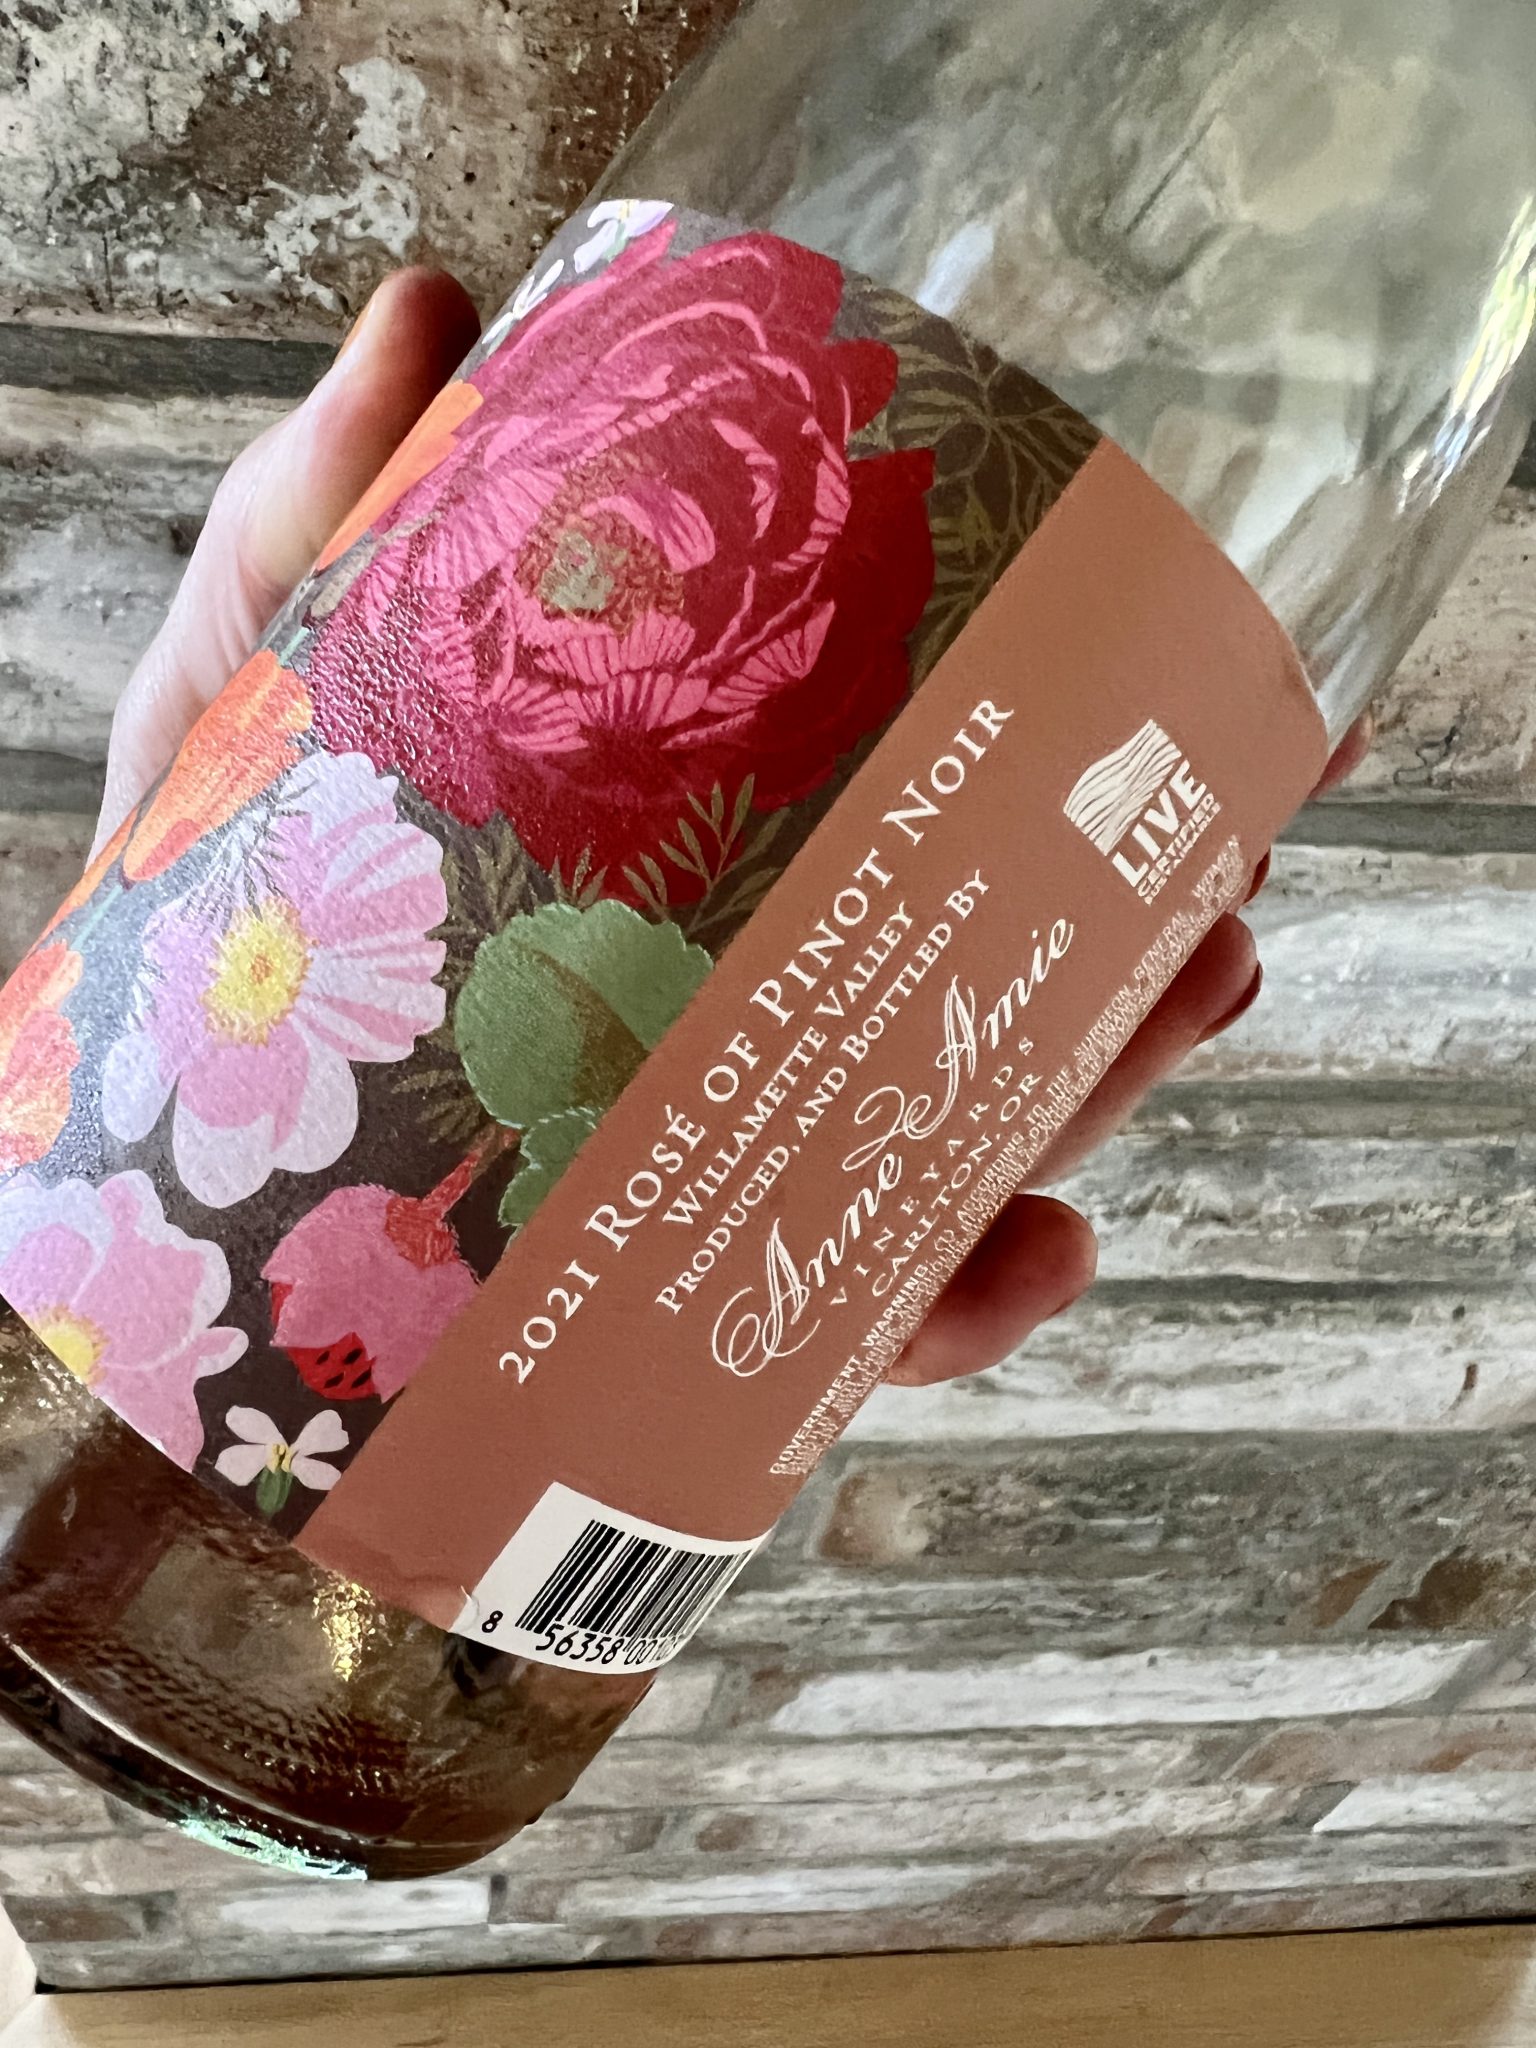
Anne Amie Vineyards, in Oregon's Yamhill-Carlton wine area, offers a 2021 Rosé of Pinot Noir you shouldn't miss. (This wine is no longer available directly through Anne Amie's website.) It is a dry (not sweet) medium bodied wine with soft fruit and herb flavors, a slight minerality, and balanced acidity that nicely supports the grilled peach salad. And the sweet label will make you smile in the same way the pretty salad does. Be sure to save it and use it as a vase for summer blooms once you've finish the delicious wine!
Click here to explore more 101-Mile Kitchen salads.
I hope you'll try this easy-going summer recipe. When you do, please share with our 101-Mile Kitchen community! Tell us in the comments, or on Facebook or Instagram, @101milekitchen. Have you joined the community? If not, we'd love to have you. You can take care of that right here, and when you do I'll send you a free Taste of Oregon appetizers recipe downloadable as a thank you!
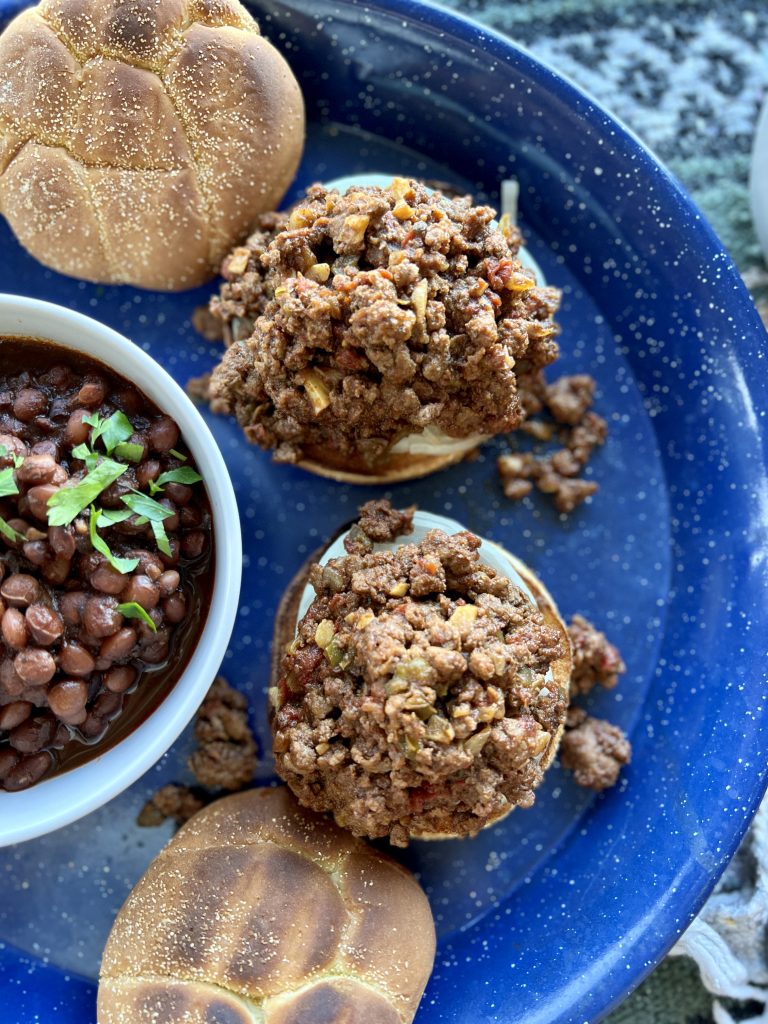
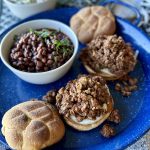
Howdy, cowboys and cowgirls! Chuckwagon Cookie here to share some pretty decent grub for summer fun. Cowboy Sloppy Joes, made with ground beef, smoky seasonings, and a little beer (non-alcoholic is my choice) are a great way to make some summer fun.
Make Cowboy Sloppy Joes when you gather around a crackly campfire, searching for Cassiopeia or the Summer Triangle. Try imagining what it might have been like to have worked the herd that day, or pretend to be making your way west on the Oregon Trail. Or simply take a pot of Cowboy Sloppy Joes with you to campouts, or make them for backyard gatherings. Ravenous kids will love these after jumping out of the pool or lake, when they get home from day camps, or when they come in off of the slip-and-slide.
Make no mistake in thinking these are just for kids, however. My dear friends Holly and Chris celebrate the end of the week by having themed Friday night mini-parties. They prove to me all the time that it's not that hard to have some simple grown-up fun.
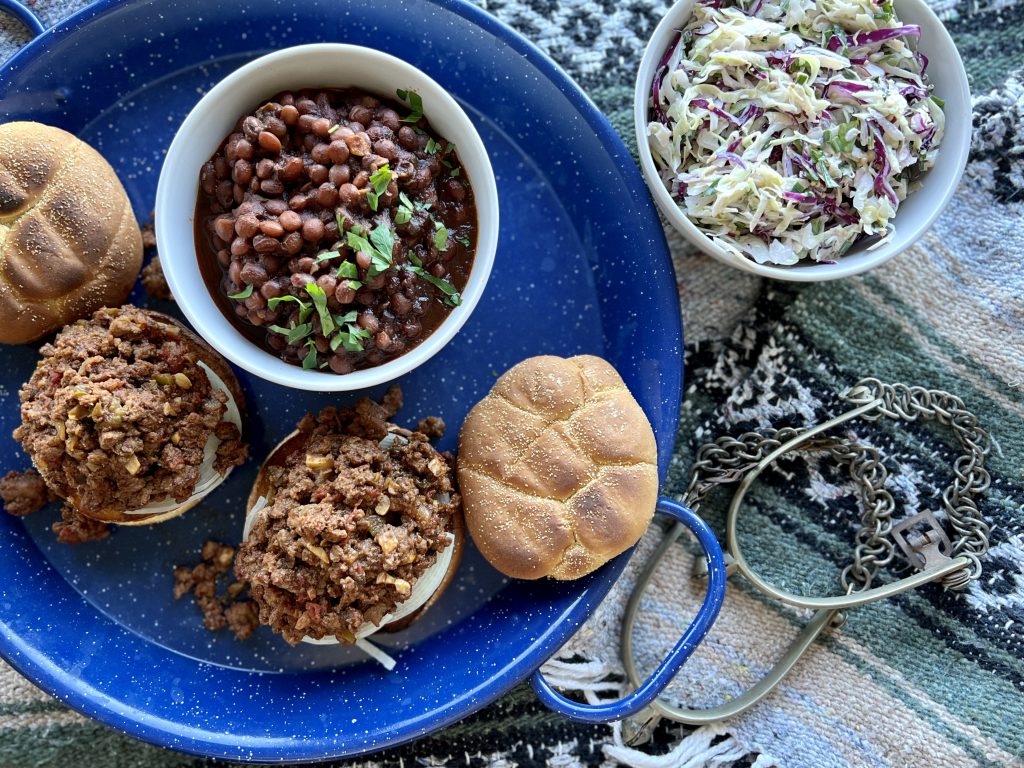
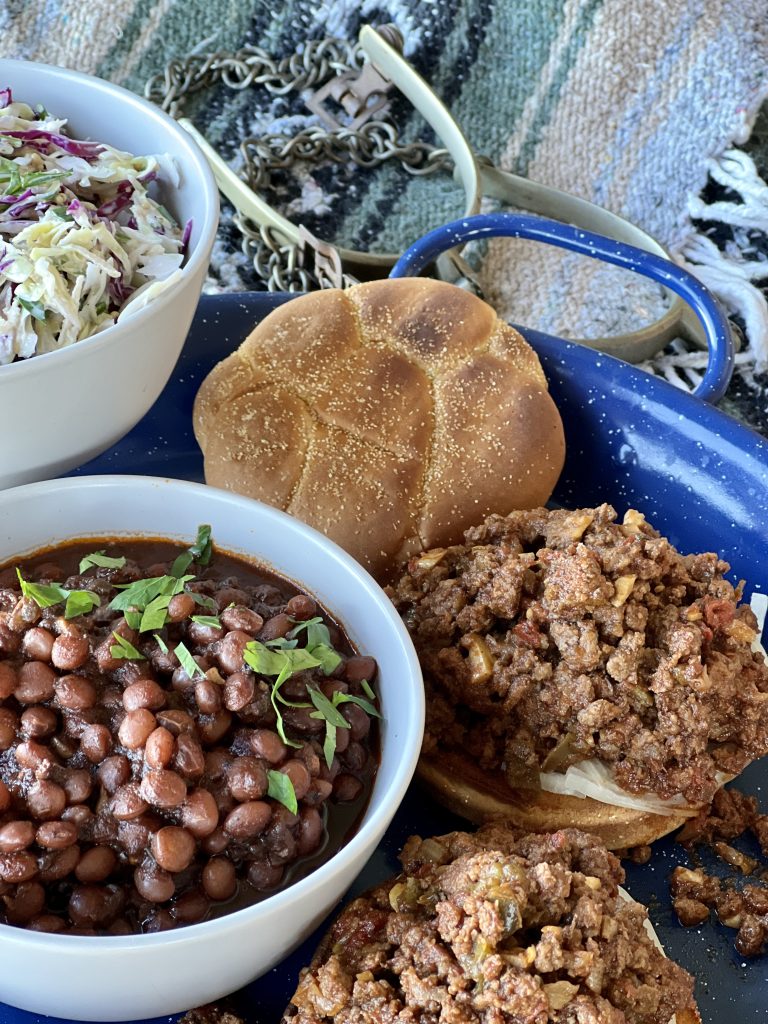
Take a page from Holly and Chris's playbook and plan a fun summer evening! For a menu of Cowboy Sloppy Joes, Cowboy Beans (click for the video recipe), and coleslaw, your attire might include a red bandana and a cowboy hat. Play a little Hank Williams or John Prine. Follow dinner up with an episode or two of 1883. You are not too old to create this kid of fun for yourself!
You'll notice that this recipe is scaled to feed six. This diverts from my new focus of developing recipes for smaller households, and here is why. I've packaged these up for the freezer in two-serving containers, which is handy in the summer when you've been out playing or just don't want to turn on the range. The sloppy joe mixture warms easily in the microwave or in a small saucepan. Besides, when the grandkids are coming over or you have that backyard cowboy party, you are all set for a slightly larger crowd.
Cheap, Quick + Easy 20-minute Beefy Spinach Burritos
If you enjoy this recipe, please give it a green star rating on the recipe card below. That will help others find it too. If you make the recipe, please show us and tag 101-Mile Kitchen on Facebook and Instagram! (It's a total thrill when I hear you've made my recipes!) And as always, your questions and feedback in the comments is welcome and appreciated.

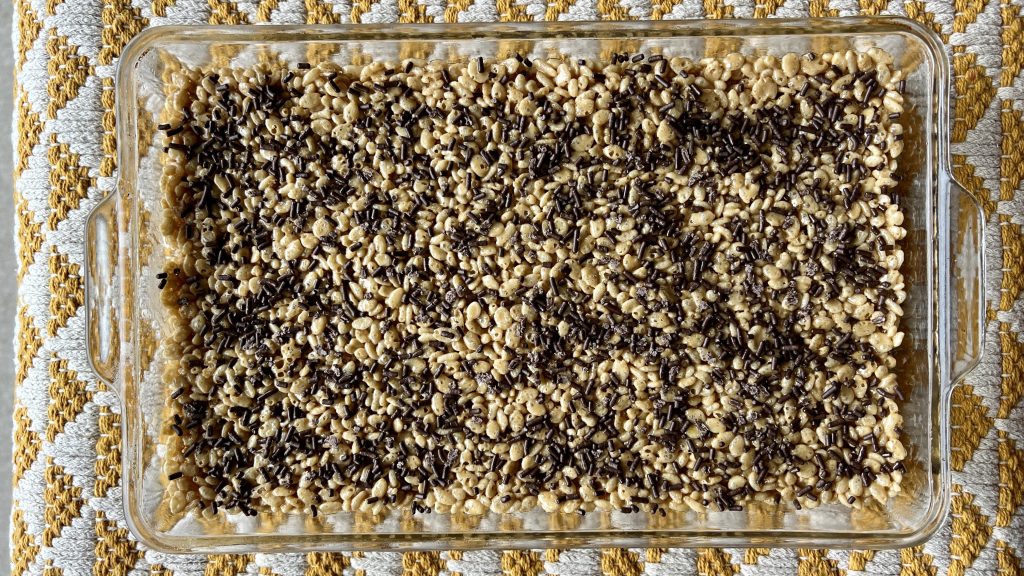
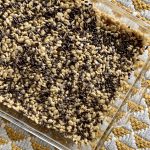
A few weeks ago I came upon this clever new idea for Coffee Rice Krispie Treats, an old family favorite. When I visit my dear mom, she still makes her famous peanut-butter rice crispie treats for me, my favorite comfort food, all these years later. The whole pan disappears before you can say snap, crackle, pop.
This recipe comes from the website Emotional Baking, with permission to share it with you. Each Emotional Baking recipe explores a specific emotion or mood and creates a recipe cure. As a result, it is a keen way to process feelings and address everyday mental health.
Ever since the horrific yet predictable incident that happened in Uvalde, Texas, comfort is definitely needed. Since gun violence is an adult issue requiring an adult response, this very adult rice krispie treat version is just right.
The Coffee-Infused Rice Krispie Treats recipe was designed to clear feelings of fogginess. Since this repeated mass tragedy in our children's schools creates a hazy, gas-lit feeling, yes. Foggy is indeed what I'm feeling.
In Canada, home base to Emotional Baking, package sizes for Rice Krispies and marshmallows are different than in the U.S. For those of us in the U. S. I made some revisions to utilize our product sizes. Also, I tinkered with their ratios by reducing the butter, and increased the amount of coffee powder for more pronounced flavor.
This no-bake treat couldn't be easier. Equally important, the addition of coffee flavor is purely genius. Why not make them today? Visit Emotional Baking for other delicious recipes that will match your mood. Whether it be happy, lonely, optimistic, or even foggy, you'll find the just-right kitchen therapy.
If you enjoy this recipe, please give it a green star rating on the recipe card below. That will help others find it too, and helps me pay the bills! If you make the recipe, please let me celebrate with you by tagging 101-Mile Kitchen on Facebook and Instagram. (It's a total thrill when I hear you've made my recipes!) And as always, your questions and feedback in the comments are welcome and appreciated.
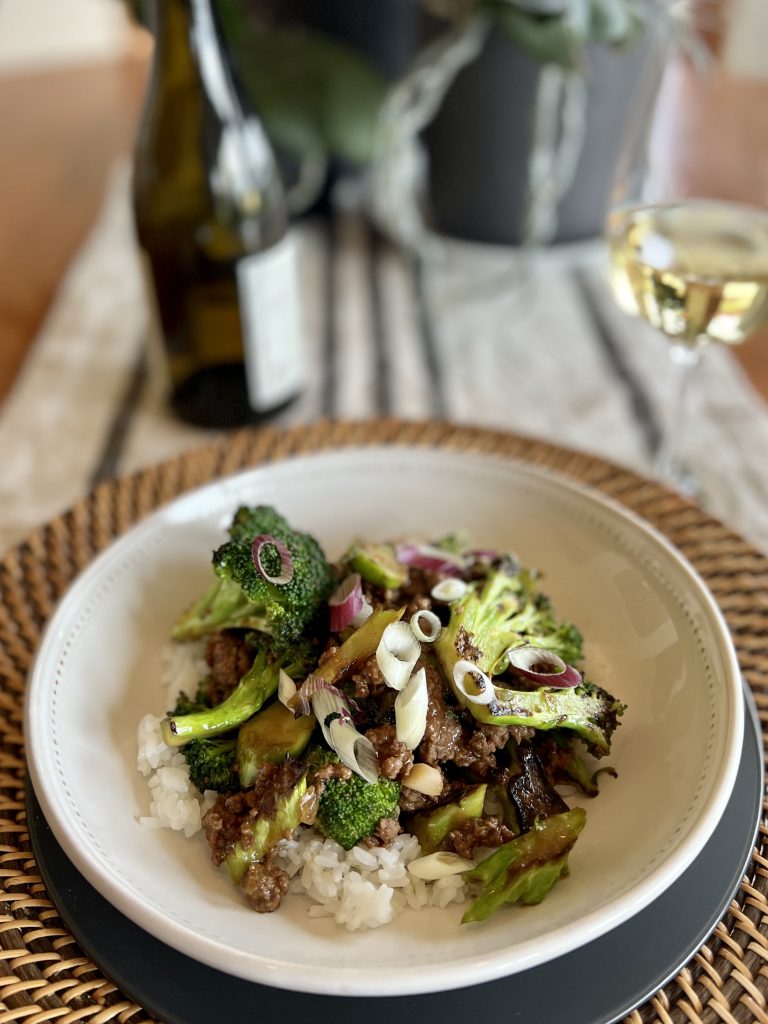
This weeknight-friendly Gingery Broccoli Beef stir-fry recipe came to me at the just-right time. Since last November we’ve been abuzz with houseguests. I took a four-month business course, and I started to teach cooking classes. And we’ve made the most of being able to travel again to see family. I can’t get enough of this gingery broccoli beef for four reasons, and think you might, too:
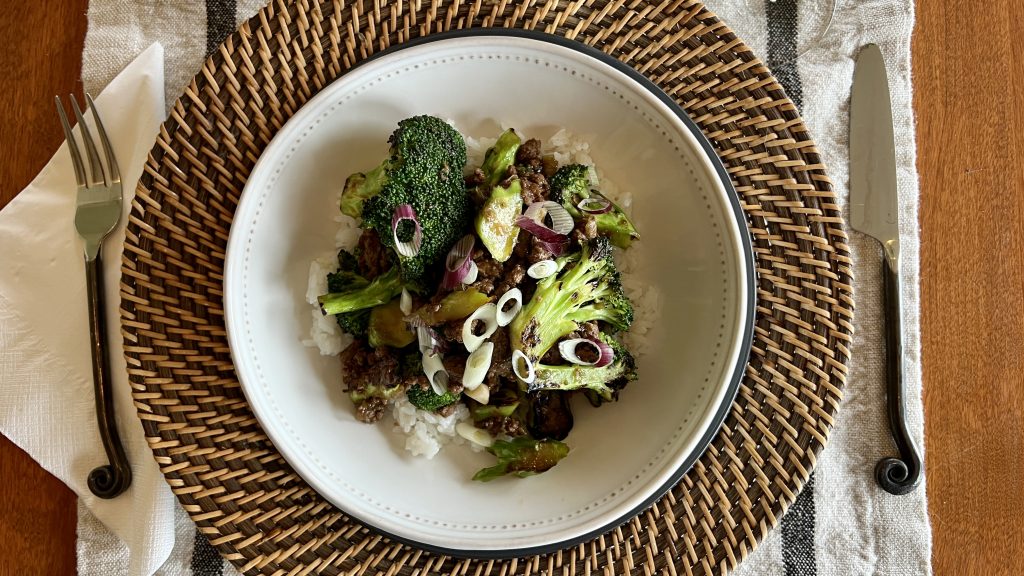
It's not often one sees the straight line in how recipes evolve, but this one is a perfect example. I learned this gingery broccoli and beef recipe from my friend Mandy. Mandy added oven-roasted broccoli to Michelle at Unbound Wellness's Mongolian Ground Beef. In a step toward speed and energy efficiency I stir-fry the broccoli in the same pan as the beef. I cut the broccoli stems into thin coins, and slice the florets to have have flat edges that allow a similar caramelization as roasting. Triple score: this way it takes less time, uses less electricity, and has one less pan to wash. Taking a page from traditional stir-fries, I add the sauce directly to the pan with the browned beef and broccoli. The stir-fry method seems a little more like the Chinese beef and broccoli dishes I have always loved, just using the weeknight classic ground beef.
Mandy and I have each made our adaptations from Michelle's original yet the spirit remains the same.

Grass-fed beef is the way to go. Grass fed beef is lower in overall fat than grain fed beef. Not only that, grass-fed beef contains two to six times more Omega-3 fatty acids than feed-lot beef. and is packed with B vitamins, vitamins A, E, and other antioxidants compared to grain fed beef. Thinly-sliced sirloin would easily work.
Don't count this recipe out for vegans. I suspect that plant-based meat crumbles or crumbled and browned tofu would be a swell swap for the ground beef in this recipe. If you give either option a try, please let the rest of us know how it goes.
If low-carb is your jam, swap the rice for cauliflower rice like Mandy does. It serves four, so my sweetheart and I each have dinner and a grab-and-go lunch with very little effort.
Don't be shy with the ginger! I uses pieces that are longer than my thumb and about twice as wide. The three-step recipe is really straightforward: Start your pot of rice first, and in about 20 minutes you'll have tasty, simple weeknight meal.

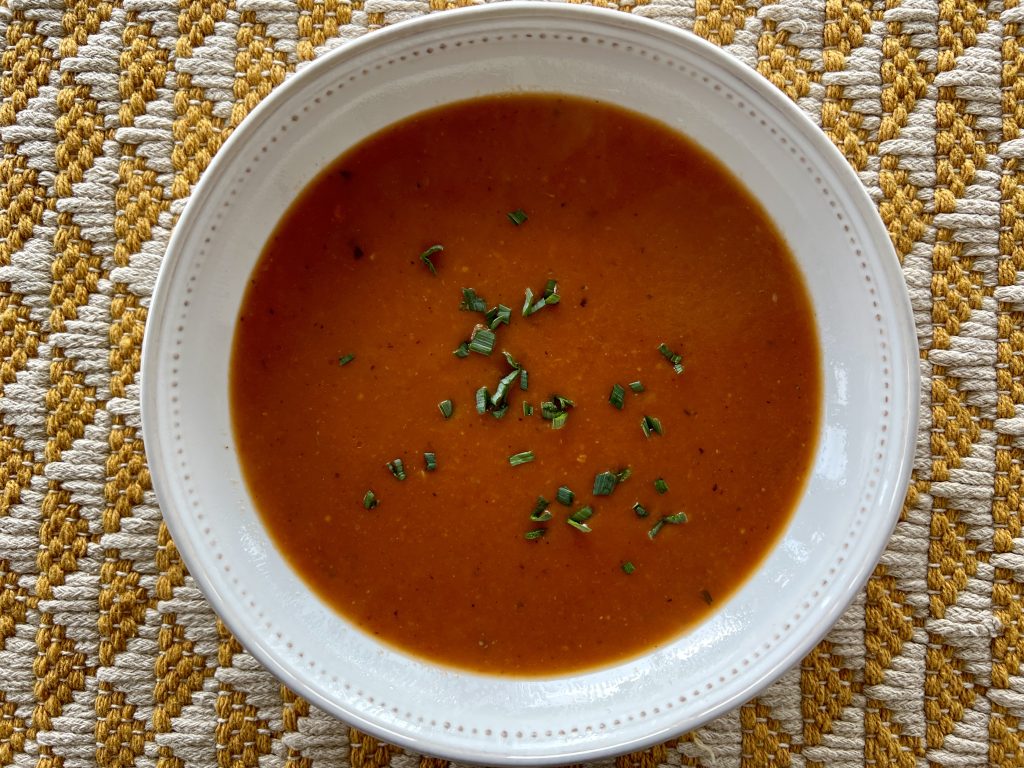
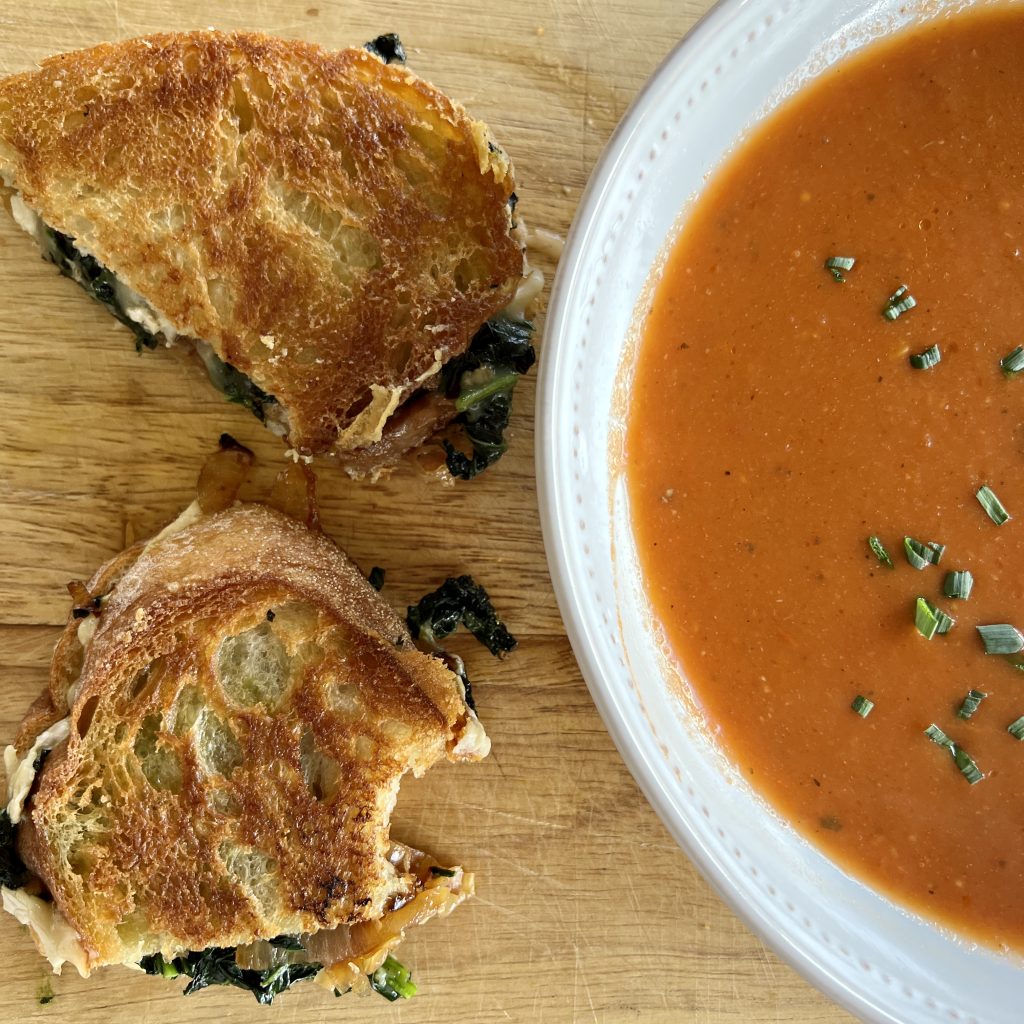
Yesterday I shared with you The World's Best Grilled Cheese Sandwich, made with garlicky greens, caramelized onion, and brie. It's only fitting that you have The World's Best Tomato Soup recipe to go with it. The two are a match made in heaven.
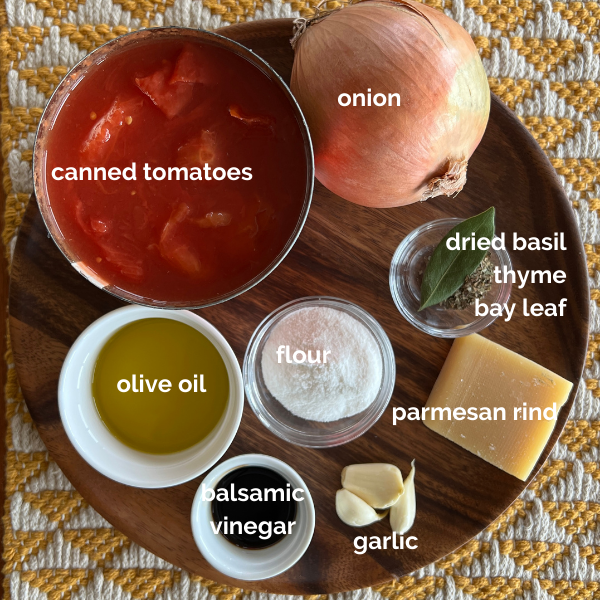
I've driven Interstate Five through California's agricultural regions many times. Enough times to see truckloads of produce pulling off the highway into the many canneries there. May I tell you that not all canned tomatoes are of the same quality? I've observed truckload after truckload of hard pink balls in the truck-trailers. It's not hard to know how they will perform in flavor and texture next to their red, ripe cousins. My practical observation is that you truly get what you pay for in canned tomatoes. Unless you use a lot of canned tomatoes, the price differential is relatively small. It might not make that much difference in a stew with lots of other flavors, but here's my rule of thumb: If the word tomato is in the title of the food I'm making, like tomato sauce, for example or the world's best tomato soup, I spend the extra dollar.
First, lets talk equipment. This is a time when an immersion blender is more than handy. Yes, you can blend the soup in batches in either a food processor or blender. However, a stick blender will get the job done and reduce the amount of cleanup you'll have. I've not met a cook yet who would argue with that!
Because it's still late winter I used dried herbs and a bay leaf, which also gets blended into the soup, but in the growing season, trade those herbs out for fresh basil, fresh thyme, or any of the tender, leafy herbs that suit you.
Two other touches make the soup extra special. I save parmesan rinds for times like this. Just throw one in during the short simmering period for an extra flavor boost. The rind will soften and become somewhat gooey looking, but holds together just fine and can easily be fished out prior to blending. If you don't have a parm rind on hand that's just fine. The soup is still lovely so don't let that stop you from making it. The second bit of magic comes with a hearty drizzle of balsamic vinegar as a finishing touch.
The olive oil in here gives it a creamy texture and appearance, but if you love a splash of milk or cream in your tomato soup, by all means use it.
If you like this recipe, please leave it a star rating by clicking on the green stars below the title in the recipe card below. If you like the 101-Mile Kitchen project, I'd be honored if you subscribed to the newsletter!

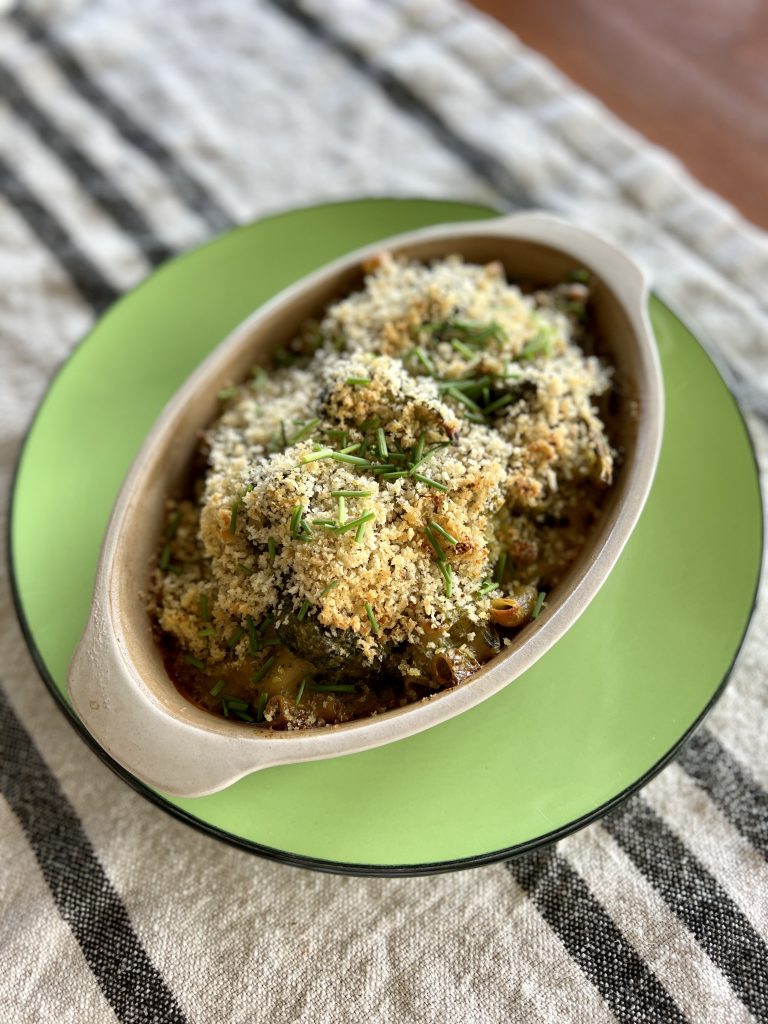
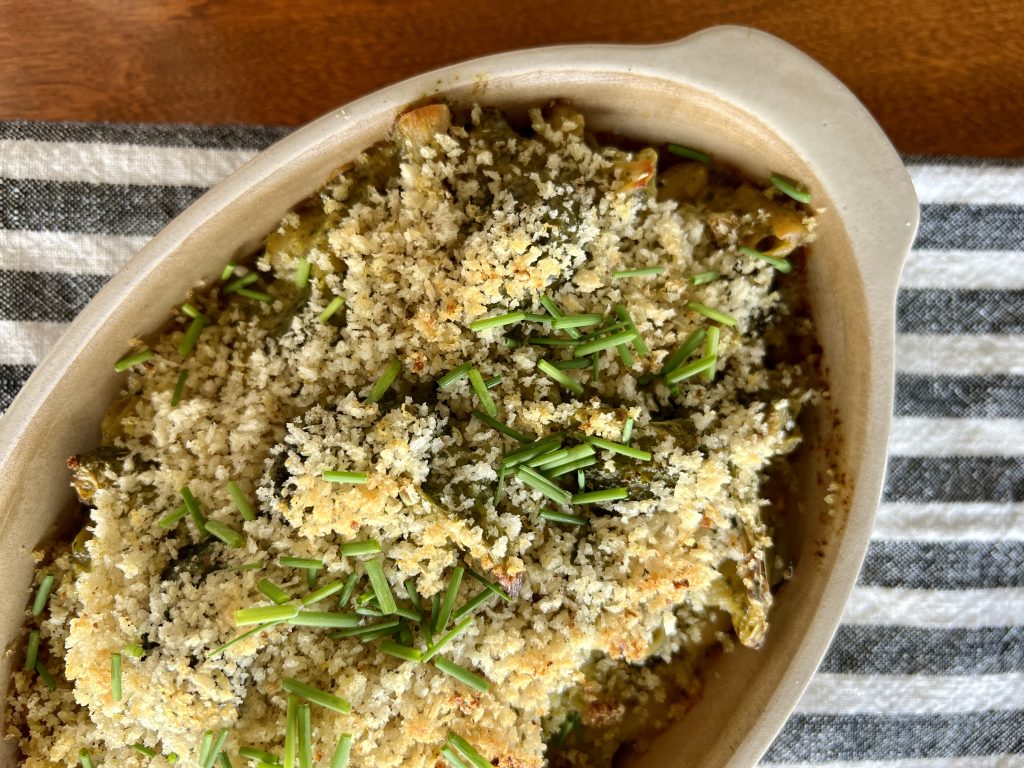
Adulting has been especially challenging this week, and comfort food has been as important as ever. Green Goddess Macaroni and Cheese has that magical combination of being carb-y, cheesy-gooey, and packed full of good-for-you stuff that ensures that if this is all you eat for a week, you'll at least be getting your vegetables.
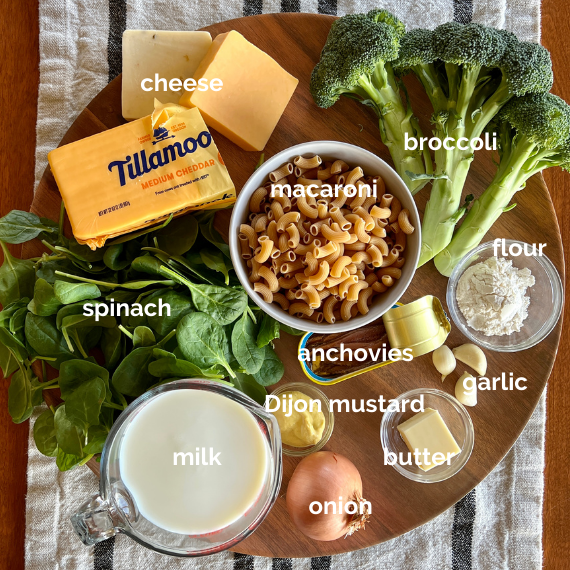
This recipe amps up the adult factor with the addition of Dijon mustard and a few anchovies to the cheesy base. These additions offer an exciting depth of flavor snuggled up with the same cozy familiarity you expect from good ol' macaroni and cheese.
When the going gets tough for friends and family we ask, "How can I help?" Often the response is something like, "Well, there's nothing anyone can really do except send your love/ good energy/ healing thoughts/ prayers." I'm a big fan of asking the universe to surround my beloveds in need, but when I hear that there's nothing I can physically do to help it is frustrating to not DO something.
This week the shoe is on the other foot. I have been on the other side of those words how can I help? and have learned their hidden power.
Even when there is nothing practical others can do to help, the willingness of a friend to accept a small chunk of my burden has a remarkable effect. Every person who asks this forms a network of support and love that lessens my emotional weight. Every one of the beautiful souls who steps forward to ask how can I help? becomes an invisible army around us-- my family and me.
So never be discouraged if there's "nothing you can do". Your presence, your calls, your prayers and good juju are so important. So impactful. So encouraging. Such a display of kindness. Love personified, even.
And, if you can, show up with a dish like this one so your loved one is sure to eat their vegetables all wrapped up in the comfort of good ol' macaroni and cheese.

Anchovies and Dijon mustard make this recipe incredibly wine-friendly, not that plain mac and cheese needs a lot of help with that! And this week there definitely has been wine! We found the 2020 Conde Valdemar Blanco Rioja from Valdemar Estates Winery in Walla Walla, Washington to be a better than perfect pairing. It is light, clean, and refreshing-- in other words, a wonderful foil to the rich cheese dish. This is truly a joyful wine.
I used to always make mac and cheese with this ratio:
One pound pasta/ 4 tablespoons flour/ 4 tablespoons butter/ 4 cups milk/ 4 cups (one pound) shredded cheese. This ratio feeds a tribe.
Since most of us here are feeding one, two, three or four people on a daily basis I've revised my formula:
One-half pound pasta/ 2 tablespoons butter/ 2 tablespoons flour/ 2 cups milk/ 2 cups (1/2 pound) shredded cheese. In our household, that makes enough for a very handy two meals apiece. If you are feeding a bigger household, guests, or a gathering, just double the recipe as it is written.
Yes, there are little anchovy fishies tucked into this dish. Umami, friend! Do give them a try. Adding the raw broccoli florets to the mixture right before baking keeps them a wee bit crunchy and not lost in the creamy pasta. The crispy topping adds a wonderful textural note, too. You may be tempted to forgo that part, but it is a low-effort-high-reward addition.
You'll also note that I used our local favorite Tillamook Creamery Cheddar and Monterey Jack cheeses in this dish. If you don't have a local cheesemaker near you, these are worth seeking out.
. . . for you, or for those you love:
Carrot Risotto with Green Garlic Sauce: Recipe Here.
Easy Winter White Vegetable Soup and Infinite Variations: Recipe Here.

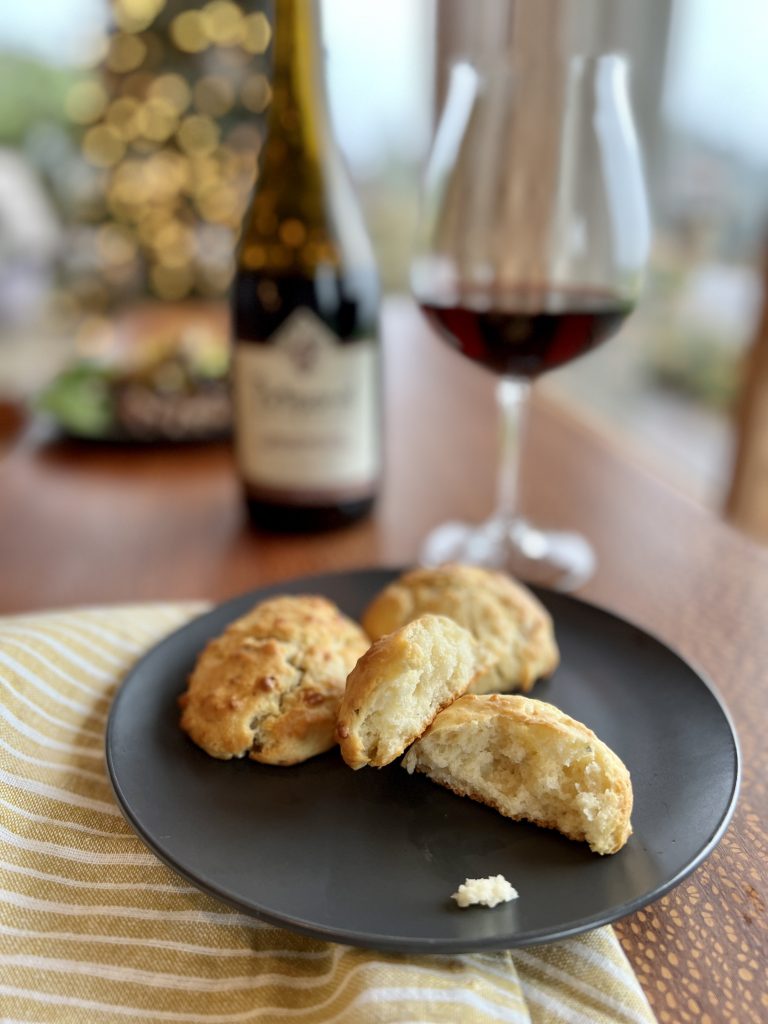
For every aspirational, time-consuming, detail-laden recipe in a cook's repertoire, she needs ten like this one in her bag of tricks. These 20-minute, one bowl Quickie Olive Oil Drop Biscuits have elevated so many meals in my lifetime. They are a perfect last-minute additional to all the soups and stews of the season. The biscuits also compliment any main-dish salad, and are a great way to stretch a meal when guests pop in (like back in the BC days.) Really, they are perfect wherever a dinner roll or biscuit would fit.
A fun trick is to make the biscuits small, dropped from a dinner spoon instead of a soup spoon, and serve them as an appetizer or snack with a glass of wine, an American version of gougères.

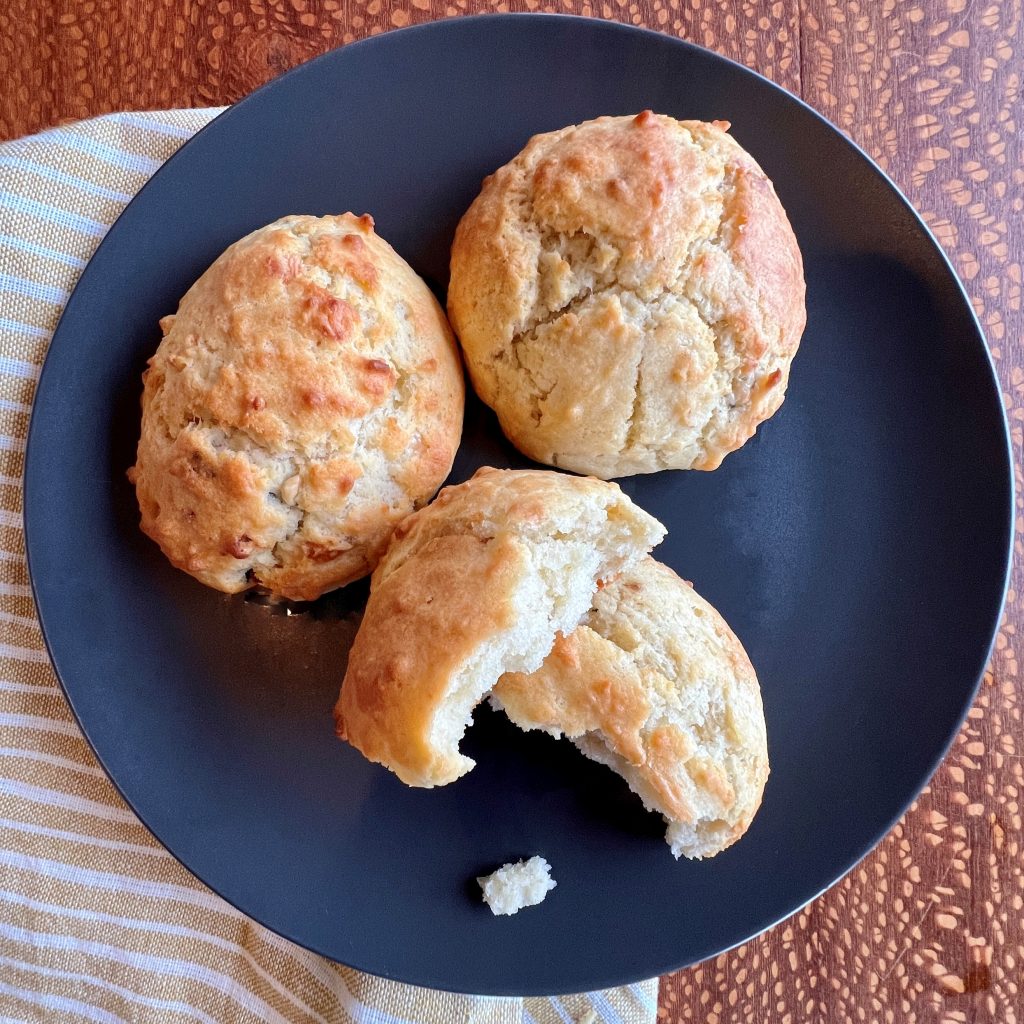
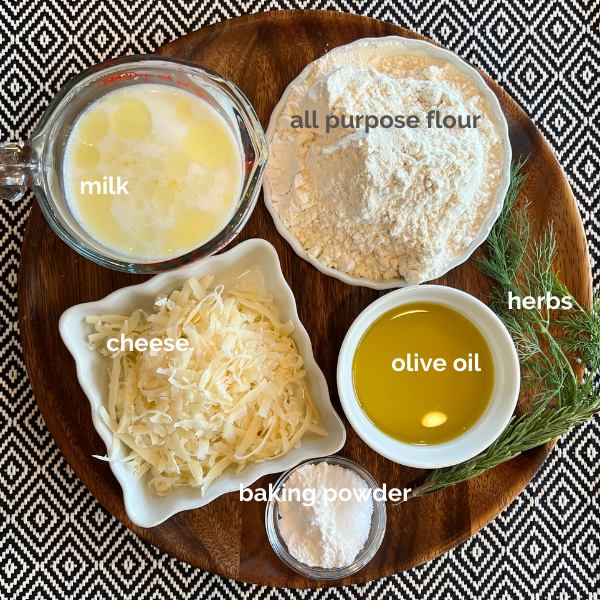
Selling point number one-- quickie olive oil drop biscuits are made in lightening speed. As in, begin preheating your oven now, and your biscuits will be mixed and formed before the oven is up to heat. There are only four primary ingredients to gather and measure here. Using olive oil eliminates the step of cutting in butter. Without the need to roll out and cut the dough like a typical biscuit you save that time, and a lot of cleanup by keeping everything contained in one bowl and not spread all over the counter.
Next, you'll fall head-over-heels for them because they are highly customizable. Olive oil drop biscuits without any of the optional add-ins are deliciously simple, and they become even more remarkable with the addition of some cheese, fresh or dried herbs, or better yet, both cheese and herbs. Any cheese that can be crumbled with your fingers or grated works here, and I often use a combination of cheeses just to use up the left-over nubbins.
Lastly, I love this recipe for olive oil droppers because it makes a relatively small batch. Did you know that in 2020, 53% of American households has one or two members? Most of us can't use a dozen biscuits. This fact is something I'm taking note of more and more when developing recipes, and you should see a change in the recipe sizes on these pages.
Any of the variations of Winter White Vegetable Soup: Get recipe here.
Healing Chickpea Orzo Bowl in Ginger Broth: Get recipe here.
Roasted Mushroom, Grain, + Spinach Salad. Get recipe here.
Roasted Peppers, White Beans, Feta + Simple Herb Sauce, made sheet-pan-style instead of grilled. Get recipe here.


You’re in the right place! I’m Pam Spettel, home cooking expert and guide, and I’m here to show you how to break up with cooking and hospitality anxiety, learn how to use recipes as guides rather than strict rules, and let your cooking intuition and confidence soar.
Superpower: Dreaming up recipes that work, serving them to my friends and family, and writing little stories about how cooking them well is the same as loving well.
Inspiration: Ingredients! The fresh, colorful, fragrant, local, seasonal ingredients found in the Pacific Northwest are my creative medium.
Heroes: Local food and wine producers– the people who keep me, my family, and our community nourished and happy.