Here is a small collection of my holiday favorite recipes that will take you from Thanksgiving into New Years. Like most everything I present to you, these highlight seasonal ingredients, and are typically full of love but not labor. As a person predisposed to the holiday scaries brought about by being a solo planner, cook, and hostess for far too many years, I no longer have time or energy for the complicated.
I grew up in a small family who lived far away from any relatives, so Thanksgivings included the complete standards but on a small scale, always prepared beautifully by my mom. I also raised my own family far away from any relatives, so that pattern repeated. If I were hosting Thanksgiving this year, it would the 38th time in the last 41 years. That's a lot of holiday cooking!
Now, my sweetheart and I have a combined seven grown kids, and ten amazing grandkids. This year we are visiting a daughter in Texas and her beautiful family. I get to relax a bit and be the assistant!
Here are some recipes that work for smaller groups, or perhaps step out of tradition a wee bit if your weary of the classic standards.
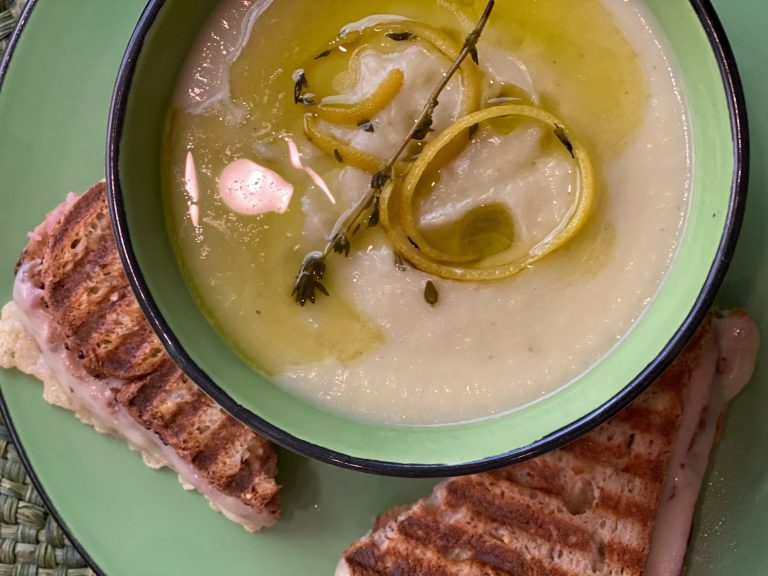
I love handing guests a cup of soup as they arrive this time of year. A cup or small mug of soup, like this Winter White Vegetable Soup, or its winter squash version (also within this recipe), is portable as guests mingle and makes a nice handwarmer coming in from the cold. This recipe has enough body and flavor to make it delicious and noteworthy, but it light enough to keep from spoiling anyone's appetite. This pureed soup requires using an immersion blender, so if you don't have one, now is the time. (This is the one I have and love.) An immersion blender is also a truly fantastic Christmas or Chanukah gift for budding cooks, or anyone who doesn't have one. Another big plus-- this soup can be made two or three days ahead and rewarmed at the last minute.
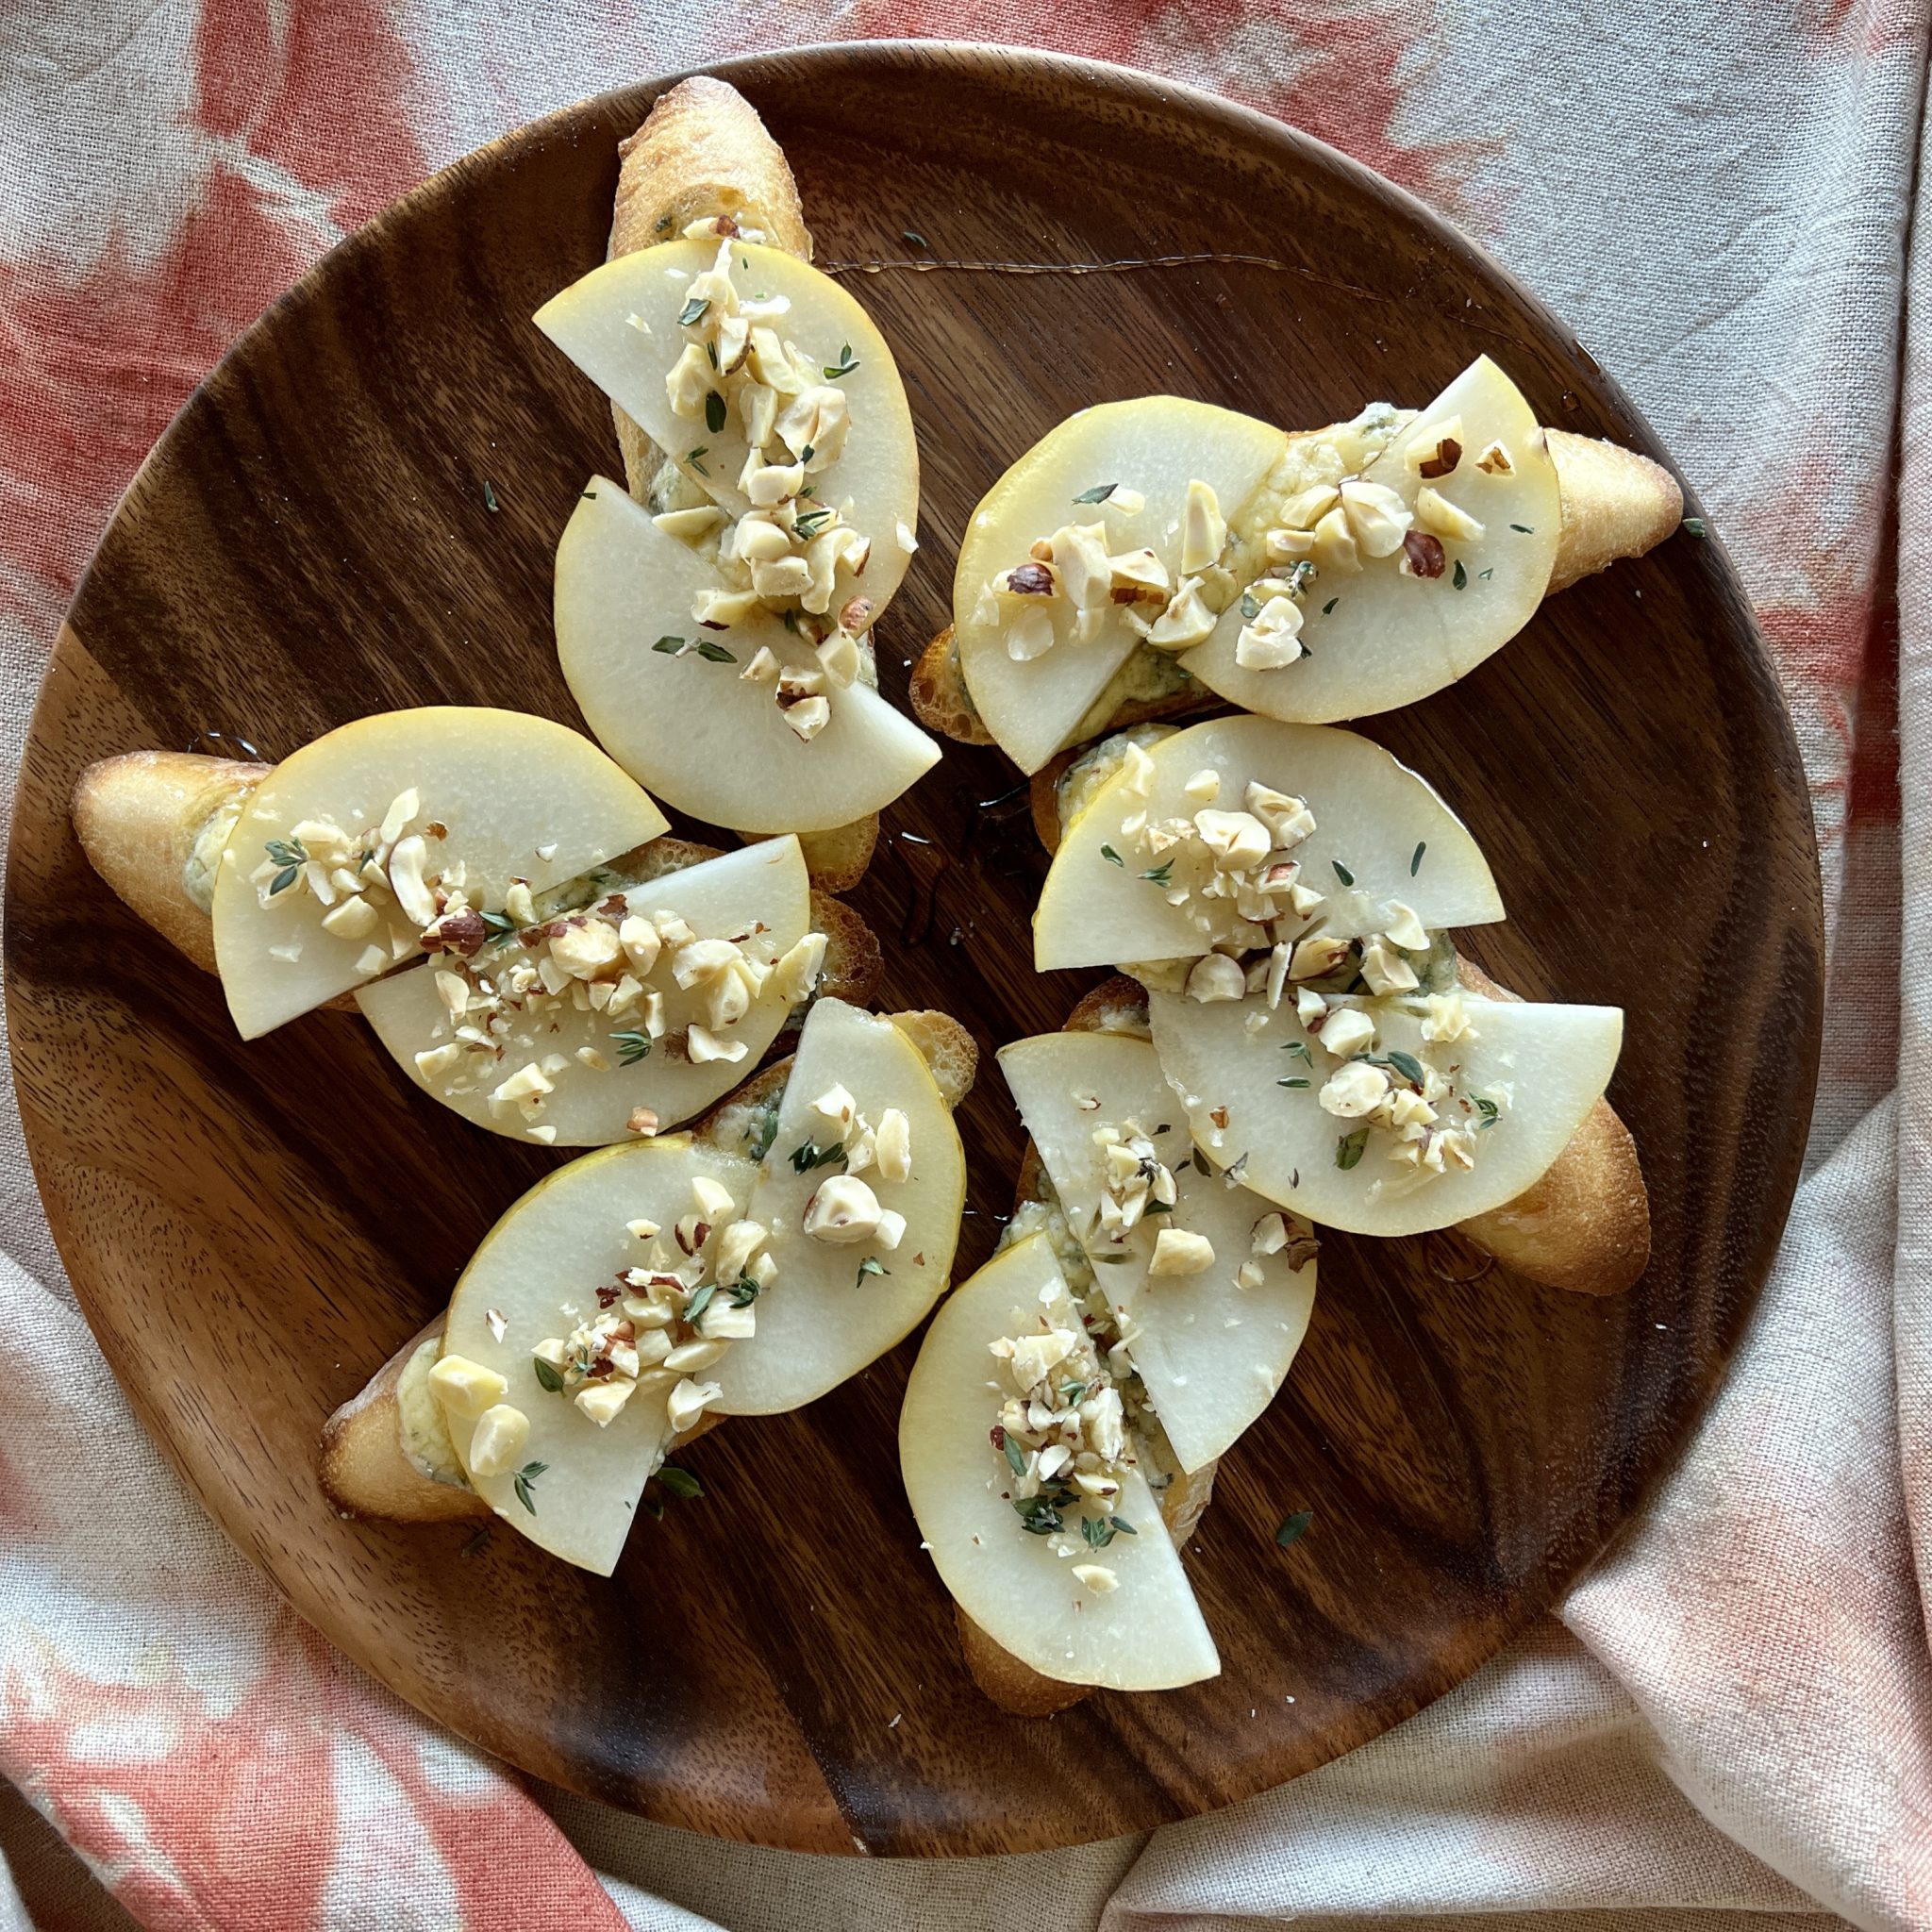
Blue Cheese and Pear Tartine (like a crostata or bruschetta) are frankly amazing. The favors sing. Use this throughout the holiday season, whether its a quiet night at home, or if you are hosting or taking food to a party.
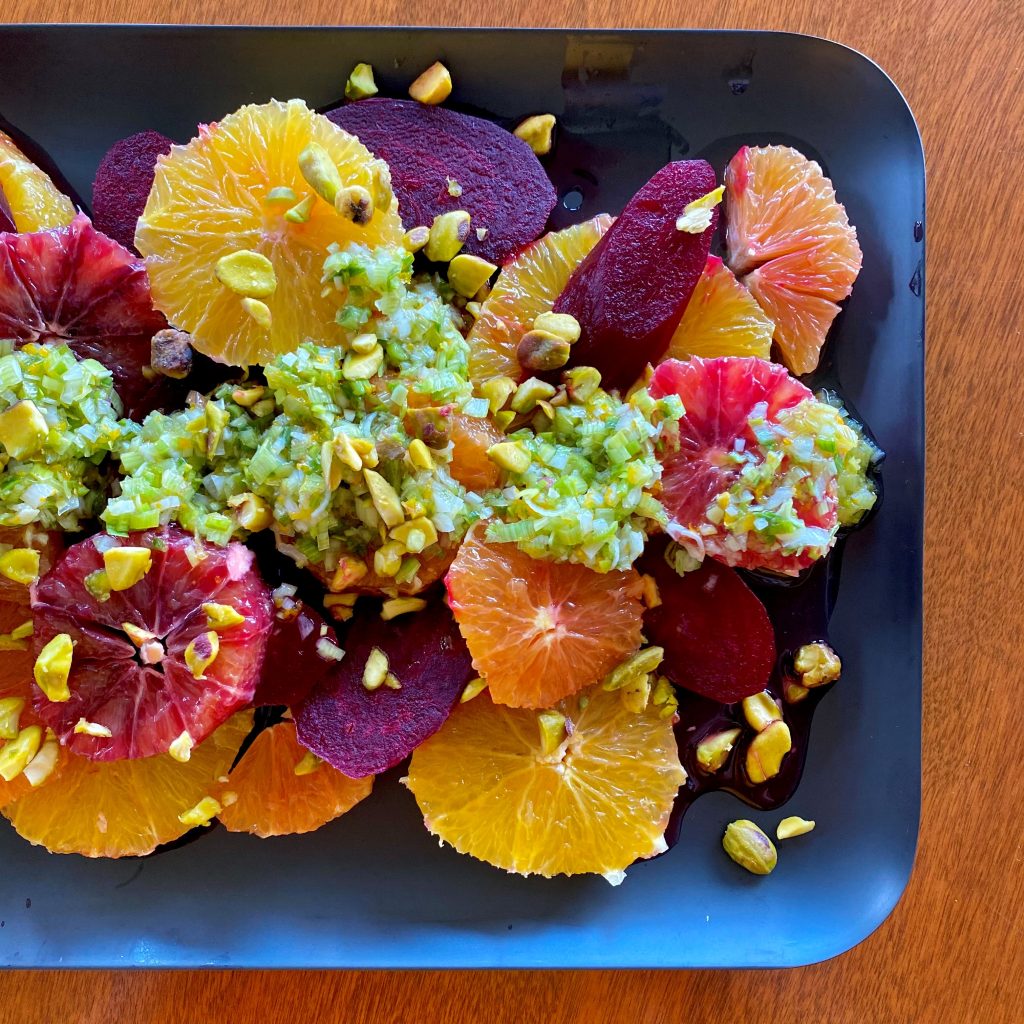
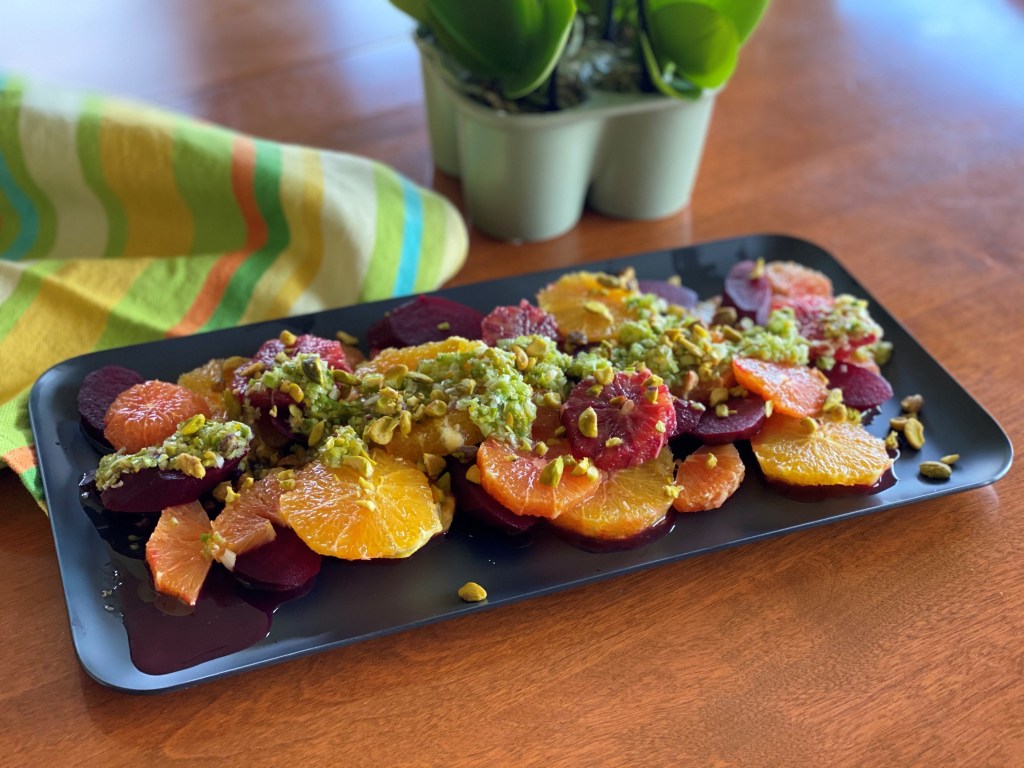
Some of my favorite holiday recipes include Citrus Rush Beet Orange Salad. I love this one for it's pop of gently acidity that seems to be very welcome with all of the other buttery dishes. It is so pretty, and the components can be made ahead.
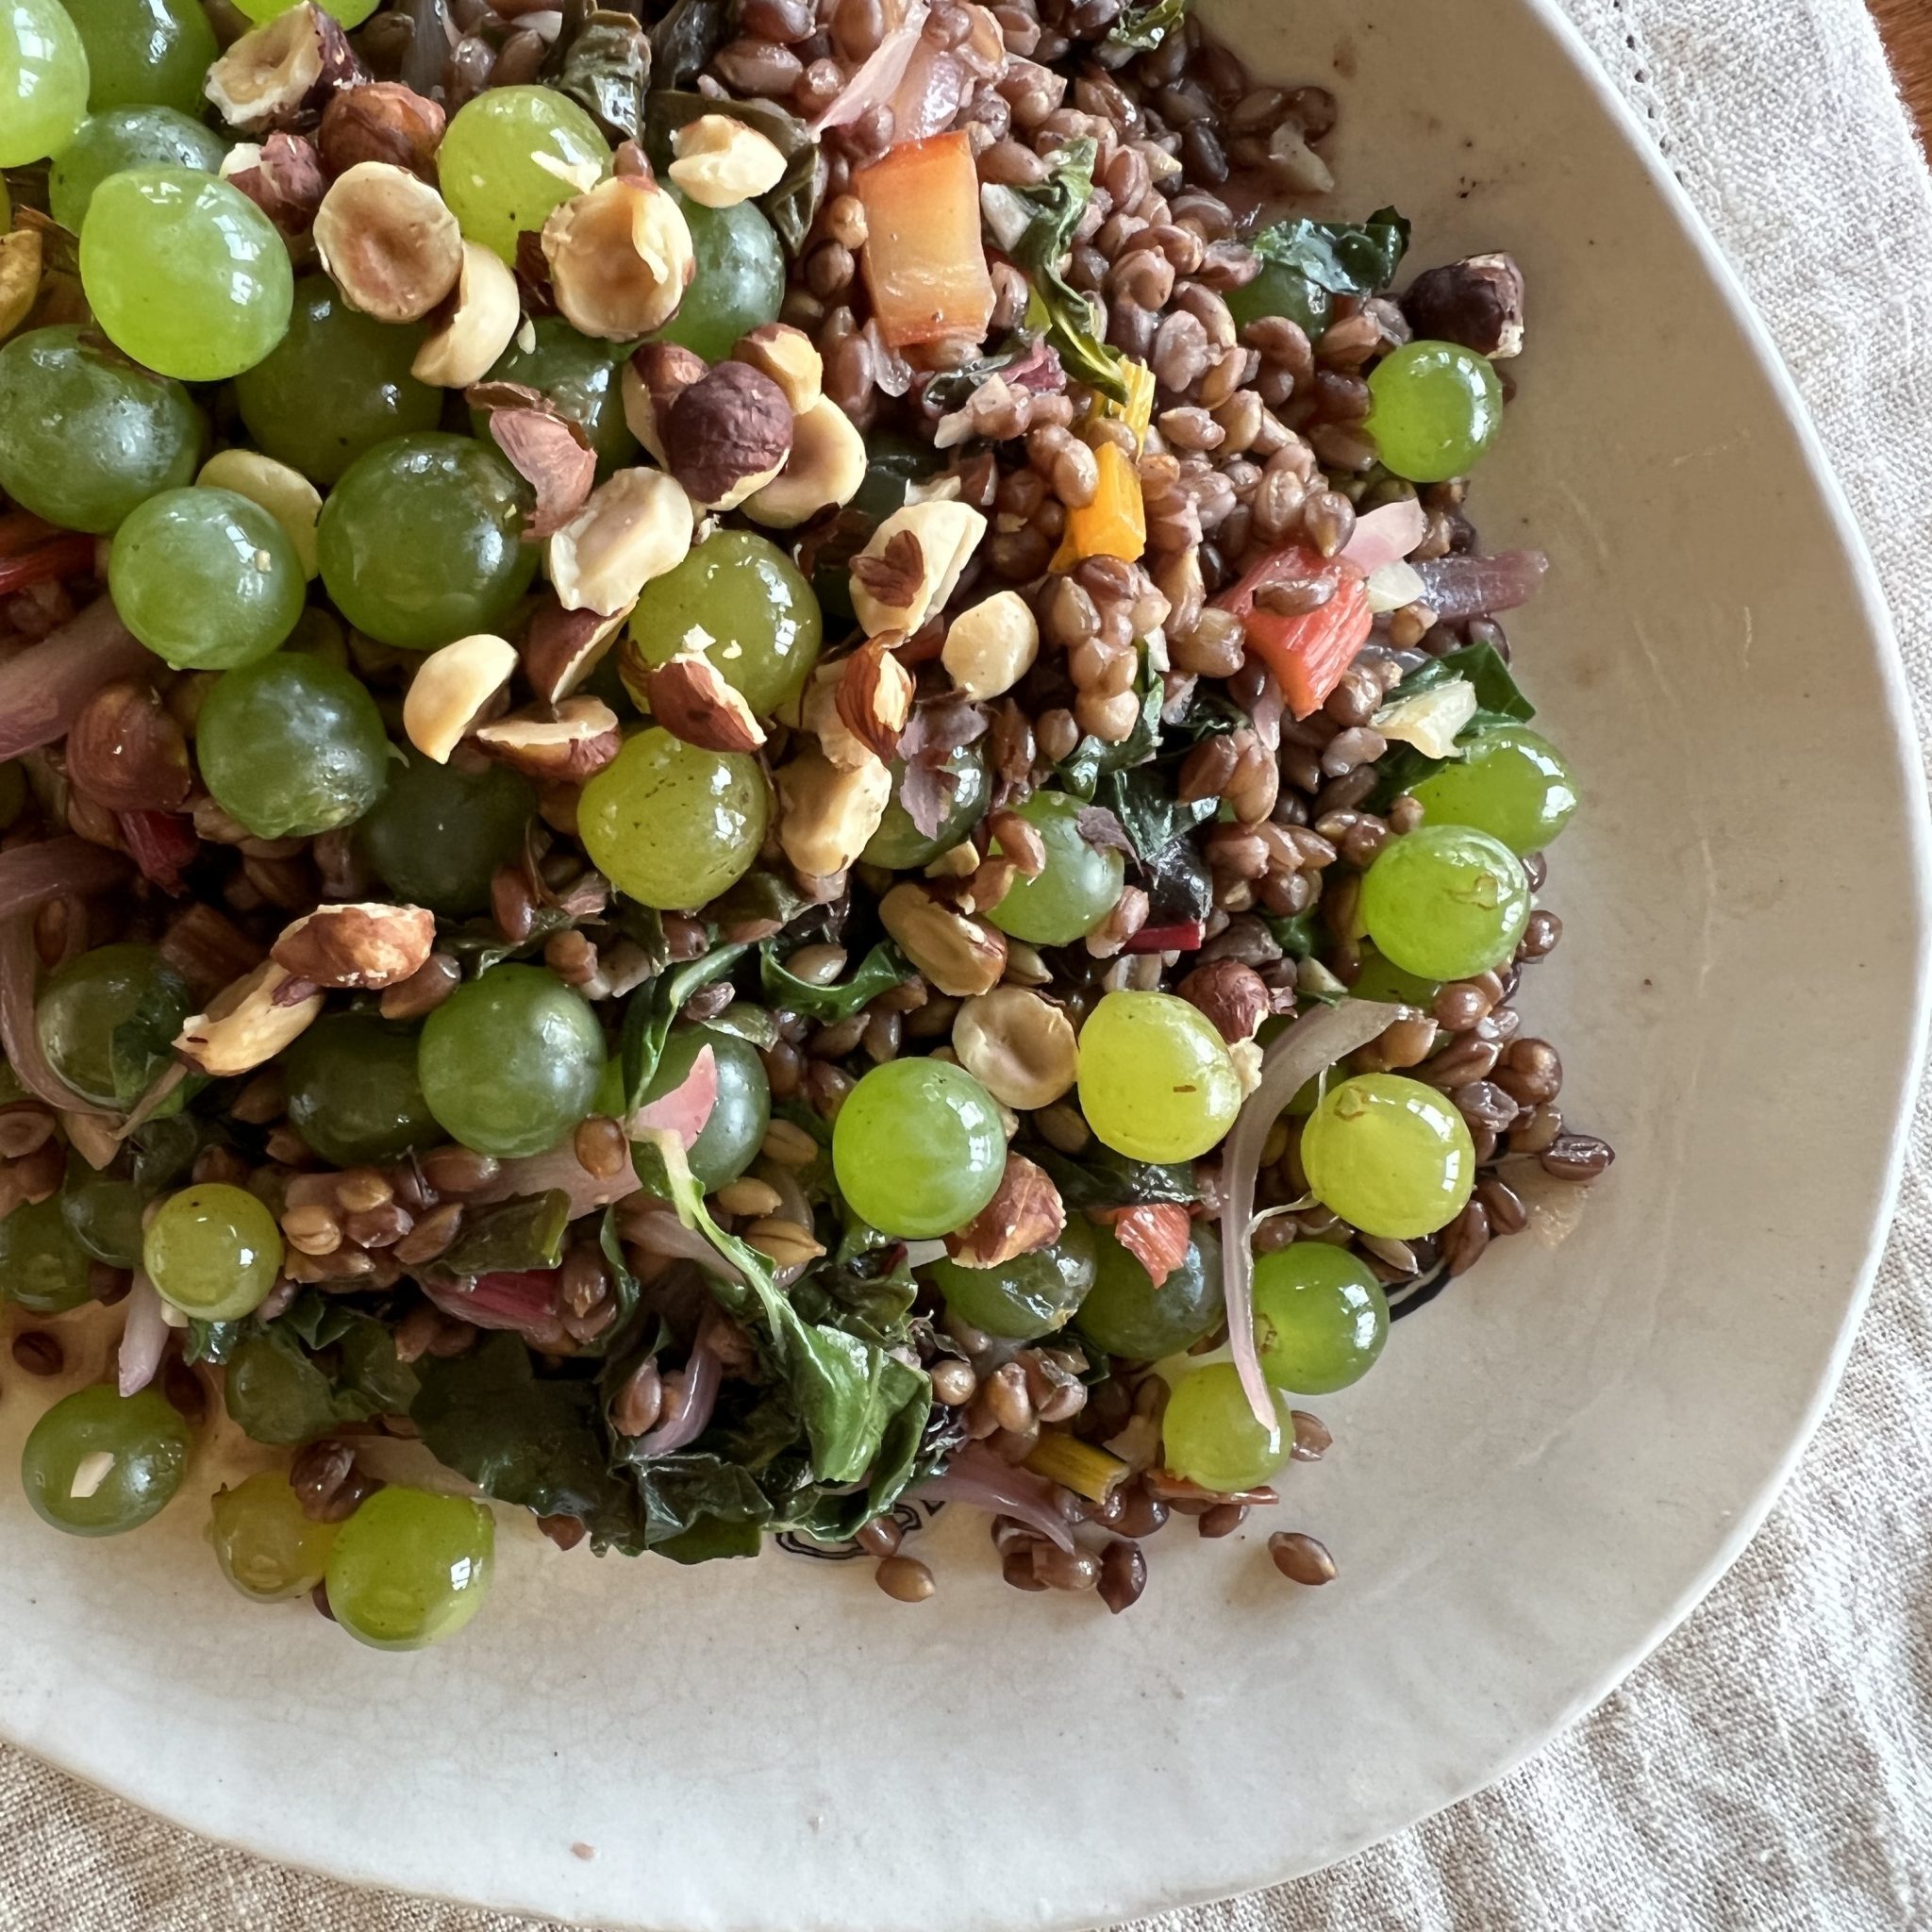
Autumn Grains, Grapes, and Greens is beautiful, and blurs the line between side dish and salad. With it's grain base, it is also wonderful to serve when vegans and vegetarians are at your table. They will truly know you love them!
As for cranberry sauce, I love hearing about everyone's favorite recipe. There are so many ways to enjoy cranberries, and it seems that once we hit on our favorite there's no room for change. This is the recipe I've used since the early '90s, and my daughter makes it every year now, too. Cranberry Sauce with Raspberry Vinegar was originally from Bon Appetit magazine, and you can find it here. I've used several blueberry and blackberry vinegars in it with equal deliciousness (P.S.-- don't be tempted to scrimp on the raspberry vinegar. That's where the magic is. And if you can get your hands on it, this blueberry or blackberry vinegar is glorious.)
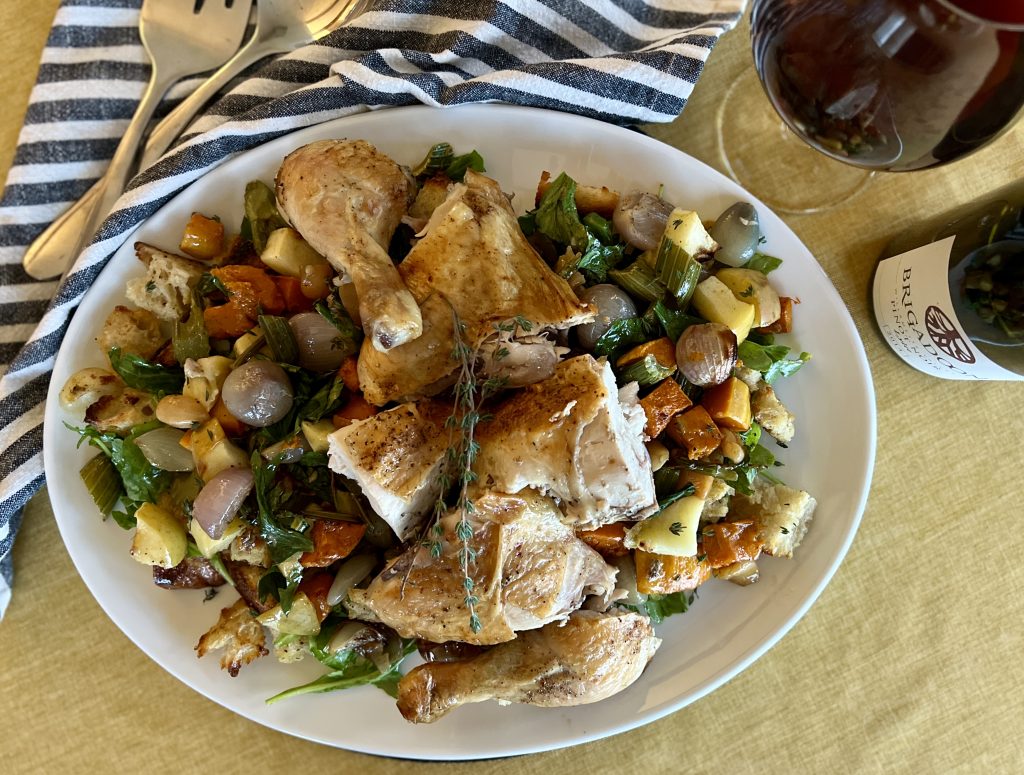
So maybe there's just two or three of you, and a big bird doesn't sound like fun. You still want something seasonal and special, but don't want to be at it all day. Another holiday favorite recipe is my Roasted Chicken + Autumn Bread Salad is really all the glory with a fraction of the time and work. Hey, it's still poultry, right? The bread salad takes the place of stuffing, vegetable sides, and refreshing salad all at once. It truly is Thanksgiving or Christmas dinner worthy.

It might be because of my old pastry chef days of making and rolling a dozen pastry crusts every Monday, but making pies feels pretty tedious amidst all of the other pre-holiday meal components. If you have non-pie eaters or gluten free eaters, these two recipes will save the day.
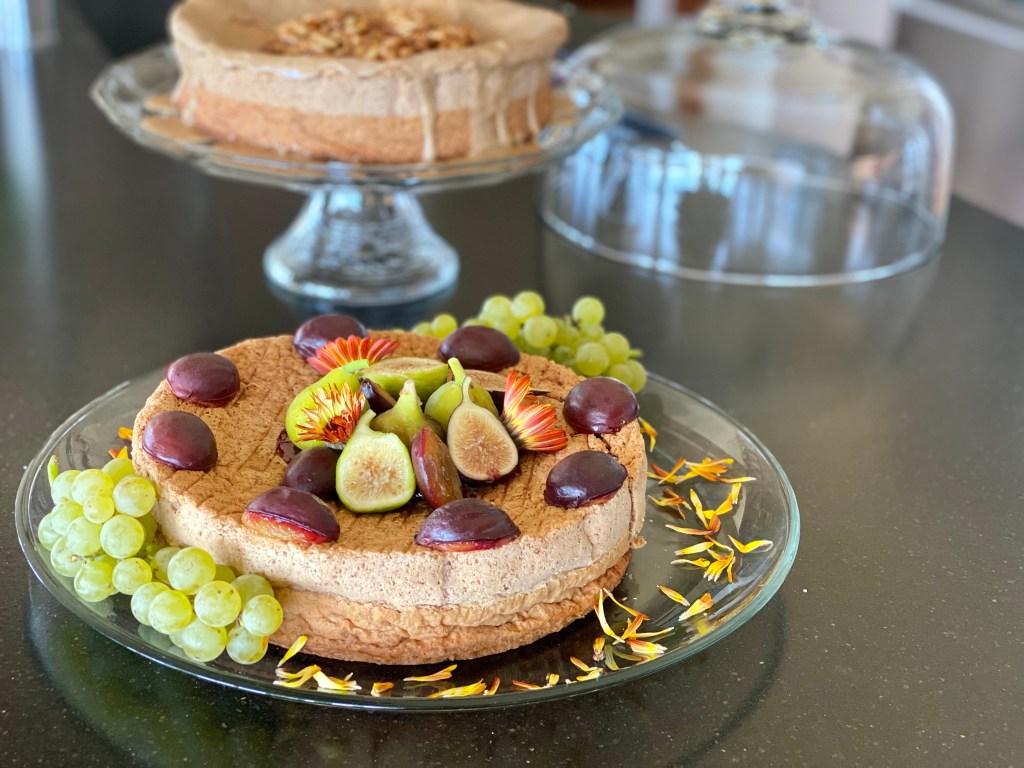
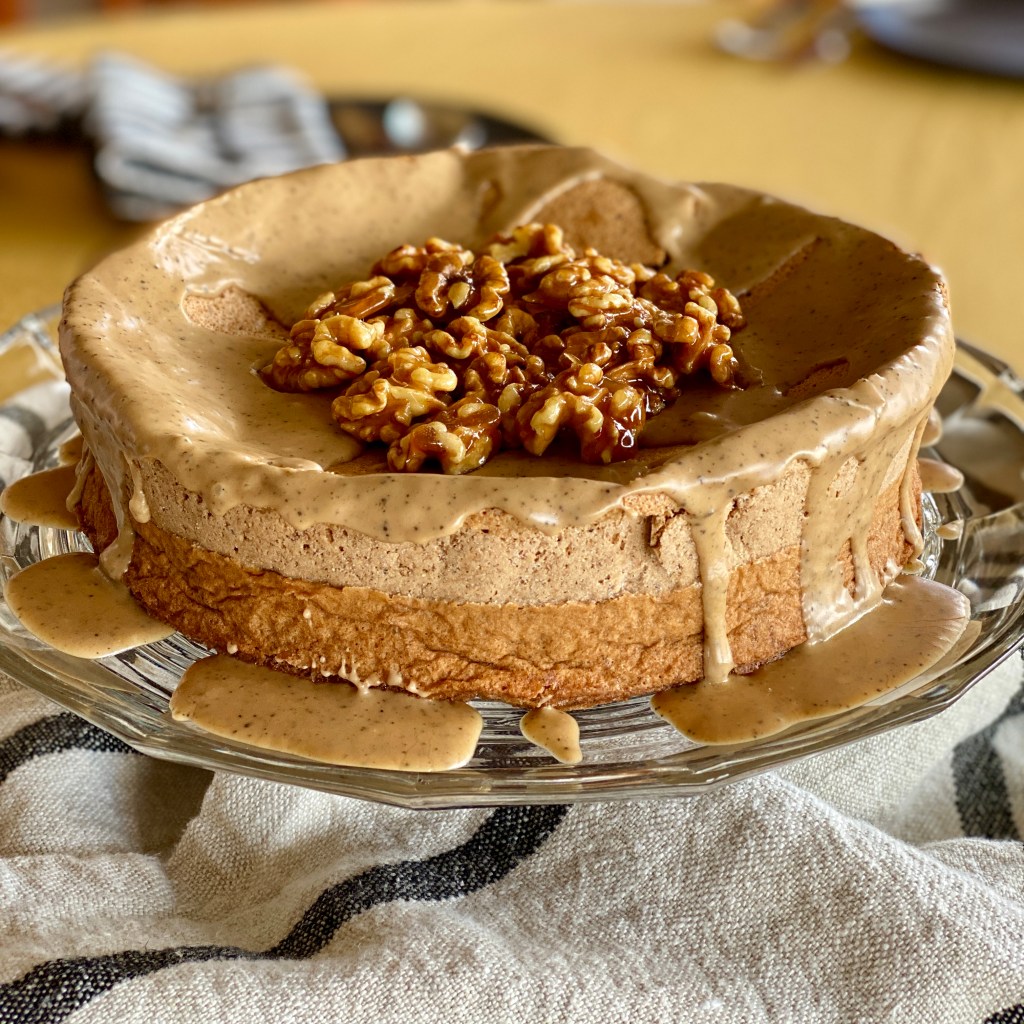
Flourless Walnut Cake (use GF flour to dust your pan) is so lovely, and so simple. Ground walnuts, some eggs, and sugar are all you need. And better yet, you can opt for the coffee flavored version, or the spice cake version. This flexible recipe gives you these flavor choices, or make it plain and serve it with the ice cream of your choice. So good, so pretty, and so simple.
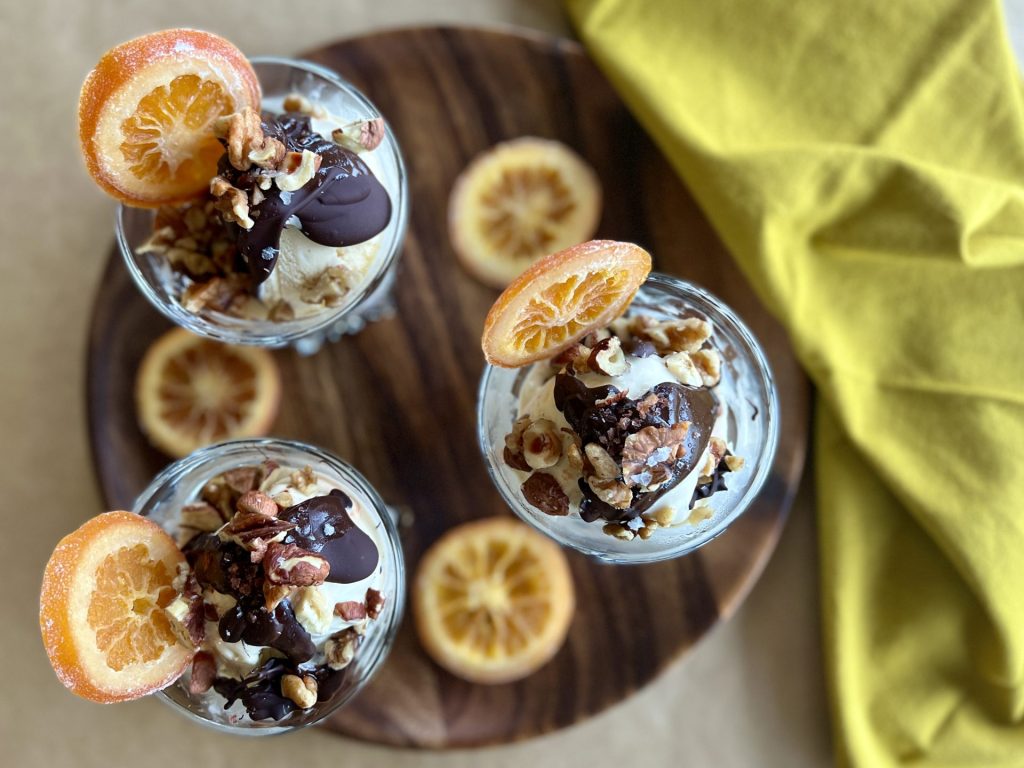
If you want to keep it really simple, how about a rich and very adult wintry Nutty Chocolate Port Ice Cream Sundae? This takes 10 minutes, and yet is as elegant and rich as any other dessert ever. And with this choice, you won't spend one minute baking. (The candied orange slices that make this so wonderful are available at most Trader Joe's stores.)
However you do your holiday, do it in a way that's authentic to you! Pure traditionalist or thoroughly modern; formal or casual; fancy or simple are all valid. It's easy to get caught up in the perfect Instagramable holiday, but it is only as wonderful as you feel!
Have you joined the 101-Mile Kitchen community? If not, we'd love to have you. You can take care of that right here, and when you do I'll send you my free Top Five Cool-Weather Cooking Guide downloadable as a thank you!
This post contains affiliate links, including but not limited to Amazon. As an Amazon Associate I earn from qualifying purchases.When you use these links to buy something I may earn a commission at no cost to you. Product affiliation helps me to keep this site ad-free while providing you with the content you enjoy. I only promote items that I use, like, and trust, or would invest in myself.
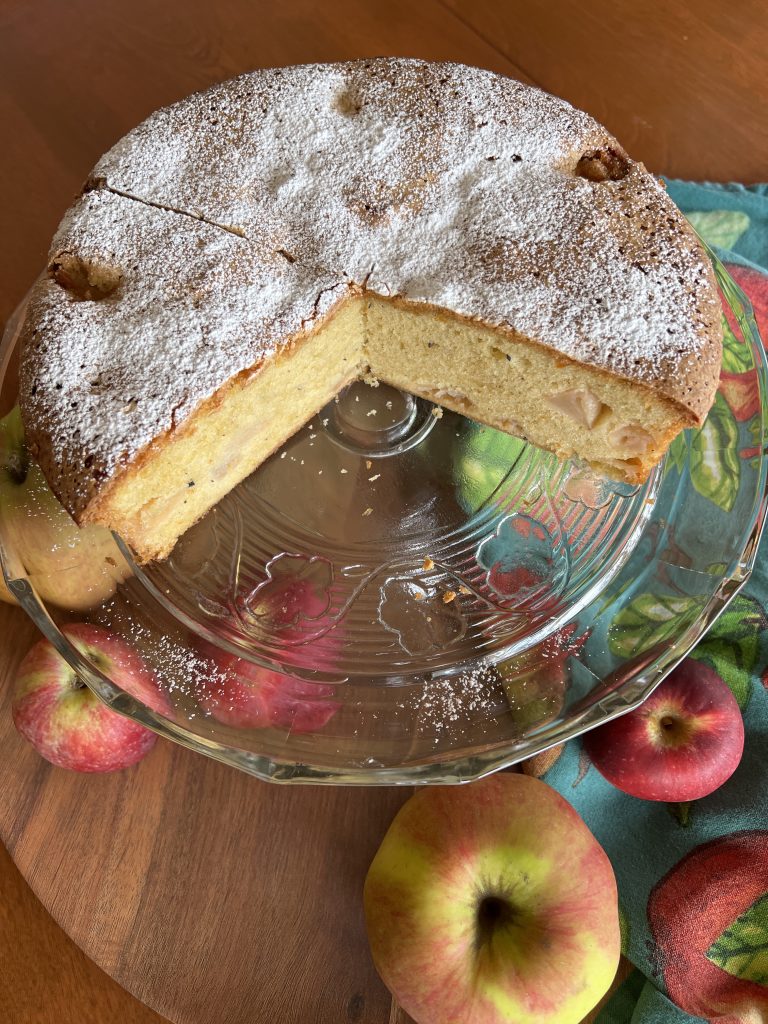
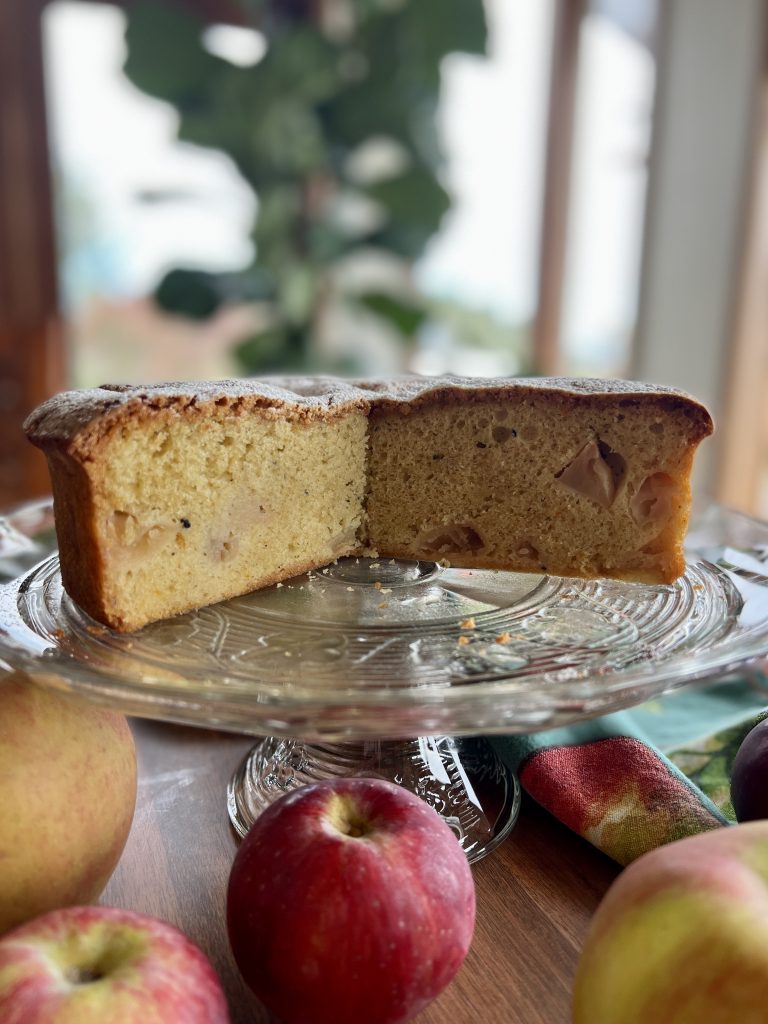
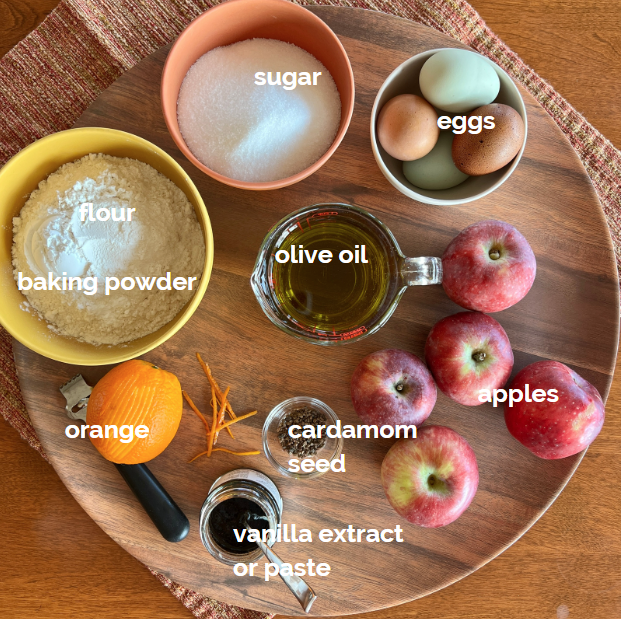
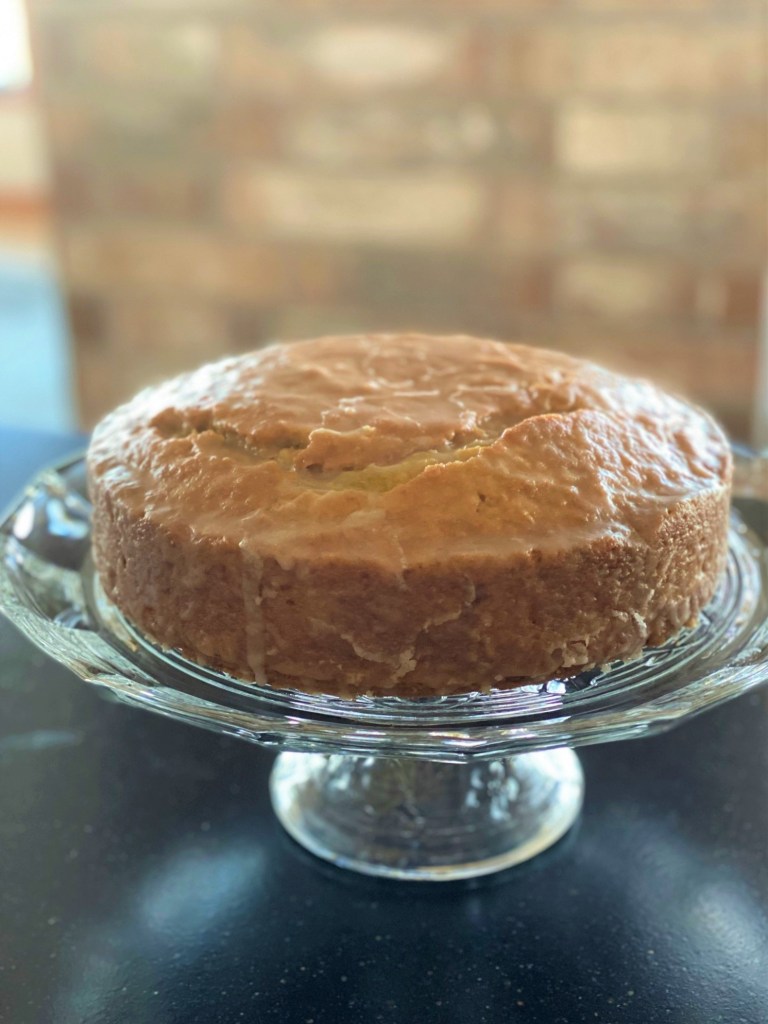
This Apple Olive Oil Cake, of all the rustic cakes I swoon over, is my very most favorite. It can be called rustic merely because it is not adorned in buttercream, an accessory that would only complicate its simplicity. Fragrant olive oil in the batter marries beautifully with orange zest, cracked cardamom seed, and pure vanilla. I am delighted the lack of cinnamon normally found in apple desserts. Am I the only one who tires of overwhelming the pure taste of apple with cinnamon?
Tom Murray, my friend and orchardist who specializes in apples at his SLO Farm (seasonal, local, organic), suggested that I try his Liberty variety. He said that its sharp flavor would balance the sweet cake, and he was right. Other varieties that are tart and hold up to baking are Pink Lady, Jonathan, Mutsu, and good old Granny Smith. Any of these will be perfect in this apple cake.
Tom sells his apples at the Lane County Farmers Market in Eugene, Oregon. Please look for him there, and try all of his lovely apple varieties.
This recipe originated with Rachel Coyle, published by Food & Wine Magazine. I've made it so many times that I've added some of my own riffs. I've found that the batter can easily old 50% more apples than in the original recipe. So in goes 1½ pounds, weighed before peeling and coring, for more appley goodness.
Cakes made with olive oil have become popular for good reason. The texture becomes more like a sponge cake, very moist and tender, but with structure. If you've yet to try the taste phenomenon of the olive oil/sugar combo, you are in for a real treat. A fruity olive oil is great for this, of course. Stonehouse Olive Oil's house blend, my house olive oil, works wonderfully in this recipe. I buy it in 9-liter quantities a few times a year.
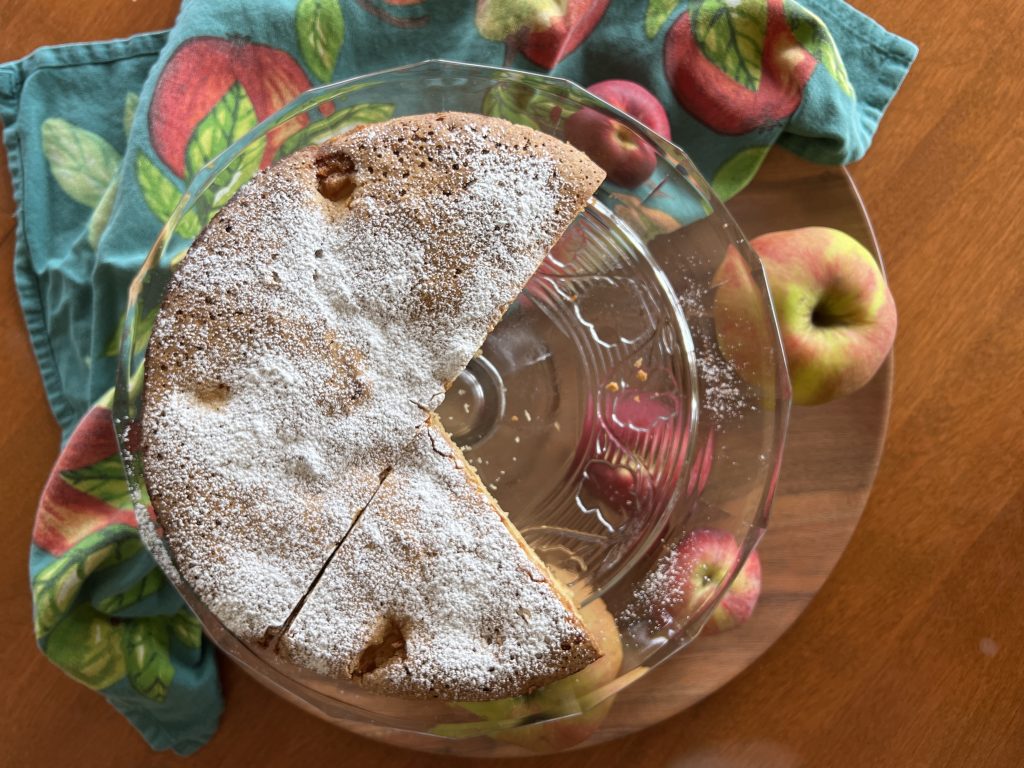
Rachel Coyle's original recipe says to use a 14-cup Bundt-style pan, and I've learned there are more great pan options for the apple olive-oil cake. A 9" springform pan creates a gorgeously tall round cake; a tube pan makes an even taller cake with a hole in the center that I really like; and I often divvy up the batter between three 6" round cake pans that serve six people each. This is perfect for our smaller household, as the cakes freeze perfectly. So handy! Please note that as of this publication date, Sur La Table is offering a 20% off sale on each of these pans, and on all of their bakeware! Just in time for holiday baking. Sur La Table only sells high-quality products that I always trust.
Flourless Walnut Cake, plain, coffee, or spice versions: Recipe here.
Zingy Lemon Ginger Zucchini Cake: Recipe here.
This post contains affiliate links. When you use these links to buy something I may earn a commission at no cost to you. Product affiliation helps me to keep this site ad-free while providing you with the content you enjoy. I only promote items that I use, like, and trust, or would invest in myself.
Have you joined the 101-Mile Kitchen community? If not, we'd love to have you. You can take care of that right here, and when you do I'll send you my Top Five Tips and Recipes for Cool-Weather Cooking downloadable as a thank you!

A few weeks ago I came upon this clever new idea for Coffee Rice Krispie Treats, an old family favorite. When I visit my dear mom, she still makes her famous peanut-butter rice crispie treats for me, my favorite comfort food, all these years later. The whole pan disappears before you can say snap, crackle, pop.
This recipe comes from the website Emotional Baking, with permission to share it with you. Each Emotional Baking recipe explores a specific emotion or mood and creates a recipe cure. As a result, it is a keen way to process feelings and address everyday mental health.
Ever since the horrific yet predictable incident that happened in Uvalde, Texas, comfort is definitely needed. Since gun violence is an adult issue requiring an adult response, this very adult rice krispie treat version is just right.
The Coffee-Infused Rice Krispie Treats recipe was designed to clear feelings of fogginess. Since this repeated mass tragedy in our children's schools creates a hazy, gas-lit feeling, yes. Foggy is indeed what I'm feeling.
In Canada, home base to Emotional Baking, package sizes for Rice Krispies and marshmallows are different than in the U.S. For those of us in the U. S. I made some revisions to utilize our product sizes. Also, I tinkered with their ratios by reducing the butter, and increased the amount of coffee powder for more pronounced flavor.
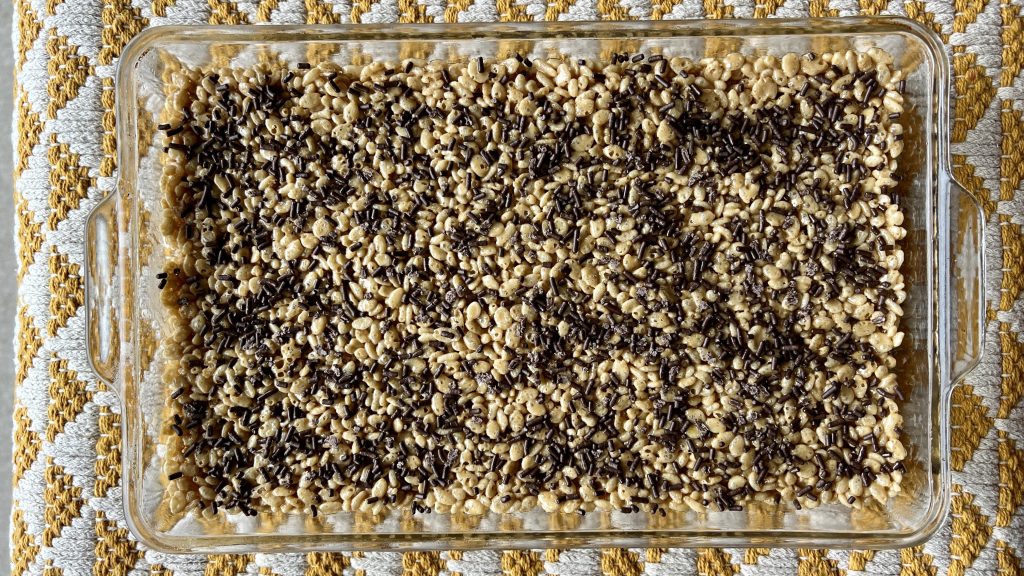
This no-bake treat couldn't be easier. Equally important, the addition of coffee flavor is purely genius. Why not make them today? Visit Emotional Baking for other delicious recipes that will match your mood. Whether it be happy, lonely, optimistic, or even foggy, you'll find the just-right kitchen therapy.
If you enjoy this recipe, please give it a green star rating on the recipe card below. That will help others find it too, and helps me pay the bills! If you make the recipe, please let me celebrate with you by tagging 101-Mile Kitchen on Facebook and Instagram. (It's a total thrill when I hear you've made my recipes!) And as always, your questions and feedback in the comments are welcome and appreciated.
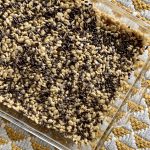
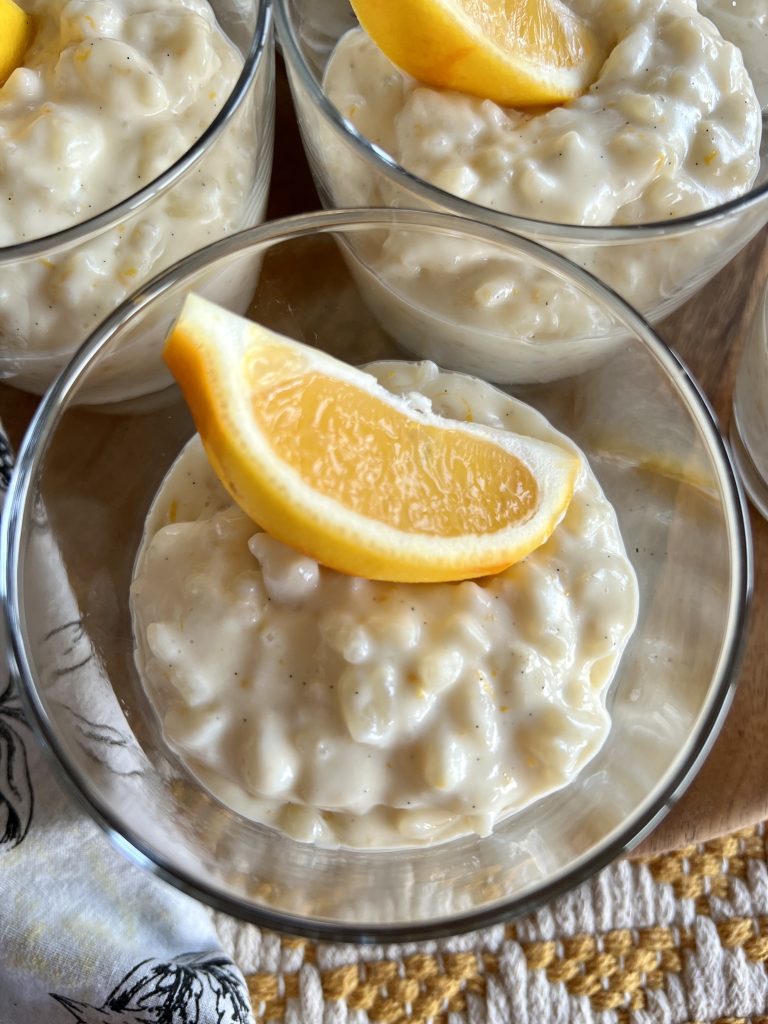
I wish I had a nickel for every time the words "comfort food" have been used in the United States since March 2020. With the money, I'd launch a campaign to deliver a cup of Vanilla Lemon Rice Pudding to the doorstep of every American, thereby redefining comfort food in our culture.
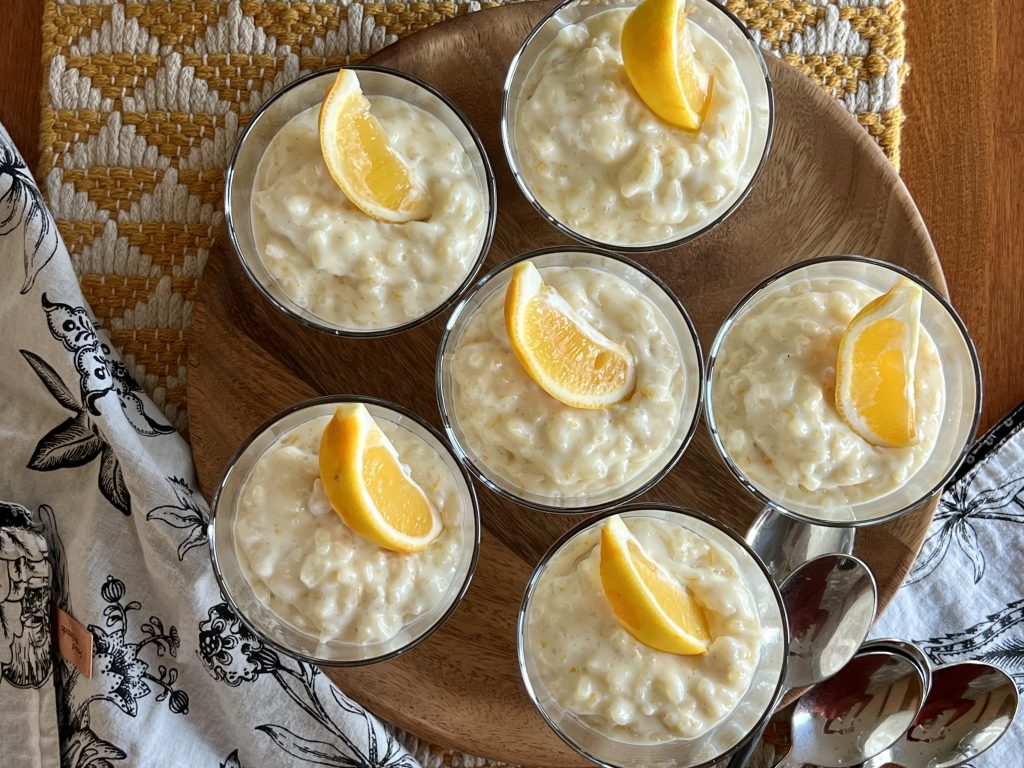
This recipe is gently sweet, creamy but not cloying. It is alive with lemon zest, and ethereal with a whole vanilla been (or vanilla extract.) Vanilla Lemon Rice Pudding is far more exciting than any other rice pudding I've ever had. Yet as comforting as your favorite cashmere sweater.
I learned of this bit of deliciousness from Katherine Burns of Rue Dauphine Paris. Katherine's Rue Dauphine Paris Instagram feed is full of glorious photos of her visits to historic gardens, churches, shops, and arrondissements in Paris, some lovely French recipes, and a glimpse of how she brings the Parisian lifestyle into her own Seattle home. Another bit of fun-- she and May of Noisettes 1420 (also a fabulous peek into Paris) host a Francophile book club, which I promise myself to participate in some soon day.
Needless to say, discovering Rue Dauphine Paris has brought me a bit of joy in these travel-less days, and has me wishing Katherine would be my guide to Paris one day.
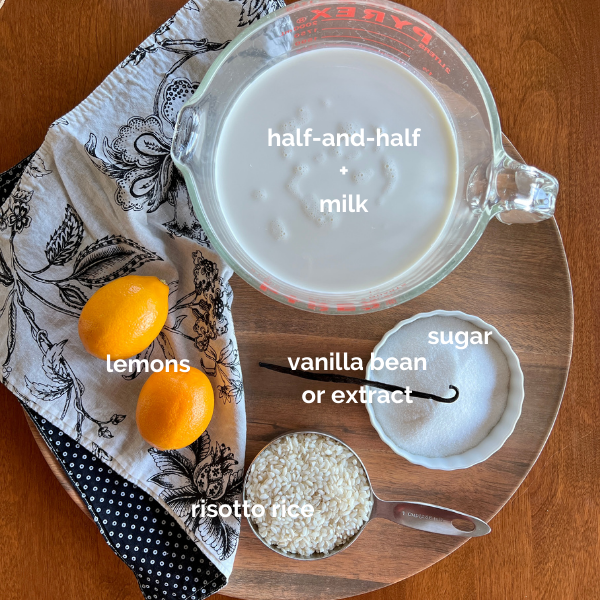
Katherine graciously allowed me to share her vanilla rice pudding recipe with you. I've renamed it to bring justice to the magic the lemon brings. I've made a slight change to the dairy component, swapping her 4 cups of whole milk + 1 1/4 cups heavy cream for 1 quart of half-and-half and 1 1/4 cups milk), otherwise this is completely hers. This change retains the silky creaminess of her version, but leaves me with no wasted partial carton of whipping cream. She is right in that the sweet aroma of lemon and vanilla this offers when bubbling on the stovetop is most pleasant.
You should definitely use Meyer Lemons when they are in season for this. The floral mandarin/lemon flavor is fantastic. I think orange zest would also be wonderful, like a creamsicle. However, standard Eureka or Lisbon (everyday grocery store0 lemons will still take you over the moon.
Katherine serves hers in flowery china cups, a touch of French charm, with a drizzle of caramel sauce. I like serving the rice pudding with a wedge of the zested lemon. A squeeze over the top brings a little acidic component as a balance to its sweet creaminess.
When I started dreaming of Vanilla Lemon Rice Pudding in the middle of the night, I knew I had to share it with you. It has become my new favorite sweet treat. Maybe it will become yours, too, as you dream of far away places.
Nutty Chocolate Port Ice Cream Sundae: Get the recipe here.

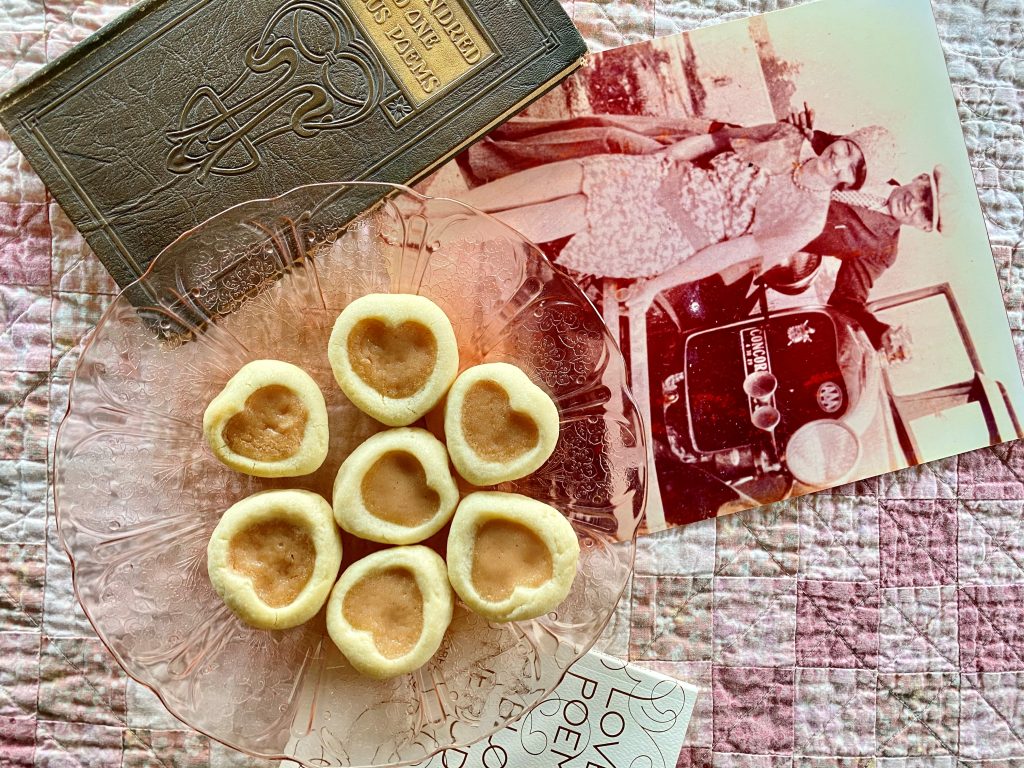
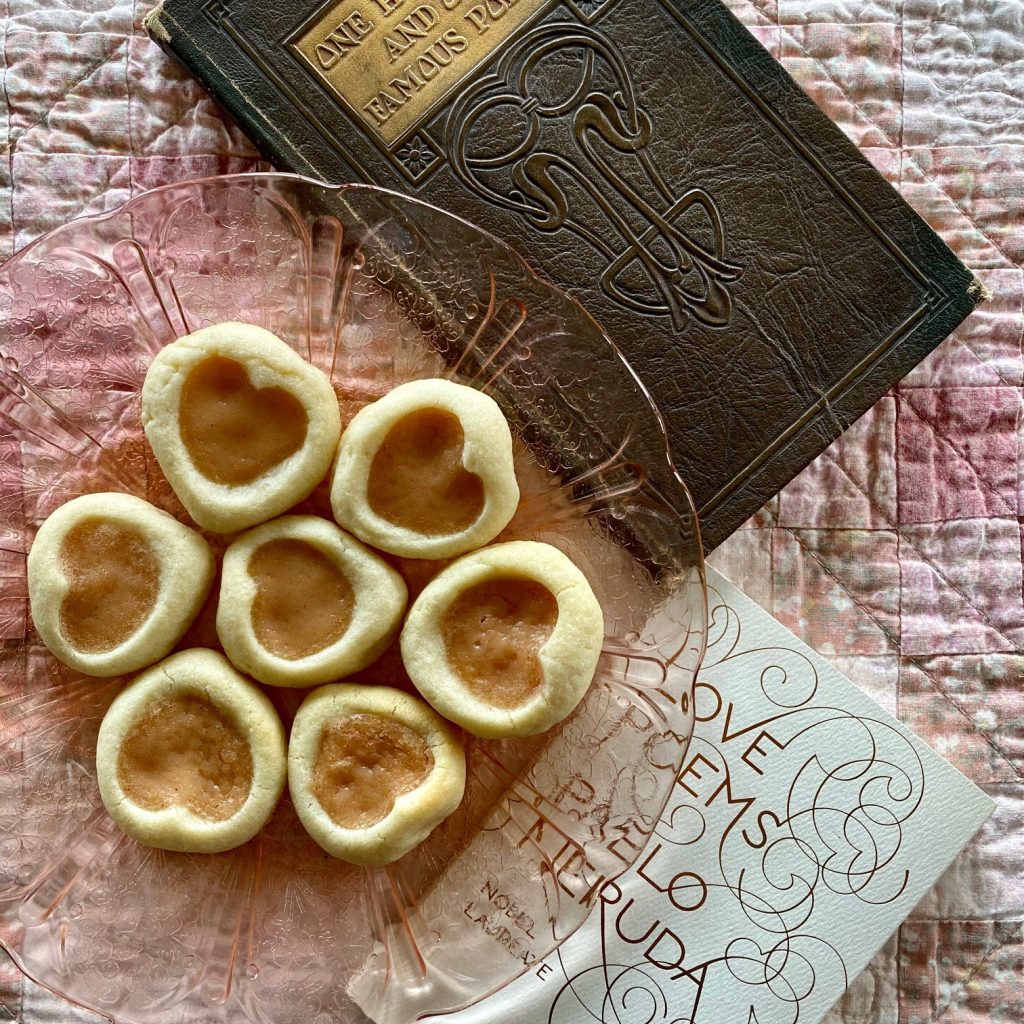
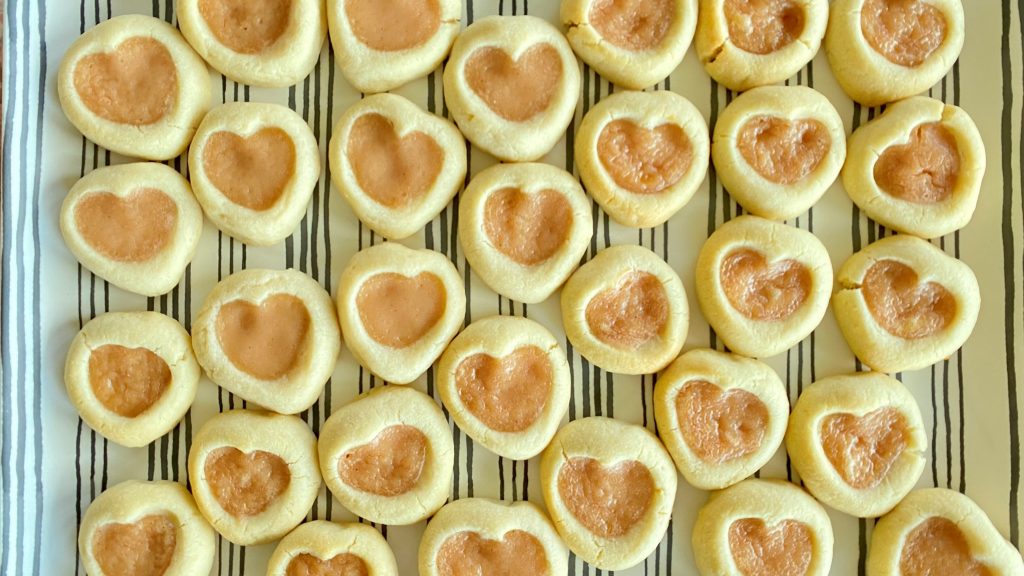
Making food for people, especially these Valentine Shortbread Heart Cookies with Blood Orange filling, is an act of love. Mr. Fred Rogers, my truest childhood hero, said, "Love isn't a state of perfect caring. It is an active noun like struggle. To love someone is to strive to accept that person exactly the way he or she is, right here and now.”
Love is showing up, on repeat, day after day. It's the things you never knew you'd do. Like spending nights in the NICU next to your newborn's incubator. Or forgiving the hurt of a friend over and over again until you don't remember it anymore, which you hope is soon. Sometimes you are the target of your own love when you allow yourself to let go of guilt, grief, or fear.
"I know the secret of life: If you want to have loving feelings, do loving things."
Anne Lamott
The wonderous thing about love, is that you will mess it up. That's just part of it.
Just like the verb cooking, loving calls for a lot doing. Trial, practice, mistake-making, and what can feel like wasted time and resources. But your flops are exactly how you learn to love better. The trick is to not give up. Keep practicing. Your acts refine as you practice them. Your acts become who you are. With a little tenacity your love eventually looks more like the soufflé you'd hoped for and less like the dog's breakfast.
Remember all this when you make these pretty little Valentine heart shortbread cookies for your beloveds. Each time you press your pinky into the dough, you imprint the part of yourself that is set on loving. The soft, unchilled dough gives way to make adorable little heart shaped vessels that hold a tad of sweet blood orange goodness you also have made.

As you form the little Valentine hearts, they will remind you of your beloveds. Some, like a crotchety uncle, hide their tenderness in crooked wrinkles. Some, like an emotional 8th grader, absolutely cannot contain their contents. Others are the picture of every-hair-in-place perfection. The likeness of each heart says they belong together on the plate. Their uniquenesses make the plateful interesting. Just like you and your beloveds.
Strawberry Sorbet and Strawberry Dairy-Free Ice Cream: Get the recipe here.
Chewy Hazelnut Meringue Cookies: Get the recipe here.
Flourless Walnut Cake, with plain, spice, and coffee-flavored versions. Get the recipe here.

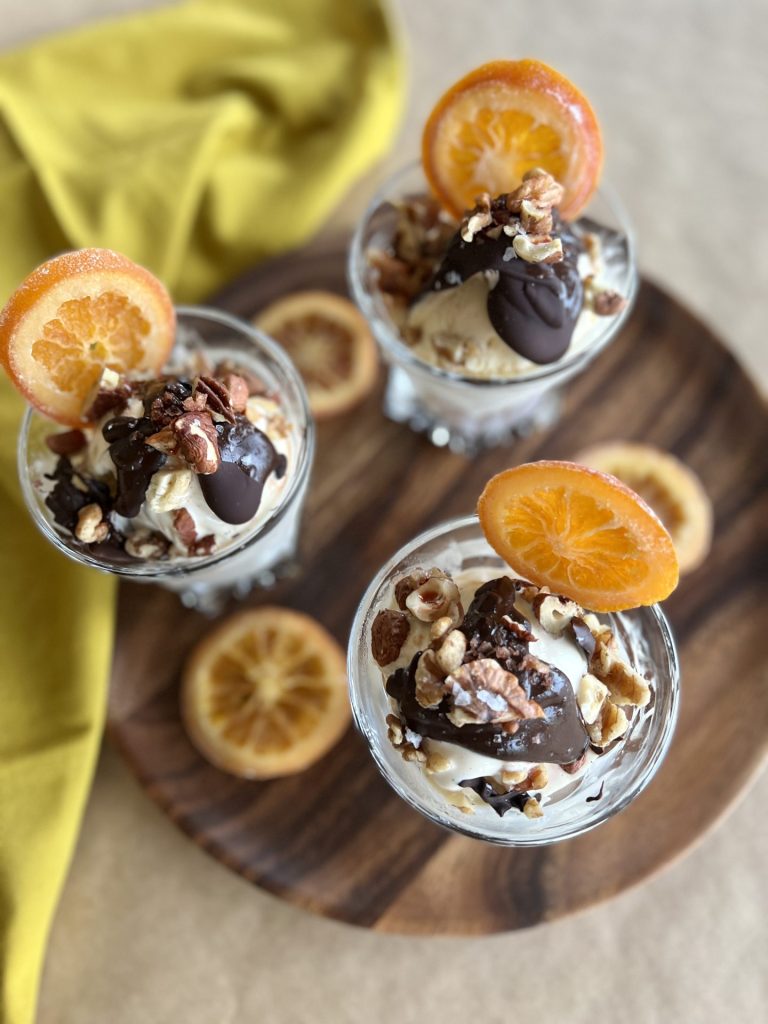
The holiday season is a wrap and the dust of 2021 has settled. Perhaps you are back to a work grind, or find yourself buried in winter snow. Or maybe you're sad that your family has left, or maybe elated that your family has left. As great as it was, maybe you are relieved to be past it all. Just because holiday treats are in the rear-view mirror doesn't mean you don't deserve a special little zero-effort dessert. Maybe you need a quiet post-holiday celebration. Maybe you need a nutty Chocolate Port Ice Cream Sundae.
If this Chocolate Port Ice Cream Sundae were an actor in a musical, it would make its quiet sultry entrance stage right, while the whole noisy chorus of holiday desserts shuffle-flapped off, stage left. The Sundae (let us call her Sundae) would glide across the stage to a stool waiting under a soft bath of light. Sundae, dressed in a slim black turtleneck and tailored trousers, would lightly park on the stool, one long leg outstretched. Slowly she would look up and raise the mic.
While the holiday dessert chorus is in the back peeling off sparkly garish costumes and wiping off melted greasepaint, Sundae begins her ballad. One part Louis Armstrong, one part Norah Jones, equal parts gravel and smoke, Sundae's song lifts the corner of your mouth and quiets your spirit.
The intimate moment with Sundae passes, but you are never the same. You'll think of this Sundae at the oddest times for years to come. So it is with this little winter dessert recipe.
Flourless Walnut Cake with Coffee or Spice flavored versions: Get the Recipe.
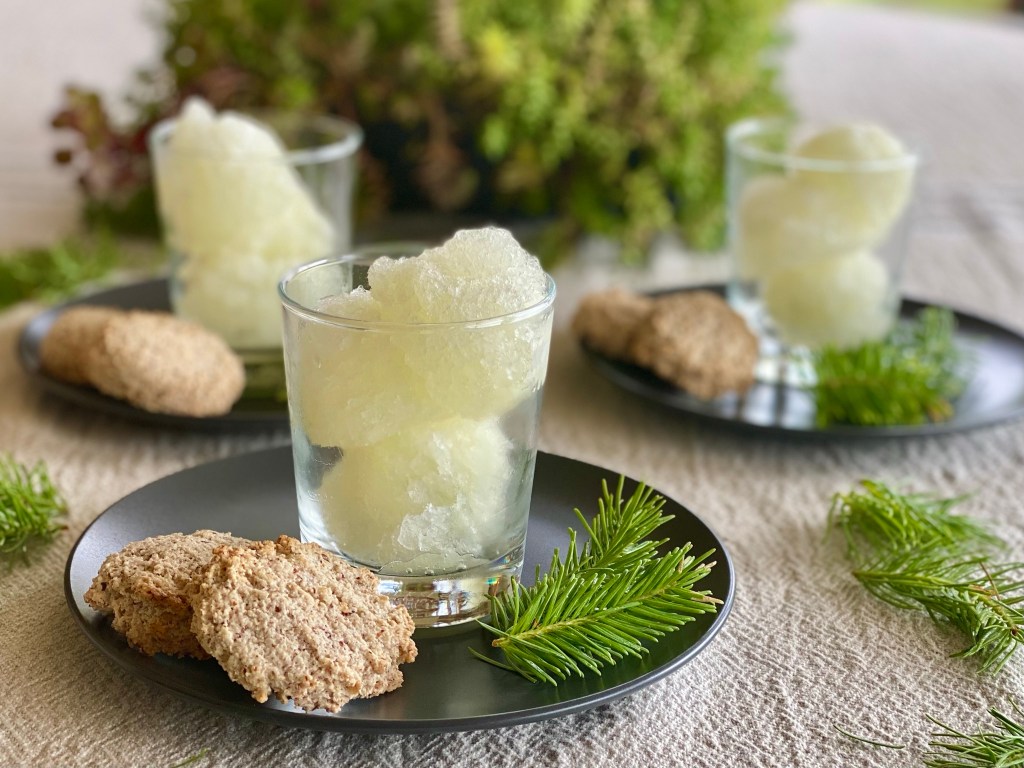
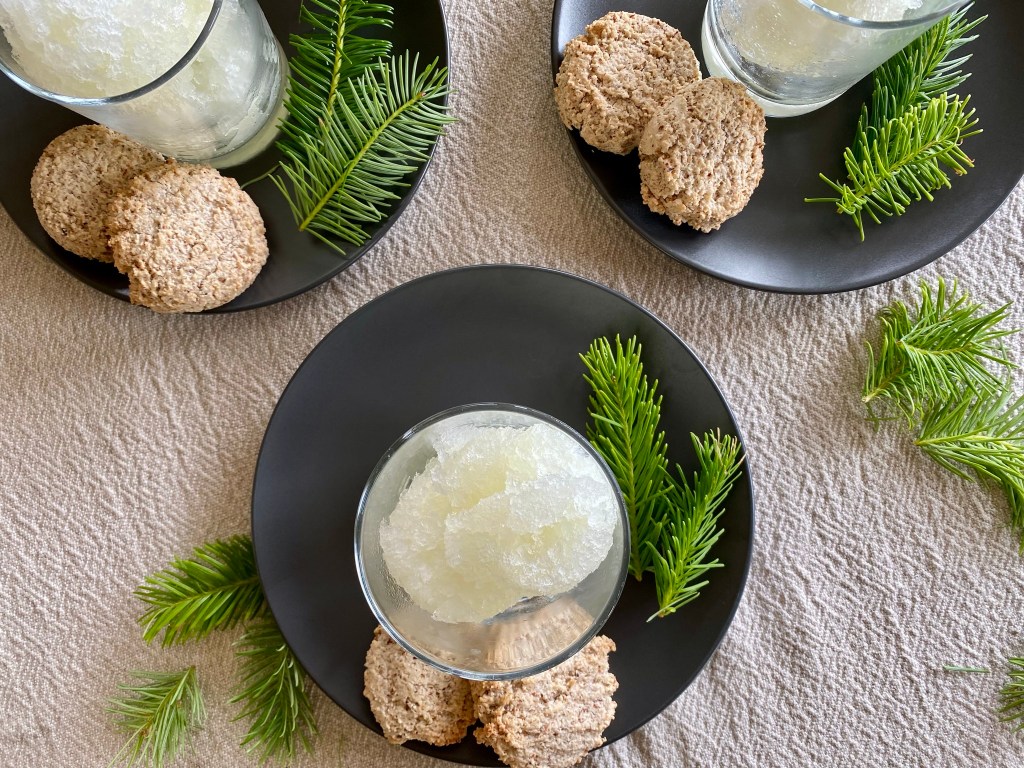
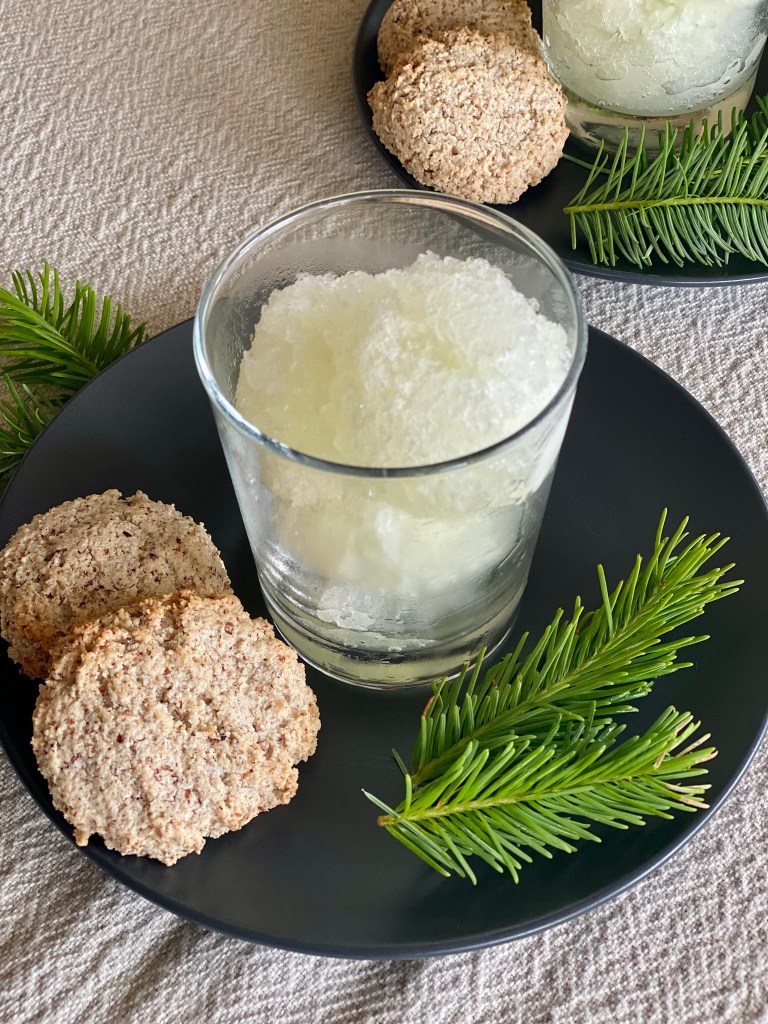
Douglas Fir Tip Sorbet: Get the Recipe.

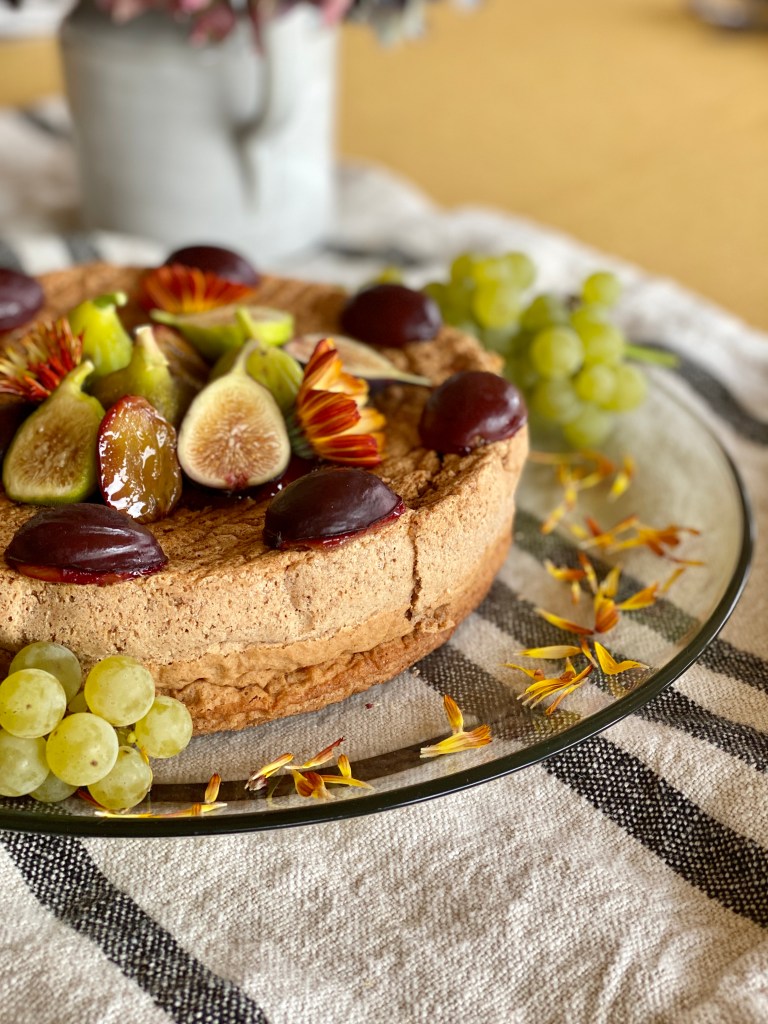
In my calculus, a rustic cake has a short list of ingredients, an interesting texture, and most importantly is adorned very plainly-- a straightforward glaze, scoop of ice cream or whipped cream, a smatter of nuts or seasonal fruit is all it takes. This Flourless Walnut Cake and its coffee or spice versions deliver on a promise of simplicity.
What a cake like this misses in complexity is made up with a certain honesty. It's like the fresh rosy-cheeked girl in a calico dress that smells of clothesline sunshine.
Or, our flourless walnut cake is like filtering your way through a crowded party, and meeting a gentle-souled person standing in the corner with whom to while the evening away.
Uncomplicated joy.
Multi-tiered, colorful swooped, swirled, and filagree-frosted cakes sometimes disappoint on the part that really matters-- flavor. With flourless walnut cake or its coffee or spice versions, what you see is what you get. The beauty is natural, not forced.
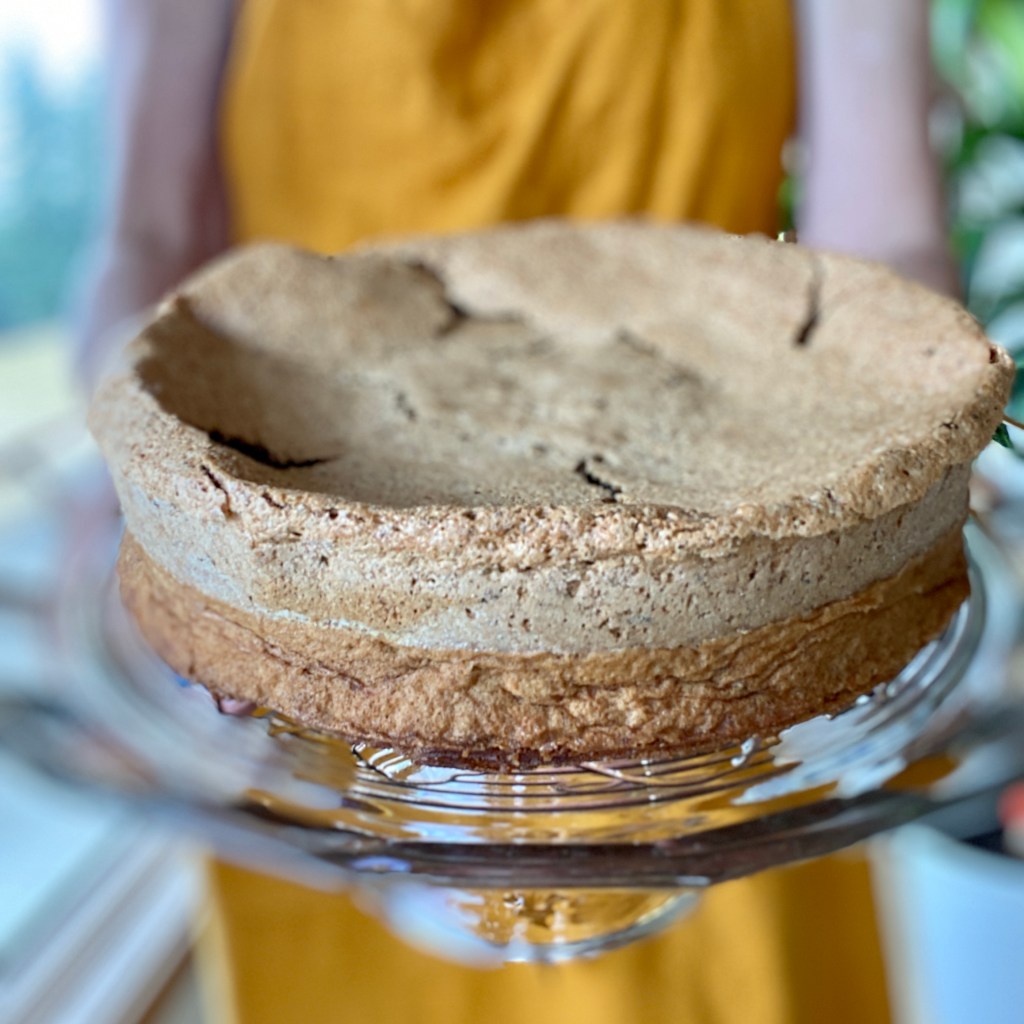
Starting with room temperature eggs, like with most baking, is imperative to the success of this recipe. Sugar simply cannot dissolve into cold yolks. Cold whites don't whip to their lofty heights. Here you spend a good deal of time building structure by dissolving sugar into yolks and stiffening the whites, so give yourself a guaranteed win by setting your eggs out in advance. (When I forget, I help the eggs warm up by placing them on a bowl of lukewarm water, changing it for more when it goes cold. Never try this with hot water or you make crack open a semi-cooked egg!)
Traditional recipes for this type of cake ask you to whip all of the whites into firm peaks at once. Here, I have you whip them to medium peaks at first, then add only a third of them to the yolk/sugar/nut mixture to lighten the batter. Then, you'll go back and whip the remaining two-thirds of the whites into firm stand-up-at-attention peaks before gently folding them into the batter. I have found this greatly increases the structure of the cake, resulting in a taller cake with less shrinkage when it comes out of the oven. Even though our dear little flourless walnut cakes are humble, they still like to make a good first impression.
If you chose, top either version with a pile of candied walnut halves, made the same way Sarah at Sustainable Cooks makes her pecans. The only difference is that I add 1 tablespoon water to the skillet along with the sugar. Make extra! Candied walnuts are great in salads or on a cheese platter, too.
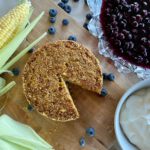
Sweet Corn Buttermilk Cake + Blueberry Compote (gluten-free)
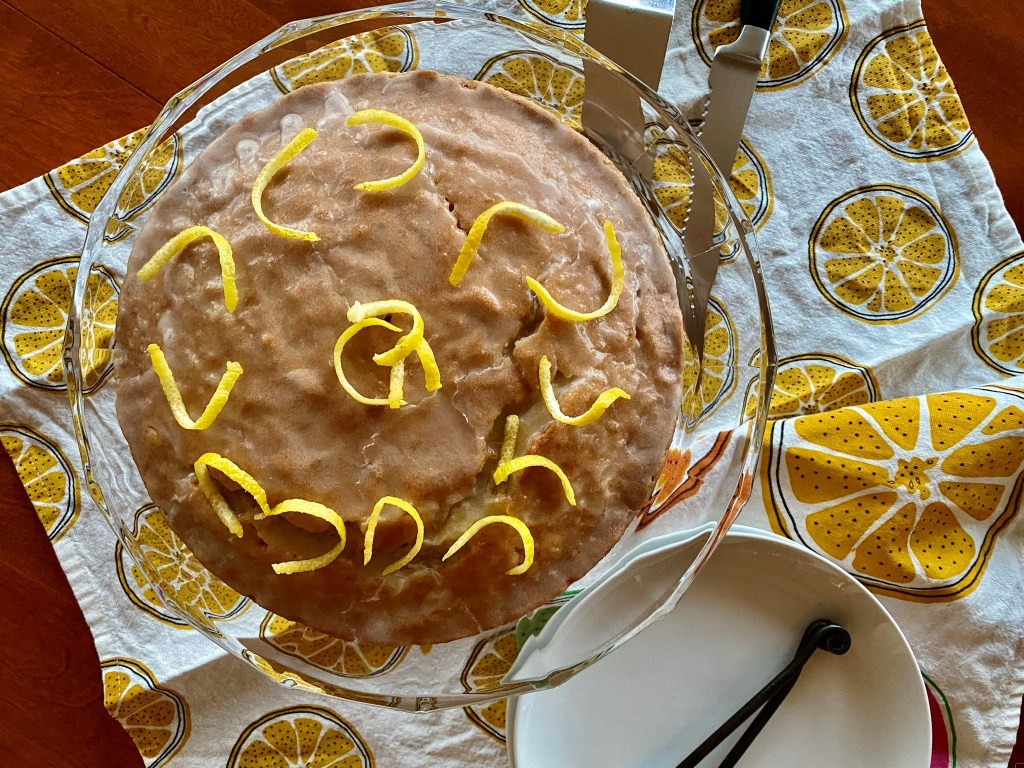
Zingy Lemon Ginger Zucchini Cake

Why people grow so much zucchini is a perfectly legitimate question. As a species we just never catch on that just three zucchini seeds will feed the whole neighborhood. How do we possibly forget year after year? The jokes about the overabundance of zucchini and the lengths people go to get rid of it are only funny because they expose this human flaw.
Neighbors drop off squashes the size of baseball bats to your front porch, ring the bell and run so you can't refuse it. Little old ladies give away brown paper grocery bags of zucchini at every church function. And if you grow a garden, you're rolling in it by mid-summer.
Even using the grate-and-hide technique of sneaking zucchini into everything-- meatloaf, chili, soups and stews, and baked goods, there is only so much one can be expected to eat.
I worked out this brightly-flavored zucchini cake as a way to draw down an enourmous supply I was gifted from a generous neighbor. It completely suits my hankering for unassuming cakes, and its sunny lemon-ginger burst is a good excuse for turning on the oven in the middle of August.
Now I get a little happy when I'm gifted a huge bag of summer squash, and my thanks are sincere.
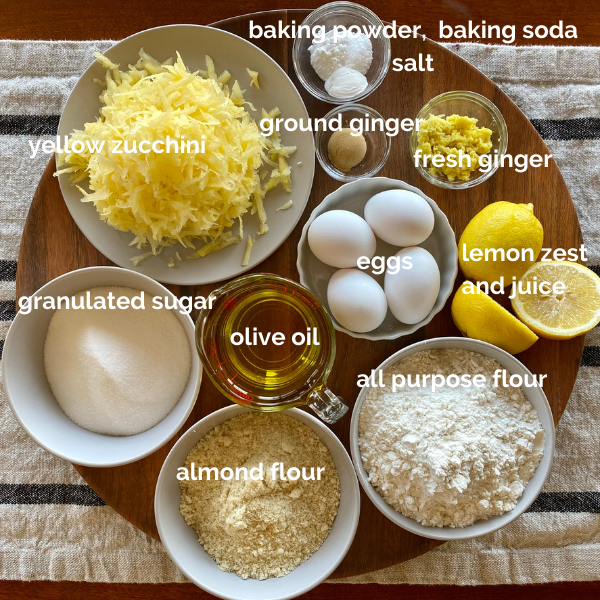
In this cake, I swap the typical butter for olive oil. Olive oil adds phenomonal rich flavor that sings with the lemon. The technique remains similar to that of a butter cake, but here the olive oil is added to the whipped eggs and sugar, turning it into a creamy fluff you just know will be good.
I used to make this cake with all-purpose flour only, but have recently added finely-ground almond flour to add a soft airiness to cakes, and it works really well here.
The copius amount of ginger in this cake comes in two forms-- freshly grated and ground-- to amp the gingery quality. Lemon and ginger are a match made in heaven, so I use a lot of lemon zest zing along with the double-dose of ginger. This large cake can hold all this flavor. It is a flavor bomb, not a flavor whisper.
The crunchy glaze-- think glazed donut and you've got the idea-- is due to the addition of granulated sugar to the typical powdered sugar. Just make sure and paint it on while the cake is still somewhat warm for this magic to happen.
In this cake and all others, start with room temperature eggs.
A stand or handheld mixer is best for the eggs/sugar/olive oil steps. It is also good for gently beginning to incorporate the flour mixture, but stop there and pick up your spatula. Folding in the zucchini, ginger, and lemon zest by hand will automatically involve the streaky bits of flour without toughening the glutens in the all-purpose flour. Your tender result will make you glad you did.
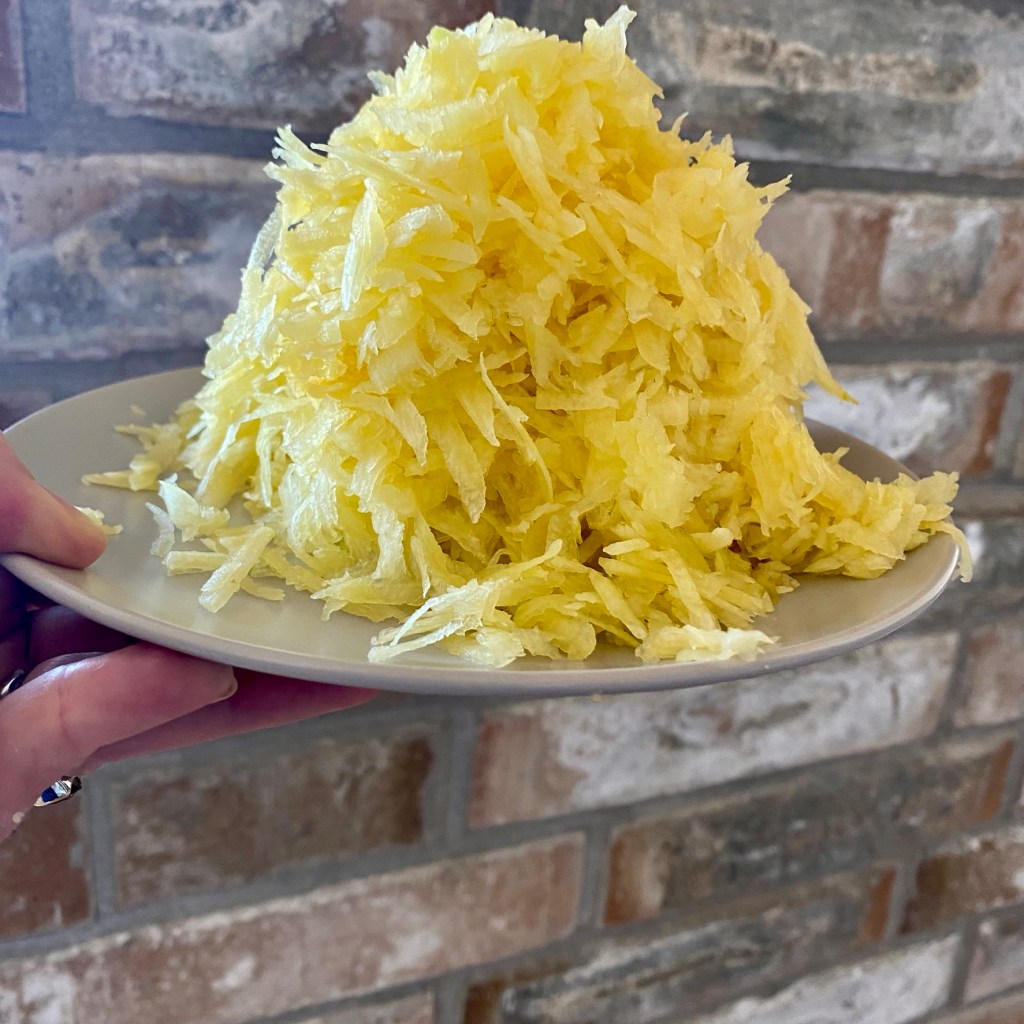
All kinds of summer squash work. I've even made this with peeled young spaghetti squash to great success. If you're using an older/larger zucchini, take out the watery seeds, and gently squeeze the grated squash over the sink to remove some of the moisture to avoid a heavy wet cake.
This turns out a large cake-- 2" tall and 9" across, making 12-15 generous slices. If you want to take it easy on cake, or are like me in a small household, this recipe fits neatly into three 6" round cakepans, with six slices each. This way we can have a little splurge, and stash two cakes in the freezer for on-the-fly entertaining or when the mood strikes again.
Use this method for releasing the cake from the pan without it breaking or crumbling.

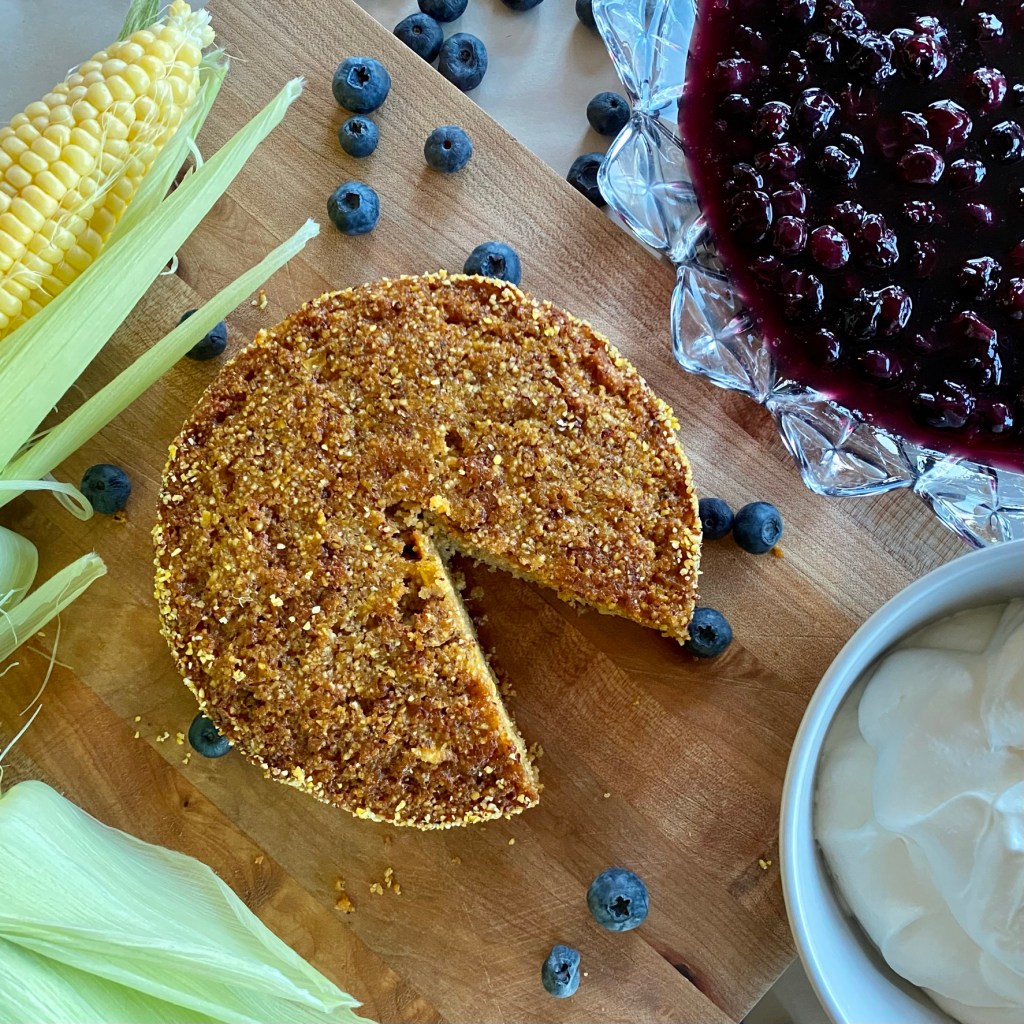
The first cake on 101-Mile Kitchen is like a country summer day on a plate. It is rustic in nature-- meaning it has textural interest and isn't overly sweet or elaborate. It is unfussy. It is flourless, therefore can be served to our gluten-sensitive beloveds. And most of all it uses fresh, seasonal, local ingredients.
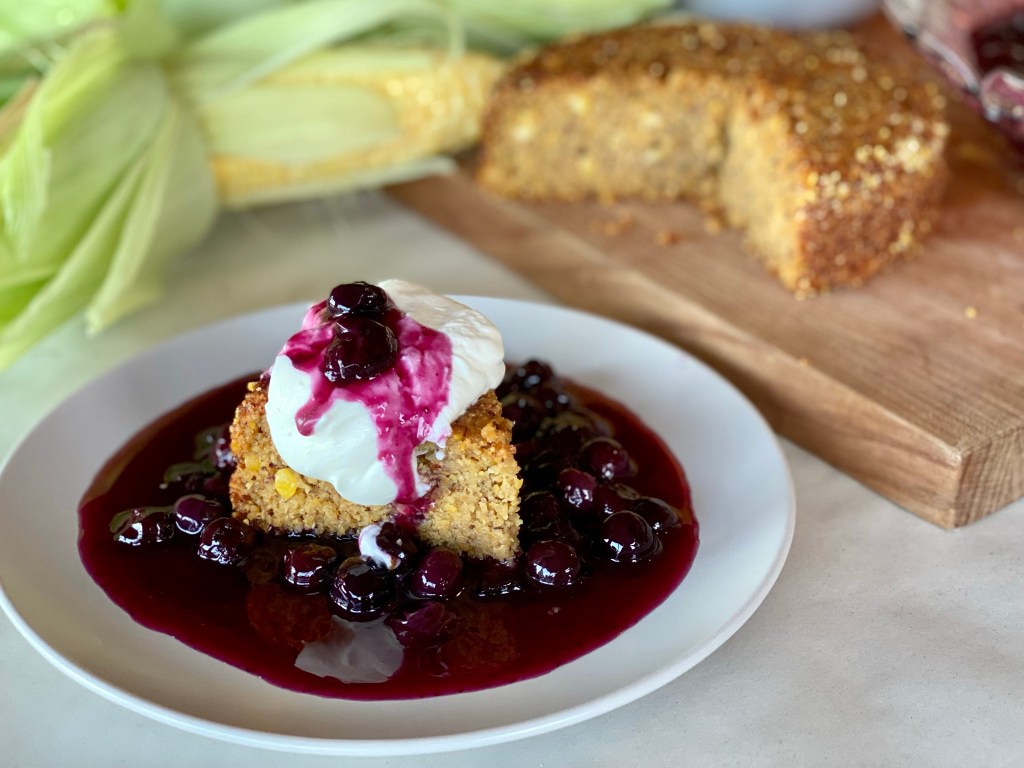
A decade ago I played with and wrote about the magical flavor triad of sweet corn, blueberries, and buttermilk. I had two inspirations at the time. First by Claudia Fleming's sweet corn ice cream recipe from her famous out-of-print book, The Last Course, from her time as the innovative pastry chef at Grammercy Tavern in the 1990's. Tim Mazurak of the delicious blog Lottie + Doof created a blueberry galette in a cornmeal crust and served it with the same sweet corn ice cream. Swoon.
My addition of buttermilk to the corn and blueberries brought bucolic thoughts of summer full circle. I promptly forgot about this happy flavor song until now.
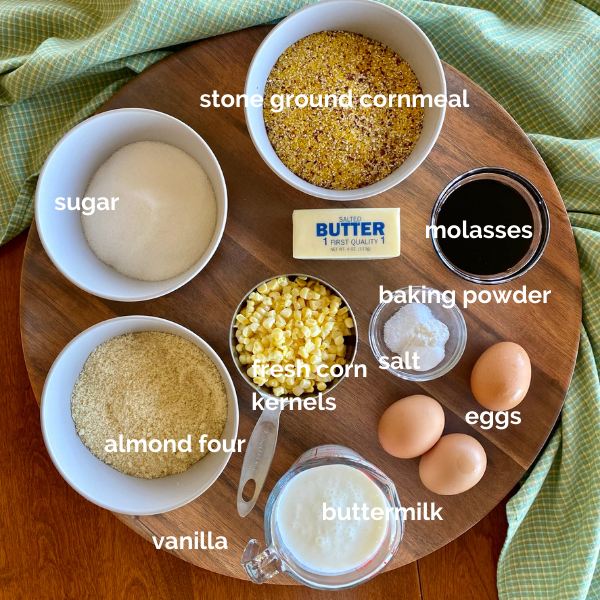
The Sweet Corn Buttermilk Cake is made with Floriani Red Flint stone-ground cornmeal from a local company, Camas Country Mill. This fantastic cornmeal and other flours, grains, and beans can be purchased at the charming Camas Country Schoolhouse Bakery and Store outside of Junction City, Oregon. Whatever brand you use, a stone-ground version is what gives this cake its particular toothsome texture.
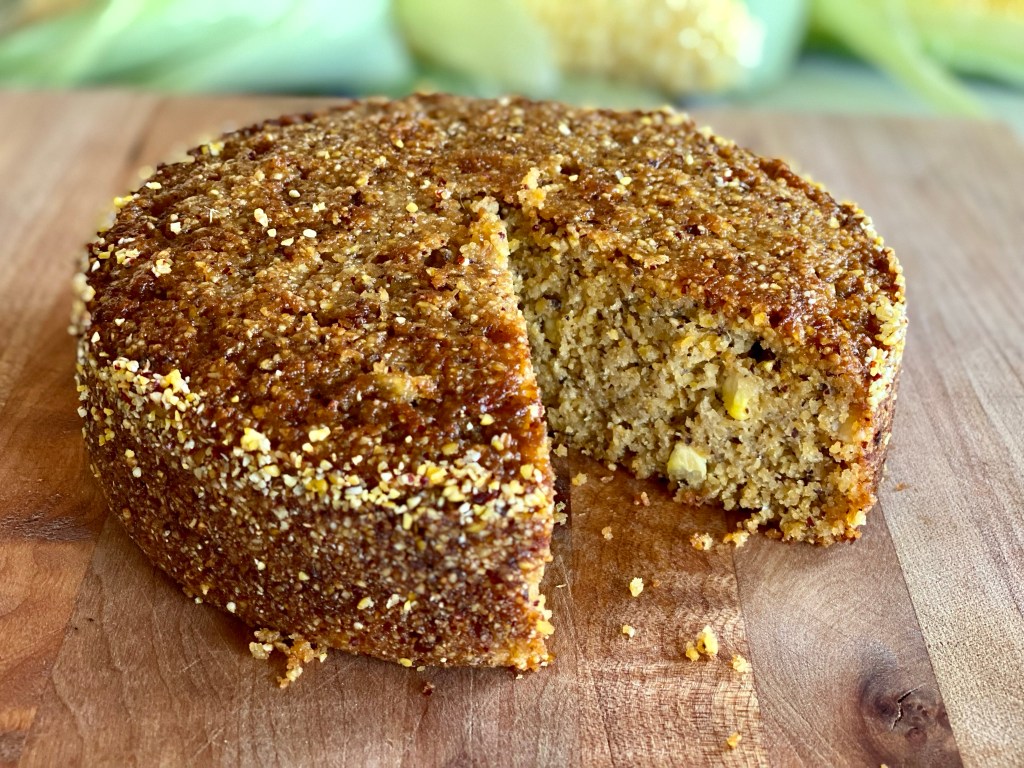
This simple cake has ingredients from the farm. Before you scoff at the idea of sweet corn in your dessert, remember that peak-season fresh sweet corn is much sweeter than zucchini, an ingredient that commonly makes its way into cakes and sweet breads.
As an aside, this flourless cake will be gluten free if your cornmeal is certified that way. The generous dose of buttermilk makes it moist, tender, and subliminally tangy.
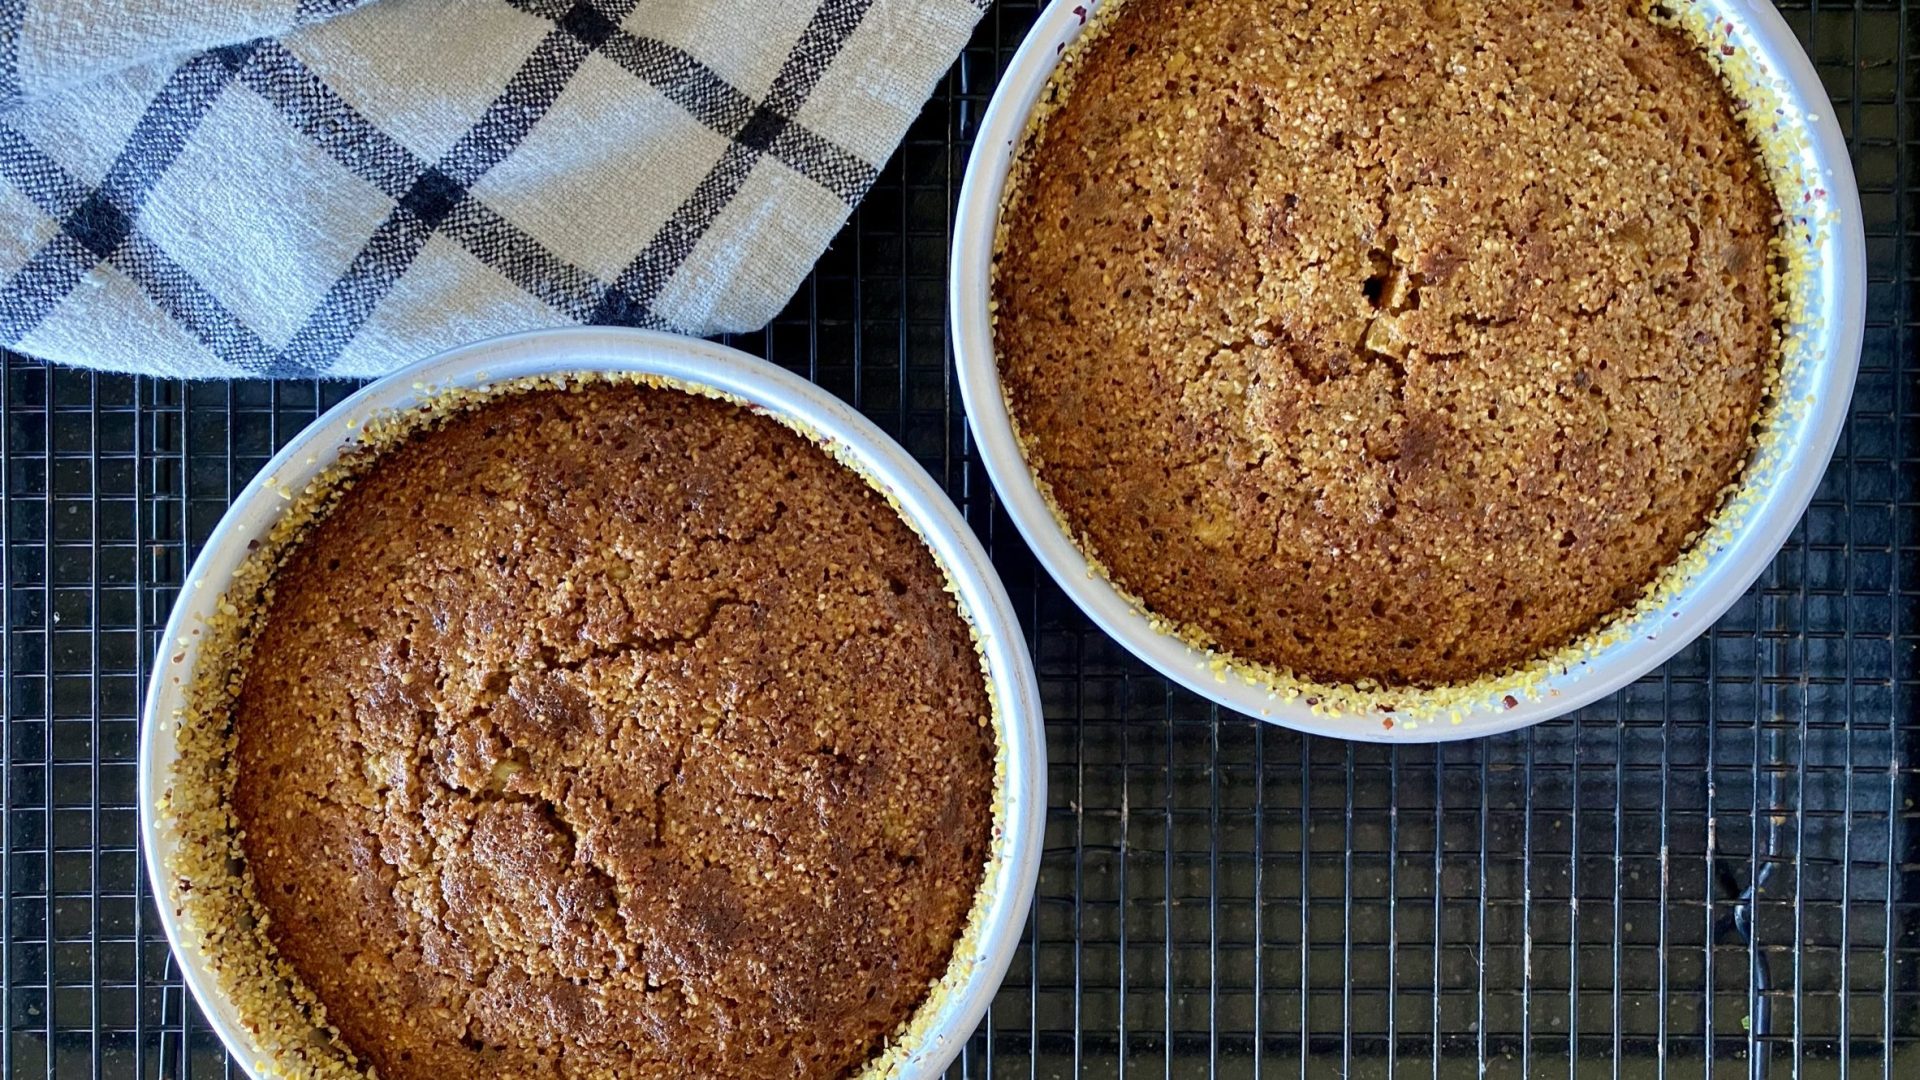
The recipe makes enough batter for one 8" round or 8" square cake. The former will result in a taller cake, the latter a shorter cake that will bake more quickly. It also makes two perfectly tall 6" round cakes. As a household of two, six-inchers are my frequent choice. One for now, the other to be tightly wrapped and popped into the freezer for impromptu company or when the dessert mood strikes.
Be sure and view this short video tutorial for how to tip a cake out of its pan without it falling apart. If you're not familiar with the technique you may find it helpful.
About homemade cakes in general: Please take the time to bring butter, eggs, and milk or buttermilk to room temperature. This is critical to achieving a good emulsion. If you've ever made a cake batter that turned curdly part way through, it is because cold ingredients just cannot emulsify. Your butter may get nice and fluffy, but plop a cold egg into it and it will seize back up into tiny bits rather than become one with the egg. The same goes for the milk or buttermilk you may add. Temperature matters!

One fanciful learning I've had this summer is to use berry-flavored vinegar in place of lemon juice in berry desserts. Berries often need a little acid to brighten them up and to balance their sweetness. The typical remedy is lemon juice. In several trials I've found that replacing lemon juice with berry vinegar gives the same lift while amplifying the berry flavor. Either works just fine in this recipe. Use what you have.
This Blueberry Compote recipe makes a lot. It can easily be halved, but it is so wonderful on pancakes, waffles, and vanilla (or sweet corn) ice cream. Don't cut yourself short.
Three years ago my beloved and I bought our forever home. We'd come together later in life and it took us a while to figure out where and how to live in a way that meets both of our needs. For ten years we searched to find this place we both love and have made our home.
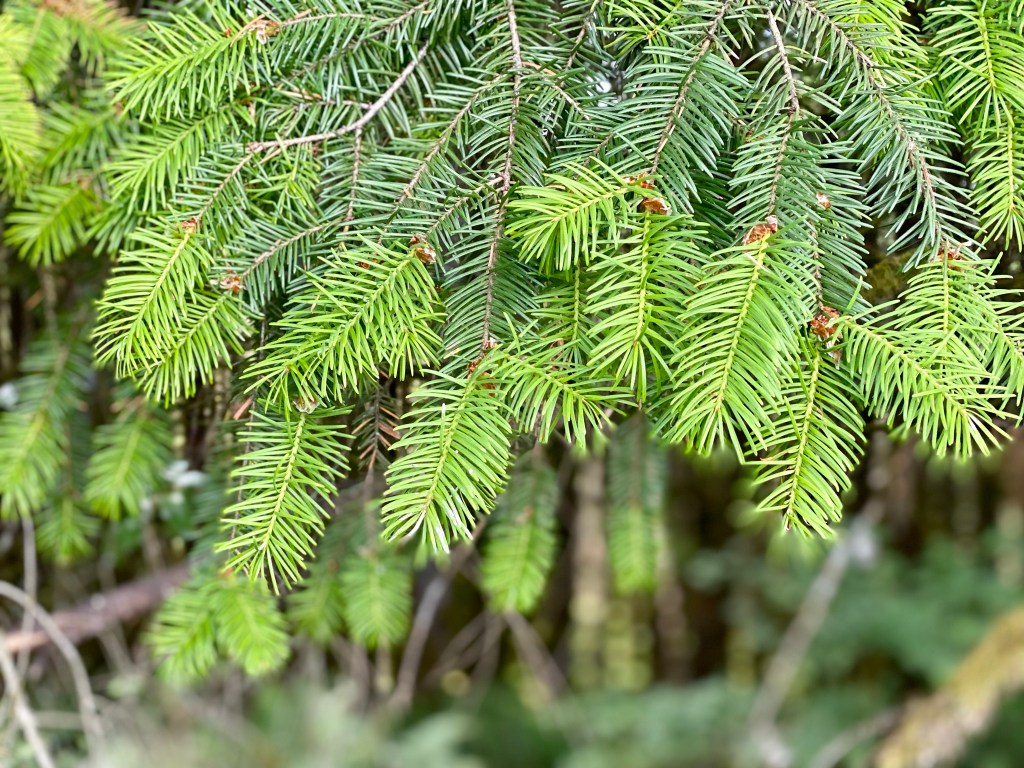
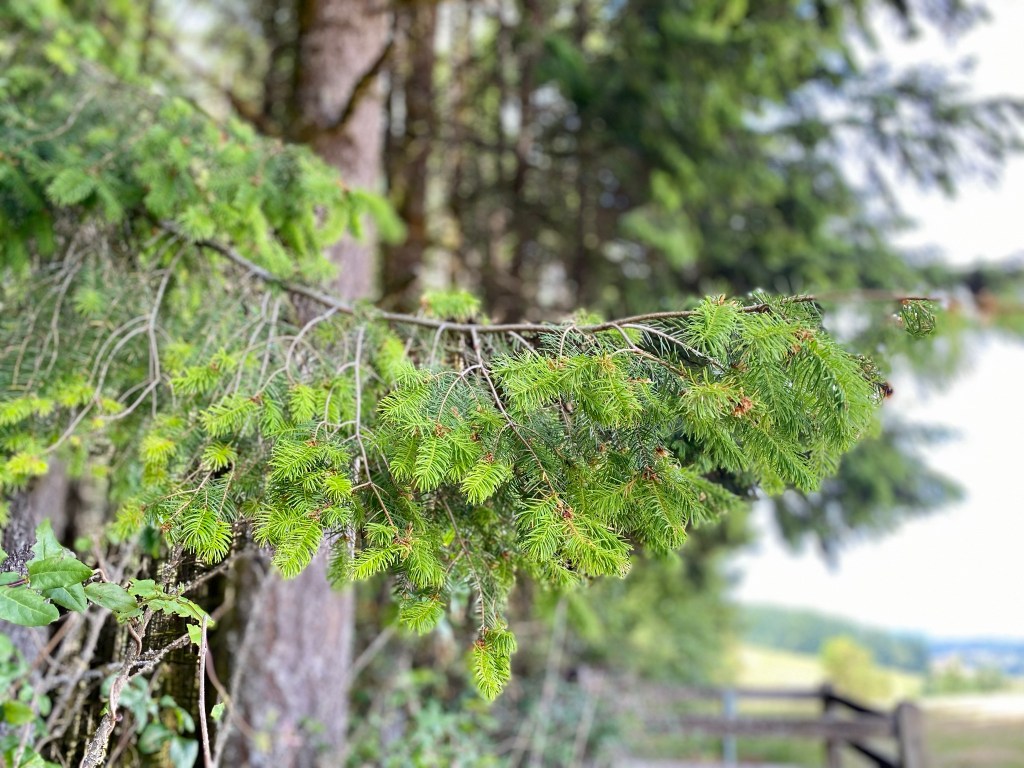
Our sweet forever home visually melts into the backdrop of a 260+ acre forest that also backs the properties of our two neighbors. We have loved the forest for all it gives. Birdsong, shade, the ever-present rustling of the treetops, the pure fresh earthy scent that's especially noticeable in the early mornings, and the creaks and howls that call from it after dark.
Beginning Tuesday, as happens in Oregon, the crop of timber-- the entire forest-- will be harvested. By September what once was a Douglas Fir forest will be three new homesites. We knew this would happen one day. We just liked to think that one day was 20 years from now.
I am heartbroken.

My husband, who has had something grumbly to say about every clear-cut we've ever driven by, has nobly risen to reframe the situation as our "view expansion and sunset enhancement opportunity." His forward lean and courage is beautiful.
I fleetingly think of changing my name to Butterfly and chaining myself to a tree. Instead I just weep.
Our dear neighbors with whom we have shared the glories of this forest gathered this weekend to pay homage to the lush, oxygen-scrubbing, interconnected organism we've enjoyed and appreciated. A wake of sorts. Poetry was recited, a tear or two was shed, and we laughed and shared community lore. My hurting heart considered serving Funeral Potatoes but I refrained.
What does one serve on the occasion of a forest being cut down?
We ate from the forest, that's what we did.
Douglas Fir Fettucine Alfredo and another beautiful sad story.
Douglas Fir Shortbread and Healing Conifer Tea from The View From Great Island

You’re in the right place! I’m Pam Spettel, home cooking expert and guide, and I’m here to show you how to break up with cooking and hospitality anxiety, learn how to use recipes as guides rather than strict rules, and let your cooking intuition and confidence soar.
Superpower: Dreaming up recipes that work, serving them to my friends and family, and writing little stories about how cooking them well is the same as loving well.
Inspiration: Ingredients! The fresh, colorful, fragrant, local, seasonal ingredients found in the Pacific Northwest are my creative medium.
Heroes: Local food and wine producers– the people who keep me, my family, and our community nourished and happy.