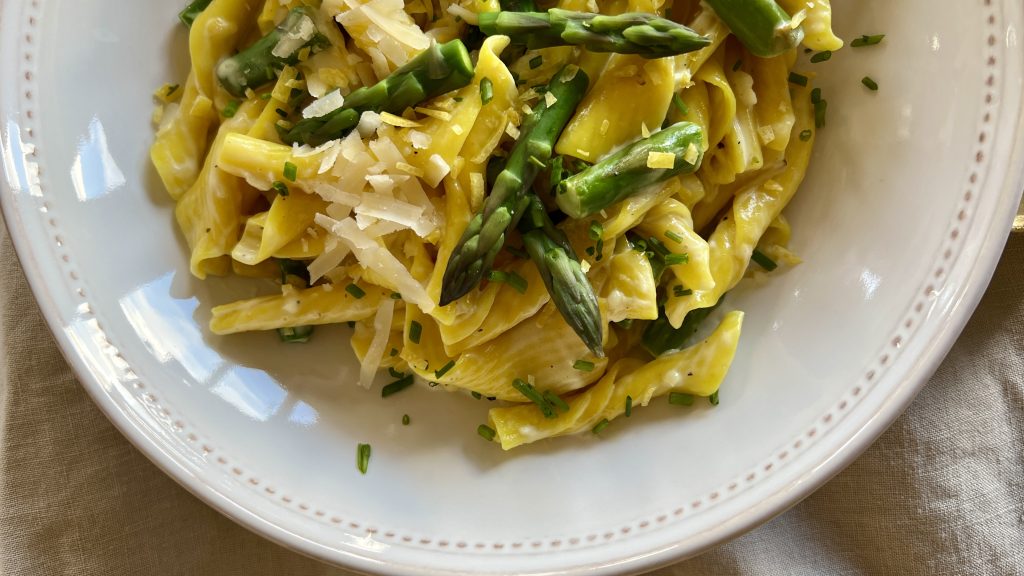
After a loooong winter's nap, I'm back to share with you a most exciting recipe for spring. Creamy Lemon Pasta is the culinary world's daffodil equivalent-- bright sunny lemons, some fresh herbs, and peas or asparagus tips bring good sunny cheer. The creamy sauce works itself out in less time than the pasta needs for cooking. The whole thing from start to finish takes about 20 minutes, a very pleasant hat-tip to spring.
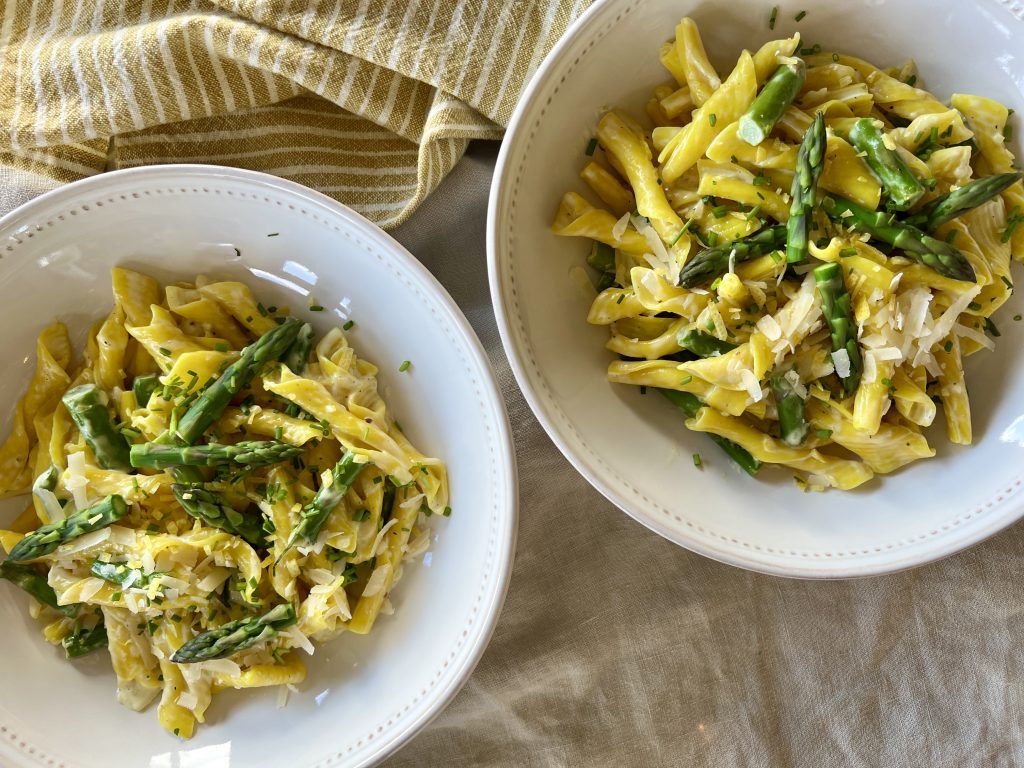
Heap your creamy lemon pasta into a bowl all by itself, or serve it with a salad and or a protein of your choice. Keep it simple, though, to impress yourself with luxury and comfort, all dressed in yellow.
About the Recipe
While this recipe is scaled for four servings, if you're a household of one or two you won't regret having leftovers. (It can easily be doubled to serve eight to ten, and is perfect for Easter dinner.) The ingredient list is short. Yay. There is just enough sauce to make the creamy lemon pasta velvety and lush without it being a gut bomb.
The pasta I've used here is a seasonal offering from Trader Joe's-- Lemon Torchietti--infused with lemon flavor that's perfect with this recipe. Grab some if you can find it. TJ's also often carries a lemon pappardelle which is nice, too. But this creamy lemon pasta recipe certainly doesn't require lemon-flavored pasta. Use what you have, use what you love.
Do give this a try. It is in my regular rotation, as it is so versatile and remarkably delicious.
This comforting, quick pasta is the culinary equivalent of the springtime daffodil, featuring lemon and peas or asparagus. It feels very fancy, but is remarkably simple.
8ouncespastatorchietti, penne, ziti, pappardelle are all good choices
8ouncesfresh or frozen peas, or asparagus cut into 1" piecesoptional
1 cupheavy cream
2 small or 1 mediumlemons, zest and juice
2 cloves garlic, peeled and finely minced or pressed
½teaspoon salt, plus more for pasta water
black pepper to taste (be generous!)
1-2teaspoonsthyme leaves, removed from stemsoptional
2 ouncesParmesan cheese, coarsely grated(about ½ cup)
Instructions
Bring a large saucepan full of water to boil on high heat. Generously salt the water, about 1 tablespoon. Cook according to package timing or until just tender. Don't overcook! About two minutes before the pasta is ready, add the peas or asparagus pieces, if using.
Save about a ½ cup of the pasta water, drain the pasta and vegetables and return them to their pan.
While the pasta is cooking, in a small saucepan combine the cream, the microplane lemon zest, garlic, salt, pepper, and thyme leaves if using. Stirring regularly, bring to a forceful simmer for 3-4 minutes.
Pour the cream mixture and half the cheese into the pasta and vegetables.Stir in the lemon juice. If the sauce needs thinning, add some of the pasta water a tablespoon or two at a time, stirring until it is light and silky. Plate into a serving bowl or individual pasta bowls. Garnish with remaining cheese and a sprinkling of herbs, if using..
Notes
To rewarm leftovers in the microwave, sprinkle on 2-3 tablespoons water and cook at 70% power, checking a 90 second intervals, until hot.
Since forever some form of sugared and spiced nut seems to come out of hiding the first weekend of December, right in time for the first holiday gatherings. I've made a lot of them over time, and now heartily endorse the talented and adorable Dorie Greenspan's Candied Cocktail Nuts from her book Everyday Dorie as the very best option.
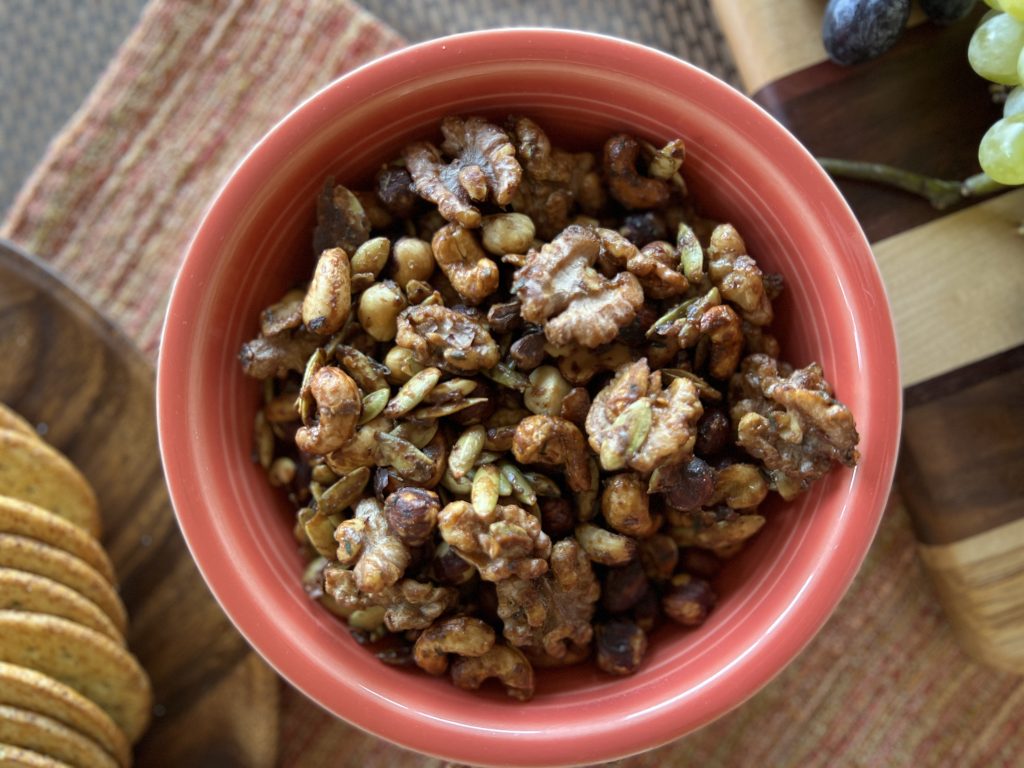
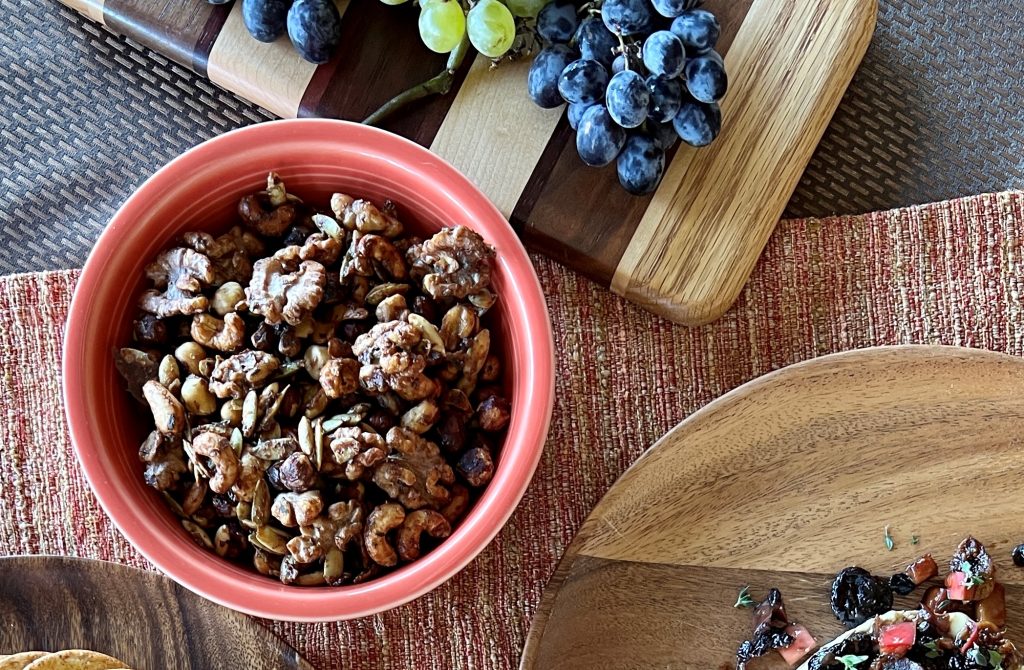
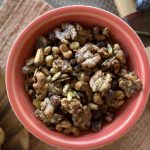
Candied cocktail nuts are the most pleasant way to start a party or celebration that I can think of. In under 15 minutes you'll have a big bowl of crispy flavored nuts that is perfect with most any libation. Season them sweet or savory.
Candied Cocktail Nuts also make perfect gifts for the holidays. Think of the neighbors, co-workers and hosts you can delight with such few ingredients and such a short time in the kitchen!
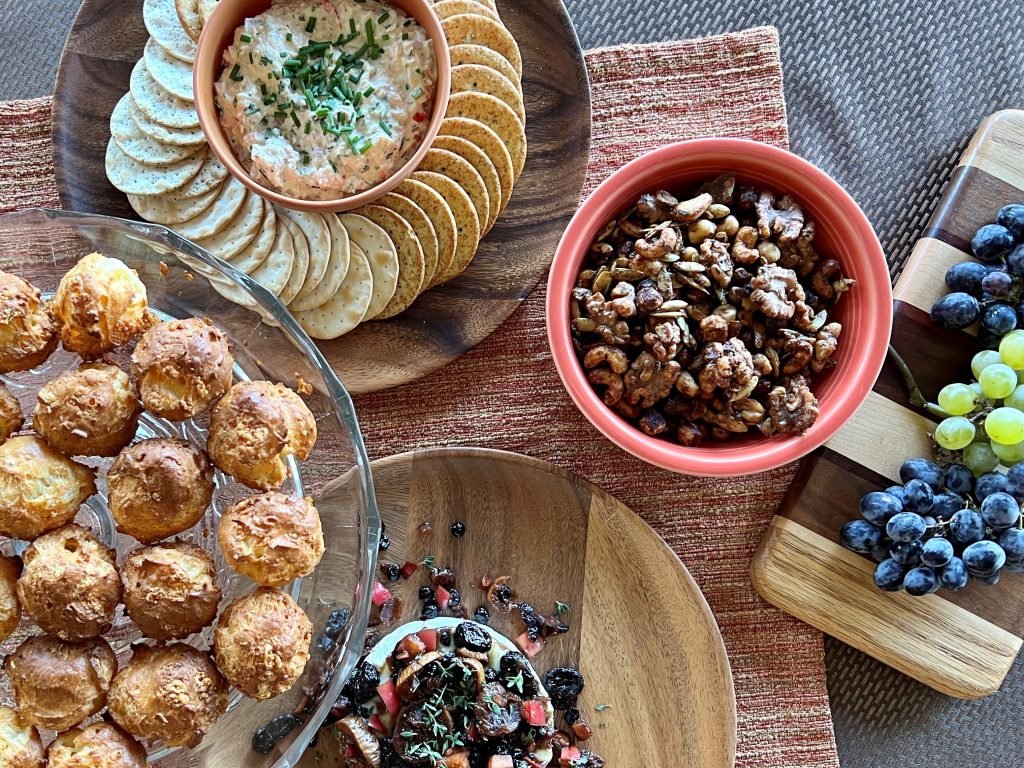
These spiced candied cocktail nuts make a perfect partner on a cheese or charcuterie platter. A handful of them also make a great salad topper. Don't forget that!
Candied Cocktail Nuts are a nice additional to an array of appetizers.
What Makes This Spiced Candied Cocktail Nut Special?
What I like about Dorie's candied cocktail nuts recipe is that the sugars are light (just one tablespoon maple syrup and one teaspoon brown sugar.) The sugars are cooked smooth into a glaze which evenly coats each nut. The glaze is meant only as a carrier delivery system to wrap each nutty nook and cranny with the spice flavor. The result is a just-right sweetness, not over the top sugaryness.
I've made room to change Dorie's cinnamon spice profile. Suit your mood or compliment the rest of your menu with whatever spices you have in your cupboard. I have found that curry blends (madras, ras el hanout, Persian lime curry) end up being my favorite spiced cocktail nuts. However, plain old cinnamon is pretty wonderful, too.
This post contains affiliate links, including but not limited to Amazon. As an Amazon Associate I earn from qualifying purchases. When you use these links to buy something I may earn a commission at no cost to you. Product affiliation helps me to keep this site ad-free while providing you with the content you enjoy. I only promote items that I use, like, and trust, or would invest in myself.
Spiced Candied Cocktail Nuts
Course: Appetizer
Season: Mist (November - March)
Dietary: Egg-Free, Gluten-Free, Vegan
Preparation: Baking, Fast + Easy
Total Time: 15 minutesminutes
Servings: 8
Author: Adapted from Dorie Greenspan's Everyday Dorie!
The quickest, easiest, most pleasant way to start a party or celebration that I can think of. In under 15 minutes you'll have a big bowl of crispy flavored nuts that is perfect with most any libation. Season them sweet or savory. Perfect gifts for the holidays, too!
8ounces untoasted shelled nutsUse a single variety, or any combination of hazelnuts, almonds, walnuts, cashews, pecans, macadamias, and/or raw pumpkin seeds.
1 tablespoonunsalted butter
1tablespoonmaple syrup
1teaspoonpacked brown sugar, light or dark
1teaspoonfleur de sel or flaky salt, or 1/2 teaspoon fine sea salt, plus more for sprinkling
¾teaspooncinnamon, or curry powder, or pumpkin spice(play around-- French quatre espice, smoked paprika, cardamom, cumin blends all would be fantastic)
¼ to ½teaspooncayenne pepper or piment d'Espelette
Instructions
Preheat the oven to 350°. Arrange the oven rack in the middle of the oven. Line a rimmed baking sheet with parchment paper or a silicone baking mat. Add the nuts. Roast for 5 minutes.
Meanwhile, place 1 tablespoon unsalted butter, 1 tablespoon maple syrup, 1 teaspoon packed brown sugar, 1 teaspoon fleur de sel or flaky salt (or 1/2 teaspoon fine salt), 3/4 teaspoon ground cinnamon, and 1/4 to 1/2 teaspoon piment d’Espelette or cayenne pepper in a medium saucepan. Cook over medium heat, stirring, until the butter melts and the mixture is smooth. You won’t have much liquid, but it will be all that you need.
Add the warm nuts to the saucepan and cook, stirring, until they are coated with the mix, 2 to 3 minutes. Return the nuts and thyme to the baking sheet and spread them out — they won’t bake well if they’re in clumps.
Bake for 5 minutes. Stir and turn the nuts and bake until fragrant and deepened in color, 4 to 5 minutes more. Place the baking sheet on a rack and discard the thyme. Sprinkle with more fleur de sel (or fine salt), and let the nuts cool completely (they will initially be sticky but will crisp up).
Notes
Tip: This recipe is so delicious and easy, you'll want to double it! If you decide to make a batch with more than 1 pound of nuts, bake them on two baking sheets.Storage: The nuts can be kept for at least 1 week in a tightly sealed container. They may get a bit sticky; to refresh them, pop them back into a 350ºF oven for 5 minutes.Sourcing nuts: You know me, I advise to use nuts that are grown in your area when you can. However Trader Joe's is a wonderful place to stock up on nuts. They are always fresh, have a great variety all in one place, and are always the best value around.
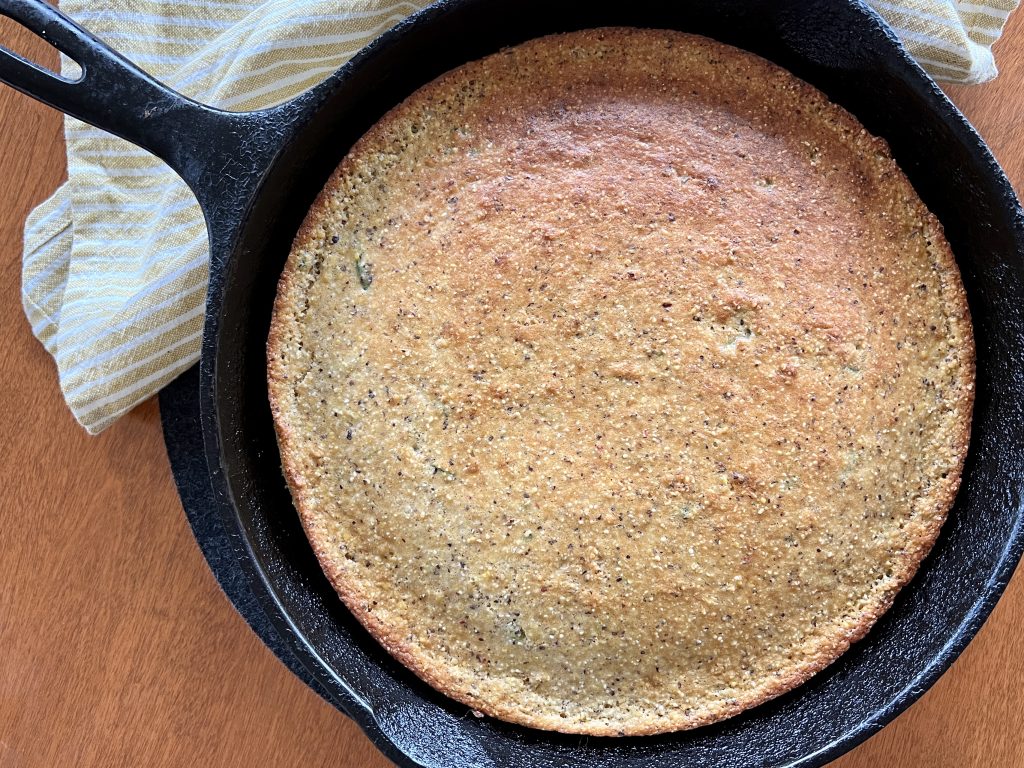
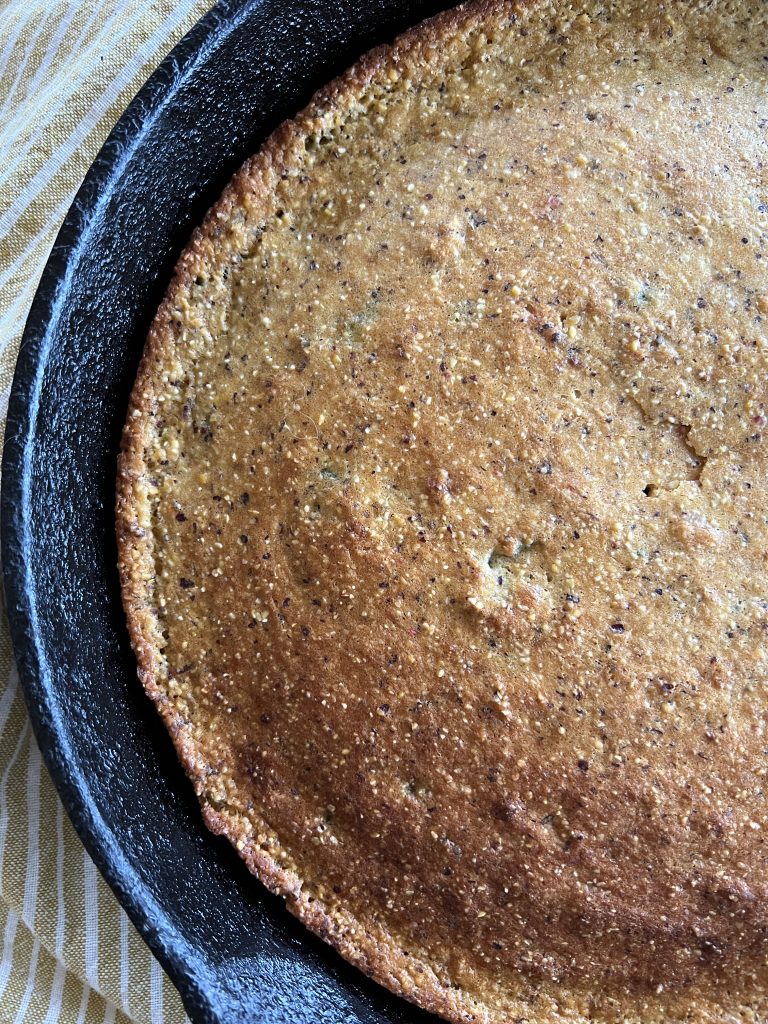
Can we admit that soup night goes from good to great when some tasty nosh cozies up to the bowl? Maple Jalapeno Cornbread is often that certain something here at the 101-Mile Kitchen. The tiniest hint of heat with mapley sweetness, a tender moist crumb, and the pleasant crunch of cornmeal is so very satisfying.
Cornbread and maple make a surprisingly good pair. Add the unique green flavor and subtle heat of jalapeno, and WOW!
Don't miss the maple butter! Whip some up while the cornbread is baking to slather on the warm bread.
Making Maple Jalapeno Cornbread
Most cornbread recipes call for buttermilk, which is an ingredient I rarely have on hand. My instincts tell me that more households may keep yogurt around than a carton of buttermilk, so I experimented with that swap with great success. The tang is still present, but the batter holds more moisture and has more spring with the use of yogurt.
I use the multi-colored heritage Abenaki corn polenta from Lonesome Whistle Farm or the Red Flint Floriani cornmeal from Camas Country Mill for this cornbread. Both are outstanding products from local companies near me, and I love the red flint flecks in both. However, any medium to coarse cornmeal will work wonderfully. Do not use fine corn flour in this recipe or you'll end up with a heavy, dense cornbread.
What Soups Are Best with Maple Jalapeno Cornbread?
Frankly, very few soups would not happily sidle up to this cornbread! My first choices would be bean-based soups and chilis. This recipe made with potatoes, corn, and poblano chiles is fantastic. Potato chowders, meaty chilis, and blended butternut, broccoli, or cauliflower soups would also be delicious with the cornbread. Really, you just can't go wrong!
This post contains affiliate links. When you use these links to buy something I may earn a commission at no cost to you. Product affiliation helps me to keep this site ad-free while providing you with the content you enjoy. I only promote items that I use, like, and trust, or would invest in myself.
Have you joined the 101-Mile Kitchen community? If not, we'd love to have you. You can take care of that right here, and when you do I'll send you my free Top Five Cool-Weather Cooking Guide downloadable as a thank you!
Maple Jalapeño Corn Bread
Course: Bread + Rolls
Cuisine: American
Season: All Season
Preparation: Baking
Prep Time: 15 minutesminutes
Cook Time: 40 minutesminutes
Total Time: 55 minutesminutes
Servings: 12
Author: Pam Spettel
Like a little heat with your sweet? Maple jalapeño cornbread (baked in either muffin form or in a skillet) is the perfect accompaniment to seasonal soups, stews, salads, and roasts. It has buttermilk tang without the buttermilk, and bakes like a dream.
Preheat oven to 400°. Generously grease the cups of a standard muffin pan, or a 12" skillet with butter or cooking spray.
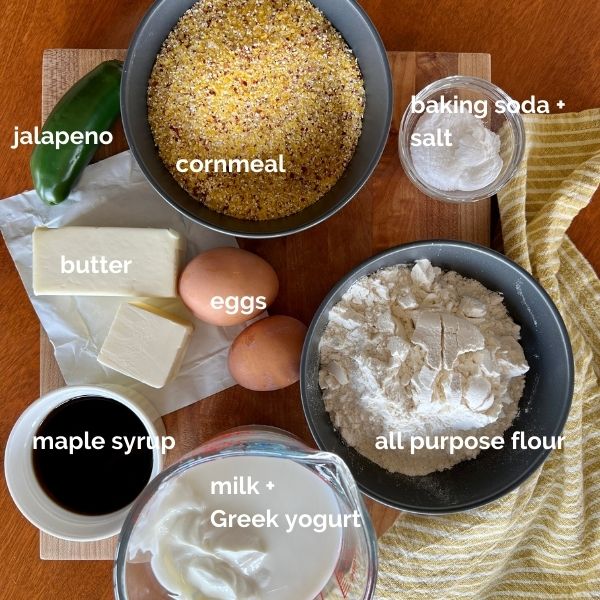
In a large mixing bowl, whisk the dry ingredients: flour, cornmeal, baking powder, baking soda, and salt. Grate the jalapeño into the flour mixture and whisk again. Set aside.
In a medium mixing bowl whisk the Greek yogurt to loosen it. Whisk in the milk. When the milk is fully incorporated whisk in the eggs. When the eggs are incorporated whisk in the butter and maple syrup.
Tip the wet ingredients into the large mixing bowl with the dry ingredients. Use a silicone spatula to combine them together, scraping down to the bottom of the bowl. Stir the ingredients together only until no flour remains.
Use a 3-tablespoon scoop or a large spoon to fill the greased muffin cups about 3/4 full with batter, or scrape the batter into the greased skillet. Place into the hot oven and lower the temperature to 375°. For muffins, bake 12 - 15 minutes or until the tops are burnished golden brown. For skillet cornbread, bake for 18-22 minutes, until the top is burnished golden brown.
If using a muffin pan, allow the muffins to cool in the pan for 5-7 minutes. Remove the muffins from the muffin pan and allow them to finish cooling on a cooling rack. If you are using a skillet, allow the skillet to cool on the cooling rack at least 20 minutes to allow them to set up before cutting and serving them.
Maple butter
In a medium mixing bowl, whisk together the soft butter and maple syrup until light and fluffy. (This may take a few minutes to completely incorporate the two.) Spoon the maple butter into a small serving bowl and sprinkle with flaky salt and serve alongside the maple jalapeno cornbread.
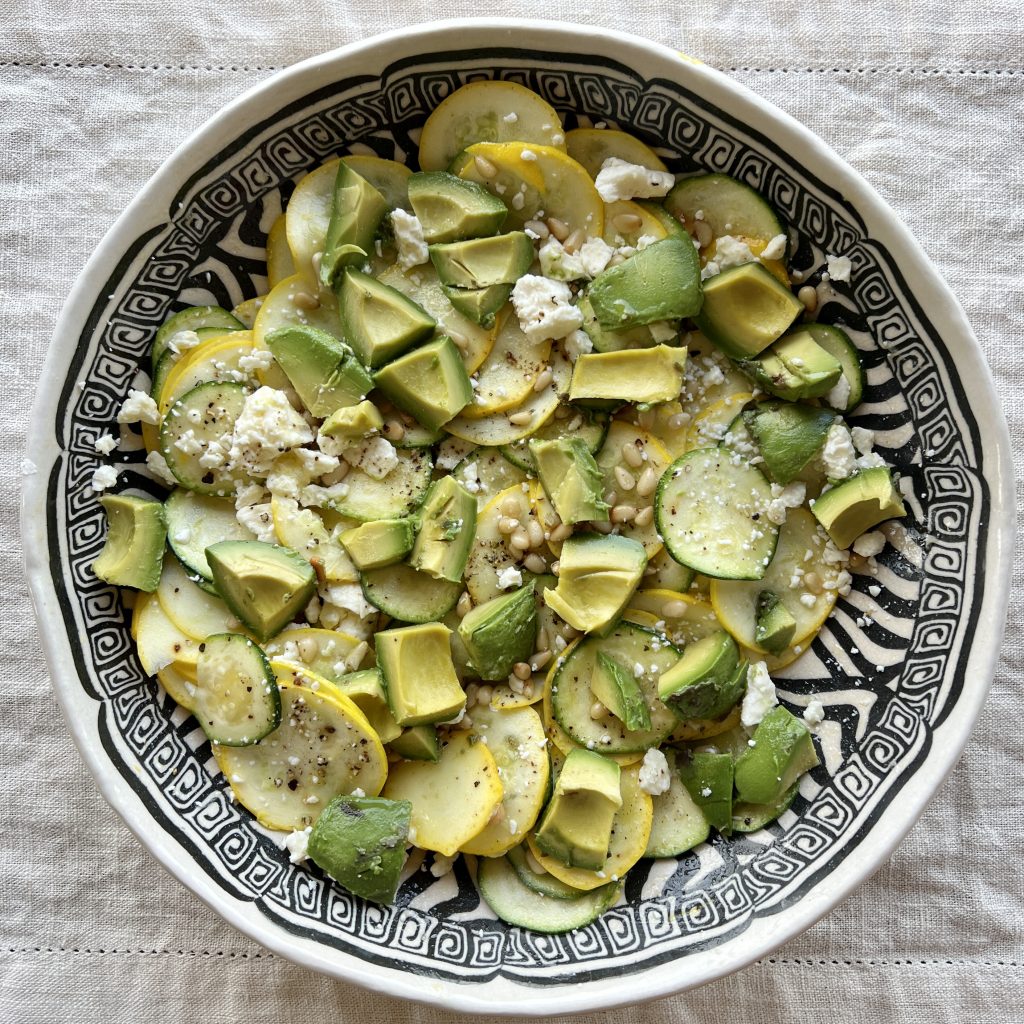
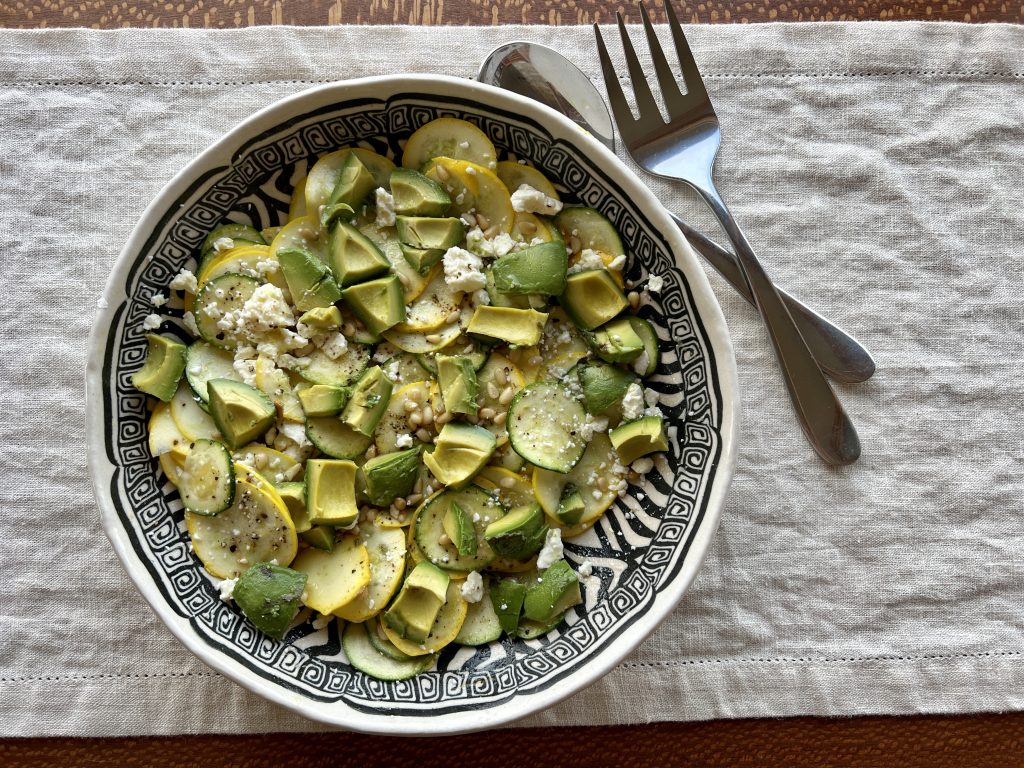
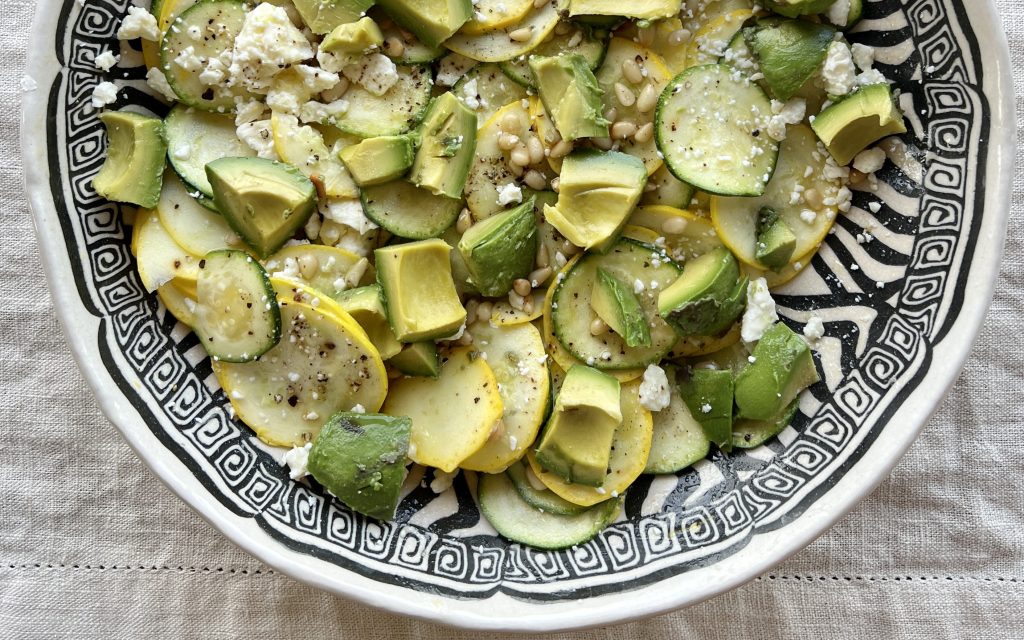
Zucchini has never inspired me much, until this summer, and it is this great one bowl Lemon Feta Zucchini Salad I have to thank for it. It's such a simple salad, but the flavors come together in a big way. Lemon juice and zest offer a bracing acidity and zip, feta adds a salty creaminess, and pine nuts offer a grounding buttery, component. Big cracks of black pepper add a ton of character. Mix it all together in one serving bowl-- so efficient and tidy! This salad is delightful with a multitude of foods, especially anything grilled, or all on its own.
Let Lemon Feta Zucchini Salad Transition You to Autumn
The autumnal equinox is only 16 days away, but zucchini will be with us for yet a while. Nearly all applications (except, maybe, a chocolate cake with zucchini hidden in it) are better with smaller young zucchini. However, don't be afraid to use the big boys of early autumn in this dish. The bigger squashes will need lengthwise halving or quartering and seed removal, but will tenderize nicely with a little marination from the dressing.
Bonus Recipe for an Easy Autumn Dinner: Roasted Pork Tenderloin
Many people tend to get really busy as September gets underway, and this speedy one-bowl lemon feta zucchini salad takes about 15 minutes to make. Snuggle it next to a sliced roasted pork tenderloin for a complete meal in 30 minutes flat. The leftovers will make a nice lunch the next day.
Here's how I'll sequence it: Preheat the oven to 425°. Wipe the tenderloin dry with a paper towel and generously salt and pepper it. In a small bowl, mix two tablespoons Dijon or grainy mustard, 2 tablespoons honey, and 1 teaspoon onion powder, if you have it. Spread half the mixture all over the pork tenderloin, place it in a large cast iron skillet or on small baking sheet, and roast it in the hot oven for 16 to 22 minutes. It should feel firm but with some give when you press it with your finger. The internal temperature should be between 140°-145°. (I remove mine from the oven at 140° to ensure it is juicy, as the temp will raise another 5 degrees while it rests.) Allow the tenderloin to rest under a foil cover for ten minutes. Slice and serve with the remaining half of the mustard sauce.
While the tenderloin is roasting, make the zucchini salad except the garnishes. Set it aside. Once the roast is sliced, give the salad a last toss, top it with the garnishes, and voila! Dinner is served.
Making the One-Bowl Zucchini Salad
The batch you see in these photos uses a mix of yellow and green zucchini, but one or the other delivers the same goodness if that's what you have. Slicing it thinly but not too thinly lets the slices hold up to a stir. A thickness of about 1/8" is your aim. The zucchini will absorb your nice dressing without wilting at this thickness. This is the tool I love to use to get even, quick slices.
A heavy dose of cracked black pepper really makes this dish, so don't hold back. Fresh basil and avocado are optional but delicious additions, but not necessary. If you have them use them; if not, don't worry.
Add the rest of the ingredients directly to the bowl without dirtying a single measuring cup or spoon. This is truly a one-bowl wonder of tidiness!
A note on toasting pine nuts: I wish I had a dollar for every time I've burnt a batch of pine nuts. Kitchen multi-tasking can be a detriment when it comes to nuts. I used to put them on a small baking sheet and pop them into the toaster oven for 6-8 minutes. Sometimes they turned out perfect, other times like mini charcoal briquets. Please take my advice and take the very few minutes it takes to toast them in a small skillet over medium heat. Shake the pan often to let them toast evenly. Stay right there! Notice their change in color and aroma. By all means, do not walk away from the pan. Relax and hang out a minute. Toasting nuts is a definite Be Here Now task.
This post contains affiliate links. When you use these links to buy something I may earn a commission at no cost to you. Product affiliation helps me to keep this site ad-free while providing you with the content you enjoy. I only promote items that I use, like, and trust, or would invest in myself.
Have you joined the 101-Mile Kitchen community? If not, we'd love to have you. You can take care of that right here, and when you do I'll send you a free Taste of Oregon appetizers recipe downloadable as a thank you!
One-Bowl Lemon + Feta Zucchini Salad
Course: Main Dish, Salad
Cuisine: American
Season: Bounty (August - October)
Dietary: Egg-Free, Gluten-Free, Vegetarian
Preparation: Fast + Easy
Total Time: 15 minutesminutes
Servings: 2as a main, 4 as a side
Author: Pam Spettel
An exceptionally flavorful way to enjoy zucchini, this one-bowl wonder is a great transition to autumnal eating.
1poundyellow and/or green zucchiniabout 2 medium zucchinis
1largelemon, zested and juiced
3tablespoonsextra virgin olive oil
1clovegarlic, grated
¼cuppine nuts, toasted
⅓cupfeta, crumbled or in small cubes
lots of freshly cracked pepper
flaky salt, to taste
1avocado, cubed or sliced (optional)
2tablespoonsfresh basil, torn into small pieces (optional)
Instructions
Slice the zucchinis to about an ⅛" thickness directly into a 2-quart serving bowl. (A mandolin really helps here.) Sprinkle the lemon zest and juice and olive oil over the zucchinis. Grate the garlic clove over the top. Give it a good heavy grind of fresh black pepper, and a few generous pinches of salt. Mix together gently but thoroughly with your hands.
Add half the toasted pine nuts, feta and fresh basil (if using) and mix again.
Arrange the slices in the bowl to look pretty-- seperate them and spread them around a bit. Sprinkle the remaining pine nuts and feta on top. Give everything another good grind of black pepper and another pinch of salt. Top with avocado slices or cubes, if you are using them. Serve. Store leftovers in the fridge for 1-2 days.
I'm beginning to think that dishes like Grilled Peach + Ricotta Salad are proof that a key purpose of summer is to oust cooking burnout. All we have to do is stand back and let the extravagant array of juicy, colorful ingredients do what they do with nominal human interference. Since the garden and farm stand bounty pretty much does all the work for us, all we have to do is relax, and maybe chop a thing or two.
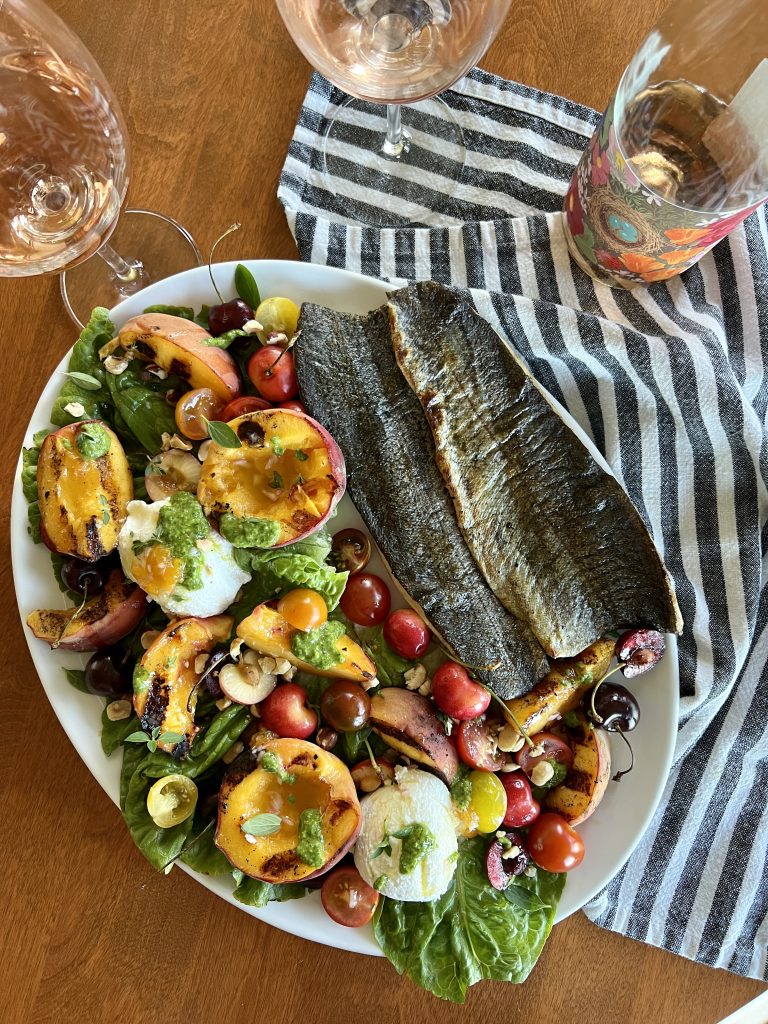
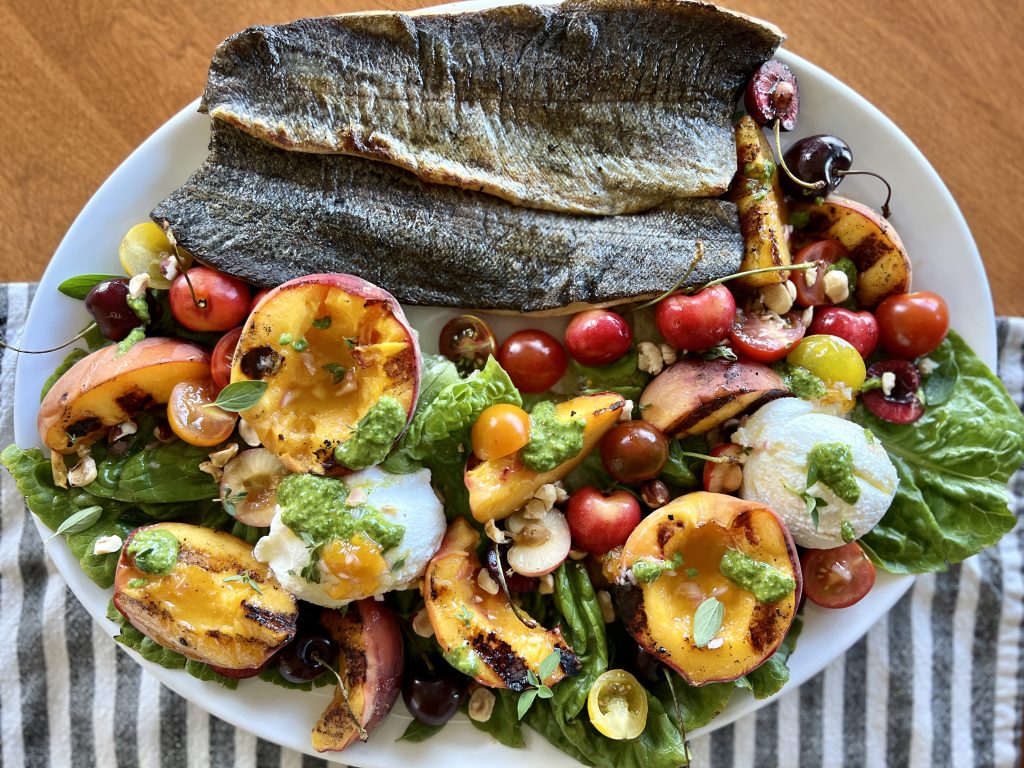
The flavors in this salad are wonderfully harmonious. First, grill-kissed peaches, lightly caramelized and warmed through, lean savory rather than peach-pie sweet. Then there are tart cherries, tangy tomatoes, and creamy ricotta. Add in savory herbs, and a sweet and unctuous dressing. All this combines to light up all five flavor receptors in your mouth. Dollops of our Summer Basil Sauce add yet one more way to use this essential sauce. And then, there's the color explosion that delights your eyes and soul as each bite is lifted on your fork. Our grilled peach + ricotta salad as dinner simply matches the exuberance and joy of the season.
Vibrant, luscious grilled peach + ricotta salad served here with grilled trout filets.
What Wine to Serve with Grilled Peach + Ricotta Salad?
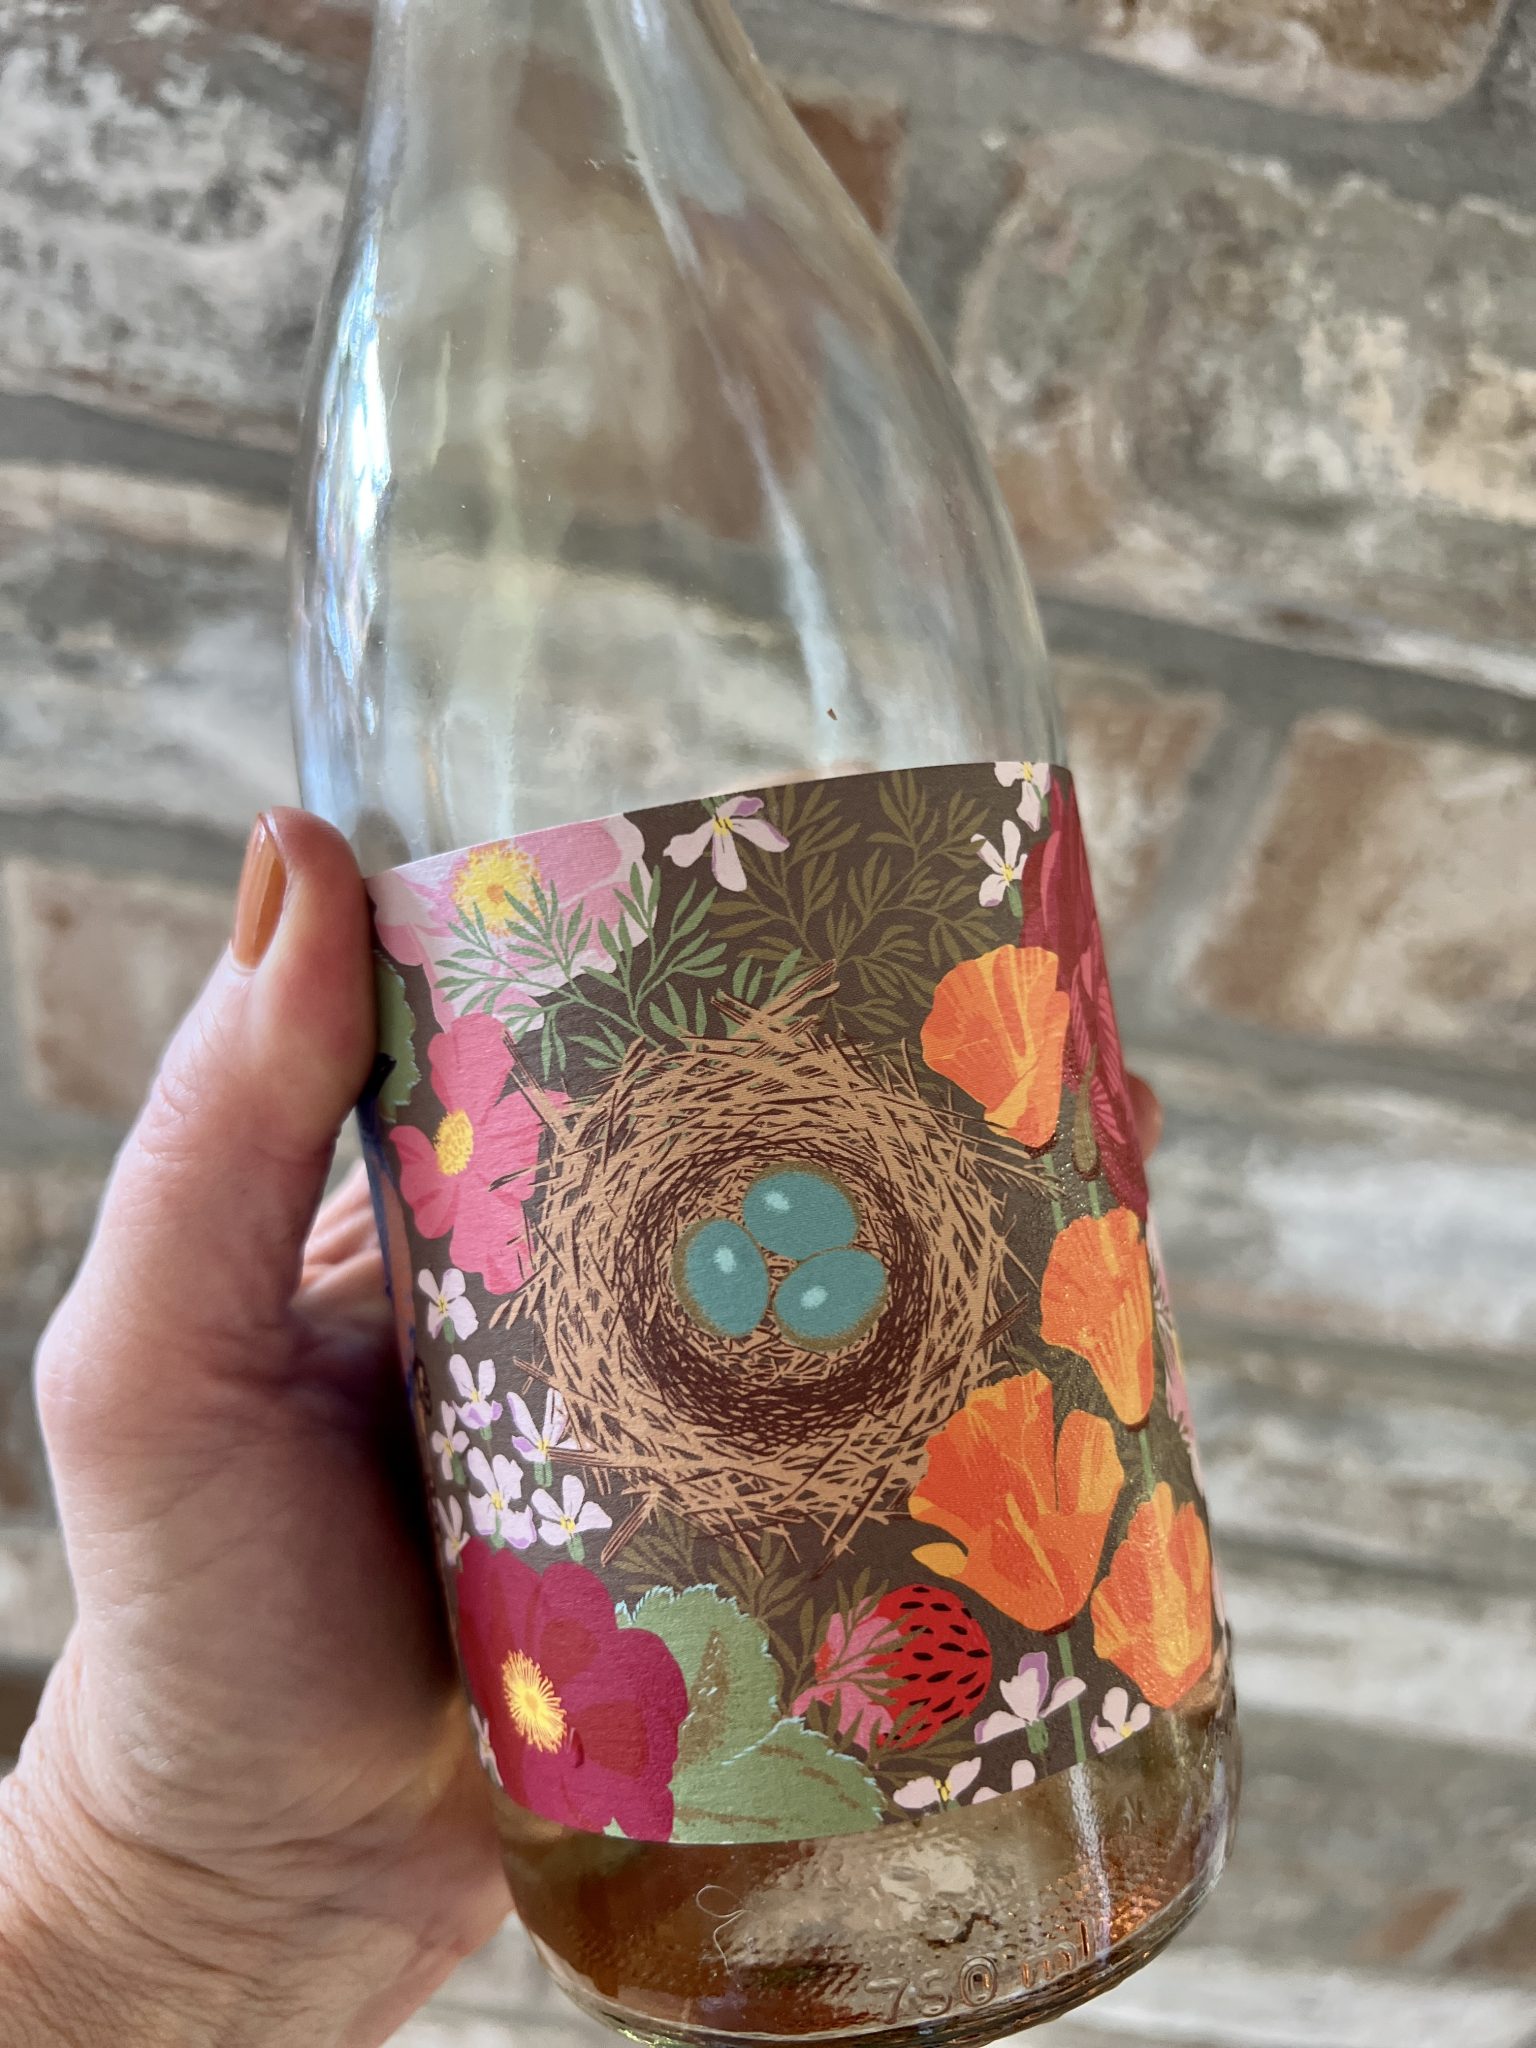
Anne Amie Vineyards, in Oregon's Yamhill-Carlton wine area, offers a 2021 Rosé of Pinot Noir you shouldn't miss. (This wine is no longer available directly through Anne Amie's website.) It is a dry (not sweet) medium bodied wine with soft fruit and herb flavors, a slight minerality, and balanced acidity that nicely supports the grilled peach salad. And the sweet label will make you smile in the same way the pretty salad does. Be sure to save it and use it as a vase for summer blooms once you've finish the delicious wine!
I hope you'll try this easy-going summer recipe. When you do, please share with our 101-Mile Kitchen community! Tell us in the comments, or on Facebook or Instagram, @101milekitchen. Have you joined the community? If not, we'd love to have you. You can take care of that right here, and when you do I'll send you a free Taste of Oregon appetizers recipe downloadable as a thank you!
Warm, juicy, grilled peaches, cherries, tomatoes, creamy whole milk ricotta, and lots of herbs. Elegant summer eating with so little effort because the ingredients do all the work for you!
2-3tablespoonsfresh thyme, oregano, and/or mint leavesuse one or a mix, depending on what you have on hand
For the Dressing
2½tablespoonswhite balsamic vinegar
1smallshallot, finely minced
1tablespoonapricot, peach, or cherry jam
1teaspoonfresh thyme, finely minced
¾teaspoon salt
fresh ground pepper to taste
Instructions
For the Dressing
Place all ingredients in a small lidded recycled jam jar. Screw the lid on tightly and shake until the salt is dissolved. Set aside.
For the Salad
Light a small section of your grill to high heat. When the grates are very hot, spray them with cooking spray. Place the peaches on the hot grate, cut side down. Leave for 2-3 minutes or until grill marks appear, then turn. Allow the peaches to grill another 3 minutes until they are very warm throughout and are nicely marked by the grill. (If you don't have a grill, use a stovetop grill pan of cast iron skillet for this step.)
Mound the washed and dried lettuce leaves onto a platter or individual serving plates and lightly toss with about one tablespoon of the dressing. Arrange the leaves as a base onto the platter. Arrange the grilled peaches on the lettuce. Use an ice cream scoop to make two mounds of ricotta on the platter. Arrange the cherries and tomatoes over the top. Drizzle the remaining dressing over the peaches, ricotta, and the whole salad. Sprinkle with the crushed hazelnuts and herb leaves. Place small dollops of the Summer Basil Sauce around all the elements of the salad. Serve!
Notes
This salad is great on its own, or as a side to simply grilled proteins.
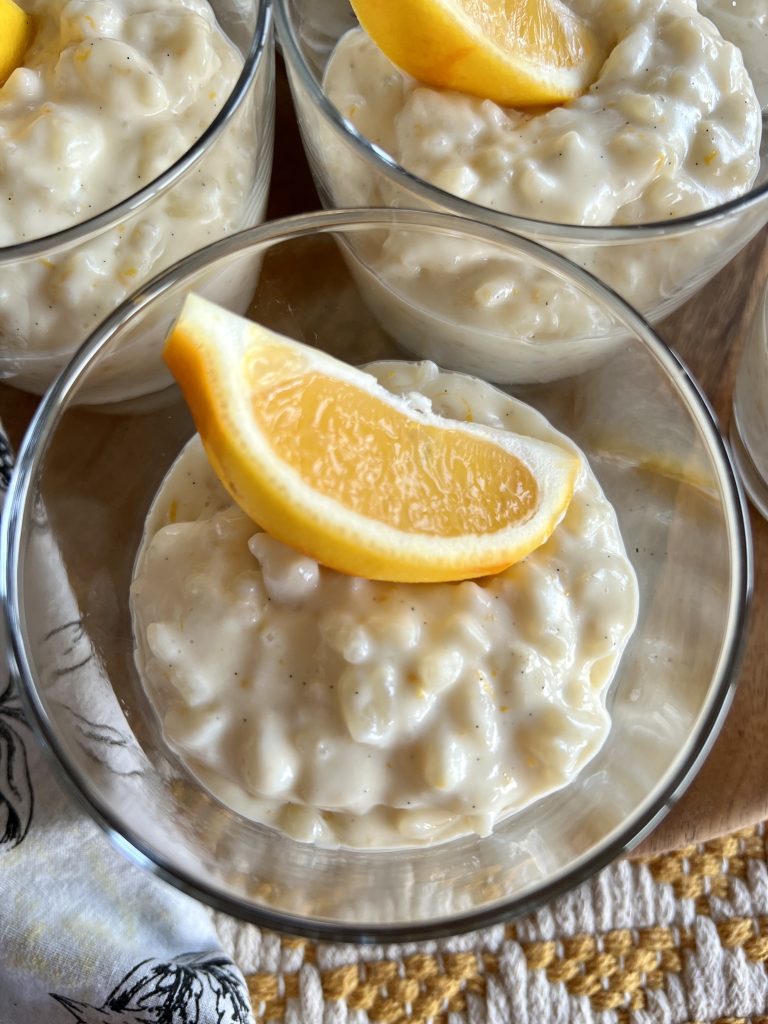
I wish I had a nickel for every time the words "comfort food" have been used in the United States since March 2020. With the money, I'd launch a campaign to deliver a cup of Vanilla Lemon Rice Pudding to the doorstep of every American, thereby redefining comfort food in our culture.
This recipe is gently sweet, creamy but not cloying. It is alive with lemon zest, and ethereal with a whole vanilla been (or vanilla extract.) Vanilla Lemon Rice Pudding is far more exciting than any other rice pudding I've ever had. Yet as comforting as your favorite cashmere sweater.
The Paris Connection
I learned of this bit of deliciousness from Katherine Burns of Rue Dauphine Paris. Katherine's Rue Dauphine Paris Instagram feed is full of glorious photos of her visits to historic gardens, churches, shops, and arrondissements in Paris, some lovely French recipes, and a glimpse of how she brings the Parisian lifestyle into her own Seattle home. Another bit of fun-- she and May of Noisettes 1420 (also a fabulous peek into Paris) host a Francophile book club, which I promise myself to participate in some soon day.
Needless to say, discovering Rue Dauphine Paris has brought me a bit of joy in these travel-less days, and has me wishing Katherine would be my guide to Paris one day.
Making Vanilla Lemon Rice Pudding
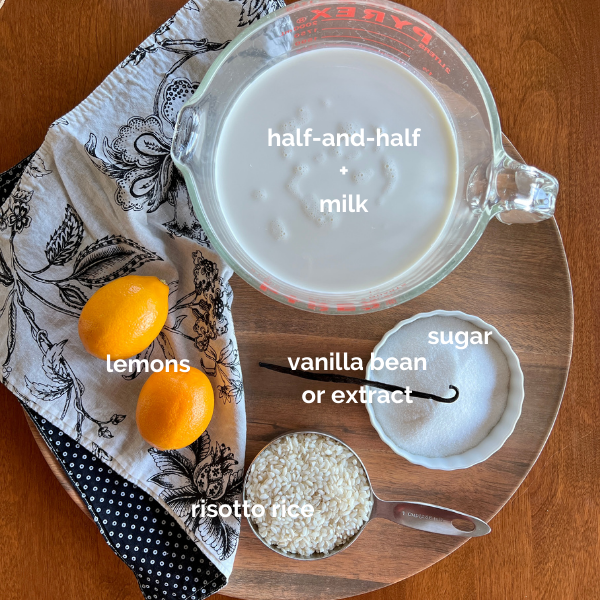
Katherine graciously allowed me to share her vanilla rice pudding recipe with you. I've renamed it to bring justice to the magic the lemon brings. I've made a slight change to the dairy component, swapping her 4 cups of whole milk + 1 1/4 cups heavy cream for 1 quart of half-and-half and 1 1/4 cups milk), otherwise this is completely hers. This change retains the silky creaminess of her version, but leaves me with no wasted partial carton of whipping cream. She is right in that the sweet aroma of lemon and vanilla this offers when bubbling on the stovetop is most pleasant.
You should definitely use Meyer Lemons when they are in season for this. The floral mandarin/lemon flavor is fantastic. I think orange zest would also be wonderful, like a creamsicle. However, standard Eureka or Lisbon (everyday grocery store0 lemons will still take you over the moon.
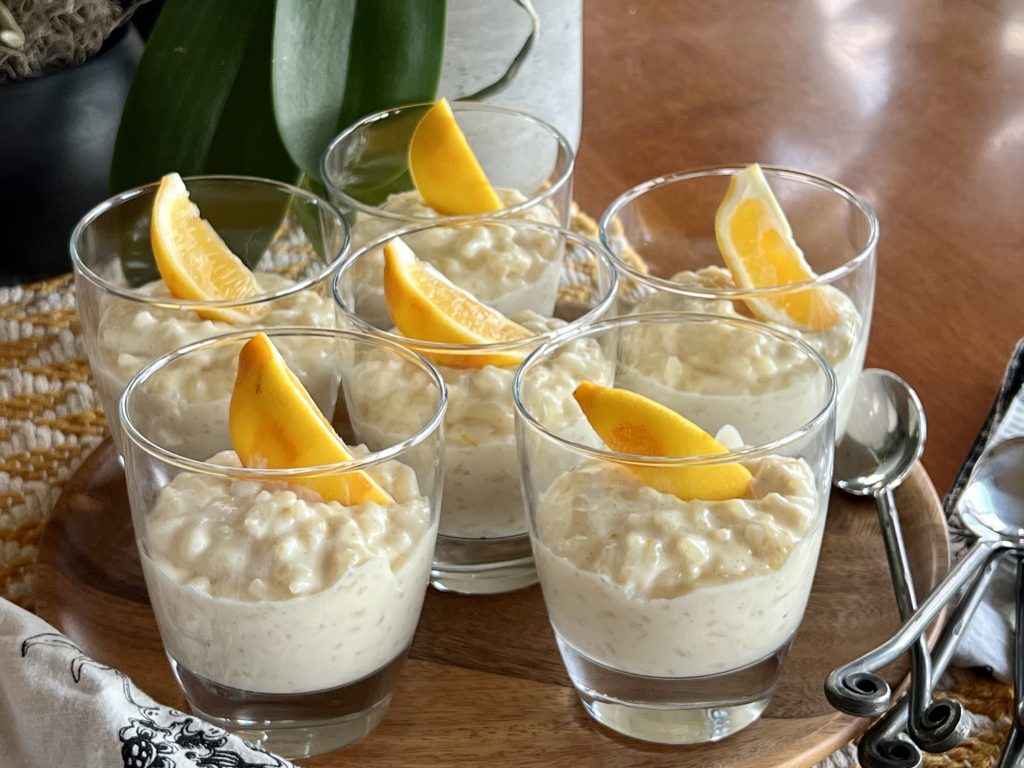
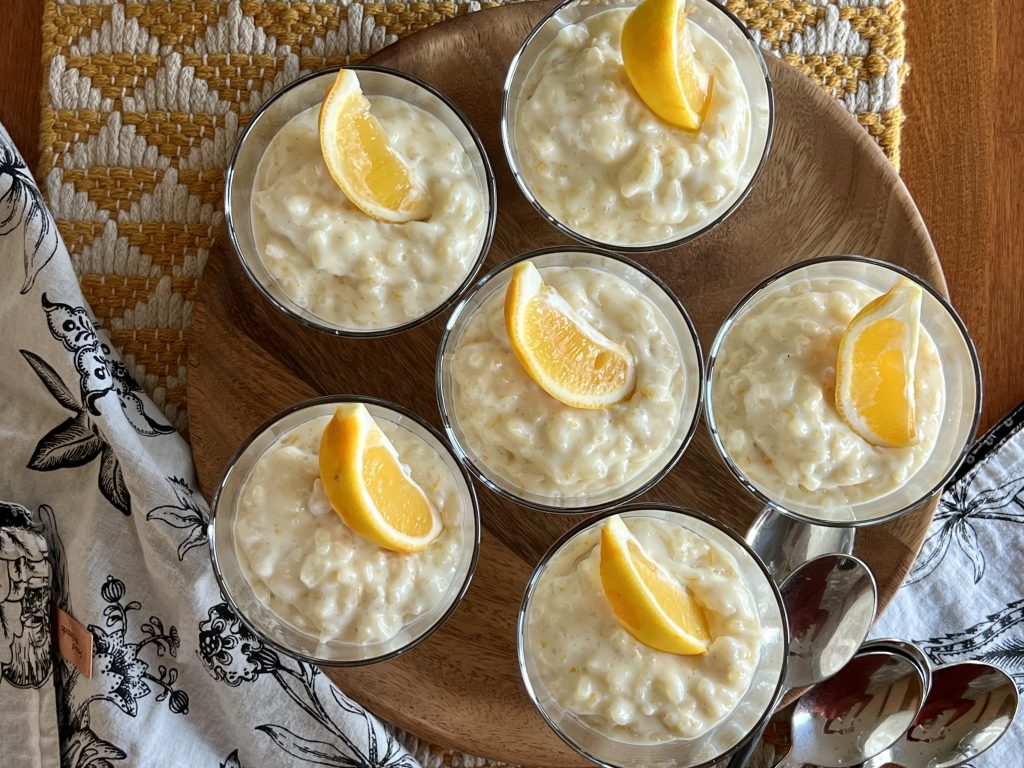
Katherine serves hers in flowery china cups, a touch of French charm, with a drizzle of caramel sauce. I like serving the rice pudding with a wedge of the zested lemon. A squeeze over the top brings a little acidic component as a balance to its sweet creaminess.
When I started dreaming of Vanilla Lemon Rice Pudding in the middle of the night, I knew I had to share it with you. It has become my new favorite sweet treat. Maybe it will become yours, too, as you dream of far away places.
Combine milk, heavy cream, sugar, vanilla seeds and bean pod, and lemon zest in a large saucepan. Bring to a simmer over medium low heat.
Stir in rice, bring back to a strong simmer, cover with a lid. Reduce heat to the lowest possible setting and simmer 60 minutes, stirring every 5 minutes or so, until rice is tender and a puddinglike texture. Spoon into serving dishes, garnish with a wedge of zested lemon to squeeze over the top, and serve warm. Cover with plastic wrap and refrigerate to store up to three days.
Notes
*Katherine Burns' original recipe calls for 4 cups of whole milk and 1¼ cups whipping cream. I changed this in order to use up an entire quart of half-and-half, and I typically have milk on hand. This provides less waste (3/4 cup of cream) in my kitchen since I use cream infrequently. Choose what's best for you, as the results are nearly indistinguishable.
Making food for people, especially these Valentine Shortbread Heart Cookies with Blood Orange filling, is an act of love. Mr. Fred Rogers, my truest childhood hero, said, "Love isn't a state of perfect caring. It is an active noun like struggle. To love someone is to strive to accept that person exactly the way he or she is, right here and now.”
Love is showing up, on repeat, day after day. It's the things you never knew you'd do. Like spending nights in the NICU next to your newborn's incubator. Or forgiving the hurt of a friend over and over again until you don't remember it anymore, which you hope is soon. Sometimes you are the target of your own love when you allow yourself to let go of guilt, grief, or fear.
"I know the secret of life: If you want to have loving feelings, do loving things."
Anne Lamott
Messing Up is OK
The wonderous thing about love, is that you will mess it up. That's just part of it.
Just like the verb cooking, loving calls for a lot doing. Trial, practice, mistake-making, and what can feel like wasted time and resources. But your flops are exactly how you learn to love better. The trick is to not give up. Keep practicing. Your acts refine as you practice them. Your acts become who you are. With a little tenacity your love eventually looks more like the soufflé you'd hoped for and less like the dog's breakfast.
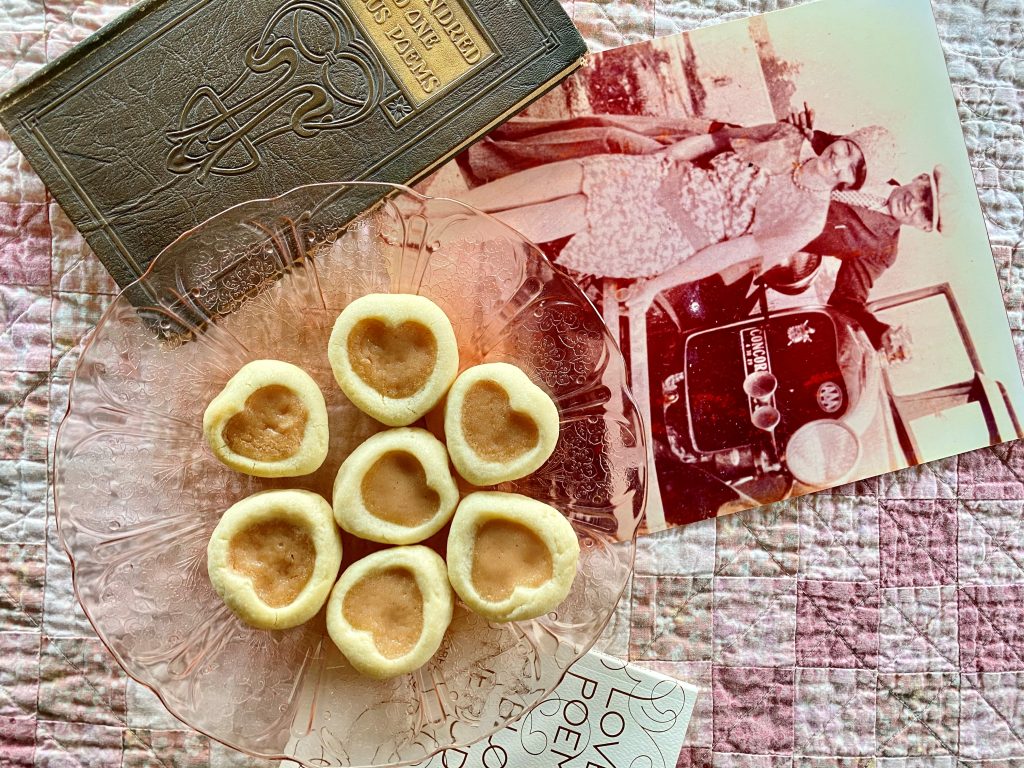
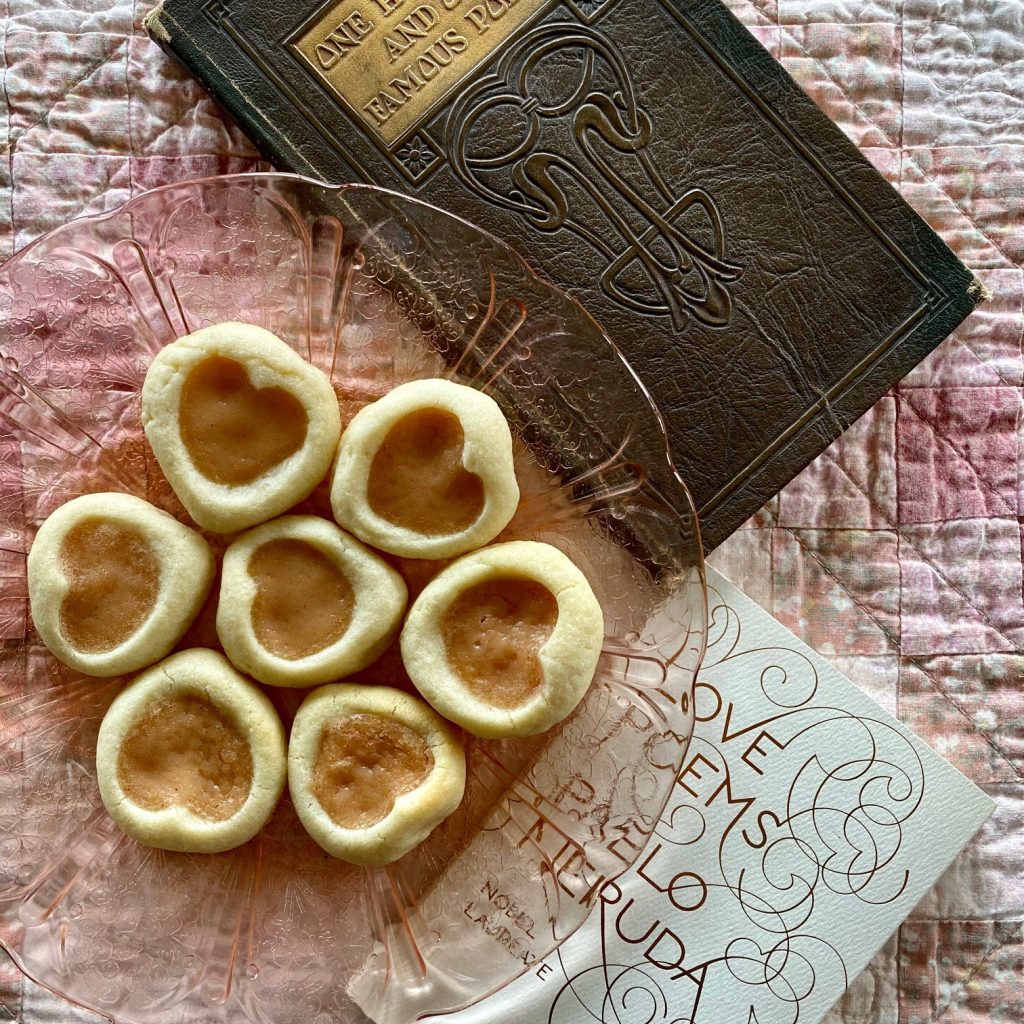
Remember all this when you make these pretty little Valentine heart shortbread cookies for your beloveds. Each time you press your pinky into the dough, you imprint the part of yourself that is set on loving. The soft, unchilled dough gives way to make adorable little heart shaped vessels that hold a tad of sweet blood orange goodness you also have made.
As you form the little Valentine hearts, they will remind you of your beloveds. Some, like a crotchety uncle, hide their tenderness in crooked wrinkles. Some, like an emotional 8th grader, absolutely cannot contain their contents. Others are the picture of every-hair-in-place perfection. The likeness of each heart says they belong together on the plate. Their uniquenesses make the plateful interesting. Just like you and your beloveds.
Pinkyprint Valentine Shortbread Heart Cookies with Blood Orange Curd
Course: Dessert
Season: Mist (November - March)
Dietary: Nut-Free
Preparation: Baking
Prep Time: 50 minutesminutes
Cook Time: 14 minutesminutes
Chilling Time: 2 hourshours
Total Time: 3 hourshours4 minutesminutes
Servings: 40cookies
Author: Pam Spettel
A simple shortbread base, filled with love and pink blood orange curd. No need for perfection here-- just celebrate each cookie's unique heart, just as you do your beloveds.
Make a double boiler by simmering 3" deep of water in a large saucepan. In a medium/large stainless steel bowl, whisk together eggs, yolks, and sugar until sugar just starts to dissolve.
Whisk in both juices and zest.
Set bowl over saucepan of simmering water. Cook curd, stirring with a rubber spatula almost constantly, until it begins to thicken. It should have the consistency of loosely whipped cream. Remove from heat.
Stir in butter cubes all at once, stirring until butter is completely melted and fully incorporated. Strain through a fine mesh strainer to remove bits of zest and any solid egg proteins.
Chill at 2 hours before using in the cookies. This makes about 1 ¾ cups-- you will only use about ½ cup for the cookies. Store the rest for another purpose.
For the Vanilla Pinkprint Cookie Dough
Line two baking sheets with parchment or non-stick mats.
Using an electric mixer, beat the butter, sugar, and salt on medium-high until light and fluffy, 2 - 3 minutes.
Beat in the egg and vanilla until fully incorporated and fluffy. On low speed, blend in the flour until just incorporated.
Using small scoop, scoop up a bit of dough and roll into a 1" ball with your palms. Place on the baking sheet. Using your pinky, press down near the top of the ball, making an indentation. Make another indentation right next to it. Make a third indentation centered in the hollow just below the first and second indentations to begin making a heart shape in the dough. Use your fingers to elongate the edge at bottom of the ball, and to make a dent in the edge of the top of the ball. Repeat, making fun little heart shapes, each with their own personality, using up the dough. You should have close to 20 hearts on each baking sheet.
Chill dough hearts until they are very firm, at least an hour. This part is critical, or you'll end up with a puddle in the end.
Putting the cookies all together:
Preheat oven to 350°. Bake one sheet for 7 minutes. Working quickly, once again use your pinky to depress the heart shape that has puffed up. It will be hot, so use caution. Using a very small spoon, like a baby or demitasse spoon, fill the depressions with cold blood orange curd. Don't over flow! Place the cookies back in the oven for another 5 - 7 minutes, keeping a close eye. You want them fully cooked and just barely beginning to go golden on the bottom, but not browning on the cookie itself. Allow to cook for two or three minutes on the baking sheet, to set up, them remove to a cooling rack to complete cooling. Store in an airtight container for up to a week, if they last that long.
Notes
Make It Your Own:Use store- bought lemon, lime, or raspberry curd instead of making your own. Easier yet, fill them with any red or pink jam.Save time by simply using your thumb to make an indent. No need to make a heart to make these cookies pretty and delish all year long.
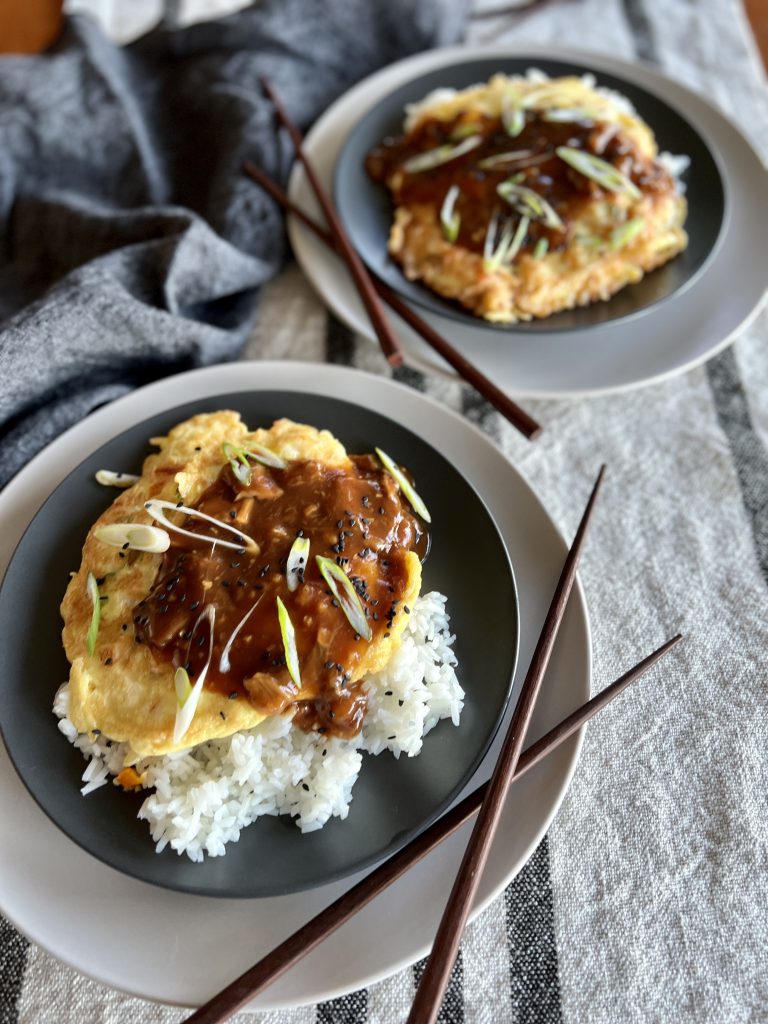
I had forgotten how much I adored egg foo young. The recipe, "Eggs, Edamame, Bean Sprouts" in Nigel Slater's 2020 book, Greenfeast: Autumn, Winter opened my aroma memory floodgates. I was taken back to very special meals in Chinese restaurants as a child.
That sent me searching the phenomenal "Omnivore's Cookbook," with its hundreds of classic and modern Chinese dishes by Maggie Zhu. Her traditional egg foo young versions include the brown sauce I remember. Approachable recipes and interesting family history fill her beautiful blog.
This recipe is a mash-up of tradition and change. Omnivore's Kitchen for tradition. Greenfeast for the addition of edamame. My own addition of making the brown sauce mushroomy.
Making Egg Foo Young at Home
Maggie Zhu's trick for getting the omelette, as she calls it, thick and puffy is to use a fair amount of vegetable oil in the pan. Her recipes say to use between 2 and 8 tablespoons of vegetable oil. Less oil will give you a flatter, less puffy, less traditionally Chinese omelette, she says, and she is right. I found that 6 Tablespoons in my 8" skillet is perfect for that tall, puffy egg foo young that I remember having in Chinese restaurants. The extra oil helps the Chinese omelette become well-browned, with the slightest crusty crispness that is more traditional.
If mushrooms aren't your thing like they are mine, omit them. Instead of the water, substitute dark vegetable or chicken stock. Here's my recipe for a rich brown roasted vegetable stock.
The edamame is optional, or peas or finely chopped broccoli can be a substitute. Egg foo Young doesn't require animal protein, so leave that out if you'd like. Once you get the hang of it, you'll see that egg foo young is more of a method than a prescription. It can be filled with any number of things, just like a French-style omelette.
The resulting egg foo young is amazingly easy, restaurant take-out fast, and powerfully delicious. I hope you like it.
Egg Foo Young
Course: Breakfast + Brunch, Main Dish, Quick + Easy
Cuisine: Chinese
Season: All Season
Dietary: Dairy-Free, Gluten-Free, Vegetarian
Preparation: Fast + Easy
30 minutesminutes
Total Time: 30 minutesminutes
Servings: 46" egg patties
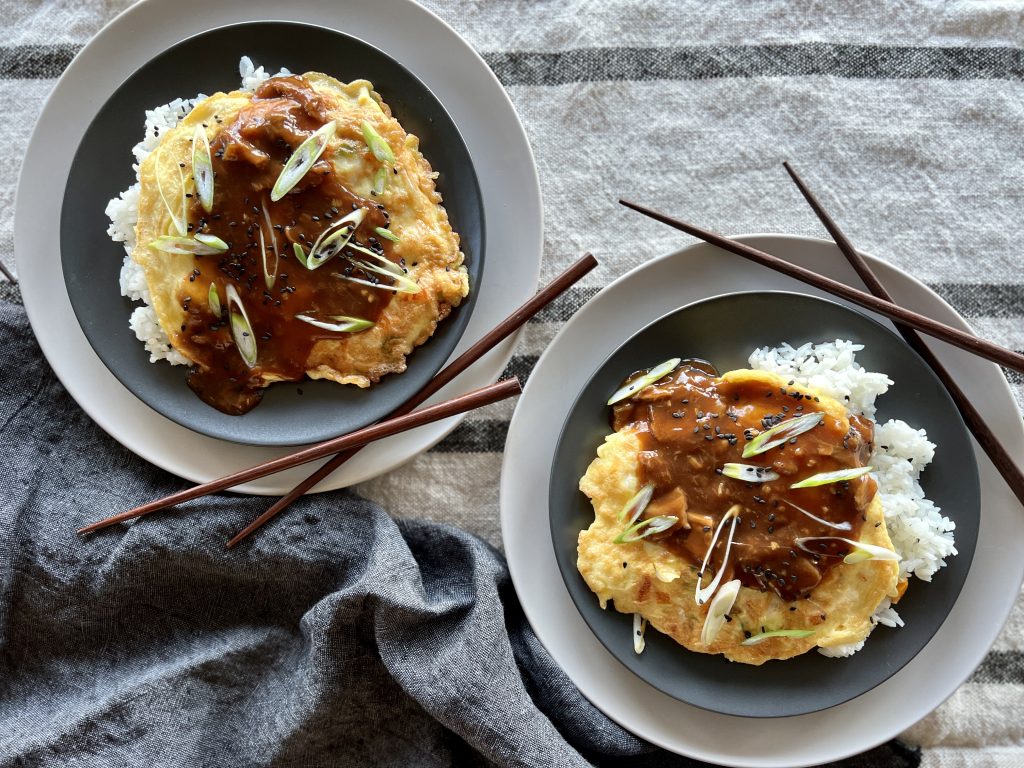
A Chinese take-out favorite made in a flash at home. Fill your egg foo young with any number of fillings to suit your mood or what you have on hand.
⅓cupedamame, peas, or finely chopped broccoli, optional
3green onions, two finely chopped and one thinly sliced on the diagonal
1cupcooked shrimp, chicken, or ham, finely chopped, optional
salt and black or white pepper to taste
6Tablespoonsvegetable oil*
Instructions
Cook the Sauce
In a small saucepan, use your fingers to break the dried mushrooms into small, irregular pieces and cover them with 1¼ cups hot water. Set aside for 15 minutes. Whisk all the remaining sauce ingredients into the saucepan with the mushrooms and cook over medium heat, whisking occasionally, until the sauce simmers and thickens, about 5-6 minutes. Keep warm.
Cook the Egg Pancakes
In a medium mixing bowl, beat the eggs with a fork until well combined. Add the bell pepper, bean sprouts, chopped green onions, and shrimp, chicken or ham, if using. Season with salt and pepper.
Heat the oil* in a small skillet over medium to medium high heat. Scoop about ½ cup of the egg mixture into the skillet. Fry until golden brown, about 4 minutes per side. Repeat with the remaining egg mixture. This should make about four 6" patties.
Serve with steamed short-grained rice, spooning the mushroom sauce over the top. Garnish with sliced green onion.
Notes
This recipe is adapted from Maggie Zhu at Omnivore's Kitchen. I thank her for her delicious blog and the step-by-step guidance in learning to cook Chinese dishes. *Maggie's recipe for egg foo young says to use between 2 and 8 tablespoons of vegetable oil. Less oil will give you a flatter, less puffy traditional omelette, she says, and she is right. I found that 6 Tablespoons in my 8" kitchen is perfect for that tall, puffy egg that I remember having in Chinese restaurants.
The holiday season is a wrap and the dust of 2021 has settled. Perhaps you are back to a work grind, or find yourself buried in winter snow. Or maybe you're sad that your family has left, or maybe elated that your family has left. As great as it was, maybe you are relieved to be past it all. Just because holiday treats are in the rear-view mirror doesn't mean you don't deserve a special little zero-effort dessert. Maybe you need a quiet post-holiday celebration. Maybe you need a nutty Chocolate Port Ice Cream Sundae.
If this Chocolate Port Ice Cream Sundae were an actor in a musical, it would make its quiet sultry entrance stage right, while the whole noisy chorus of holiday desserts shuffle-flapped off, stage left. The Sundae (let us call her Sundae) would glide across the stage to a stool waiting under a soft bath of light. Sundae, dressed in a slim black turtleneck and tailored trousers, would lightly park on the stool, one long leg outstretched. Slowly she would look up and raise the mic.
While the holiday dessert chorus is in the back peeling off sparkly garish costumes and wiping off melted greasepaint, Sundae begins her ballad. One part Louis Armstrong, one part Norah Jones, equal parts gravel and smoke, Sundae's song lifts the corner of your mouth and quiets your spirit.
The intimate moment with Sundae passes, but you are never the same. You'll think of this Sundae at the oddest times for years to come. So it is with this little winter dessert recipe.
Other Wintry Desserts You'll Love
Flourless Walnut Cake with Coffee or Spice flavored versions: Get the Recipe.
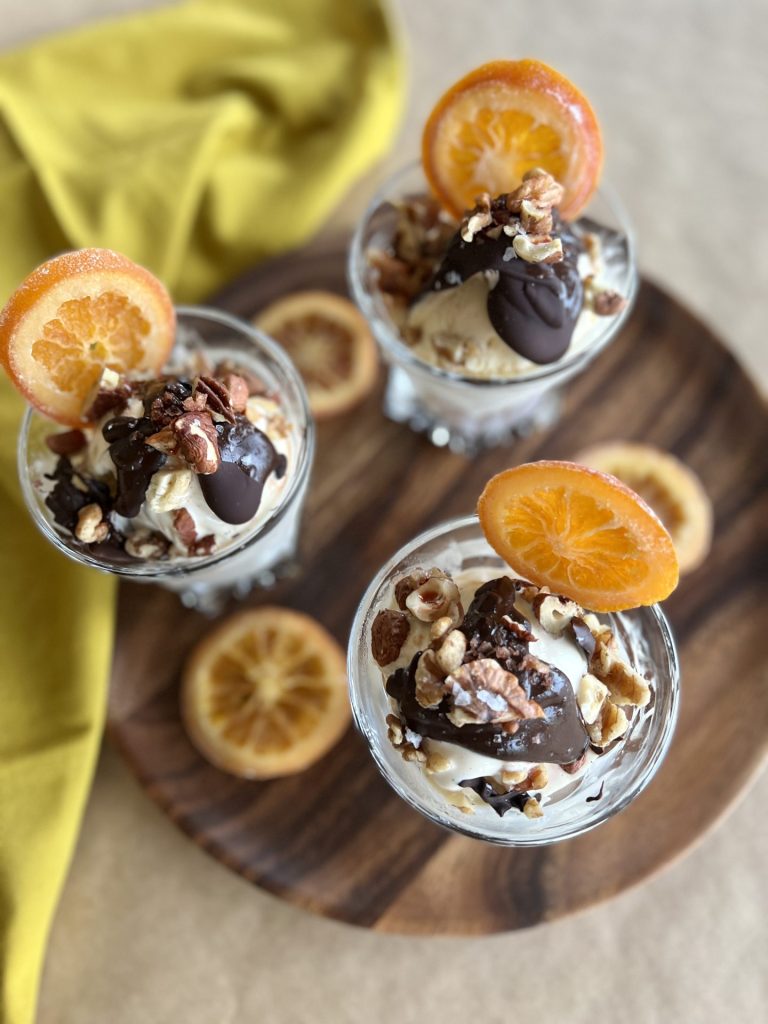
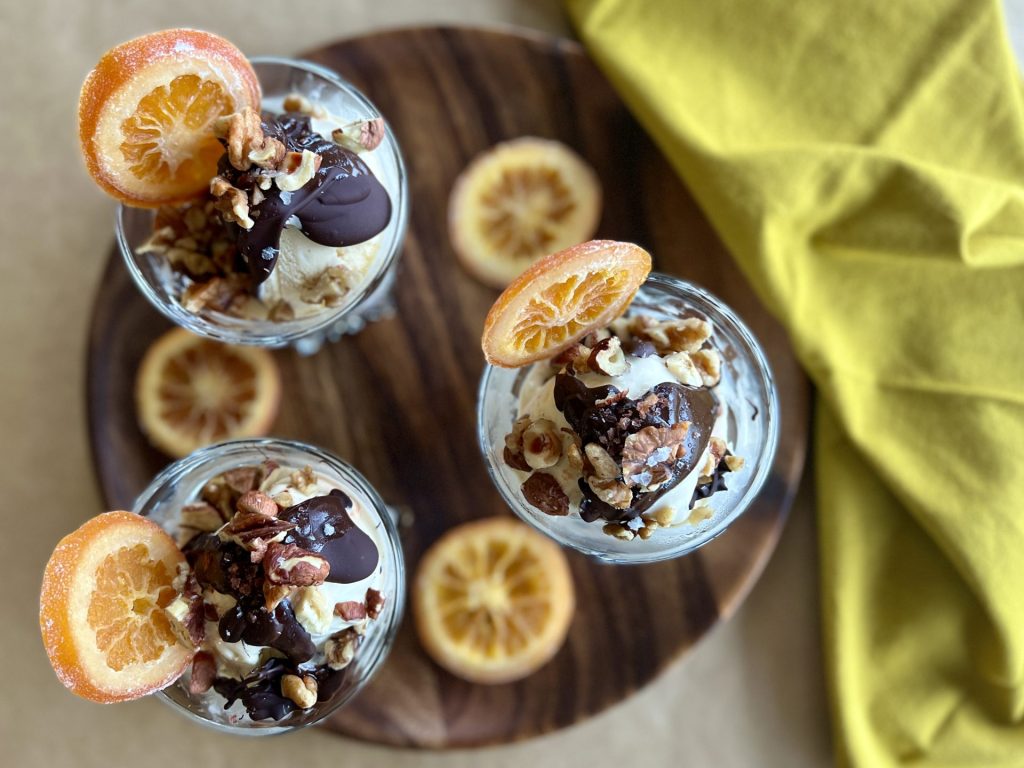
Warm melted pure chocolate, a splash of nutty port, a handful of toasted nuts on vanilla ice cream, and a few drops of flavorful bitters. An adult dessert of the best kind.
½Tbsp.toasted nuts, crushed with the flat of a chef's knifealmonds, hazelnuts, pecans, or walnuts, or a mix of what yu like
2scoopsvanilla ice cream
1Tbsp.port, good sherry, or bourbon
2-3 dropsAngostura or black walnut bitters (optional)
1 piececrystallized orange (optional) or a wedge of fresh orange
pinchMaldon or other finishing salt
Instructions
Finely chop the chocolate and put it in a small heatproof bowl over a small saucepan of barely simmering water.* Stir frequently until the chocolate is about 85% melted, about 3-4 minutes, and remove from the heat. Stir every minute or two to allow the residual heat to finish melting the chocolate. Be cautious about multi-tasking during this step to avoid overheating the chocolate and causing it to seize.
If they aren't already toasted, put the nuts in a small skillet over medium heat and stir frequently until they are aromatic and ever so slightly browned, stirring very frequently, about 3-4 minutes. Be cautious about multi-tasking during this step to avoid burning the nuts. Cool slightly and crush the nuts with the flat side of a chef's knife, or roughly chop.
Scoop the ice cream into a small bowl or cocktails glass. Spoon the warm chocolate over the top, followed by the liquor. Top with the crushed nuts and crystallized orange. Sprinkle with a few drops of bitters and a pinch of crunchy Maldon salt. Serve immediately. Sit back and swoon.
Notes
*Alternatively on a convection cooktop, melt the chocolate directly in a small saucepan on a very low setting. On my convection cooktop, chocolate melts beautifully on 1.5.Many kinds of nuts would be perfect here: Almonds, hazelnuts, pecans, and walnuts. The very best might even be those from a can of fancy mixed nuts.I'm famous for burning nuts! Don't let that happen to you! Experiment with the liquor and or bitters you chose. There are so many kinds available these days. This is a happy way to end a dinner party, especially if you've knocked yourself out before the dessert comes. It's the easiest show-stopping winter dessert I can imagine.
I am always surprised at how many people don't enjoy winter vegetables and the glorious things you can make with them, like this simple deconstructed Borscht Bowl. Here is my theory why.
Deconstructed Borscht Bowl
Not all that long ago, people ate whatever the seasons offered. Storage vegetables sustained us into the cold winter. Parsnips, potatoes, carrots, rutabagas, turnips, cabbages, and beets were familiar and welcome.
Then the frozen food explosion of the early 1950s came. Supermarkets full of freezer cases exploded into cities and suburbs. We now have over three generations of people who have had the luxury of eating sweet peas in January as though it is natural. Consequently, we have lost our taste for hearty winter vegetables.
Frozen food technology is great, really. But to allow it to shake us lose from the joys of seasonal eating? To let go of a whole swath of foods designed to provide what we need in cold weather? What a shame. Let's fix that with some borscht-y goodness.
Rustic, Warming, Healing, and Delicious
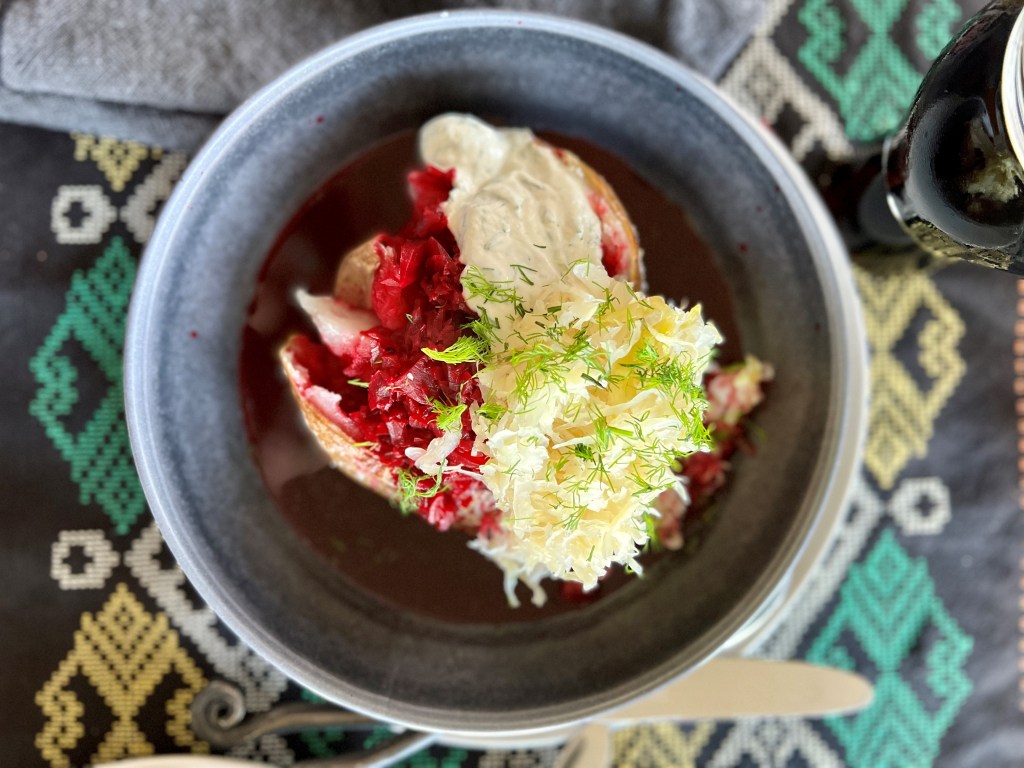
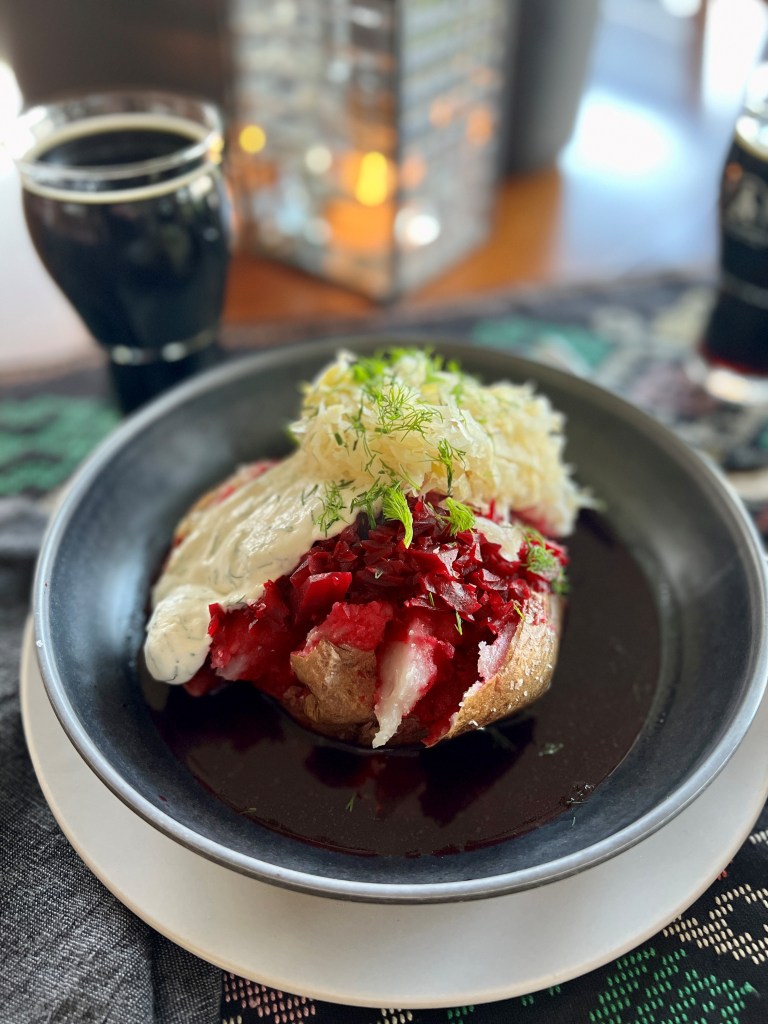
Our deconstructed Borscht Bowl is inspired by Eastern European borscht made of beet, potato, cabbage, sour cream and dill. Here, we just arrange the components a little differently. It is the perfect thing to eat on a dark winter's evening, a chunk of caraway rye black bread and perhaps some browned sausages alongside.
I love the short-day season at the dinner table. Nearly every night we light candles and dim the overhead lights. The glow of candlelight on the face of my beloved dinner companion casts him in his one-and-only kind of charm. Dinner topics move from what happened outdoors today to what it happening in our souls today. These dinners help our roots sink deeper.
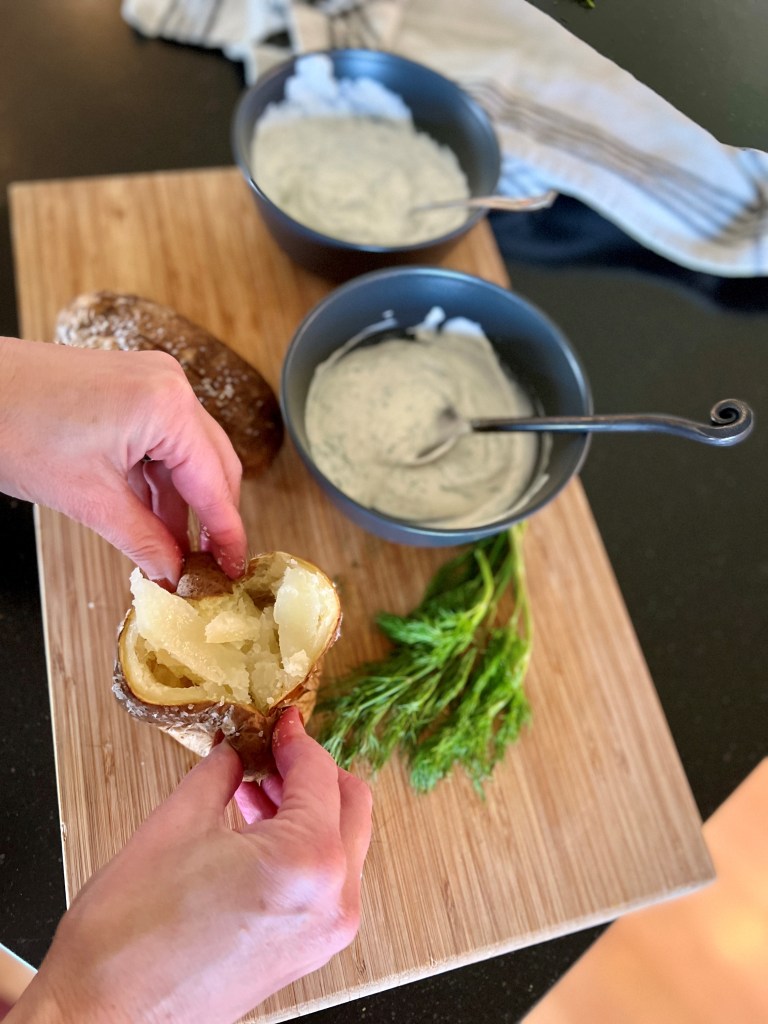
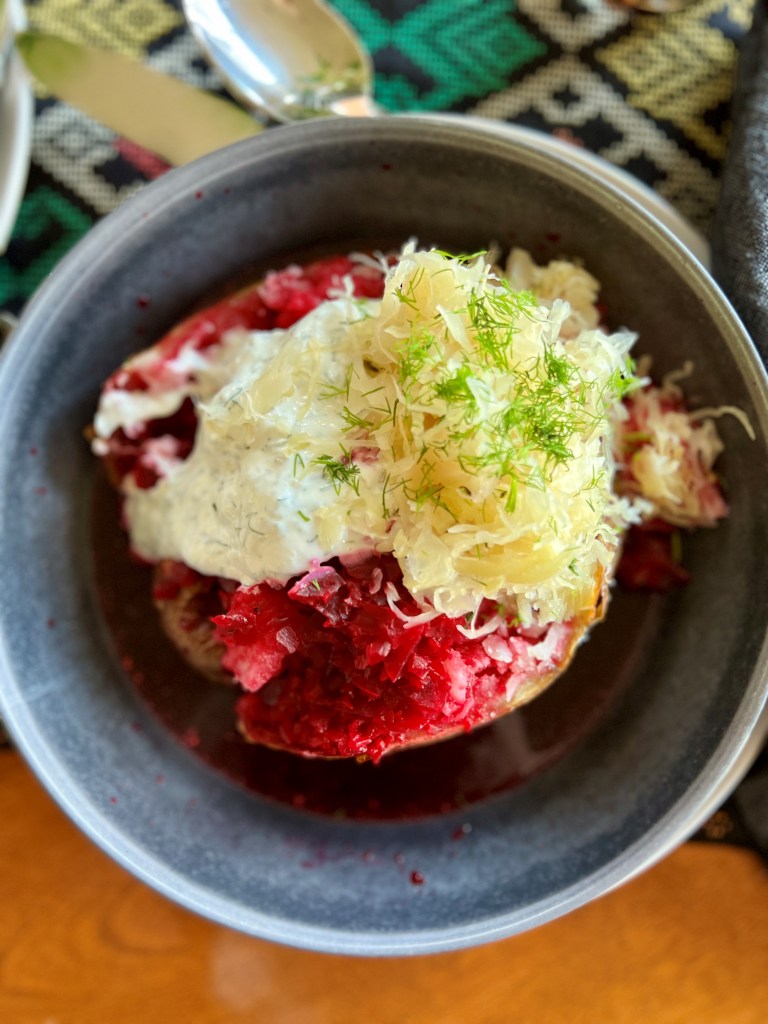
In the same way, one of my favorite things is to wrap my hands around a warm bowl of wintery food. Try filling your bowl with a fluffy, crusty baked potato. Ladle over rosy beets and broth. Pile on store-bought or homemade sauerkraut, full of beneficial immunity-boosting bacteria. Dollop on horseradish-laced sour cream. Embrace eating with the season.
Making the Deconstructed Borscht Bowl
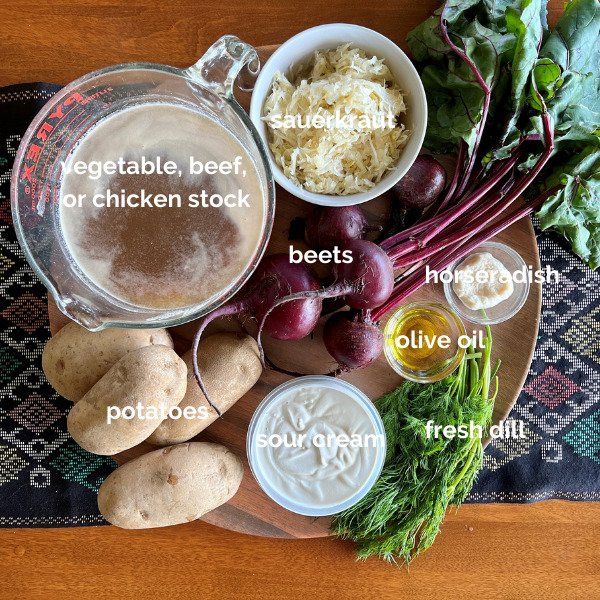
Ingredients you will need.
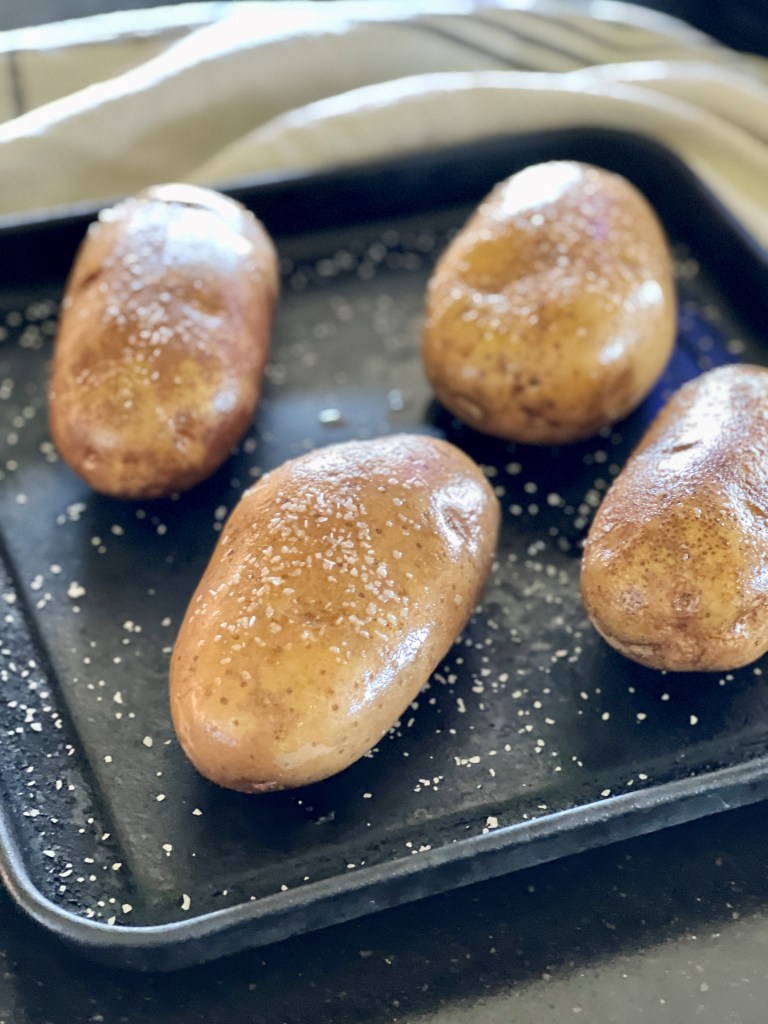
The crackly-skinned, fluff-filled baked potato in the bottom of the bowl adds heft and makes a good excuse to warm your space with the oven. Best of all, it mops up the delicious bright pink broth.
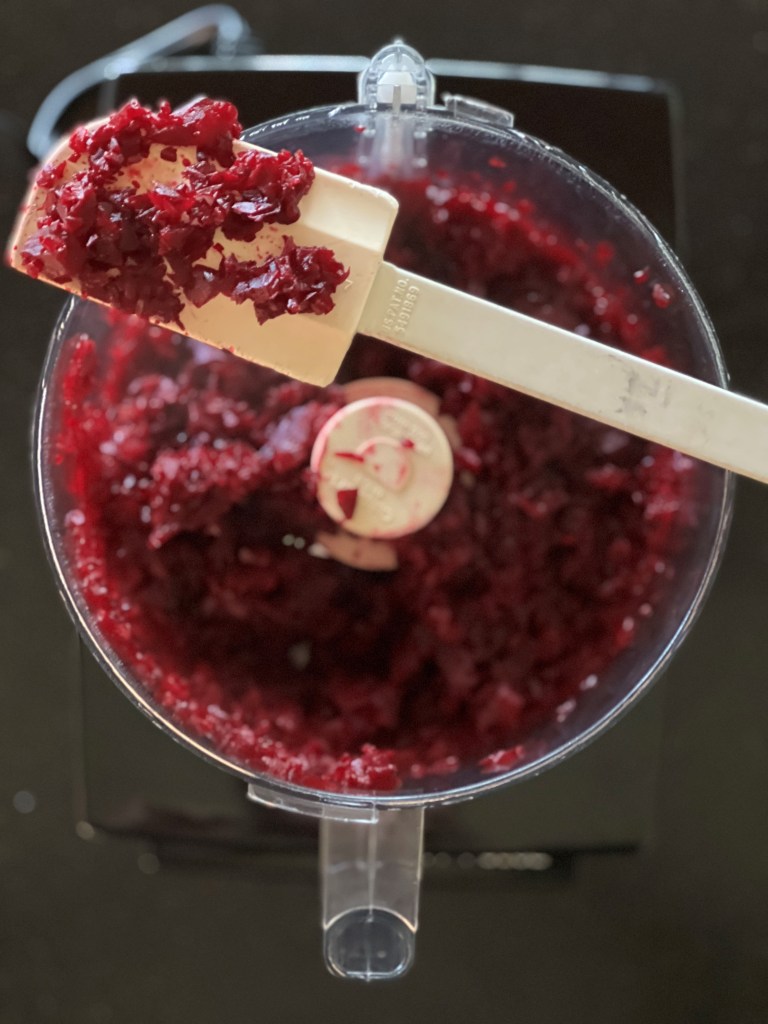
The beets and their broth are made quickly on the stovetop or in a pressure-cooker while the potatoes are baking.
The cabbage in this bowl comes in the form of sauerkraut-- either homemade or store-bought. Fermented foods are so good for us! Pile it on and toast to your health!
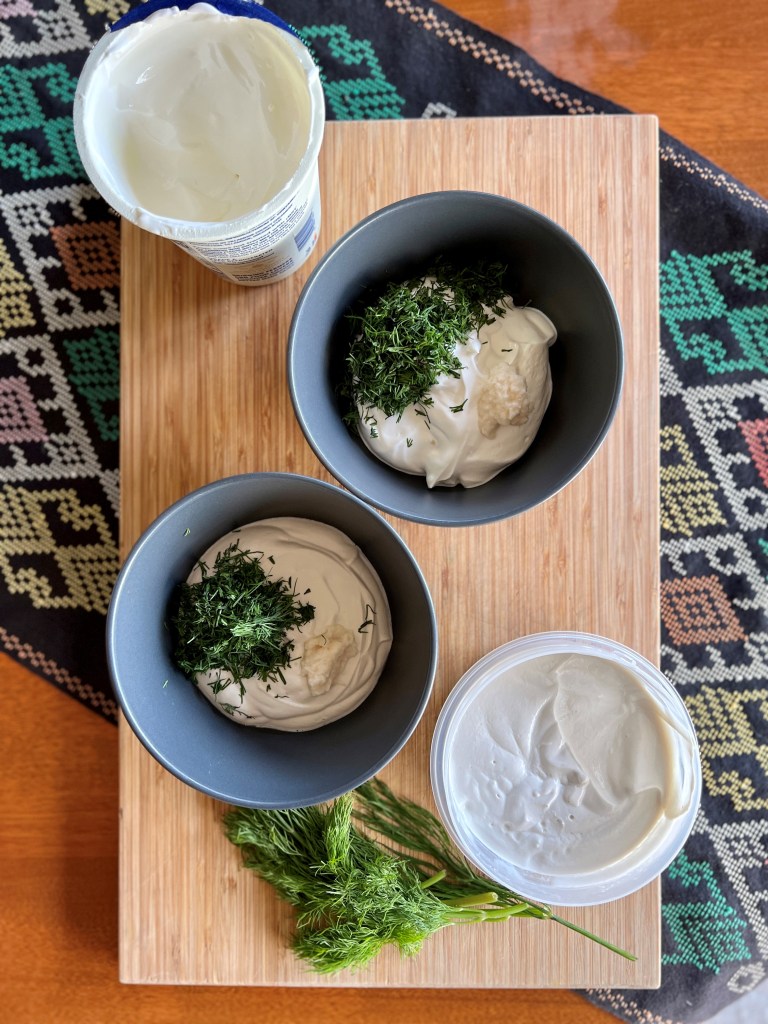
Finally, we stir some horseradish, freshly grated or prepared, into some sour cream along with a lot of fresh dill to dollop over the Borscht Bowl, and give it a snowy dusting of dill over the top. Yes, please.
How the Deconstructed Borscht Bowl comes together: Bake potatoes until crisp outside, fluffy inside; Mince cooked beets to add to simmering broth; House divided! Add horseradish and chopped dill to both dairy and cashew sour creams here!; Pop open potato, put it in bowl, top with ladles of hot beets and broth, top with herbed sour cream and sauerkraut; Viola!
Deconstructed Borscht Bowl is inspired by Eastern European borscht made of beet, potato, cabbage, sour cream and dill. Here, we just arrange the winter vegetable components into a bowl for a hearty warming winter meal.
5cupsvegetable, beef, or chicken stockhomemade, purchased, or made from bouillon
1 ½poundsbeets, cooked and peeled
2cupssauerkraut, homemade or purchased
8ouncessour cream or cashew sour cream (recipe below)for dairy-free/vegan option
2-3teaspoonshorseradish, freshly grated or prepared
1/2 cupchopped fresh dill, packed
salt + pepper to taste
Cashew Sour Cream
1cupraw cashew pieces (no need for the more expensive whole nuts here)Where available, Trader Joe's is a good source for most nuts, including cashews.
½cupwater
2½Tbsp.lemon juice or apple cider vinegar, or a mix of both
½tsp. salt
Instructions
Deconstructed Borscht Bowl
Preheat oven to 400°. Rub the potatoes with olive oil and place them on a baking sheet. Sprinkle them with coarse salt, and with a sharp knife, cut a 2"-3" slit in the top of each potato. Roast until a knife inserted into the center offers no resistance and they give in to a little squeeze. Depending on your oven, this may take 40 minutes to an hour.
Bring the stock to a simmer in a large saucepan. Cut the beets into chunks and pulse them 12-15 times in a food processor to a fine irregular mince. Stir the minced beets into the simmering stock. Taste for salt and add more to the broth if needed, along with some freshly cracked black pepper. Squeeze most of the brine from the sauerkraut and gently warm it in a microwave oven or small saucepan. Stir together the sour cream or cashew sour cream, horseradish to taste, and most of the dill, reserving some dill for garnish.
Place each potato into its own wide bowl, and crack it open along its slit by pinching the potato together and toward the center like a Chinese fortune teller (cootie catcher.) Ladle the hot beets and broth over each potato. Place a big dollop of herbed sour cream on the potato. Pile on the sauerkraut, and garnish with the remaining dill. Serve piping hot.
Cashew Sour Cream
Cover cashews in boiling water and soak at least one hour up to overnight, and drain, OR (my favorite method) place the cashews and cover with water in an electric pressure cooker and cook on high for 8 minutes. Allow to cool, and drain.
Place the drained cashews the lemon juice and/or apple cider vinegar, and salt in a blender. Blend on high until it is completely smooth, scraping down the sides often. Taste for sourness, and add more lemon juice/apple cider vinegar to taste. Store in the refrigerator. Cashew sour cream will thicken as it chills. It will keep in your fridge about one week, and it can also be frozen. Stir well between uses. Makes about 14 ounces.
Follow Me
Welcome!
You’re in the right place! I’m Pam Spettel, home cooking expert and guide, and I’m here to show you how to break up with cooking and hospitality anxiety, learn how to use recipes as guides rather than strict rules, and let your cooking intuition and confidence soar.
Superpower: Dreaming up recipes that work, serving them to my friends and family, and writing little stories about how cooking them well is the same as loving well.
Inspiration: Ingredients! The fresh, colorful, fragrant, local, seasonal ingredients found in the Pacific Northwest are my creative medium.
Heroes: Local food and wine producers– the people who keep me, my family, and our community nourished and happy.
We use cookies on our website to give you the most relevant experience by remembering your preferences and repeat visits. By clicking “Accept”, you consent to the use of ALL the cookies.
This website uses cookies to improve your experience while you navigate through the website. Out of these, the cookies that are categorized as necessary are stored on your browser as they are essential for the working of basic functionalities of the website. We also use third-party cookies that help us analyze and understand how you use this website. These cookies will be stored in your browser only with your consent. You also have the option to opt-out of these cookies. But opting out of some of these cookies may affect your browsing experience.
Necessary cookies are absolutely essential for the website to function properly. These cookies ensure basic functionalities and security features of the website, anonymously.
Cookie
Duration
Description
cookielawinfo-checkbox-analytics
11 months
This cookie is set by GDPR Cookie Consent plugin. The cookie is used to store the user consent for the cookies in the category "Analytics".
cookielawinfo-checkbox-functional
11 months
The cookie is set by GDPR cookie consent to record the user consent for the cookies in the category "Functional".
cookielawinfo-checkbox-necessary
11 months
This cookie is set by GDPR Cookie Consent plugin. The cookies is used to store the user consent for the cookies in the category "Necessary".
cookielawinfo-checkbox-others
11 months
This cookie is set by GDPR Cookie Consent plugin. The cookie is used to store the user consent for the cookies in the category "Other.
cookielawinfo-checkbox-performance
11 months
This cookie is set by GDPR Cookie Consent plugin. The cookie is used to store the user consent for the cookies in the category "Performance".
viewed_cookie_policy
11 months
The cookie is set by the GDPR Cookie Consent plugin and is used to store whether or not user has consented to the use of cookies. It does not store any personal data.
Functional cookies help to perform certain functionalities like sharing the content of the website on social media platforms, collect feedbacks, and other third-party features.
Performance cookies are used to understand and analyze the key performance indexes of the website which helps in delivering a better user experience for the visitors.
Analytical cookies are used to understand how visitors interact with the website. These cookies help provide information on metrics the number of visitors, bounce rate, traffic source, etc.
Advertisement cookies are used to provide visitors with relevant ads and marketing campaigns. These cookies track visitors across websites and collect information to provide customized ads.