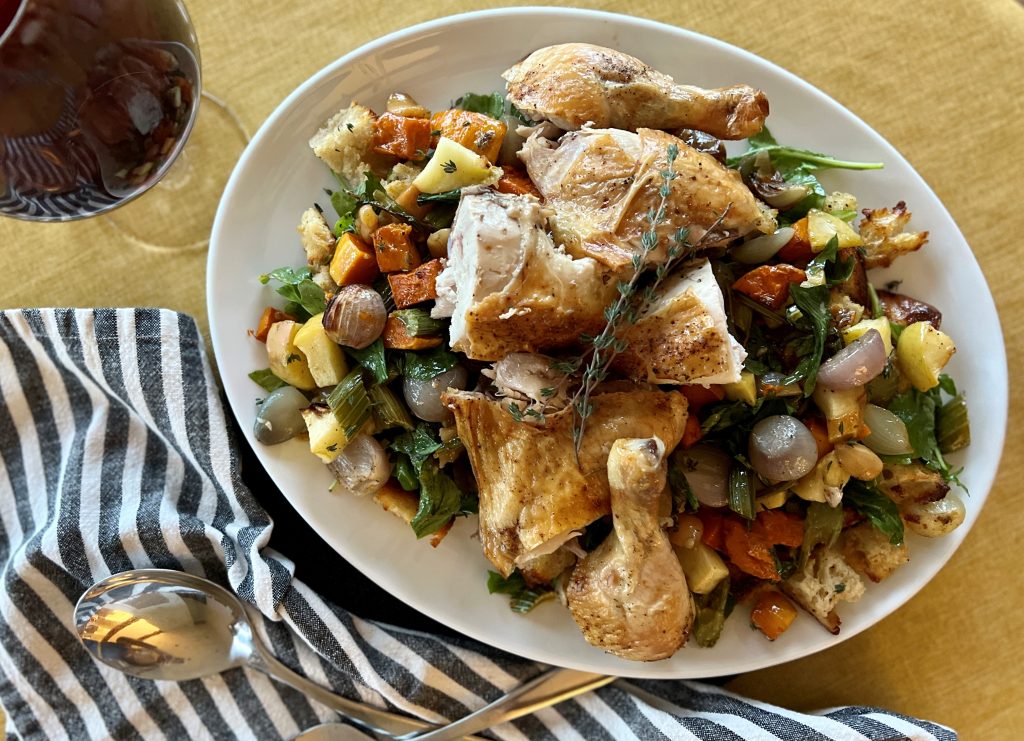
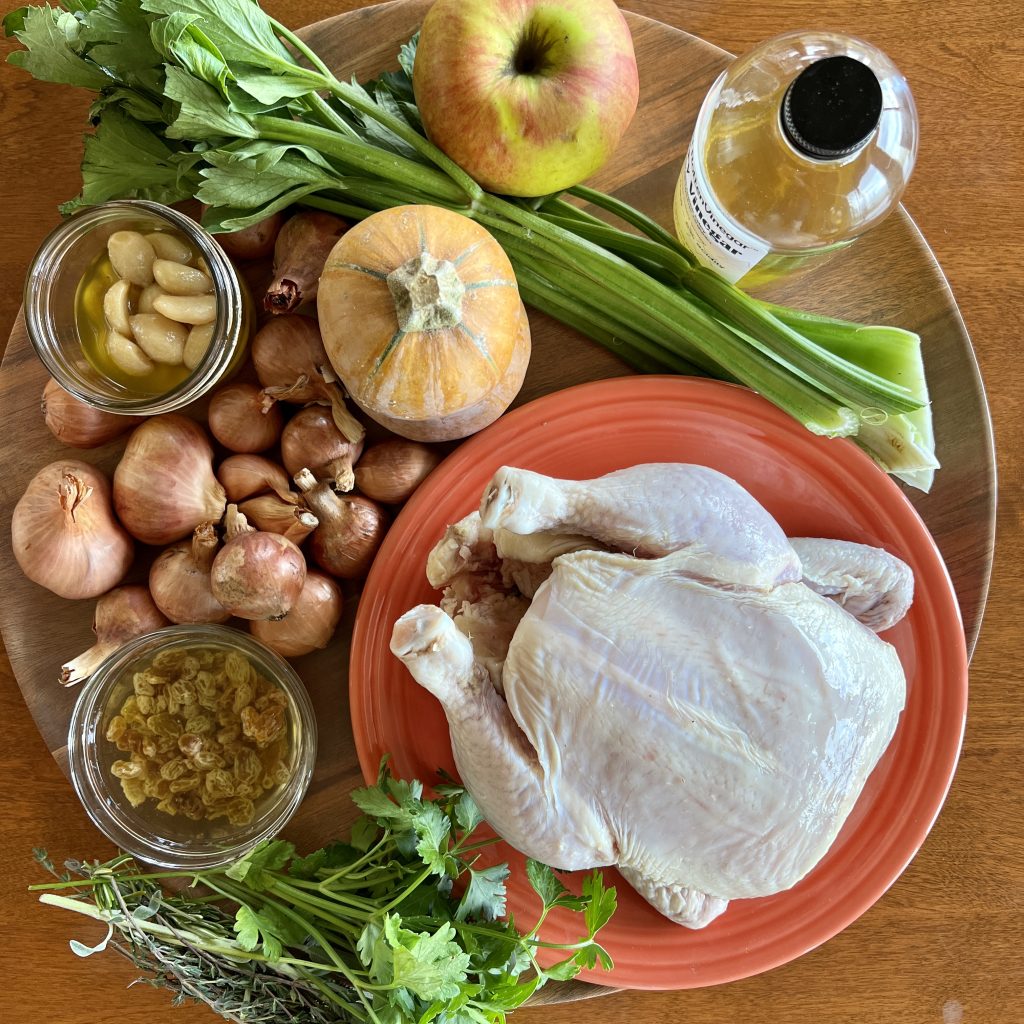
Here's a recipe I'm quite proud of: Roasted Chicken + Autumn Bread Salad. A quickly-roasted chicken delivers its juices to butternut squash, whole sweet shallots, and tart apples roasting beside it on a sheet pan. Peppery arugula in a light dressing mix with vinegar-soaked golden raisins and crispy-chewy toasted bread chunks make a lovely autumn panzanella-style salad that make a bed for the chicken and deeply flavored vegetables. It's all you need on one platter. I can't think of a better Saturday night or Sunday afternoon cool-weather dinner.
This roasted chicken and autumn bread salad borrows inspiration from the late Judy Rodgers, generous traditionalist and exemplary restaurateur. And golly, is it good.

First let me tell you about the chicken Ms. Rodgers made famous at the Zuni Cafe in San Francisco. At Zuni, whole, small chickens are roasted in a wood-fired brick oven. The juicy, crackly-skinned chicken is served with a warm bread salad. At Zuni, chunks of hand-torn toasted bread, scallions, garlic, bitter greens, dried currants, and pine nuts are tossed in a light vinaigrette. When you experience this dish, it becomes the gold standard for all roasted chicken. And the craveable bread salad is just as good.
Until now, my go-to method of roasting chicken has been the Zuni Cafe way. Ms. Rodger's way. I pat the chicken dry and give it a dry rub of salt and pepper. Then, I loosely wrap it and put in the fridge for two days before roasting. The chicken skin dries in the refrigerated air, setting it up for crispness. Then on roasting day I set into a hot skillet and rush into a very hot oven. A series of flips mid-roast, and viola! The most crispy-skinned and juicy chicken ever. Put this roasted chicken together with a seasonal bread salad-- oh my!
Sometimes I haven't planned this out well, or don't have the time or energy for these steps but still would love a roasted chicken. Hmmm. What could I do about that?
Ditching the two-day dry brine period and shortening the overall cooking time with our unique preparation method is a great advantage for the home cook. And it still turns out a chicken that is almost as wonderful as the Zuni style.
It's easy to end up with dry white meat when roasting a chicken, and yet so easy to prevent it! By separating the breast and wing section from the leg and thigh section, we give the legs and thighs a 15-minute head start in the oven, sparing the white meat from overcooking. I call this a major kitchen coup!
The best tool for working with a whole chicken is kitchen shears. Get yourself a good pair. Poor quality shears need to be replaced frequently, so make this investment up front when you can. This is the pair I recommend for its value. You can spend more, but these are very good and will last.
With this method we use our kitchen shears to easily separate the breast and wing section from the rest of the bird. We start by separating the breast from the legs in two quick "vee" cuts. Then we flip the breast section upwards like a page in a legal pad. From there, it's very simple to separate the front from the back of the bird at the shoulders.
Roasted winter squash, celery, apple, golden raisins, tons of shallot, and arugula make this a fall-into-winter salad. In the spring and summer, swap those things out for fresh peas or sauteed zucchini, blistered cherry tomatoes, lots of fresh herbs, scallions, and torn mustard greens for a lighter taste. Use what is in season, and the rest remains the same. No matter what time of year, be sure to use garlic confit if you can. It's is always in season!
Have you joined the 101-Mile Kitchen community? If not, we'd love to have you. You can take care of that right here, and when you do I'll send you my Top Five Tips and Recipes for Cool-Weather Cooking downloadable as a thank you!
This post contains affiliate links. When you use these links to buy something I may earn a commission at no cost to you. Product affiliation helps me to keep this site ad-free while providing you with the content you enjoy. I only promote items that I use, like, and trust, or would invest in myself.

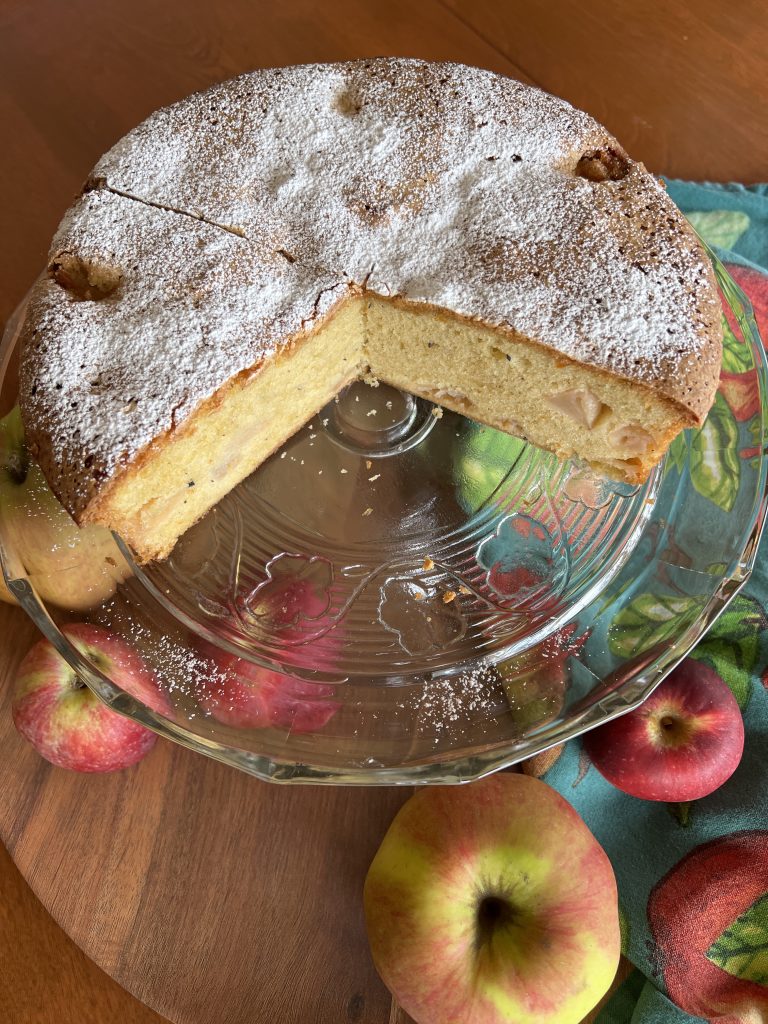
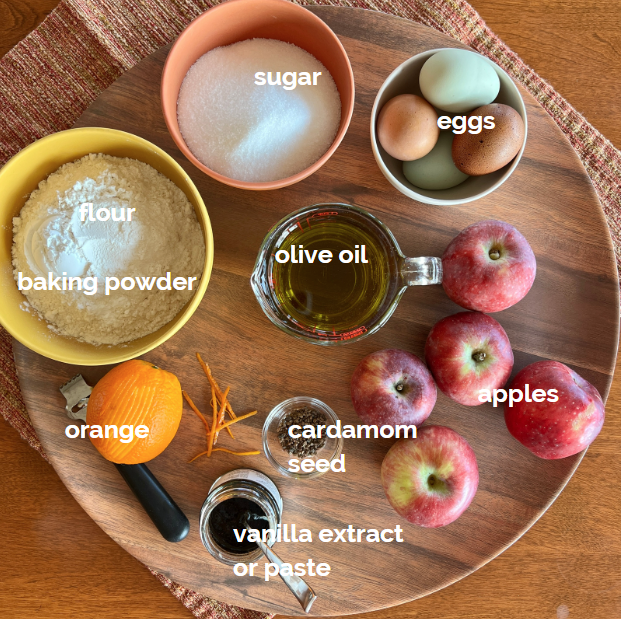
This Apple Olive Oil Cake, of all the rustic cakes I swoon over, is my very most favorite. It can be called rustic merely because it is not adorned in buttercream, an accessory that would only complicate its simplicity. Fragrant olive oil in the batter marries beautifully with orange zest, cracked cardamom seed, and pure vanilla. I am delighted the lack of cinnamon normally found in apple desserts. Am I the only one who tires of overwhelming the pure taste of apple with cinnamon?
Tom Murray, my friend and orchardist who specializes in apples at his SLO Farm (seasonal, local, organic), suggested that I try his Liberty variety. He said that its sharp flavor would balance the sweet cake, and he was right. Other varieties that are tart and hold up to baking are Pink Lady, Jonathan, Mutsu, and good old Granny Smith. Any of these will be perfect in this apple cake.
Tom sells his apples at the Lane County Farmers Market in Eugene, Oregon. Please look for him there, and try all of his lovely apple varieties.
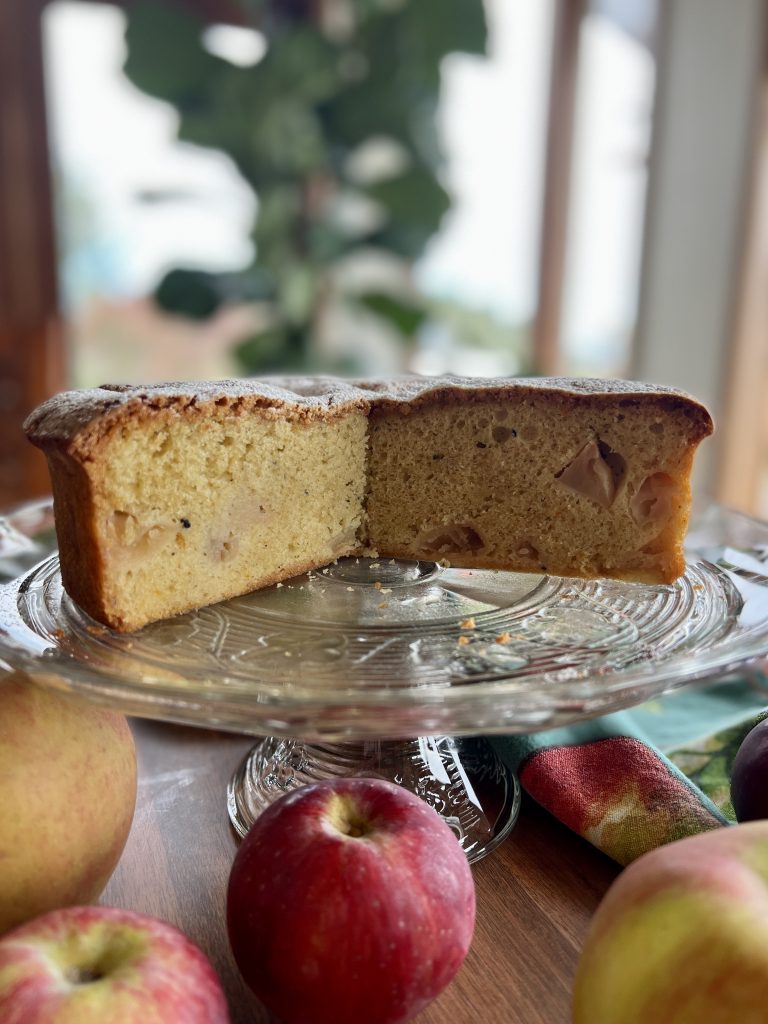
This recipe originated with Rachel Coyle, published by Food & Wine Magazine. I've made it so many times that I've added some of my own riffs. I've found that the batter can easily old 50% more apples than in the original recipe. So in goes 1½ pounds, weighed before peeling and coring, for more appley goodness.
Cakes made with olive oil have become popular for good reason. The texture becomes more like a sponge cake, very moist and tender, but with structure. If you've yet to try the taste phenomenon of the olive oil/sugar combo, you are in for a real treat. A fruity olive oil is great for this, of course. Stonehouse Olive Oil's house blend, my house olive oil, works wonderfully in this recipe. I buy it in 9-liter quantities a few times a year.
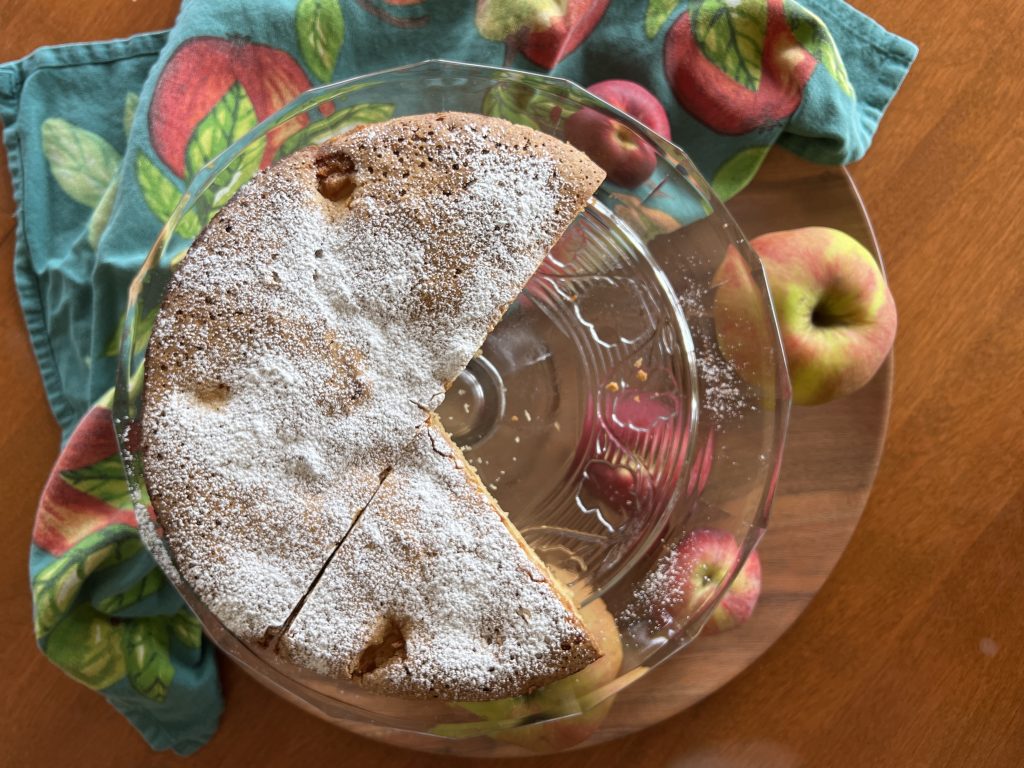
Rachel Coyle's original recipe says to use a 14-cup Bundt-style pan, and I've learned there are more great pan options for the apple olive-oil cake. A 9" springform pan creates a gorgeously tall round cake; a tube pan makes an even taller cake with a hole in the center that I really like; and I often divvy up the batter between three 6" round cake pans that serve six people each. This is perfect for our smaller household, as the cakes freeze perfectly. So handy! Please note that as of this publication date, Sur La Table is offering a 20% off sale on each of these pans, and on all of their bakeware! Just in time for holiday baking. Sur La Table only sells high-quality products that I always trust.
Flourless Walnut Cake, plain, coffee, or spice versions: Recipe here.
Zingy Lemon Ginger Zucchini Cake: Recipe here.
This post contains affiliate links. When you use these links to buy something I may earn a commission at no cost to you. Product affiliation helps me to keep this site ad-free while providing you with the content you enjoy. I only promote items that I use, like, and trust, or would invest in myself.
Have you joined the 101-Mile Kitchen community? If not, we'd love to have you. You can take care of that right here, and when you do I'll send you my Top Five Tips and Recipes for Cool-Weather Cooking downloadable as a thank you!


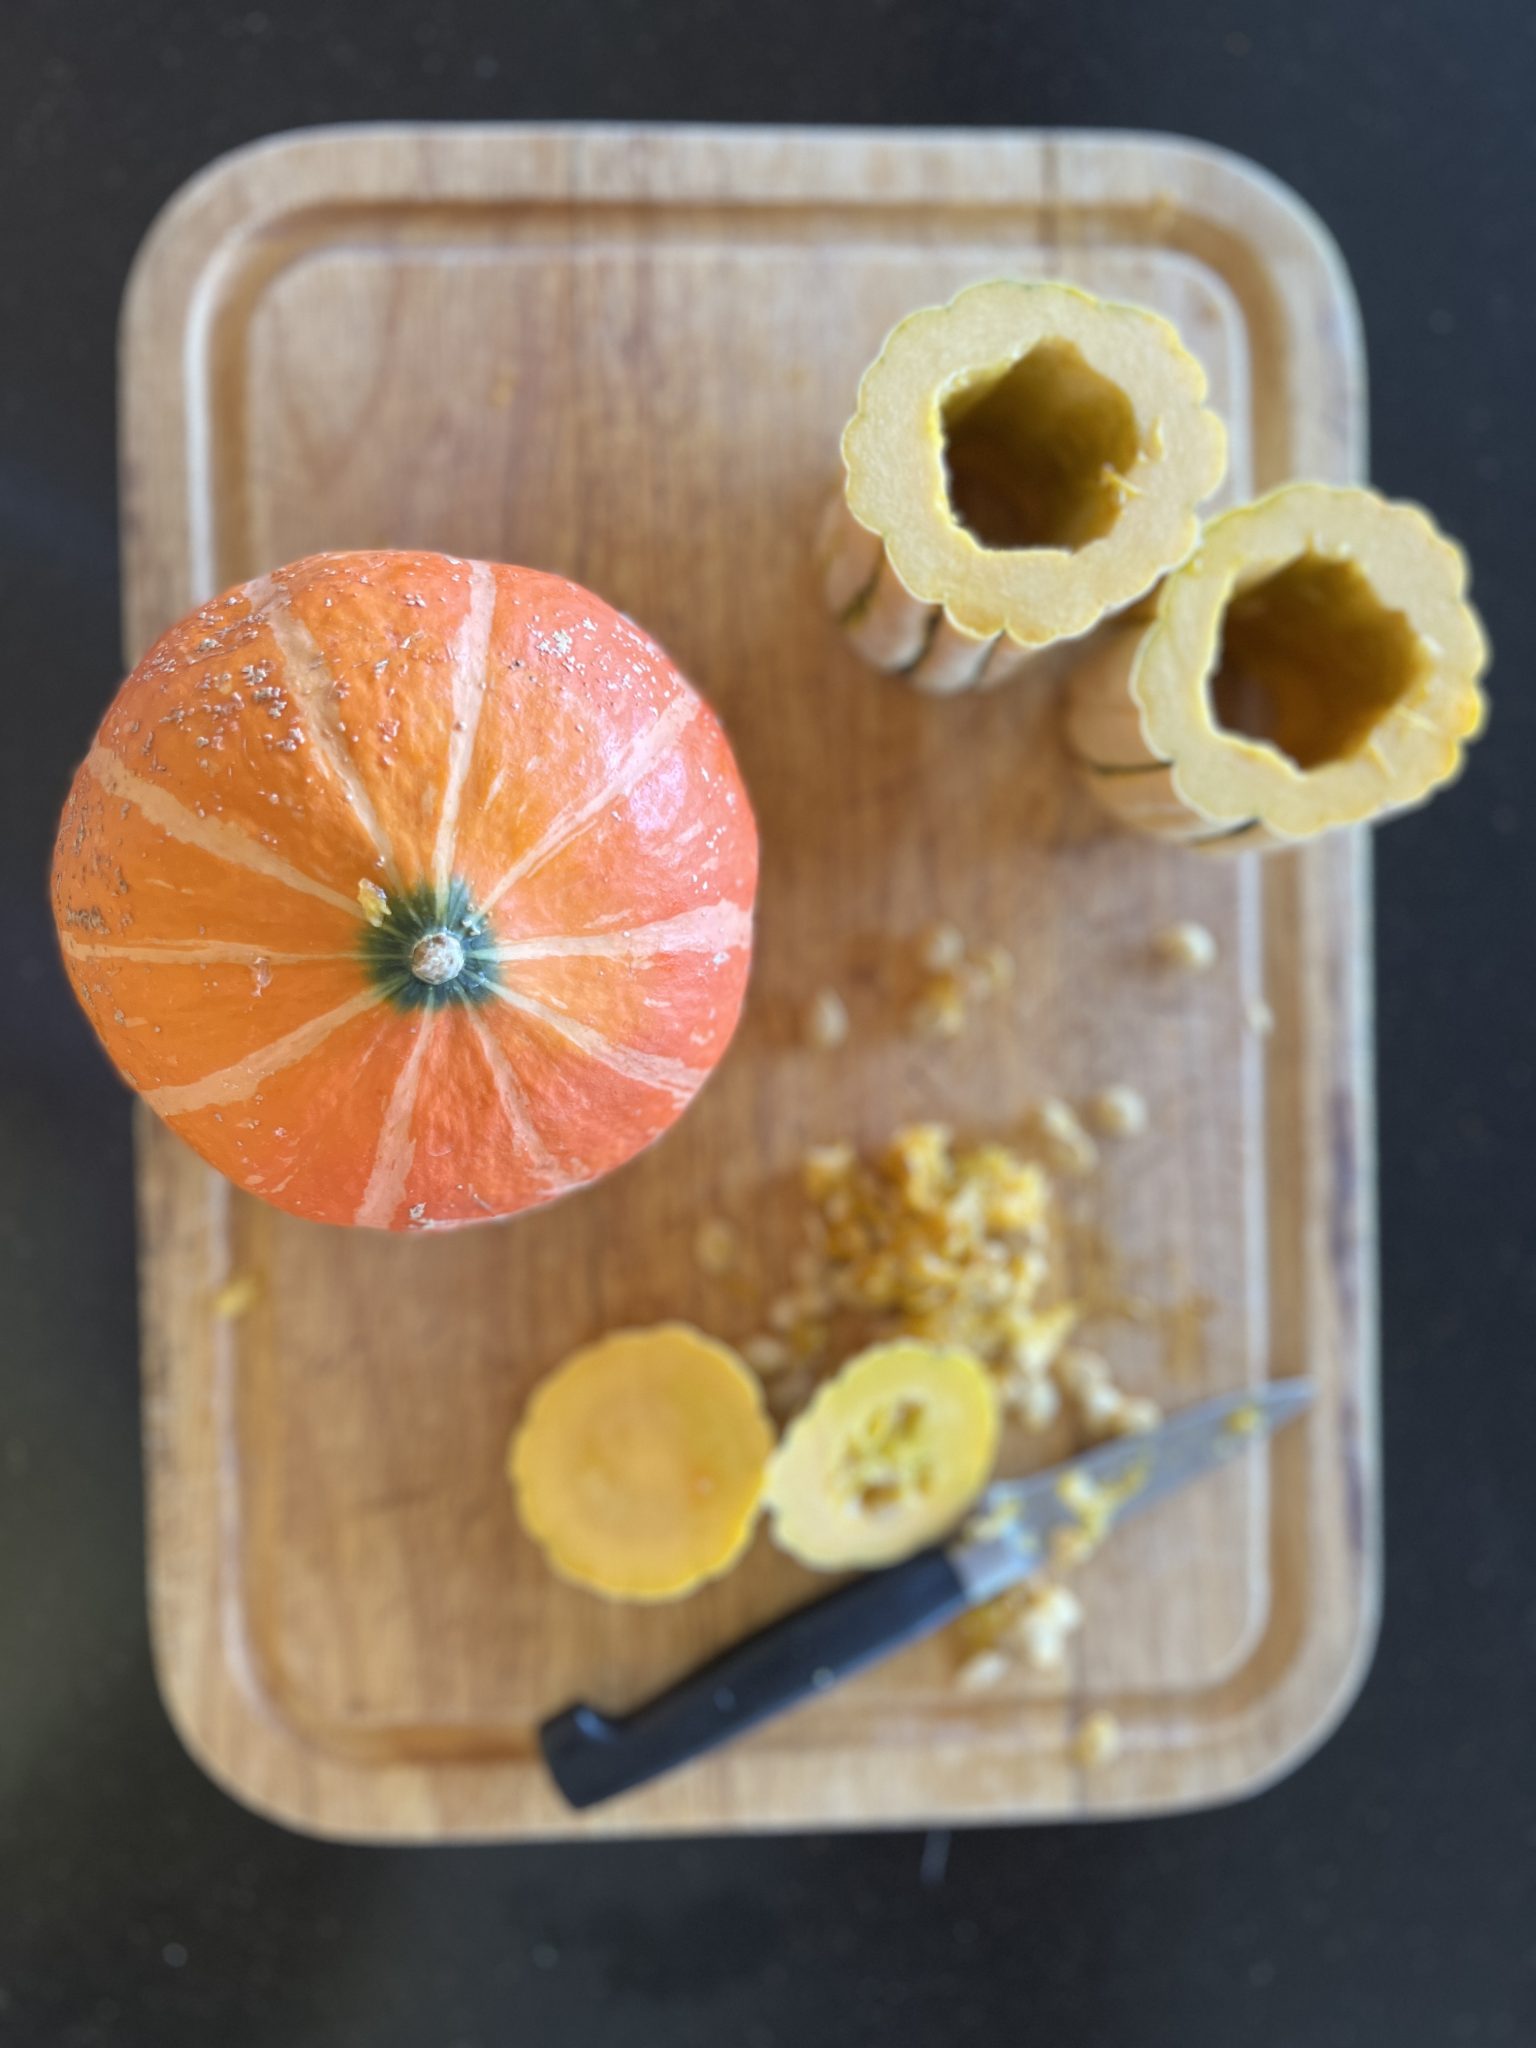
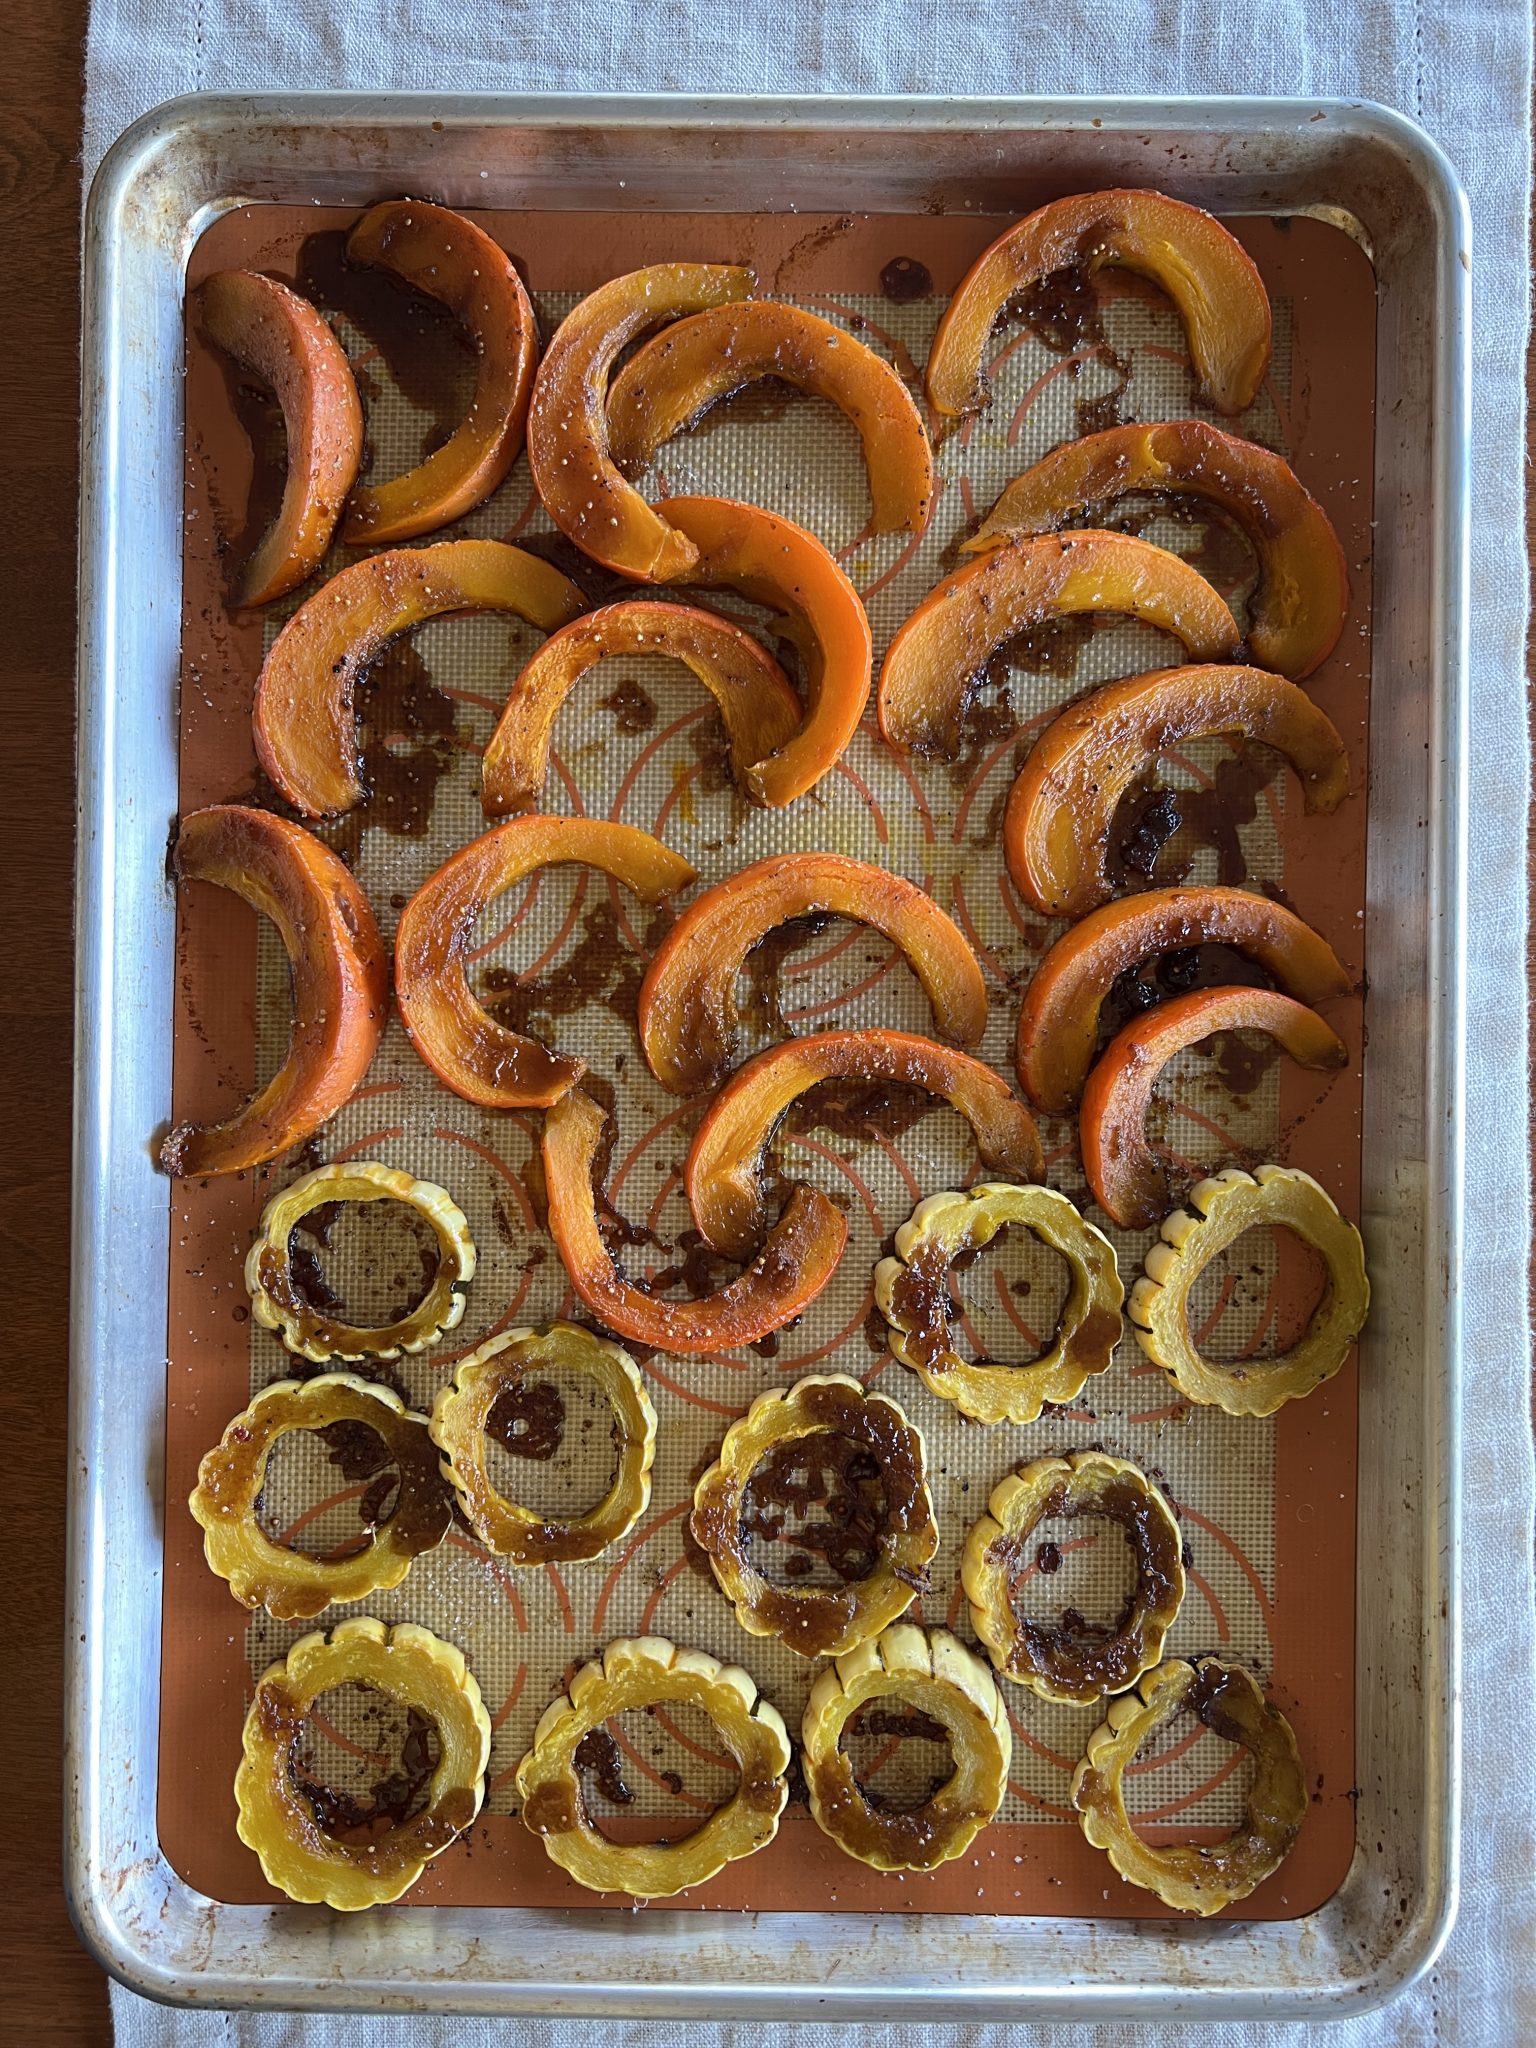
Is it possible to be glum in the presence of orange things, like this autumn sunset-hued roasted fig-glazed winter squash? As autumn comes knocking, this three-ingredient wonder is a cheery and scrumptious welcome to the cool-weather cooking season.
Like an oven being lit, my imaginative cooking fires are lit by trying new ingredients. This little recipe started when I was recently introduced to blackstrap vinegar. At our farmers market, I met Klee and Cherie Wiles-Pearson of Spoiled Rotten Vinegar who make, among other vinegar, the award-winning blackstrap vinegar used in this dish. They appropriately call it "One American's retort to Italy's aged Balsamic." Blackstrap molasses makes it full-bodied, rich, and sweet, and it works in most applications where one would normally reach for Balsamic. One sip of this living food and I am forever hooked.
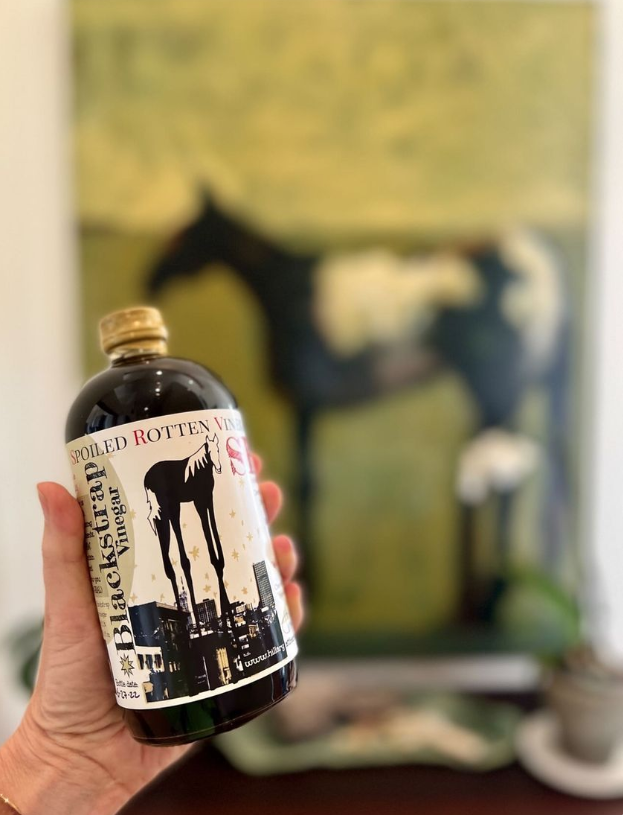
Klee ferments and bottles Spoiled Rotten Vinegar's distinctive vinegars. Cherie designs the beautiful, information-filled labels that highlight the work of local artists. The charming Spoiled Rotten Vinegar bottles are not made to be hidden behind cupboard doors.
Besides straight-up out of the oven, here are other some ways to put this fig-glazed winter squash to work from now until spring.
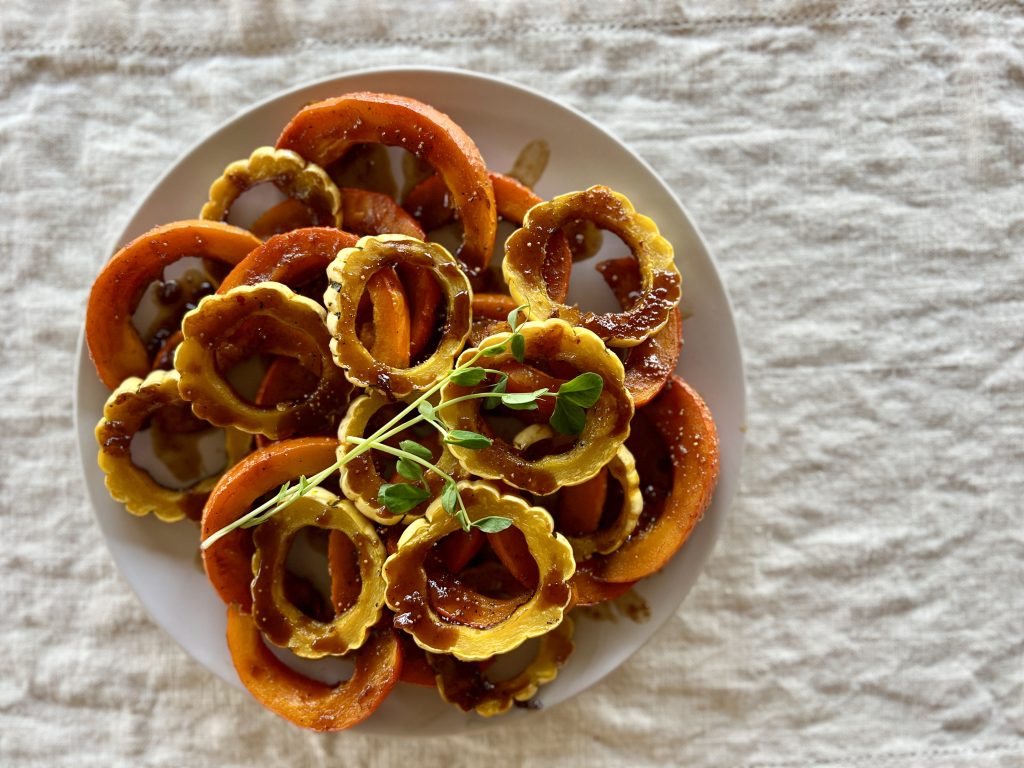
What variety of winter squash wouldn't be lovely in this recipe? I am wildly fond of the Red Kuri variety, not only because of its red-orange luminosity, but also because it cooks to a silky texture without falling apart. Kabocha squash is similar. And don't forget Delicata, which offers a yellow contrast and is a great little squash, too. Except for butternut, none of the varieties listed in the recipe below require peeling. Their skins soften equally to the flesh when roasted.
Scrub winter squash and then microwave it for 2 minutes or so on high power before cutting into it. This allows the knife to slide through the squash more easily. I think it makes scooping the seeds out a little easier, too.

Above all, don't give up on this recipe if you can't find blackstrap vinegar. Dark Balsamic is a worthy substitute.
Where are fig jams, spreads, or butters found? Many grocery stores that have a gourmet-style cheese section carry fig jam, spread, or butter. Ask there. Trader Joe's fig butter is good and is generally the most affordable. I keep a jar or two of it around for cheese boards and cheesy paninis. You may also find it in the jams and jellies section of your grocery. This is the fig spread I'm using at the moment, and it is excellent.
The density of the glaze is dependant on the particular fig jam, spread, or butter you use. If your glaze is so thick that it doesn't drizzle off your mixing spoon, thin it with a tablespoon or so of water. You want it just loose enough to drizzle in a thin ribbon. If you happen to thin it too much, just reduce the fig/vinegar mixture back down in a small saucepan over medium heat for a few minutes.
Save any glaze leftovers and use it in a salad dressing. With a little olive oil added, it is terrific on a leafy salad with apples, chopped dried figs, and some toasted nuts.
Store leftover fig-glazed squash tightly covered in the fridge. Then rewarm it gently in a microwave oven or a toaster oven.
Warm Spinach Salad +Pancetta Dressing; recipe here.
This post contains affiliate links, including but not limited to Amazon. As an Amazon Associate I earn from qualifying purchases. When you use these links to buy something I may earn a commission at no cost to you. Product affiliation helps me to keep this site ad-free while providing you with the content you enjoy. I only promote items that I use, like, and trust, or would invest in myself.

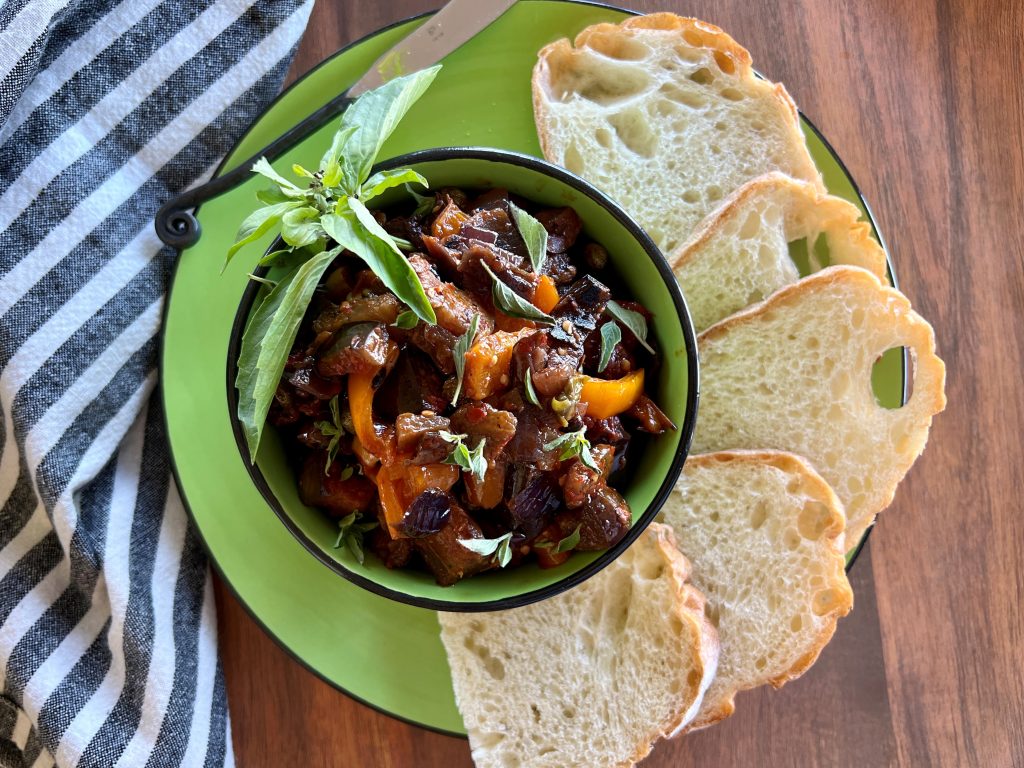
Oregon-style smoky caponata is my attempt to replicate a most memorable caponata I once had at the historic James Beard awarded Nick's Italian Café in McMinville, Oregon. Nick's caponata (a sort of Sicilian version of ratatouille) is made in a wood-fired oven that imparts a lovely smoky note not typical to caponata. I think of it every year at this time, when tomatoes, eggplants, and peppers are at their seasonal peak. This year I decided to make it at home, even without a wood burning oven of my own.
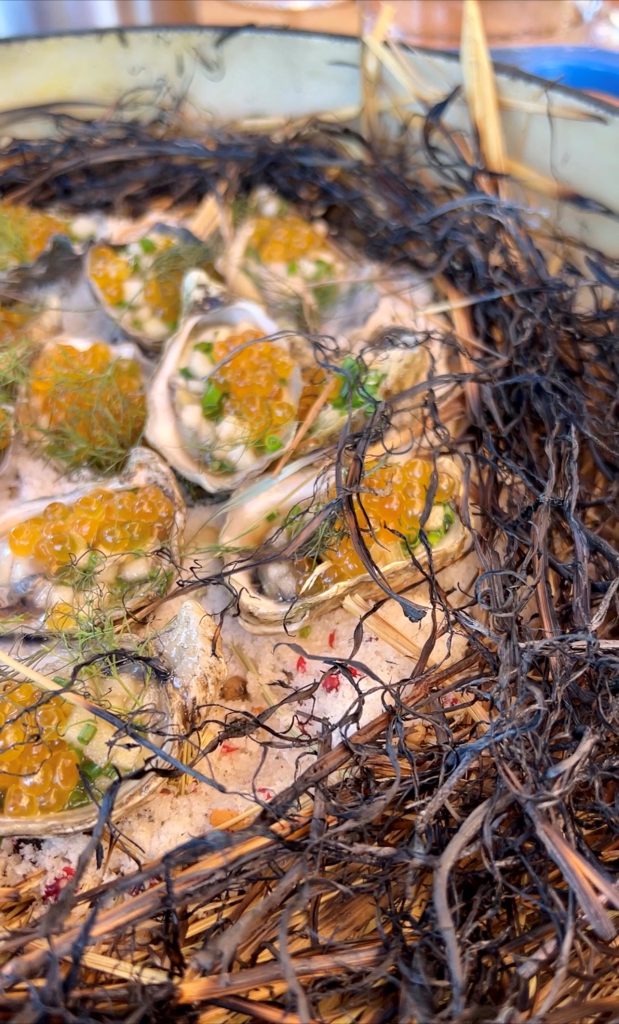
The idea of how to pull this off, however, came from another Oregon restaurant. We recently ate at King Estate Winery Restaurant, where a fresh oyster dish came in a covered Dutch oven in which hay from their farm encircled the oysters, was lit, and then quickly covered before being whisked tableside. We erupted in happy sighs of awe when the lid was removed, the smoke puffed out, and the gently smoked raw oysters were revealed. The aroma was incredible and the food inside was a stunning surprise.
I thought-- Hey! I mean, hay! I'm an Oregon hay farmer! I've got tons of that stuff. What could I smoke? How about a caponata like Nick's?

Caponata makes a flavorful summer bounty bruschetta. Why not pile it into a bowl, surrounded by the toast for an interactive dish people can build themselves? It's also a great all-in-one pizza topping. Or, use it as a relish on a cheese and charcuterie platter. To change up any leftovers, blitz it into a smooth paste for a dip for flatbread, a sandwich spread, or pizza sauce base.
My most favorite way to use caponata might be in pasta. Caponata with nearly any pasta, with a scoop of pasta water and more olive oil for a silky sauce? Yes! Add a generous spoonful of ricotta, a flurry of pine nuts, and some basil on top and you've got a wonderful weeknight dinner.
This little caponata recipe is entirely worth the multiple steps. If you skip the optional hay smoking step you'll still end up with a caponata that will be a little more complex than usual by using the grill.
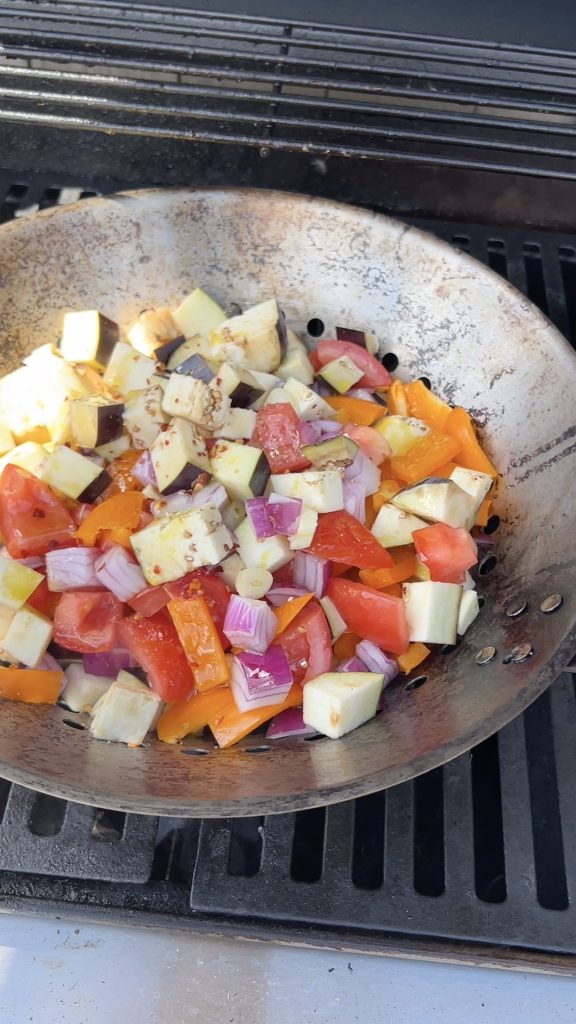
Caponata is usually made by roasting the eggplant in the oven, then adding it to the other ingredients on the stovetop to complete the cooking. I've found that roasting all the vegetables together in a grill basket (this high-quality stainless steel one is on sale right now) on the grill saves turning on the oven and eliminates a step. When making it in the winter months or if you don't have a grill, this step can be done in the oven with all the cubed vegetables on a baking sheet at one time . The oven method will not have the smoky quality, but will be traditional and delicious.
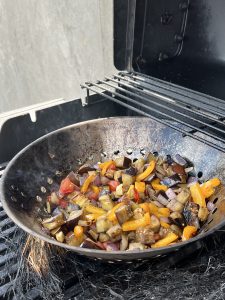
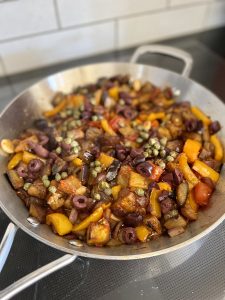
The vegetables are cooked and hay-smoked (directions below) on the grill, then we finish the dish in a large skillet on the stovetop. This is where we lightly and quickly stew the vegetables with capers, olives, a little sugar and vinegar for the typical sweet/sour finish, olive oil, and herbs. This final part takes about 15 minutes.
Serve the caponata at room temperature or lightly chilled. It is even better the day after it's made and the flavors have integrated, making it perfect for do-ahead meals and entertaining.
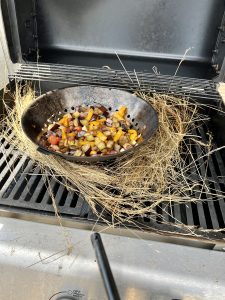
Hay smoking provides a light, gentle smoked quality to any vegetable, potato, chicken or fish dish cooked on the grill. To hay smoke caponata on the hot grill, carefully take a handful of cut hay and arrange it around the grill pan. Acting very quickly, use a long-necked lighter to touch the hay in two or three places and immediately shut the lid of the grill. You'll see a light smoke coming from under the lid and seams of the grill. After three or four minutes, carefully open the grill to make sure the flame is out. Now, a light kiss of hay smoke aroma and flavor has fallen on the vegetables.
Remember to avoid overcooking! Do this step after the food is not quite at the doneness you desire. It will continue to cook in the enclosed hot grill for three of four additional minutes.
When you make this recipe, please show it off to our 101-Mile Kitchen community! Let us know in the comments, or on Facebook or Instagram, @101milekitchen. Speaking of that, have you joined the community? If not, we'd love to have you. You can take care of that right here, and when you do I'll send you a free Taste of Oregon appetizers recipe downloadable as a thank you!
Beluga Lentil, Grilled Nectarine, and Burrata Salad
Grilled Peppers, White Beans, Feta + Herb Sauce
This post contains affiliate links. When you use these links to buy something I may earn a commission at no cost to you. Product affiliation helps me to keep this site ad-free while providing you with the content you enjoy. I only promote items that I use, like, and trust, or would invest in myself.


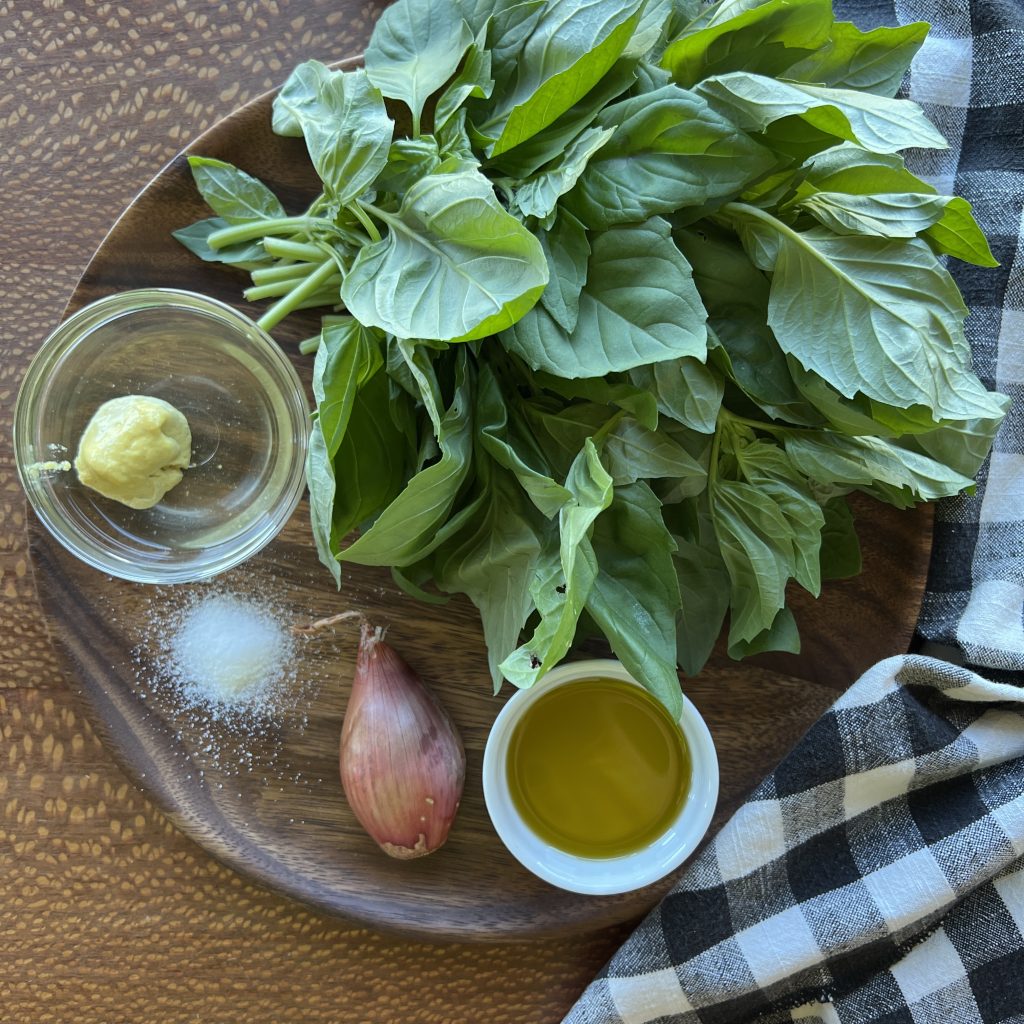
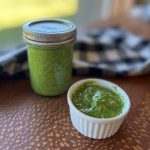
Summer Basil Sauce has me stunned by its magical simplicity, and I'll be making it at least one a week until basil season ends. Five everyday ingredients and a one-minute whirl in a food processor (this is the one I've used and loved for decades) produces a versatile sauce that will make you want to dance into the summer moonlight.
The recipe for basil sauce began in the mind of David Lebovitz, the famous American-in-Paris cookbook author. The Perfect Scoop is my favorite of his books, loaded with recipes for the very best ice creams, sorbets, and sherbets. But I digress-- we were talking about basil.
You know what I really love about summer basil sauce? It is the fastest, easiest way to improve so many seasonal foods with hardly any work. More time for summer fun and yummier eating? I'm in. If you grow basil in your garden, I feel you giving me a big kiss for sharing this way of putting it to great use.
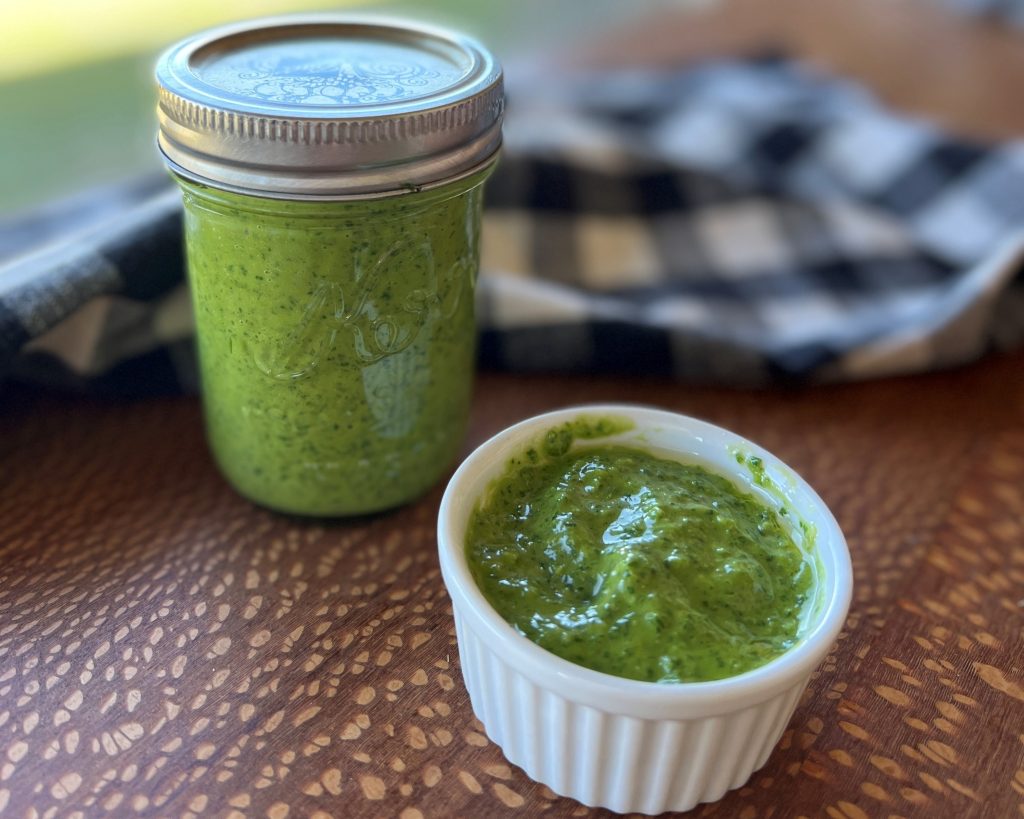
This spot-of-glory sauce is less specific and more versatile than pesto. Its compatibility with the wide slate of summer ingredients lets other flavors shine through in such a friendly way. It is 100 percent swoon-worthy. I view this as a kitchen essential-- one of those things every cook should know how to make.
It is slightly thinner, silkier, and gets its piquancy from a spot of Dijon mustard rather than Parmesan and pine nuts. There are two differences between my version and David's. I add slightly more Dijon for a subtle complexity bump. The mustard remains undetectable as an ingredient but adds a little certain something. And, because basil is often sold by weight instead of giving you a measurement by the cup I offer it by weight. Approximately one very large farmers market bunch or big Trader Joe's clamshell worth. And, wow, is it ever a bright green! My favorite color.
David Lebovitz calls it Basil Vinaigrette which I think undersells its super powers as an all-around sauce. Yes, it has a tablespoon or two of vinegar as an ingredient, but it serves as much more than a dressing for salads or marinade for meats.
Since discovering this sauce a few weeks ago, I've used it like this:
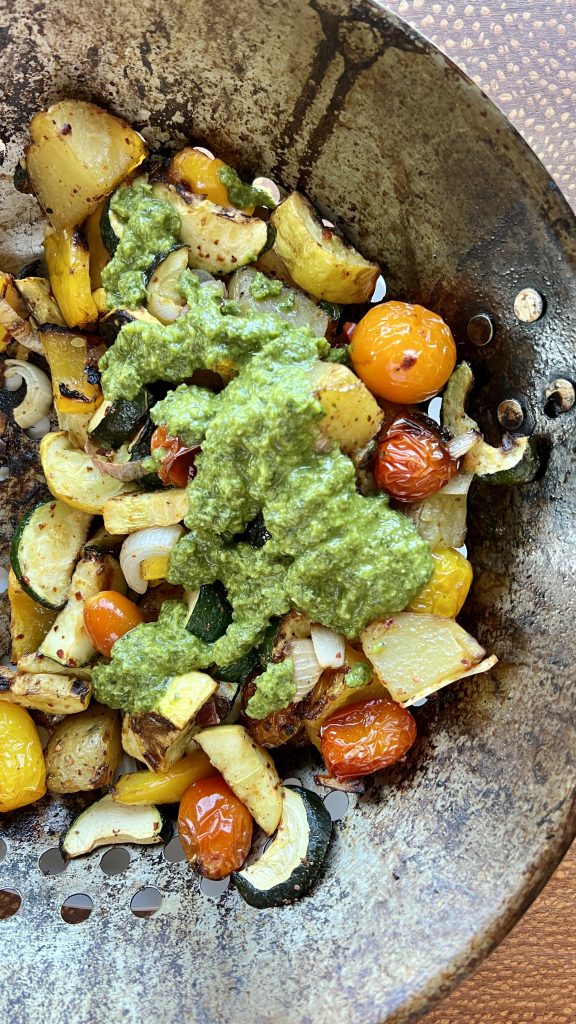
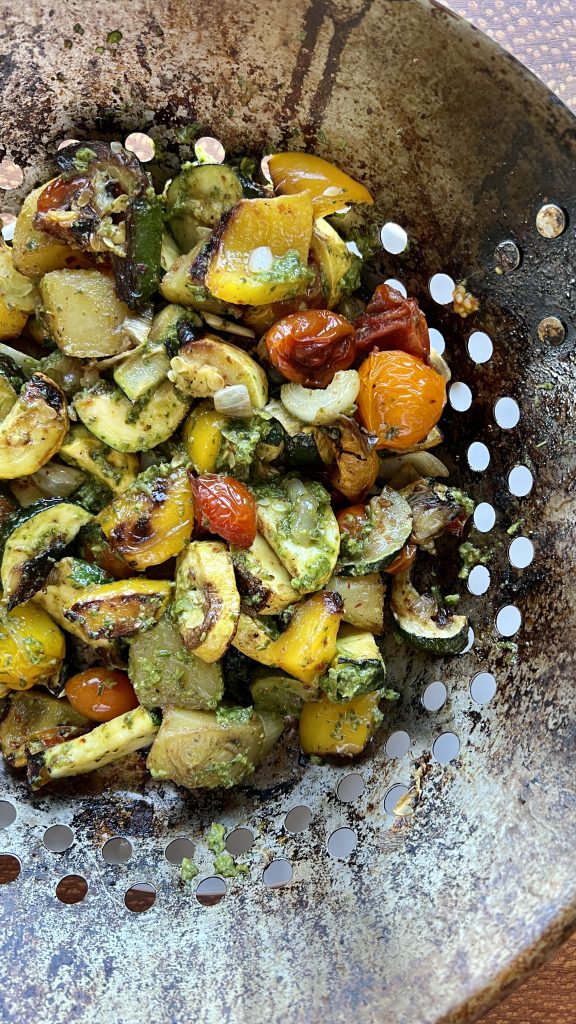
I've got it queued up to use in bean salads, stirred into scrambled eggs, drizzled over a caprese salad, as a glaze for grilled chicken thighs, splashed onto any pizza before or after baking (especially a Margarita-style one,) and perhaps a spoonful added to a typical classic vinaigrette for leafy salads.
How will you use this amazing green goodness? I invite you to join me in using this to amp up our easy-going summer eating all season long. When you find yourself using this simple basil sauce in ways of your inventing, please share with our 101-Mile Kitchen community! Tell us in the comments, or on Facebook or Instagram, @101milekitchen. Have you joined the community? If not, we'd love to have you. You can take care of that right here.
This post contains affiliate links. If you use these links to buy something I may earn a commission at no cost to you. Product affiliation allows me to keep this site ad-free while providing you with the content you enjoy. I only promote items that I use, like, and trust, or would invest in myself.
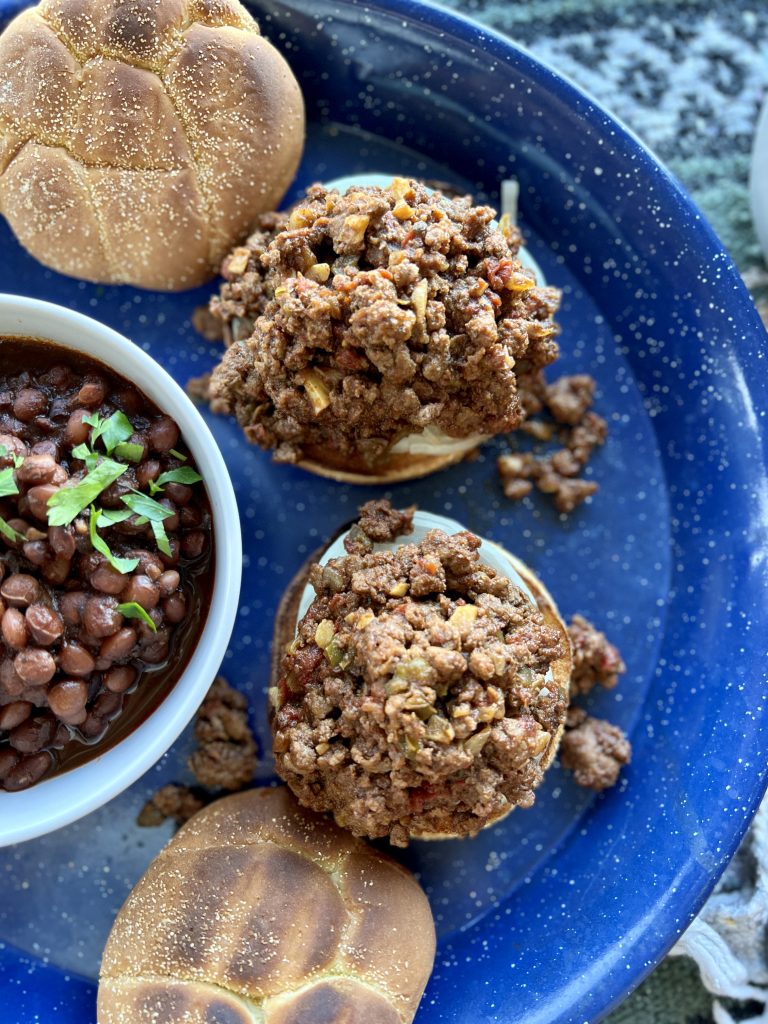
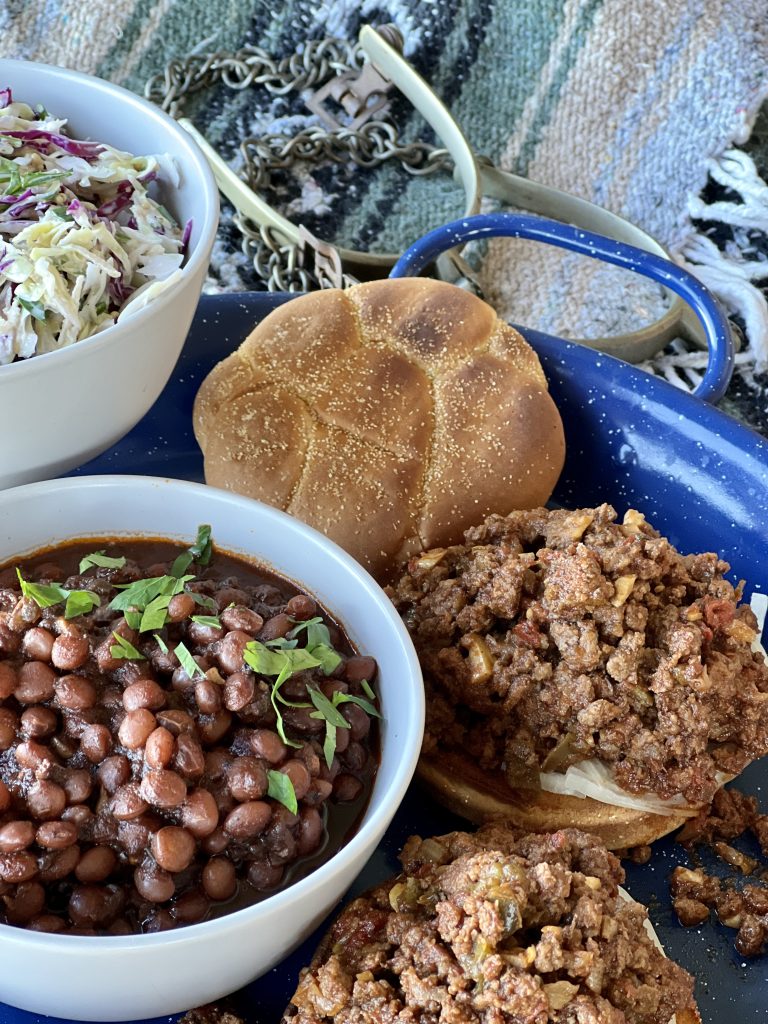
Howdy, cowboys and cowgirls! Chuckwagon Cookie here to share some pretty decent grub for summer fun. Cowboy Sloppy Joes, made with ground beef, smoky seasonings, and a little beer (non-alcoholic is my choice) are a great way to make some summer fun.
Make Cowboy Sloppy Joes when you gather around a crackly campfire, searching for Cassiopeia or the Summer Triangle. Try imagining what it might have been like to have worked the herd that day, or pretend to be making your way west on the Oregon Trail. Or simply take a pot of Cowboy Sloppy Joes with you to campouts, or make them for backyard gatherings. Ravenous kids will love these after jumping out of the pool or lake, when they get home from day camps, or when they come in off of the slip-and-slide.
Make no mistake in thinking these are just for kids, however. My dear friends Holly and Chris celebrate the end of the week by having themed Friday night mini-parties. They prove to me all the time that it's not that hard to have some simple grown-up fun.
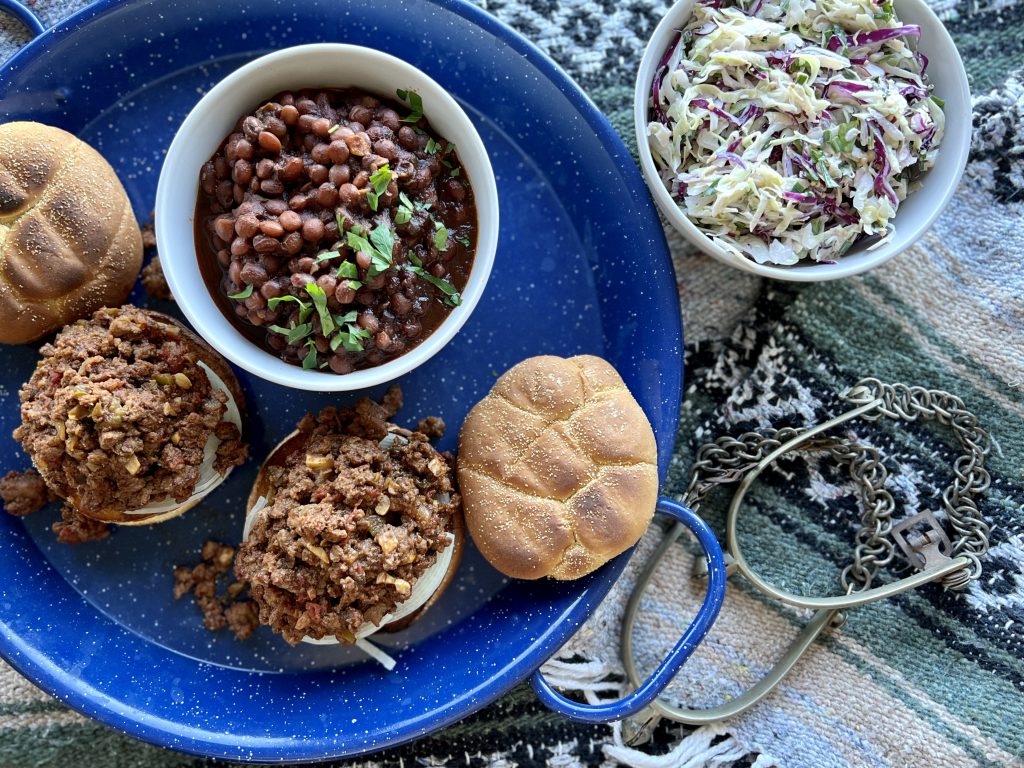
Take a page from Holly and Chris's playbook and plan a fun summer evening! For a menu of Cowboy Sloppy Joes, Cowboy Beans (click for the video recipe), and coleslaw, your attire might include a red bandana and a cowboy hat. Play a little Hank Williams or John Prine. Follow dinner up with an episode or two of 1883. You are not too old to create this kid of fun for yourself!
You'll notice that this recipe is scaled to feed six. This diverts from my new focus of developing recipes for smaller households, and here is why. I've packaged these up for the freezer in two-serving containers, which is handy in the summer when you've been out playing or just don't want to turn on the range. The sloppy joe mixture warms easily in the microwave or in a small saucepan. Besides, when the grandkids are coming over or you have that backyard cowboy party, you are all set for a slightly larger crowd.
Cheap, Quick + Easy 20-minute Beefy Spinach Burritos
If you enjoy this recipe, please give it a green star rating on the recipe card below. That will help others find it too. If you make the recipe, please show us and tag 101-Mile Kitchen on Facebook and Instagram! (It's a total thrill when I hear you've made my recipes!) And as always, your questions and feedback in the comments is welcome and appreciated.

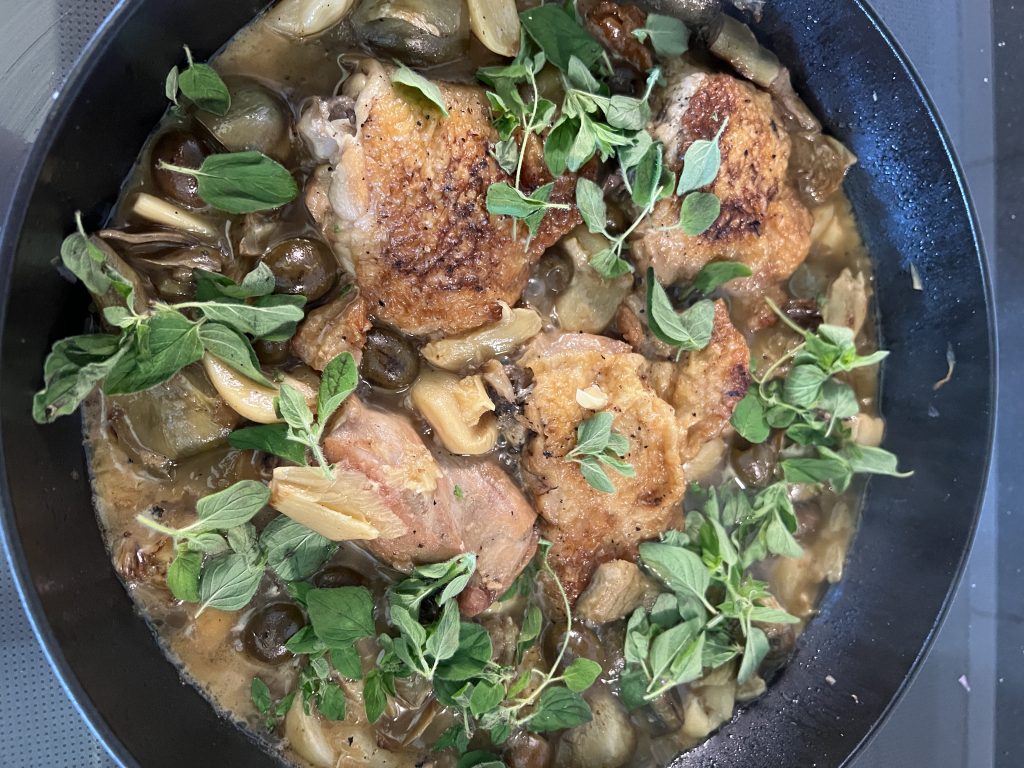
Mediterranean Artichoke Chicken is one of those recipes you'll go to again and again. Make it once and you'll love it for its silky sauce, fork-tender chicken, and utter simplicity. Everything comes together in one skillet, yet it is light and so so delicious.
First, this may look or sound like a challenging recipe, but it is not. The steps are easy to work through:
Next, let's address the elephant in the room. Yes, you are reading this right-- 40 to 60 cloves of garlic. When garlic gets a nice warm braise, it turns soft and savory-sweet. The tender garlic breaks down and adds to the sauce for this dish, so please don't be afraid of it. When I made it this time I counted 64 cloves from my fun-sized bag of pre-peeled Costco garlic, and it was perfectly divine.
Decades ago I took a cooking class in New Orleans, and I'll never forget this encouragement from the instructor. "Treat garlic like a vegetable-- it's just another vegetable. Use it generously." That has forever changed my cooking. Give it a try.
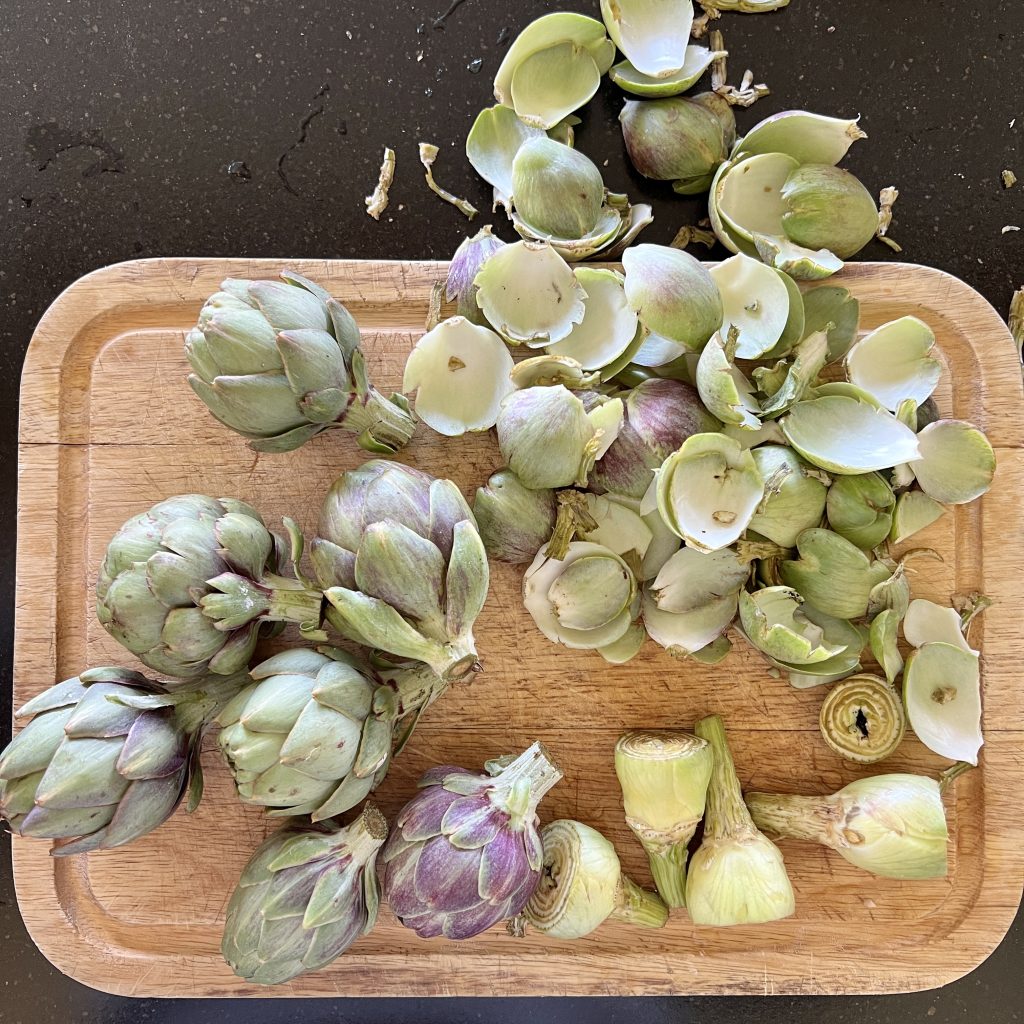
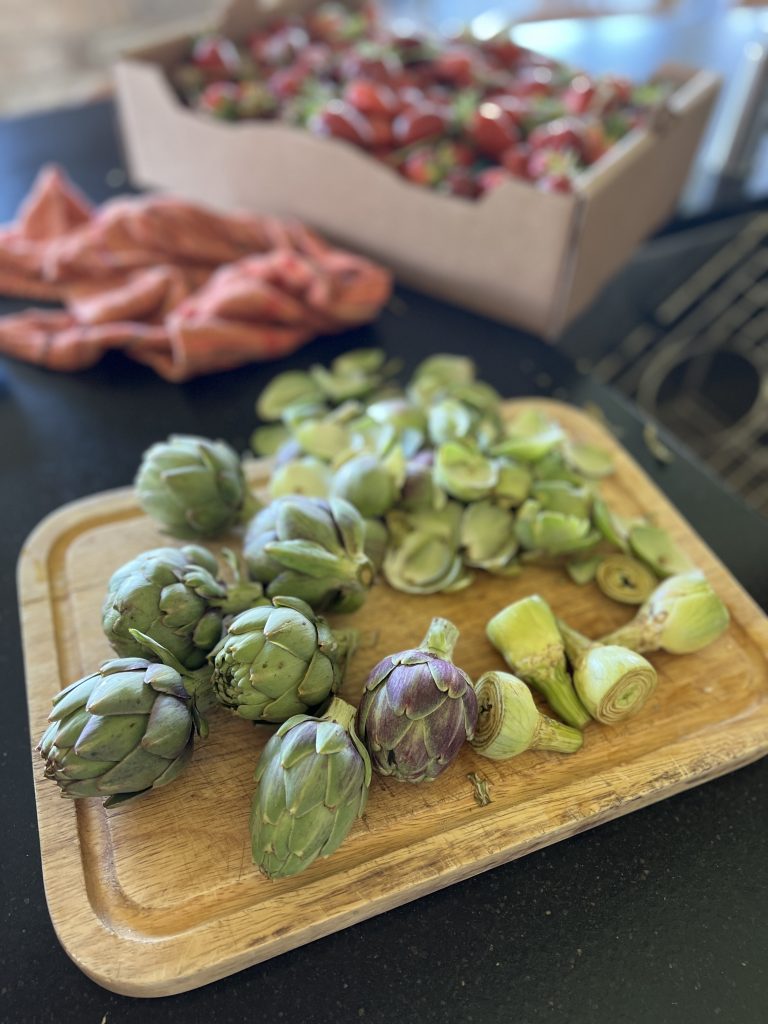
Frozen or well-drained jarred artichokes work just fine in this recipe, but during spring fresh artichokes are a great way to go. This time I had some palm-sized baby artichokes from the farmers market. Preparation for them is the same as for large artichokes. First, gently peel the darker, thicker leaves away until you reach the pale and tender leaves towards the center. Next, trim about 1/3 of the crown away from the tip, slicing horizontally. Use a vegetable peeler or pairing knife to peel the stem, then slice them in half vertically, top to bottom.
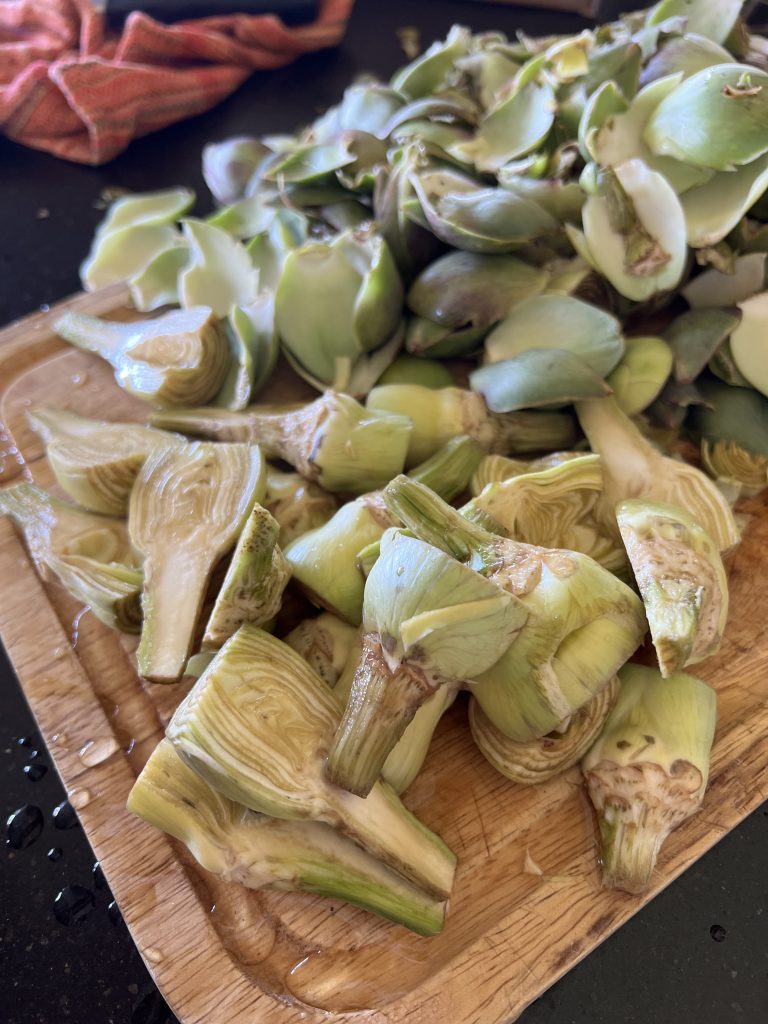
If you are working with large artichokes, you'll likely need to scoop out the prickly part of the inner choke with the tip of a spoon, but the babies don't need this. Finally, you'll plop the trimmed artichoke hearts into a bowl you've filled with cool water and healthy splash of white vinegar. The acidified water will keep the artichokes from darkening while you work through them. When you're ready to use them, remove them from the water and pat them dry.
Yes, this takes some time. I use this time as an exercise in presence, noticing all the different colors an textures of my artistic medium, the amazing artichoke! Notice the rosette that emerges when you cut off the top? And the topographical map that appears when you slice down the center? I settle in to the task, allowing my mind to calm as my hands work. This special time is one of the things I love most about cooking, and working with produce especially.
You will have a rather enormous pile of artichoke leaves when you're done. That's just part of artichokes, just like the pile that's left behind when you husk and de-silk fresh corn. Add this to your compost pile just like you do other vegetable trimmings. When we talk about edible flowers, remember that the artichoke is the flower of this amazing plant.
All that to say, if you opt to go the frozen or jarred artichoke route, no one will blame you, and you'll still have an utterly delicious Mediterranean Artichoke Chicken braise.
Weeknight Gingery Broccoli Beef Stir-Fry
Turkey Meatball + Roasted Lemon Zucchini Pasta
If you enjoy this recipe, please give it a green star rating on the recipe card below. That will help others find it too! If you make the recipe, please show us and tag 101-Mile Kitchen on Facebook and Instagram! (It's a total thrill when I hear you've made my recipes!) And as always, your questions and feedback in the comments is welcome and appreciated.


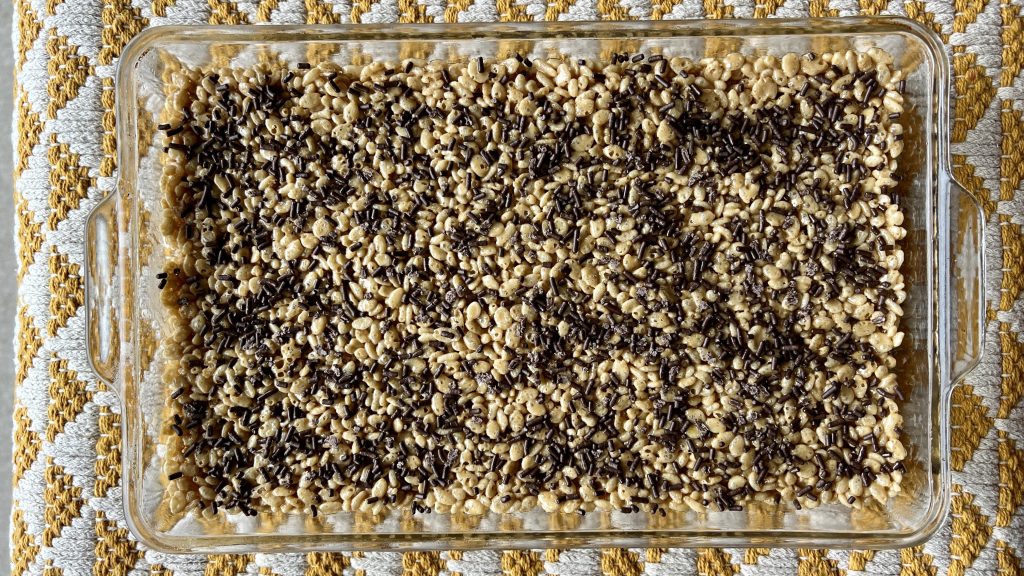
A few weeks ago I came upon this clever new idea for Coffee Rice Krispie Treats, an old family favorite. When I visit my dear mom, she still makes her famous peanut-butter rice crispie treats for me, my favorite comfort food, all these years later. The whole pan disappears before you can say snap, crackle, pop.
This recipe comes from the website Emotional Baking, with permission to share it with you. Each Emotional Baking recipe explores a specific emotion or mood and creates a recipe cure. As a result, it is a keen way to process feelings and address everyday mental health.
Ever since the horrific yet predictable incident that happened in Uvalde, Texas, comfort is definitely needed. Since gun violence is an adult issue requiring an adult response, this very adult rice krispie treat version is just right.
The Coffee-Infused Rice Krispie Treats recipe was designed to clear feelings of fogginess. Since this repeated mass tragedy in our children's schools creates a hazy, gas-lit feeling, yes. Foggy is indeed what I'm feeling.
In Canada, home base to Emotional Baking, package sizes for Rice Krispies and marshmallows are different than in the U.S. For those of us in the U. S. I made some revisions to utilize our product sizes. Also, I tinkered with their ratios by reducing the butter, and increased the amount of coffee powder for more pronounced flavor.
This no-bake treat couldn't be easier. Equally important, the addition of coffee flavor is purely genius. Why not make them today? Visit Emotional Baking for other delicious recipes that will match your mood. Whether it be happy, lonely, optimistic, or even foggy, you'll find the just-right kitchen therapy.
If you enjoy this recipe, please give it a green star rating on the recipe card below. That will help others find it too, and helps me pay the bills! If you make the recipe, please let me celebrate with you by tagging 101-Mile Kitchen on Facebook and Instagram. (It's a total thrill when I hear you've made my recipes!) And as always, your questions and feedback in the comments are welcome and appreciated.
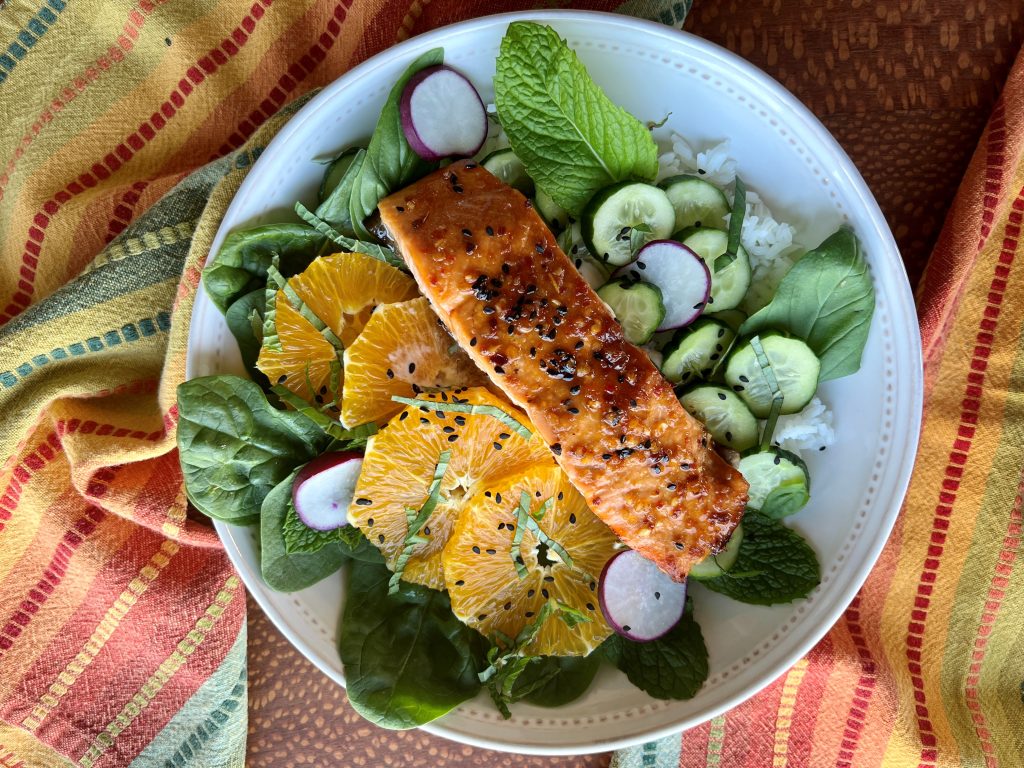
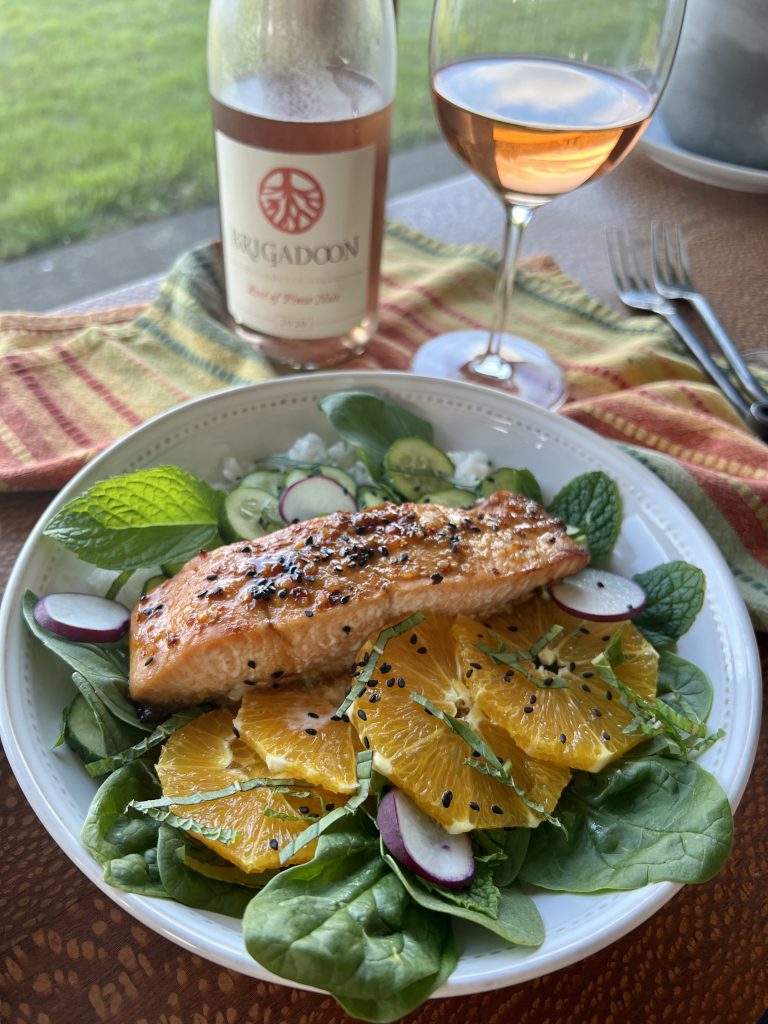
Every now and then I come up with a meal that blows even my own mind. Sweet + Spicy Salmon Rice Bowls is one of those times.
Chinook salmon, referred to as king salmon because of their size, are in season in the Pacific Northwest. They are expensive because they are in population decline. That is why I now am buying sustainably farmed salmon. Farmed salmon in not only less expensive, it allows dwindling fish populations a chance to recover and keep responsible fishermen and women working.
I don't choose just any old industrialized farmed salmon, but only that which is raised in its natural ocean environment, not in a tank that is environmentally unsound and can contain toxins. I'd love for you to read more about this responsible and humane way of raising fish.
Not only that, but more and more chefs are using sustainably farmed fish. They know this is one way to be sure there will be more in the future. And, well, when it's raised right it tastes just as great as wild.
This entire process will take 45 minutes, tops. This recipe is layed out for one person and is easily scaled up if you serve more. The dressing will make enough for 4 bowls, but is a tremendous salad dressing and marinate for chicken shrimp, and other fish, so if you have a couple tablespoons of it left it won't be hard to put it to good use.
First, put a pot of jasmine rice on the stove, in your rice maker, or instant pot. If you cook it on the stove like I do, take it off the heat, leave the lid on, and allow it to steam for ten minutes after its simmer for perfect rice.
Next, you'll whip up a flavorful mixture that will serve you in three ways. It becomes the salmon marinade and glaze, and it dresses the finished salmon rice bowl, tying everything together deliciously. Four ingredients, one small bowl, bam! (Be cautious about the heat of your chili sauce-- not all is created equal so be sure to take a wee taste to gauge how much heat you'd like.) Pour a few tablespoonsful in a shallow dish and put your salmon in it to marinate, and reserve the rest.
Then you'll put your salmon on a small baking sheet and stick it in a hot oven for 5 minutes. After five minutes switch the oven to broil, and broil it for 3-4 minutes, or until the glaze is beginning to bubble, thicken, and brown. (I use my toaster oven to cook the salmon. It's more energy efficient, and when the weather is warm it doesn't heat the house up.)
While the salmon is soaking and the rice is cooking, you'll slice up some cute little Persian cucumbers and an orange or two. You'll wash and dry some baby spinach. You'll pluck some leaves of fresh mint and basil from their stems, and slice one or two leaves into thin slivers for garnish.
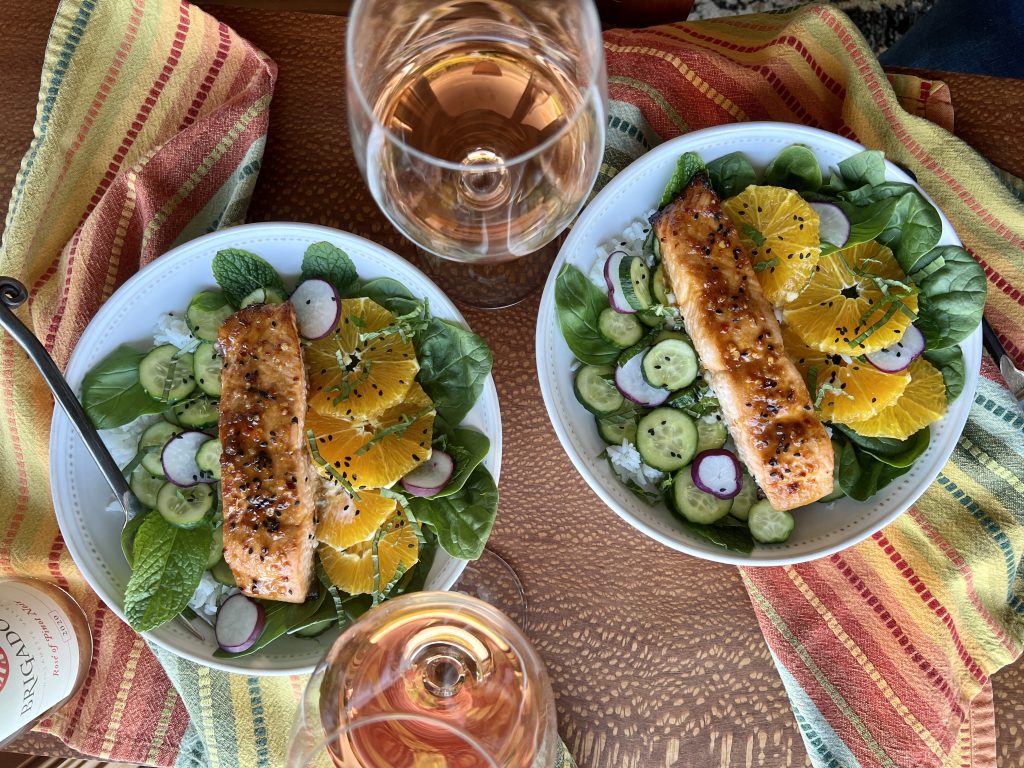
As soon as all the components are ready, you'll divvy up the rice among the bowls, and lay the spinach leaves on top. (I like to arrange the spinach to one side of the bowl. It's artsy that way.) You'll then fan out a few orange slices on top of the spinach, then arrange the cucumber slices on the opposite side of the bowl to make room for the salmon to go in the center. Drizzle it all with the marinade/dressing. Tuck the whole mint and basil leaves here and there-- they become part of the green salad. Sprinkle everything with sesame seeds if you have them, black are especially pretty. Fluff the herb slivers over the top. If you have some colorful radishes to thinly slice, they add another visual and flavor component, but aren't essential.
So there you have it, Sweet + Spicy Salmon Rice Bowls! Doesn't that look pretty? Wait until you taste it.
Roasted Mushroom, Grain + Spinach Salad
Warm Spinach Grain Salad + Pancetta Dressing
If you enjoy this recipe, please give it a green star rating on the recipe card below. That will help others find it too! If you make the recipe, please show me and tag 101-Mile Kitchen on Facebook and Instagram! (It's a total thrill when I hear you've made my recipes!) And as always, your questions and feedback in the comments is welcome and appreciated.


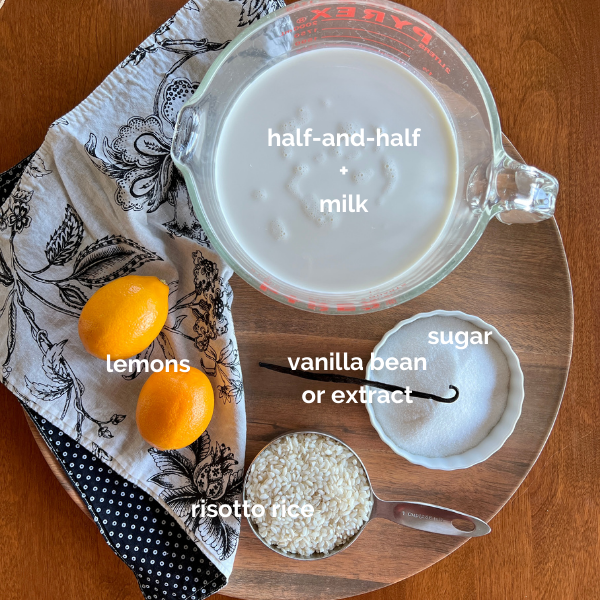
I wish I had a nickel for every time the words "comfort food" have been used in the United States since March 2020. With the money, I'd launch a campaign to deliver a cup of Vanilla Lemon Rice Pudding to the doorstep of every American, thereby redefining comfort food in our culture.
This recipe is gently sweet, creamy but not cloying. It is alive with lemon zest, and ethereal with a whole vanilla been (or vanilla extract.) Vanilla Lemon Rice Pudding is far more exciting than any other rice pudding I've ever had. Yet as comforting as your favorite cashmere sweater.

I learned of this bit of deliciousness from Katherine Burns of Rue Dauphine Paris. Katherine's Rue Dauphine Paris Instagram feed is full of glorious photos of her visits to historic gardens, churches, shops, and arrondissements in Paris, some lovely French recipes, and a glimpse of how she brings the Parisian lifestyle into her own Seattle home. Another bit of fun-- she and May of Noisettes 1420 (also a fabulous peek into Paris) host a Francophile book club, which I promise myself to participate in some soon day.
Needless to say, discovering Rue Dauphine Paris has brought me a bit of joy in these travel-less days, and has me wishing Katherine would be my guide to Paris one day.

Katherine graciously allowed me to share her vanilla rice pudding recipe with you. I've renamed it to bring justice to the magic the lemon brings. I've made a slight change to the dairy component, swapping her 4 cups of whole milk + 1 1/4 cups heavy cream for 1 quart of half-and-half and 1 1/4 cups milk), otherwise this is completely hers. This change retains the silky creaminess of her version, but leaves me with no wasted partial carton of whipping cream. She is right in that the sweet aroma of lemon and vanilla this offers when bubbling on the stovetop is most pleasant.
You should definitely use Meyer Lemons when they are in season for this. The floral mandarin/lemon flavor is fantastic. I think orange zest would also be wonderful, like a creamsicle. However, standard Eureka or Lisbon (everyday grocery store0 lemons will still take you over the moon.
Katherine serves hers in flowery china cups, a touch of French charm, with a drizzle of caramel sauce. I like serving the rice pudding with a wedge of the zested lemon. A squeeze over the top brings a little acidic component as a balance to its sweet creaminess.
When I started dreaming of Vanilla Lemon Rice Pudding in the middle of the night, I knew I had to share it with you. It has become my new favorite sweet treat. Maybe it will become yours, too, as you dream of far away places.
Nutty Chocolate Port Ice Cream Sundae: Get the recipe here.


You’re in the right place! I’m Pam Spettel, home cooking expert and guide, and I’m here to show you how to break up with cooking and hospitality anxiety, learn how to use recipes as guides rather than strict rules, and let your cooking intuition and confidence soar.
Superpower: Dreaming up recipes that work, serving them to my friends and family, and writing little stories about how cooking them well is the same as loving well.
Inspiration: Ingredients! The fresh, colorful, fragrant, local, seasonal ingredients found in the Pacific Northwest are my creative medium.
Heroes: Local food and wine producers– the people who keep me, my family, and our community nourished and happy.