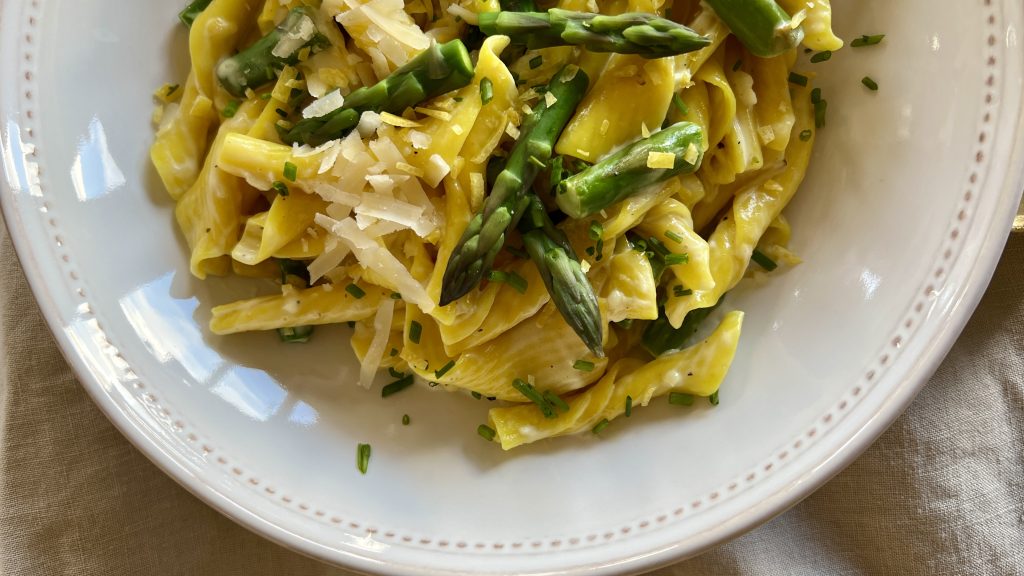
After a loooong winter's nap, I'm back to share with you a most exciting recipe for spring. Creamy Lemon Pasta is the culinary world's daffodil equivalent-- bright sunny lemons, some fresh herbs, and peas or asparagus tips bring good sunny cheer. The creamy sauce works itself out in less time than the pasta needs for cooking. The whole thing from start to finish takes about 20 minutes, a very pleasant hat-tip to spring.
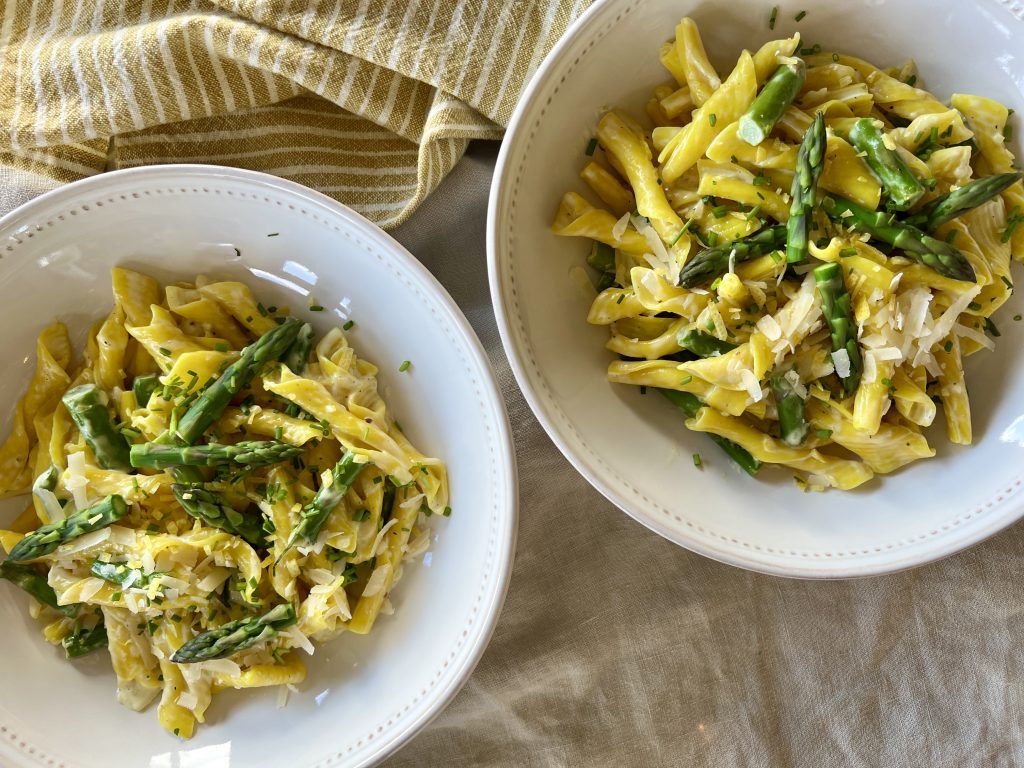
Heap your creamy lemon pasta into a bowl all by itself, or serve it with a salad and or a protein of your choice. Keep it simple, though, to impress yourself with luxury and comfort, all dressed in yellow.
About the Recipe
While this recipe is scaled for four servings, if you're a household of one or two you won't regret having leftovers. (It can easily be doubled to serve eight to ten, and is perfect for Easter dinner.) The ingredient list is short. Yay. There is just enough sauce to make the creamy lemon pasta velvety and lush without it being a gut bomb.
The pasta I've used here is a seasonal offering from Trader Joe's-- Lemon Torchietti--infused with lemon flavor that's perfect with this recipe. Grab some if you can find it. TJ's also often carries a lemon pappardelle which is nice, too. But this creamy lemon pasta recipe certainly doesn't require lemon-flavored pasta. Use what you have, use what you love.
Do give this a try. It is in my regular rotation, as it is so versatile and remarkably delicious.
This comforting, quick pasta is the culinary equivalent of the springtime daffodil, featuring lemon and peas or asparagus. It feels very fancy, but is remarkably simple.
8ouncespastatorchietti, penne, ziti, pappardelle are all good choices
8ouncesfresh or frozen peas, or asparagus cut into 1" piecesoptional
1 cupheavy cream
2 small or 1 mediumlemons, zest and juice
2 cloves garlic, peeled and finely minced or pressed
½teaspoon salt, plus more for pasta water
black pepper to taste (be generous!)
1-2teaspoonsthyme leaves, removed from stemsoptional
2 ouncesParmesan cheese, coarsely grated(about ½ cup)
Instructions
Bring a large saucepan full of water to boil on high heat. Generously salt the water, about 1 tablespoon. Cook according to package timing or until just tender. Don't overcook! About two minutes before the pasta is ready, add the peas or asparagus pieces, if using.
Save about a ½ cup of the pasta water, drain the pasta and vegetables and return them to their pan.
While the pasta is cooking, in a small saucepan combine the cream, the microplane lemon zest, garlic, salt, pepper, and thyme leaves if using. Stirring regularly, bring to a forceful simmer for 3-4 minutes.
Pour the cream mixture and half the cheese into the pasta and vegetables.Stir in the lemon juice. If the sauce needs thinning, add some of the pasta water a tablespoon or two at a time, stirring until it is light and silky. Plate into a serving bowl or individual pasta bowls. Garnish with remaining cheese and a sprinkling of herbs, if using..
Notes
To rewarm leftovers in the microwave, sprinkle on 2-3 tablespoons water and cook at 70% power, checking a 90 second intervals, until hot.
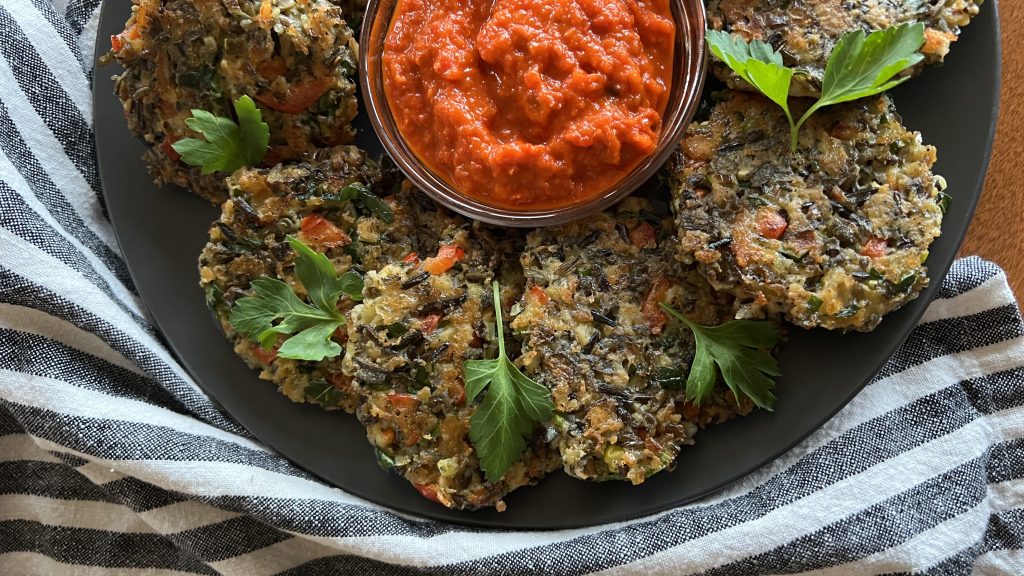
I've been dreaming of developing a recipe for Wild Rice Fritters and Red Pepper Dip for months, and it finally took shape in this last puff of space of the year.
I love this span of time. The old year is essentially over. The new year is drawing its own deep breath readying for its debut. In this liminal vacuum, dreaming and realigning with nature happen without much effort. I begin celebrating the quieter side of winter.
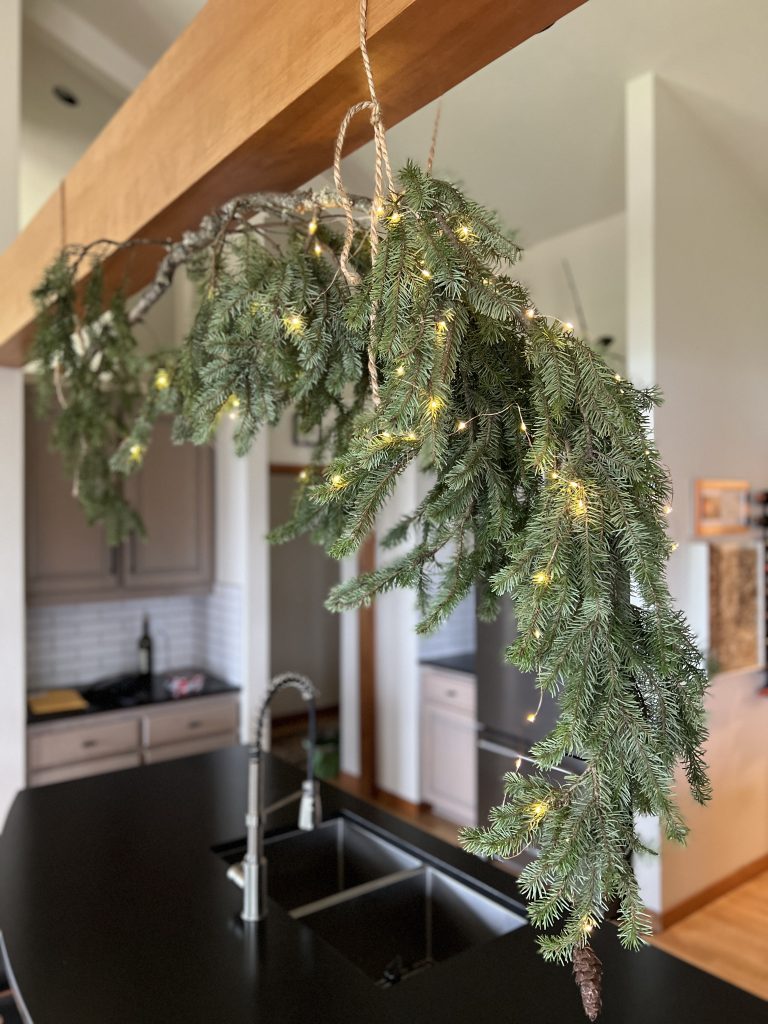
Christmas is over and we’re supposed to be hauling trees out of the house, but I couldn’t resist hanging this windfall fir branch from my kitchen rafters, and lighting it up to extend my celebration of winter.
Wild Rice Fritters, Perfect for the Season
The 101-Mile Kitchen spirit emphasizes eating seasonally, but along with that comes living seasonally. Like a bear in its wintery den, my digestion slows this time of year. Eating smaller meals that feature storage ingredients like dried beans and wild rice, squashes, and root vegetables makes the best sense when I'm listening to my body.
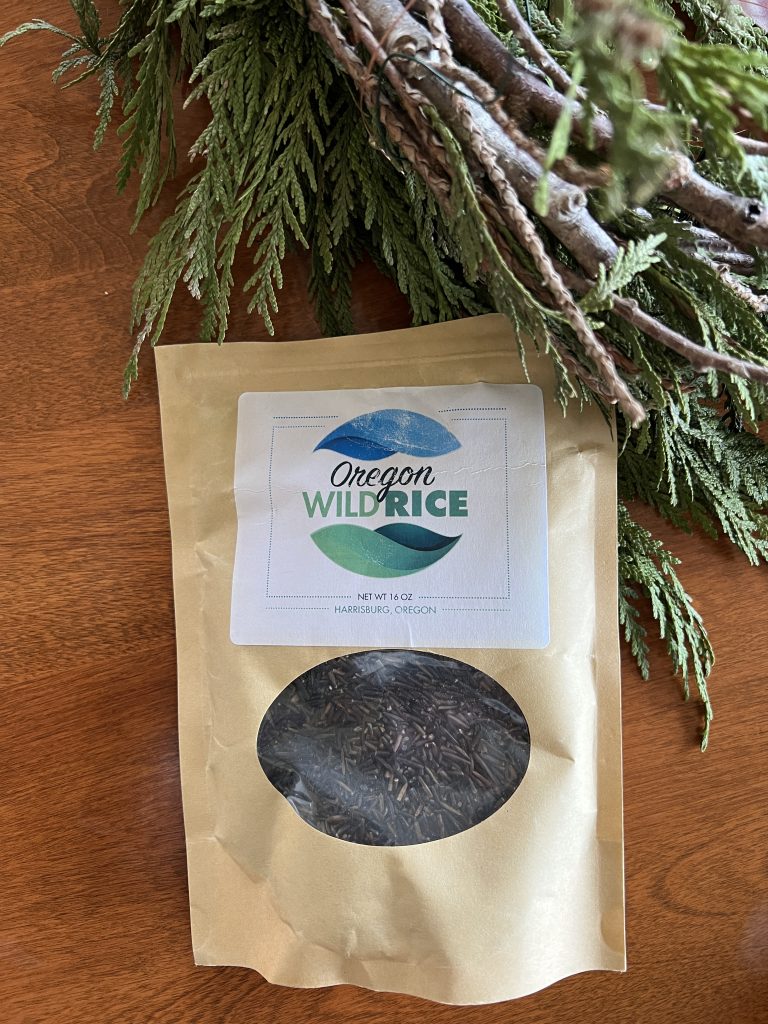
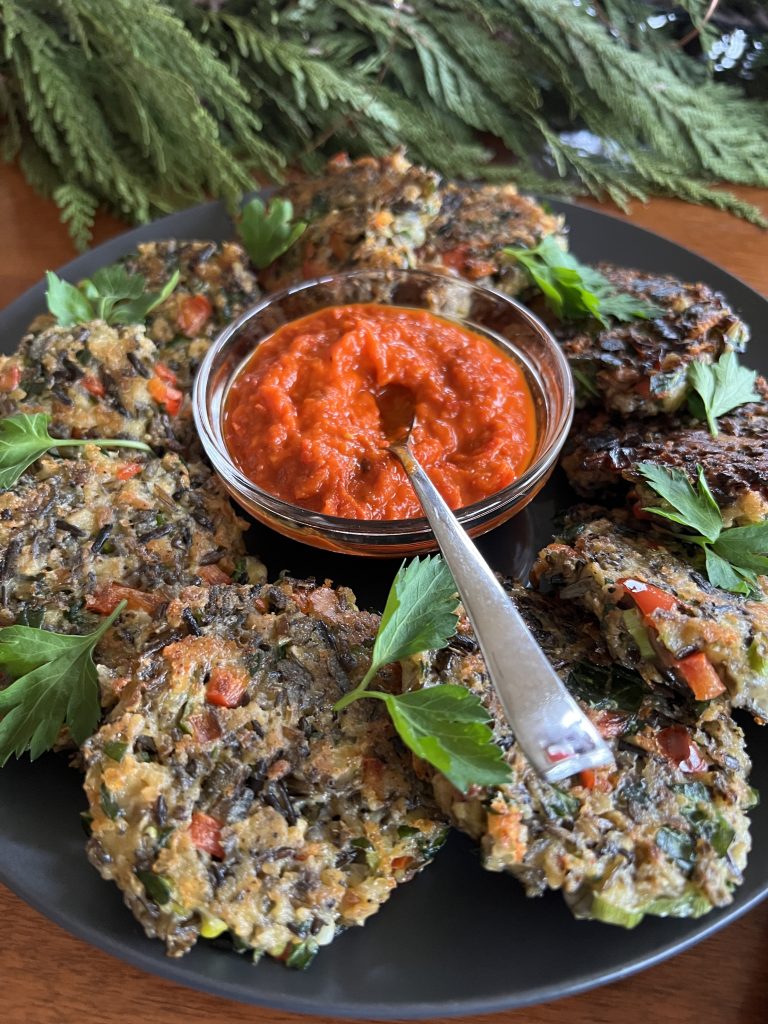
Wild rice fritters make a satisfying small meal or appetizer, or a great side dish to a larger winter meal. I use Oregon's very own Oregon Wild Rice, about 20 miles as the crow flies from our 101-Mile Kitchen hillside. The Langdon family stopped draining their fields of the autumn rains to convert their former grass-seed operation to wild rice in 2016, bringing their farmer practices in better line with nature. We've become the beneficiaries by enjoying their flavorful wild rice more often.
Versatile and Simple Red Pepper Dip
When it comes to injecting bright color to our meals this time of year, this red pepper dip really delivers. The beautiful bright red-orange dip is also delightful along with roasted Brussels sprouts halves, as sandwich spread, (do try it on grilled cheese sandwiches), and as a pizza sauce.
Other Light But Satisfying Wintery Meals You Might Like:
1cupwild rice, raw(You will have about one cup of rice left over for another use.)
3 largeeggs
3green onions, thinly sliced
½red or yellow bell pepper
1oz.spinach leaves, thinly sliced and then chopped (about 1 cup)
2cloves garlic, minced or pressed
1tablespooncapers, minced
4 oz.fontina, gruyere, or cheddar cheese, grated
1teaspoonsea salt
1/2teaspoonfreshly ground black pepper
1cupplain cracker crumbs, finely crushed
1tablespoonbutter
1 tablespoon olive oil, plus 1 teaspoon for rice
For the Red Pepper Dip
12 oz.jarroasted red peppers
1tablespoonolive oil
1 clovegarlic, smashed
½teaspoonsalt
2teaspoonsbalsamic vinegar or blackstrap vinegar
Instructions
Make the Fritters
Place the rice in a small saucepan and rinse with cold water. Carefully drain and add one teaspoon olive oil and 2½ cups water. Stir. Bring to a boil, then cover and drop the temperature to low. Cook until the rice is tender and the grains are beginning to unfurl. Drain through a fine mesh strainer and allow to cool while you carry on.
In a large mixing bowl, whisk the eggs. Add the green onions, red or yellow bell pepper, spinach, garlic, capers, cheese, salt and pepper, and stir.
Add two cups of the cooled wild rice and the cracker crumbs. Stir together thoroughly.
Heat a large stainless steel or cast iron skillet over medium high heat. Heat the butter and olive oil to the pan until bubbly. Using a ¼ cup scoop or measuring cup for consistent size, form patties with your hands, and drop them into the hot skillet. Press down on them gently to flatten them in the skillet. Cook for about 4-5 minutes per side until well-browned and crispy, adjusting temperature as necessary to keep them from burning. You will do this in two batches. Remove cooked fritters to a paper-towel-lined cutting board or plate.
Place the cooked fritters on a serving plate along with a small bowl of Trader Joe's Roasted Red Pepper Spread for dipping. Enjoy these hot or room temperature. Freeze leftovers for up to two weeks. Rewarm in a 350° oven.
Make the Red Pepper Dip
Drain the roasted red peppers well, and lay them out on a double layer of paper towels, or more sustainably, on a double layer of cotton dish cloth. Press the peppers firmly to release as much moisture as possible. Dry them off.
Add all ingredients except the peppers to a food processor and process until the garlic is finely minced. Add the peppers, and process until the peppers are not quite smooth and the dip is homogenous. Store in a recycled jar with tight-fitting lid for up to five days. Serve at room temperature.
Notes
The beautiful bright red dip is also delightful with roasted Brussels sprouts halves, as a spread on ham, turkey, roast beef, or stacked vegetable sandwiches, grilled cheese sandwiches, and as a pizza sauce.
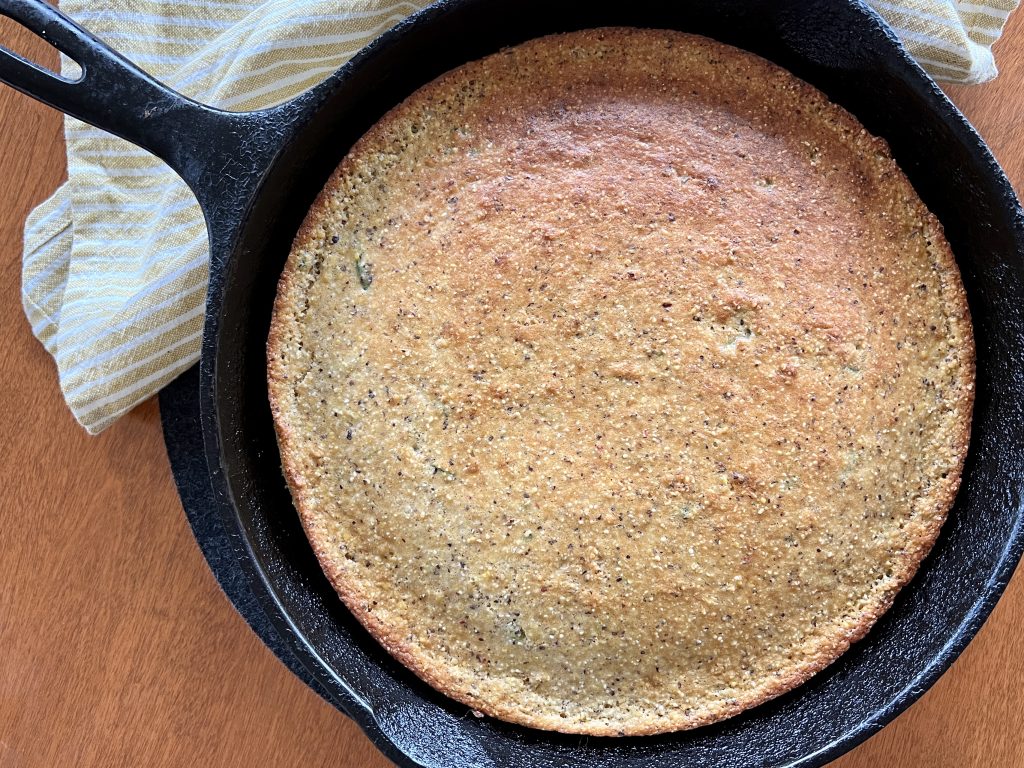
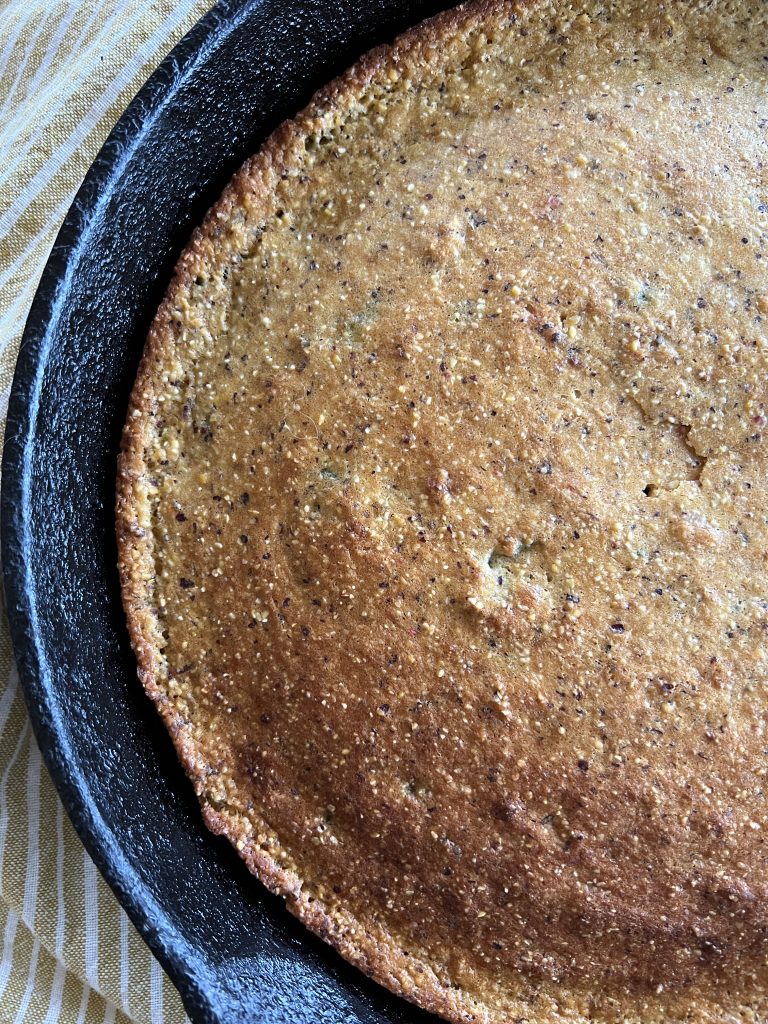
Can we admit that soup night goes from good to great when some tasty nosh cozies up to the bowl? Maple Jalapeno Cornbread is often that certain something here at the 101-Mile Kitchen. The tiniest hint of heat with mapley sweetness, a tender moist crumb, and the pleasant crunch of cornmeal is so very satisfying.
Cornbread and maple make a surprisingly good pair. Add the unique green flavor and subtle heat of jalapeno, and WOW!
Don't miss the maple butter! Whip some up while the cornbread is baking to slather on the warm bread.
Making Maple Jalapeno Cornbread
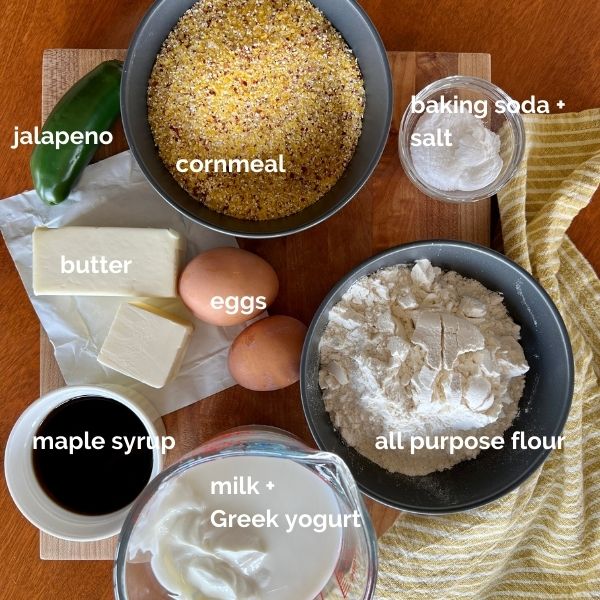
Most cornbread recipes call for buttermilk, which is an ingredient I rarely have on hand. My instincts tell me that more households may keep yogurt around than a carton of buttermilk, so I experimented with that swap with great success. The tang is still present, but the batter holds more moisture and has more spring with the use of yogurt.
I use the multi-colored heritage Abenaki corn polenta from Lonesome Whistle Farm or the Red Flint Floriani cornmeal from Camas Country Mill for this cornbread. Both are outstanding products from local companies near me, and I love the red flint flecks in both. However, any medium to coarse cornmeal will work wonderfully. Do not use fine corn flour in this recipe or you'll end up with a heavy, dense cornbread.
What Soups Are Best with Maple Jalapeno Cornbread?
Frankly, very few soups would not happily sidle up to this cornbread! My first choices would be bean-based soups and chilis. This recipe made with potatoes, corn, and poblano chiles is fantastic. Potato chowders, meaty chilis, and blended butternut, broccoli, or cauliflower soups would also be delicious with the cornbread. Really, you just can't go wrong!
This post contains affiliate links. When you use these links to buy something I may earn a commission at no cost to you. Product affiliation helps me to keep this site ad-free while providing you with the content you enjoy. I only promote items that I use, like, and trust, or would invest in myself.
Have you joined the 101-Mile Kitchen community? If not, we'd love to have you. You can take care of that right here, and when you do I'll send you my free Top Five Cool-Weather Cooking Guide downloadable as a thank you!
Maple Jalapeño Corn Bread
Course: Bread + Rolls
Cuisine: American
Season: All Season
Preparation: Baking
Prep Time: 15 minutesminutes
Cook Time: 40 minutesminutes
Total Time: 55 minutesminutes
Servings: 12
Author: Pam Spettel
Like a little heat with your sweet? Maple jalapeño cornbread (baked in either muffin form or in a skillet) is the perfect accompaniment to seasonal soups, stews, salads, and roasts. It has buttermilk tang without the buttermilk, and bakes like a dream.
Preheat oven to 400°. Generously grease the cups of a standard muffin pan, or a 12" skillet with butter or cooking spray.
In a large mixing bowl, whisk the dry ingredients: flour, cornmeal, baking powder, baking soda, and salt. Grate the jalapeño into the flour mixture and whisk again. Set aside.
In a medium mixing bowl whisk the Greek yogurt to loosen it. Whisk in the milk. When the milk is fully incorporated whisk in the eggs. When the eggs are incorporated whisk in the butter and maple syrup.
Tip the wet ingredients into the large mixing bowl with the dry ingredients. Use a silicone spatula to combine them together, scraping down to the bottom of the bowl. Stir the ingredients together only until no flour remains.
Use a 3-tablespoon scoop or a large spoon to fill the greased muffin cups about 3/4 full with batter, or scrape the batter into the greased skillet. Place into the hot oven and lower the temperature to 375°. For muffins, bake 12 - 15 minutes or until the tops are burnished golden brown. For skillet cornbread, bake for 18-22 minutes, until the top is burnished golden brown.
If using a muffin pan, allow the muffins to cool in the pan for 5-7 minutes. Remove the muffins from the muffin pan and allow them to finish cooling on a cooling rack. If you are using a skillet, allow the skillet to cool on the cooling rack at least 20 minutes to allow them to set up before cutting and serving them.
Maple butter
In a medium mixing bowl, whisk together the soft butter and maple syrup until light and fluffy. (This may take a few minutes to completely incorporate the two.) Spoon the maple butter into a small serving bowl and sprinkle with flaky salt and serve alongside the maple jalapeno cornbread.
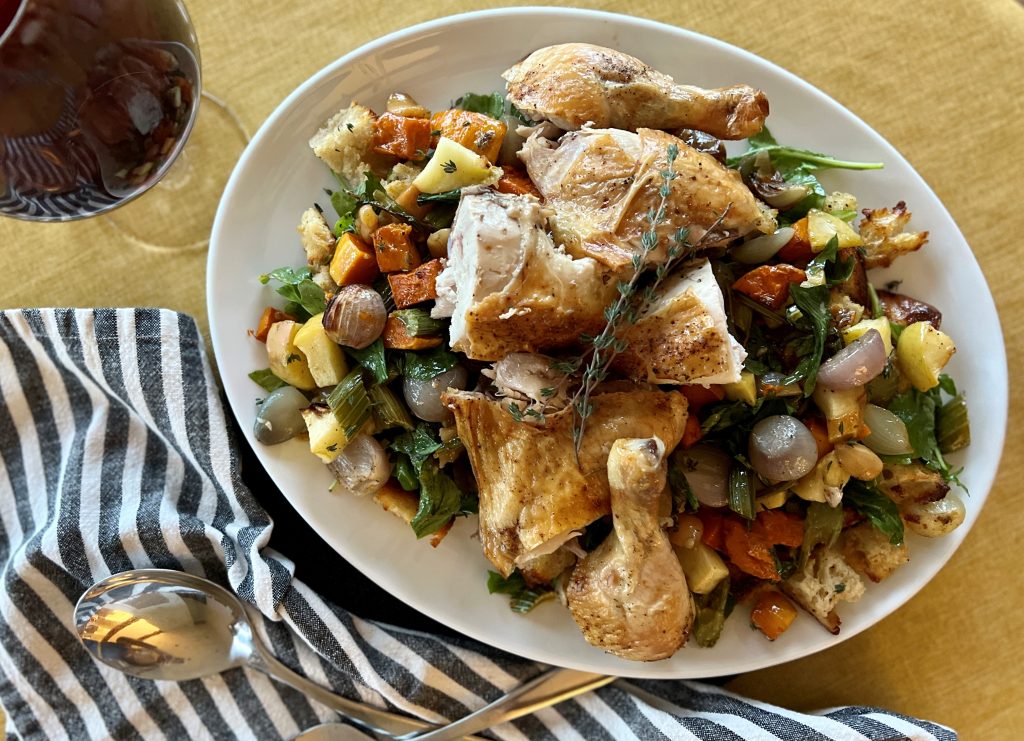
Here's a recipe I'm quite proud of: Roasted Chicken + Autumn Bread Salad. A quickly-roasted chicken delivers its juices to butternut squash, whole sweet shallots, and tart apples roasting beside it on a sheet pan. Peppery arugula in a light dressing mix with vinegar-soaked golden raisins and crispy-chewy toasted bread chunks make a lovely autumn panzanella-style salad that make a bed for the chicken and deeply flavored vegetables. It's all you need on one platter. I can't think of a better Saturday night or Sunday afternoon cool-weather dinner.
This roasted chicken and autumn bread salad borrows inspiration from the late Judy Rodgers, generous traditionalist and exemplary restaurateur. And golly, is it good.
The Inspiration for Roasted Chicken + Autumn Bread Salad
First let me tell you about the chicken Ms. Rodgers made famous at the Zuni Cafe in San Francisco. At Zuni, whole, small chickens are roasted in a wood-fired brick oven. The juicy, crackly-skinned chicken is served with a warm bread salad. At Zuni, chunks of hand-torn toasted bread, scallions, garlic, bitter greens, dried currants, and pine nuts are tossed in a light vinaigrette. When you experience this dish, it becomes the gold standard for all roasted chicken. And the craveable bread salad is just as good.
Until now, my go-to method of roasting chicken has been the Zuni Cafe way. Ms. Rodger's way. I pat the chicken dry and give it a dry rub of salt and pepper. Then, I loosely wrap it and put in the fridge for two days before roasting. The chicken skin dries in the refrigerated air, setting it up for crispness. Then on roasting day I set into a hot skillet and rush into a very hot oven. A series of flips mid-roast, and viola! The most crispy-skinned and juicy chicken ever. Put this roasted chicken together with a seasonal bread salad-- oh my!
Sometimes I haven't planned this out well, or don't have the time or energy for these steps but still would love a roasted chicken. Hmmm. What could I do about that?
Ditching the two-day dry brine period and shortening the overall cooking time with our unique preparation method is a great advantage for the home cook. And it still turns out a chicken that is almost as wonderful as the Zuni style.
How Can I Roast a Chicken Without Drying Out the White Meat?
It's easy to end up with dry white meat when roasting a chicken, and yet so easy to prevent it! By separating the breast and wing section from the leg and thigh section, we give the legs and thighs a 15-minute head start in the oven, sparing the white meat from overcooking. I call this a major kitchen coup!
The best tool for working with a whole chicken is kitchen shears. Get yourself a good pair. Poor quality shears need to be replaced frequently, so make this investment up front when you can. This is the pair I recommend for its value. You can spend more, but these are very good and will last.
With this method we use our kitchen shears to easily separate the breast and wing section from the rest of the bird. We start by separating the breast from the legs in two quick "vee" cuts. Then we flip the breast section upwards like a page in a legal pad. From there, it's very simple to separate the front from the back of the bird at the shoulders.
Preparing the chicken for the oven.
Match Your Roasted Chicken and Bread Salad to the Season
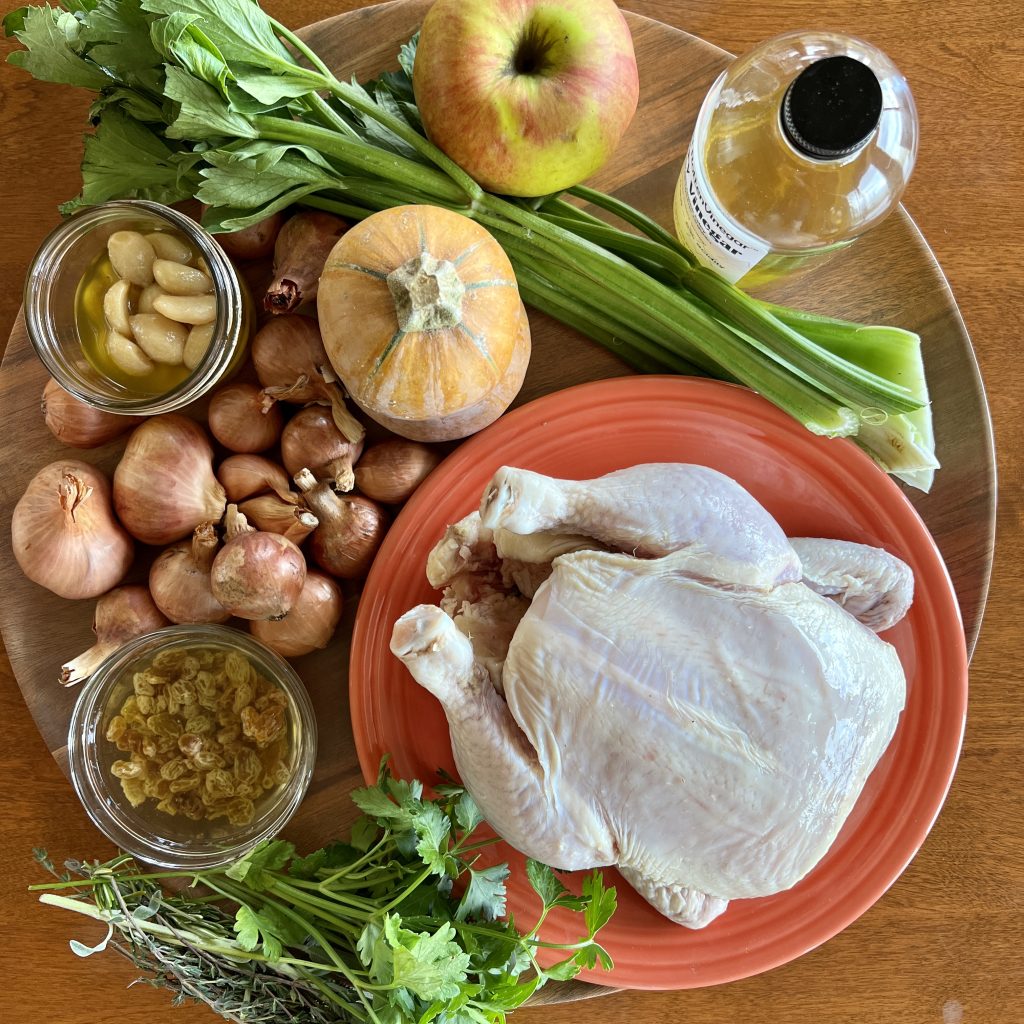
Roasted winter squash, celery, apple, golden raisins, tons of shallot, and arugula make this a fall-into-winter salad. In the spring and summer, swap those things out for fresh peas or sauteed zucchini, blistered cherry tomatoes, lots of fresh herbs, scallions, and torn mustard greens for a lighter taste. Use what is in season, and the rest remains the same. No matter what time of year, be sure to use garlic confit if you can. It's is always in season!
Ingredients. Not pictured, bread and arugula.
Have you joined the 101-Mile Kitchen community? If not, we'd love to have you. You can take care of that right here, and when you do I'll send you my Top Five Tips and Recipes for Cool-Weather Cooking downloadable as a thank you!
This post contains affiliate links. When you use these links to buy something I may earn a commission at no cost to you. Product affiliation helps me to keep this site ad-free while providing you with the content you enjoy. I only promote items that I use, like, and trust, or would invest in myself.
Preheat the oven to 425°. Place one oven rack in the upper third of the oven, and one in the lower third. Wipe the chicken dry. Using kitchen shears, and the chicken breast-side up and legs pointed to you, cut along the bottom edges of the breast upwards toward the wing on each side, following the natural "vee" shape. Fold the breast upward (like flipping a page of a legal pad). Press down to flatten the chicken. Use the shears to separate the breast/wing section from the backbone and neck.
Sprinkle both bird sections liberally with salt and pepper. Place the leg/thigh section on the baking sheet and put several sprigs of thyme, a sprig of sage, and a sprig of rosemary under it. Place the baking sheet on the lower oven rack for 15 minutes.
Prep the vegetables and apple while the legs/thighs are roasting. Place them in a bowl, salt and pepper to taste, and add the garlic confit (or olive oil and garlic cloves) and toss well to coat the vegetables in oil and set it aside.
After the first 15 minute roast, place the chicken breast/wing section on the baking sheet with herbs underneath and roast for another 15 minutes. While this is happening, place the golden raisins in a small dish and cover them with the vinegar. Set aside.
After the second 15 minute roast, place the prepared vegetable mixture all around the chicken on the baking sheet, distributing them evenly. Place the baking sheet back in the oven for another 15 minutes.
During this 15 minute roast, tear the bread into uneven bite-sized chunks onto a small baking sheet. Sprinkle with salt and pepper, and drizzle with olive oil. Toss the bread pieces well. Place the bread pieces in the oven on the upper rack for 6-8 minutes. Remove from the oven and toss, then if necessary, return to the oven for another few minutes. You are looking for a mix of crunch and tender bits, some browning and crispy bits, and some that will be softer. This step is very dependent on your own oven, so please watch carefully to avoid burning!
When the chicken reaches 160° at the thickest part of the thigh and breast, it is done. Remove from the oven to rest before cutting it into serving pieces.
In a large bowl (I use the same bowl that the vegetables were in) place the toasted bread chunks, arugula, another swirl of olive oil, and the golden raisins and their vinegar. Toss well and spread the bread salad on a platter. Spoon the roasted vegetables and all the pan juices onto the bread salad.
Use the kitchen shears to separate the chicken into 2 legs, two thighs, two wings, and two breasts. Use a heavy knife to cut the breast pieces in half, resulting in 4 chicken breast pieces. Arrange the ckien over the vegetables and serve.
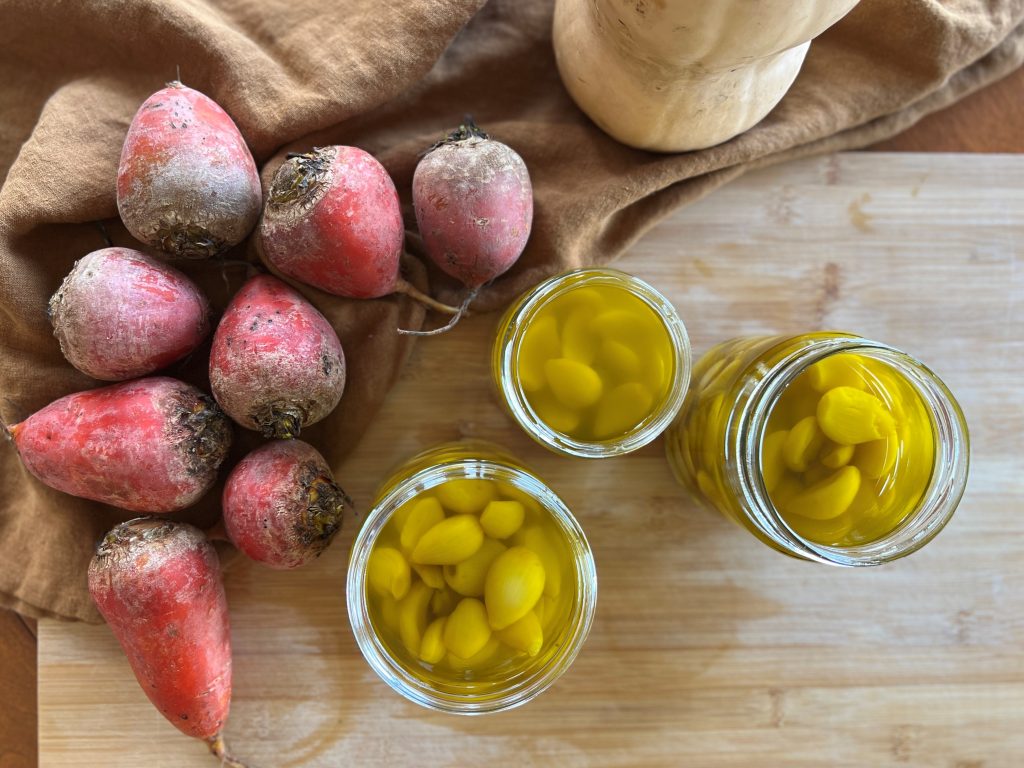
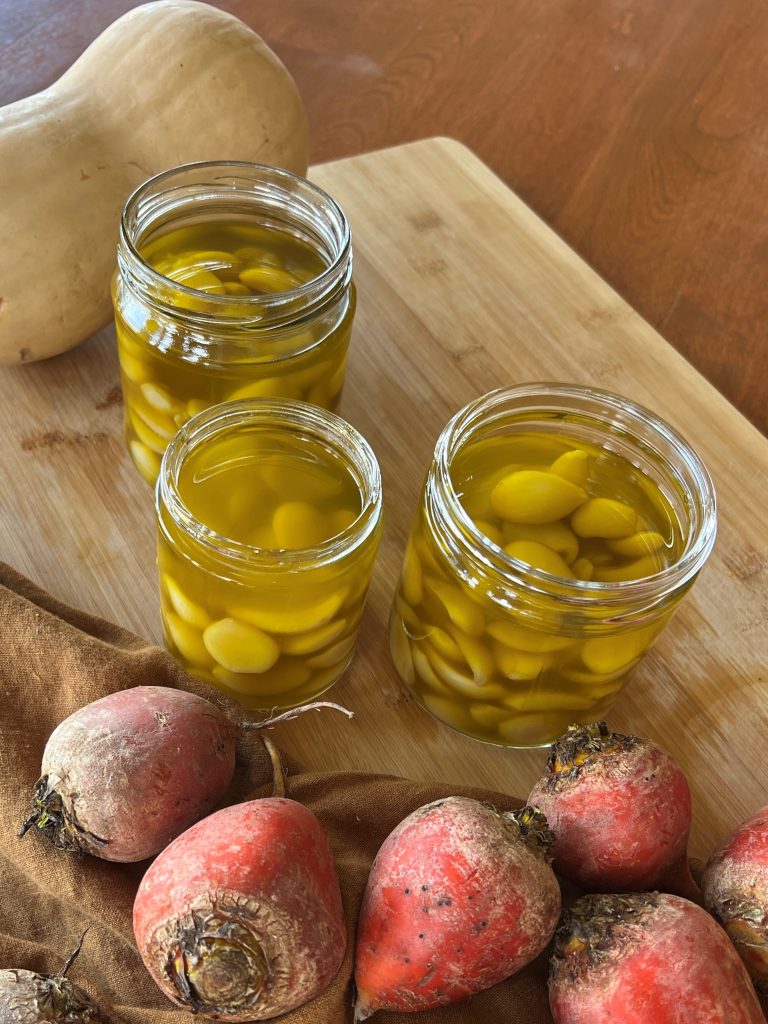
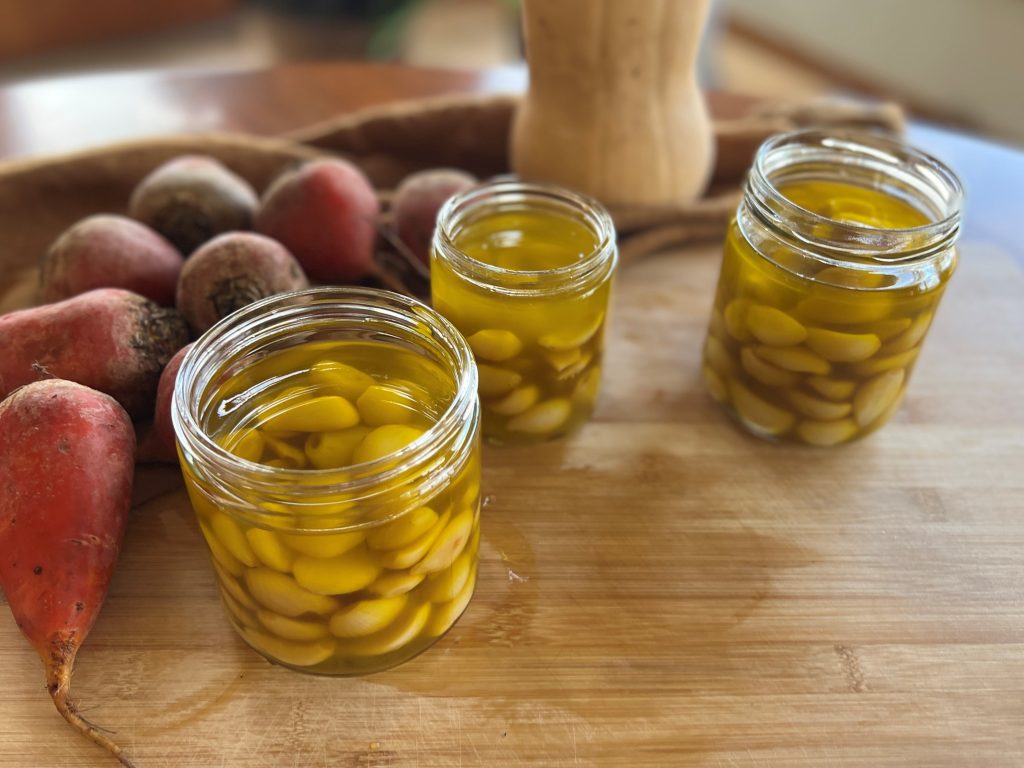
I encourage you to make garlic confit, the wonderful kitchen workhorse that amplifies so many other fall and winter ingredients. It is so easy to do. The soft cloves and/or flavored oil can go into anything that you would otherwise use garlic in. The slow cooked cloves are much more tame than raw garlic, making them enjoyable for people who want the flavor of garlic without the bite.
Use garlic confit as a pasta sauce or pizza base layer by smashing the softened cloves into some of the oil. The same treatment makes great garlic bread or toast. I sauté or roast vegetables, chicken, fish, or shrimp in garlic confit. Use a spoonful to top a pan-seared steak or chicken. The oil alone is great in a homemade vinaigrette like this. The cloves alone are perfect on a cheese or charcuterie platter, or alongside a sandwich.
What is Confit?
Confit is a French word meaning to preserve. Vegetables or meats that are preserved in fats or oils, or fruits preserved in sugar syrups are considered confit.
While I won’t take a shortcut in buying broth and stock, I do use pre peeled garlic. I buy the three-pound bags of organic pre-peeled garlic at Costco, and use about half of it to make many jars of garlic confit. I use the rest in my day to-day cooking.
How Should I Use My Garlic Confit?
Here's a brief list of delicious ways to use garlic confit:
Smash some of the garlic cloves into some of the oil and spread it on bread for quick and easy garlic toast.
Smash some together and use is at a simple pizza sauce base. Add your other toppings and bake!
Spoon confit garlic cloves into a small dish and put on your next charcuterie and cheese board.
Saute any vegetable in a spoonful or two of the oil and cloves. Carrots, peas, broccoli and broccoli rabe, greens like kale, chard, and collards are especially great this way.
Add extra flavor to roasted vegetables. Add spoonsful of garlic confit to a sheet pan of chopped winter vegetables-- cabbage chunks, cauliflower, peppers, onions, parsnips, turnips, carrots-- and roast at 425° until done.
Use garlic confit instead of butter in mashed potatoes and/or mashed celeriac.
Add a layer of flavor to your stews from the beginning by searing meats and vegetables in garlic confit first.
Use the oil and some chopped garlic cloves from your confit jar to your next vinaigrette.
Pan sear steaks or chicken pieces in garlic confit.
Add some of the oil and chopped cloves to cooked rice and other grains and beans.
Garlic Confit
Course: Condiments
Cuisine: French
Season: All Season
Cook Time: 2 minutesminutes
Total Time: 2 minutesminutes
Author: Pam Spettel
Garlic confit is a springboard to better cool-weather cooking. Use the tender cooked garlic cloves and flavored oil as a condiment or seasoning to breads, meats, and vegetables, and use the garlic-flavored oil as a start to phenomenal sautees, sauces, and vinaigrettes.
Use a paring knife to rim away the stem end or any blemishes from the peeled garlic cloves. Then place the peeled blemish-free cloves in a saucepan (as many as you want), cover with olive oil, and put a lid on it. Make sure the cloves are covered by at least 1/4 inch of oil.
From here you have two choices: set the saucepan into a 250° oven for two hours, or set it on low heat on your cooktop for about the same amount of time. Gently stir the garlic in the oil every 30 minutes to keep them from browning. Moderate your heat as needed to gently cook the garlic. The aim is to soften the garlic cloves, not to toast or roast them. You will know they are ready when the oil has grown deeply golden and the garlic cloves are fork-tender and somewhat translucent.
Garlic confit is best stored in tightly sealed jars in your refrigerator. The refrigerated oil will thicken and become cloudy. It will return to its beautiful liquid-gold self when set out for about 30 minutes, or you can scoop some out and place it in a dish in a warm spot to hurry it along.
After scooping some out to use, make sure that any garlic cloves that are exposed get covered in oil. If there isn’t enough in the jar for that, simply drizzle in a little more from your day-to-day bottle. The oil creates a seal over the garlic cloves that preserves your jar of gold.
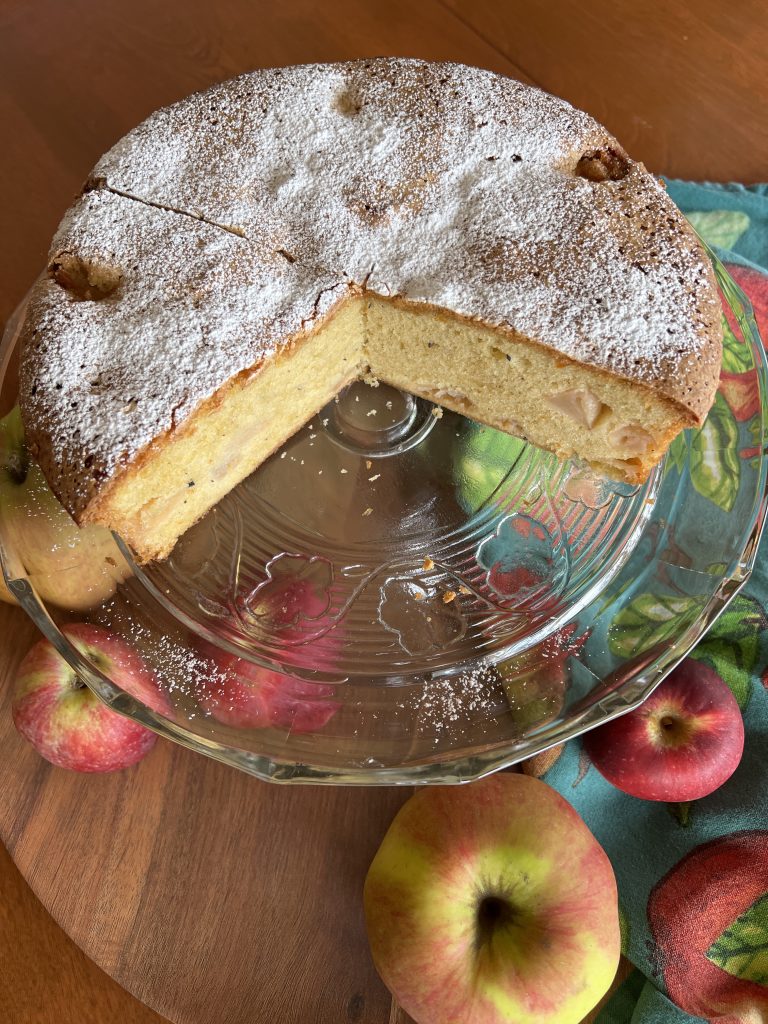
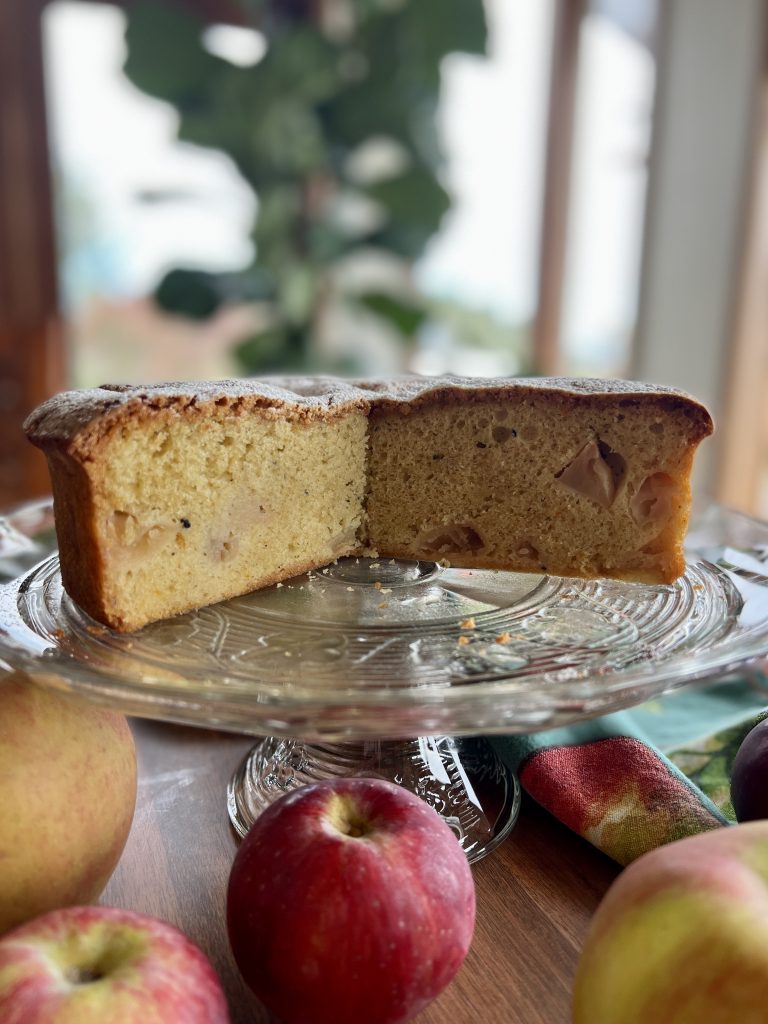
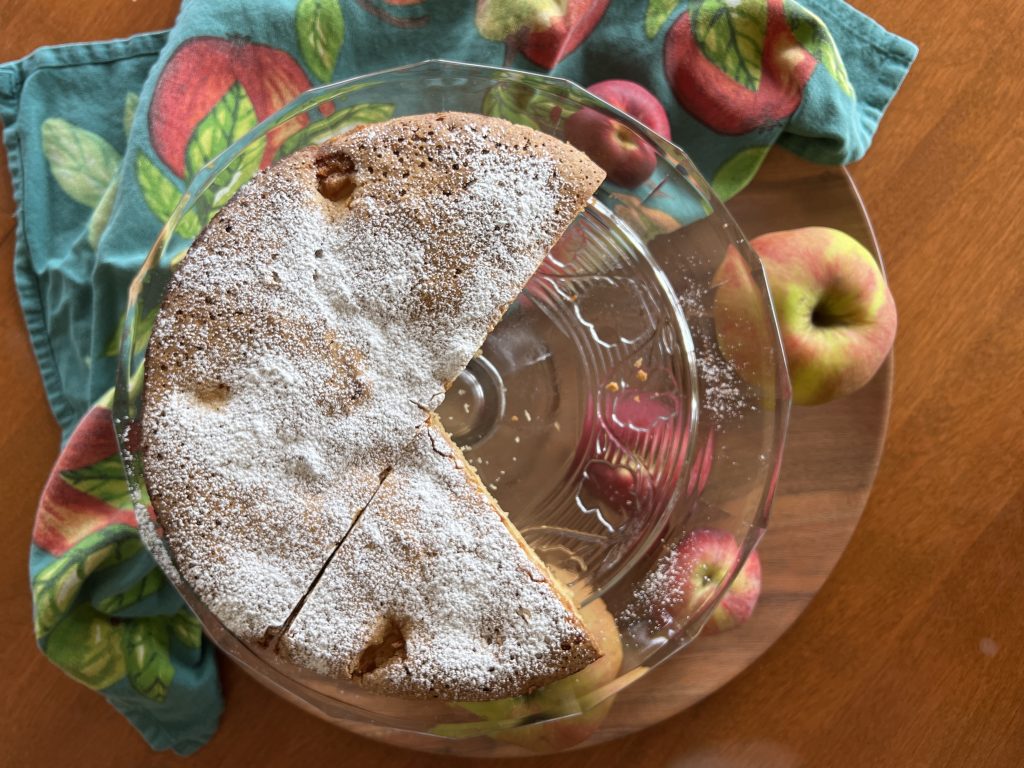
This Apple Olive Oil Cake, of all the rustic cakes I swoon over, is my very most favorite. It can be called rustic merely because it is not adorned in buttercream, an accessory that would only complicate its simplicity. Fragrant olive oil in the batter marries beautifully with orange zest, cracked cardamom seed, and pure vanilla. I am delighted the lack of cinnamon normally found in apple desserts. Am I the only one who tires of overwhelming the pure taste of apple with cinnamon?
What Varieties of Apples are Best for This Cake?
Tom Murray, my friend and orchardist who specializes in apples at his SLO Farm (seasonal, local, organic), suggested that I try his Liberty variety. He said that its sharp flavor would balance the sweet cake, and he was right. Other varieties that are tart and hold up to baking are Pink Lady, Jonathan, Mutsu, and good old Granny Smith. Any of these will be perfect in this apple cake.
Tom sells his apples at the Lane County Farmers Market in Eugene, Oregon. Please look for him there, and try all of his lovely apple varieties.
Extra apples in the batter make it extra moist and extra delicious.
About This Apple Olive Oil Cake
This recipe originated with Rachel Coyle, published by Food & Wine Magazine. I've made it so many times that I've added some of my own riffs. I've found that the batter can easily old 50% more apples than in the original recipe. So in goes 1½ pounds, weighed before peeling and coring, for more appley goodness.
Cakes made with olive oil have become popular for good reason. The texture becomes more like a sponge cake, very moist and tender, but with structure. If you've yet to try the taste phenomenon of the olive oil/sugar combo, you are in for a real treat. A fruity olive oil is great for this, of course. Stonehouse Olive Oil's house blend, my house olive oil, works wonderfully in this recipe. I buy it in 9-liter quantities a few times a year.
Choosing a Pan for this Cake
Rachel Coyle's original recipe says to use a 14-cup Bundt-style pan, and I've learned there are more great pan options for the apple olive-oil cake. A 9" springform pan creates a gorgeously tall round cake; a tube pan makes an even taller cake with a hole in the center that I really like; and I often divvy up the batter between three 6" round cake pans that serve six people each. This is perfect for our smaller household, as the cakes freeze perfectly. So handy! Please note that as of this publication date, Sur La Table is offering a 20% off sale on each of these pans, and on all of their bakeware! Just in time for holiday baking. Sur La Table only sells high-quality products that I always trust.
This post contains affiliate links. When you use these links to buy something I may earn a commission at no cost to you. Product affiliation helps me to keep this site ad-free while providing you with the content you enjoy. I only promote items that I use, like, and trust, or would invest in myself.
Have you joined the 101-Mile Kitchen community? If not, we'd love to have you. You can take care of that right here, and when you do I'll send you my Top Five Tips and Recipes for Cool-Weather Cooking downloadable as a thank you!
Author: Adapted from Rachel Coyle of Food & Wine Magazine
This apple olive oil cake is moist and light, studded with chunks of apple, and fragrant with cardamom, orange, vanilla, and, of course, the olive oil itself. This recipe will have you tossing all others aside, forever and ever. It's that special.
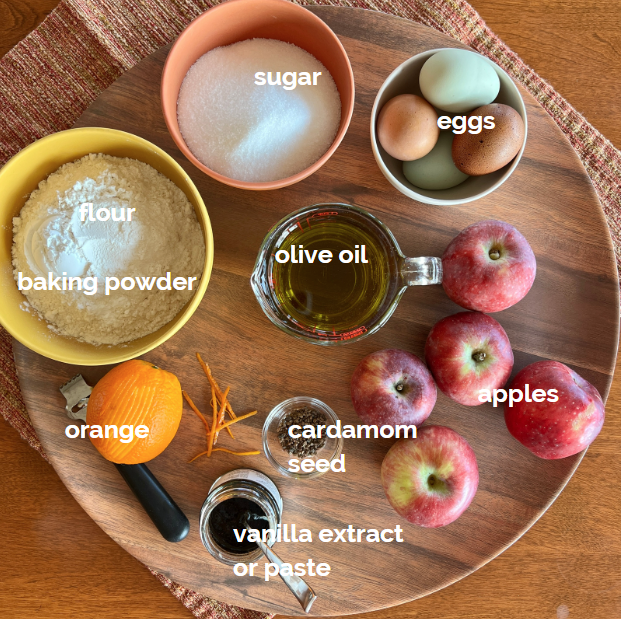
2teaspoons cardamom seeds, crushed in a mortal and pestleor 1 teaspoon ground cardamom
1tablespoon orange zest
2teaspoons pure vanilla extract
1cupextra-virgin olive oil
2⅓cupsall purpose flour, plus more for dusting the pan
1tablespoonbaking powder
1½poundstart firm apples, peeled and diced into ⅓" piecesGranny Smith, Jonagold, Liberty, Pink Lady, Mutsu are all very good for this
2tablespoonspowdered sugar
Instructions
Preheat oven to 350°. Generously grease and flour a 9" springform pan, a 14-cup Bundt-style pan or tube pan, or three 6" round cake pans**. Crush cardamom seeds in a mortar and pestle until finely crushed, if using, and set aside.
Place the granulated sugar, eggs, egg yolks, and salt in the bowl of a heavy-duty stand mixer fitted with the whisk attachment. Beat on medium speed until the mixture is light and fluffy, about 2-3 minutes. Whisk in the cardamom, orange zest, and vanilla, scraping down the sides of the bowl as needed.
With mixer running on medium speed, gradually add olive oil in a slow, steady stream, slowly pour as necessary to ensure oil is fully incorporated. If the oil is pooling, simple stop the flow and continue whipping until it is incorporated, and then continue adding the rest. At this stage, you will have an emulsion that is a bit fluffy, but somewhat thin.
Remove the mixing bowl from the stand. Using a course-mesh strainer or a sifter, sift the flour and baking powder over the egg mixture. Use a rubber spatula to fold the flour mixture in until almost completely incorporated. Add the apples, and fold just until combined. Gently pour the batter into the prepared pan.
Bake in the preheated oven until golden brown and a long wooden pick inserted in the center comes out clean, about 1 hour, turning the pan in the oven about halfway through. Allow the cake to sit 10-15 minutes, then the invert it onto a wire cooking rack. Cool completely, about 2 hours, then sift the powdered sugar over the top. Serve with vanilla ice cream, in a puddle of Creme Anglaise, or whipped cream.
Notes
** Bear in mind that the smaller the pan, the shorter the cooking time. If you decide to use the 6" cake pans, start checking for doneness at the 25-minute point.
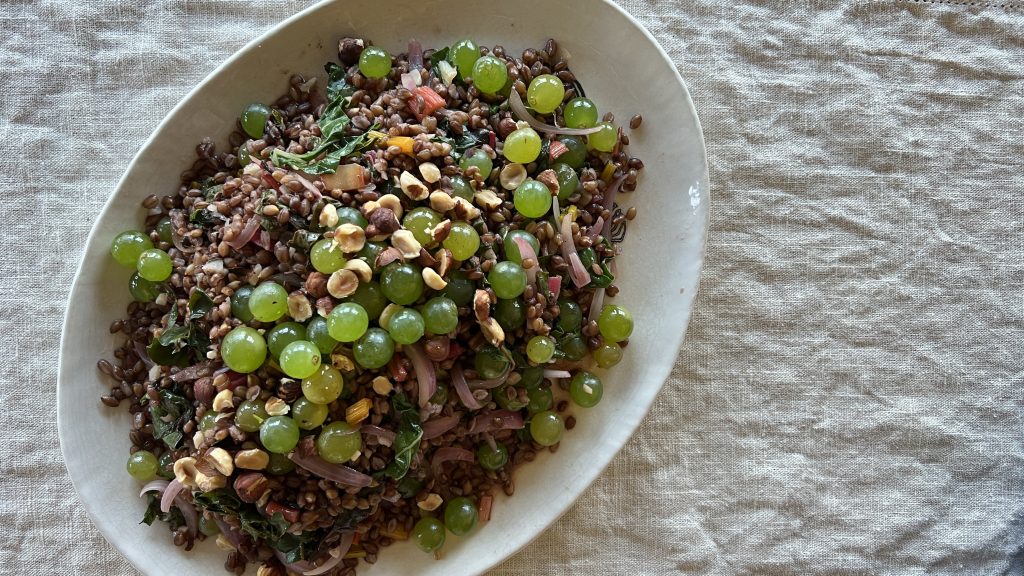
Today I'm teaching my community how to make this wonderful warm autumn grains, grapes, and greens pilaf. Our phenomenal Lane County Farmers Market has hosted a series of cooking demonstrations generously funded by the Upper Willamette Soil and Water Conservation District. Some fabulous local chefs have been smashing it up with their demos all summer long. And today, it's me, a professional home cook sharing with the crowd. I'm extremely honored to be among this group of people, making our local foods more accessible to our community, and adding value to those shopping at our market.
About This Grains, Grapes and Greens Pilaf
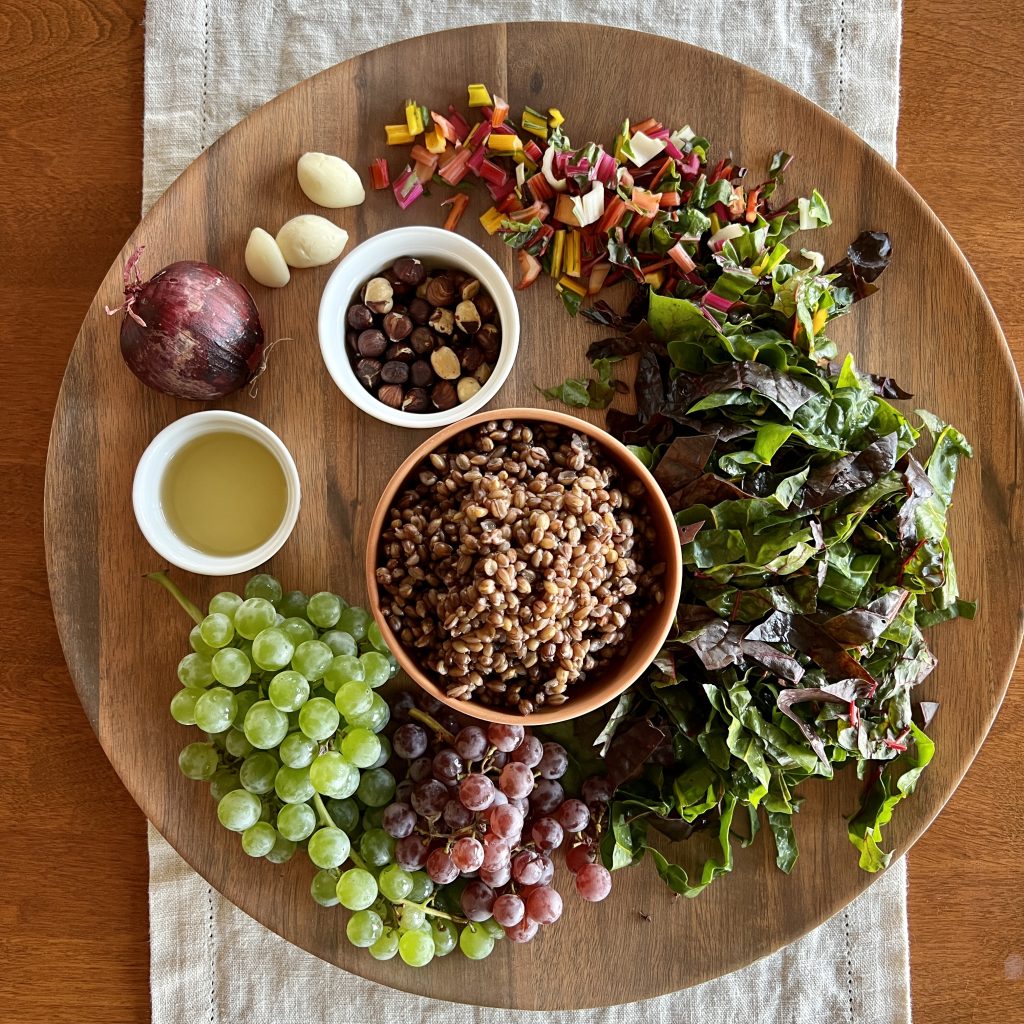
With the exception of olive oil, salt, and pepper, every single ingredient in this dish was purchased at the farmers market. My intent in developing today's recipe was to stuff it full of local ingredients, spotlighting ingredients that abound at the market today and the growers and producers who bring them to us. This very moment. This exact week of this exact season. I wanted my dish to taste like Oregon at this very moment. There is a good chance that many of these ingredients will give you that "terroir", or sense of place, if you live in the northern hemisphere. If you live down under, file this away for your autumn cooking next April.
Grains, Grapes, and Greens is a Seasonally Flexible Recipe
This recipe rendition captures autumn, with grapes coming ripe and wintery greens, still tender and young, just now coming to market. Grains are enduring-- we enjoy them throughout the year. Here are some change-ups you might make with this idea, no matter the season:
Replace the grapes with apples, firm pears, or segmented citrus. In the summer, blueberries, pitted cherries, and diced stone fruit will work wonderfully.
Rotate through barley, wheat berries, farro, freekeh, and the array of colorful rices-- black, brown, red, and purple. They all work perfectly as the base for this type of warm salad or pilaf.
What nuts grow in your area? We're famous for our hazelnuts here in Oregon. As a matter of fact, we grow 99% of the U.S. hazelnut crop. Use whatever nut you have or love. Almonds, pecans, and walnuts are equally good here. Even pine nuts, really a seed, not a nut, would be wonderful.
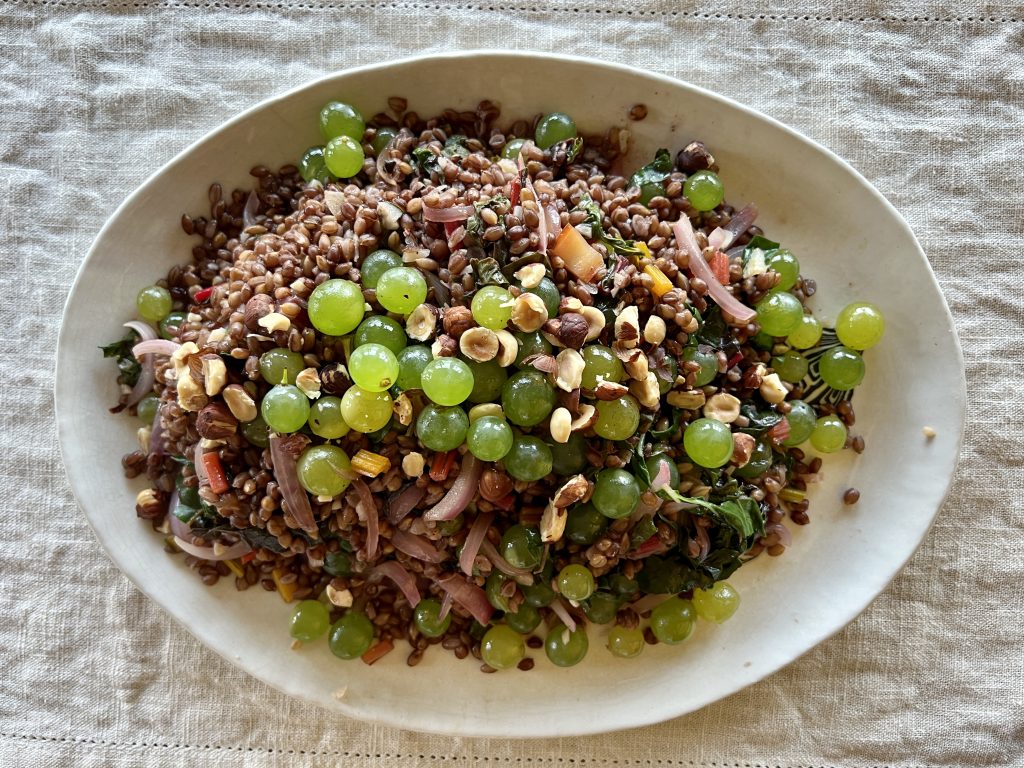
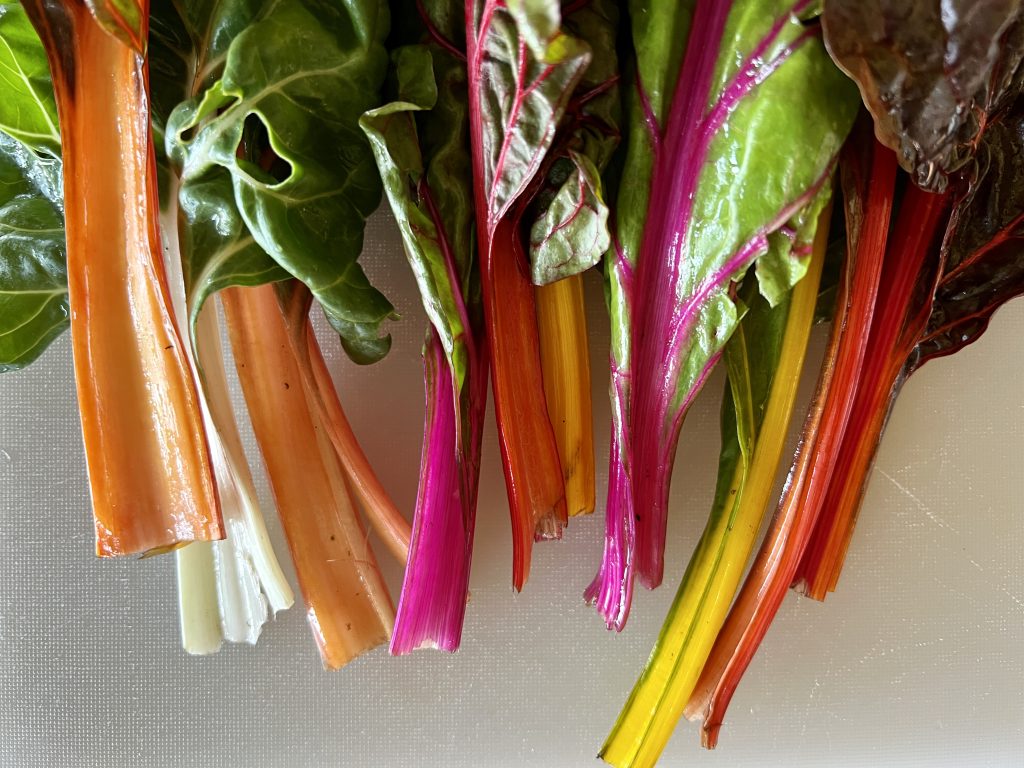
Whatever hearty, sauté-able green you can put your hands on would be fantastic. Kales, chards, collards, mustards, dandelions, nettles, and arugulas are the first ones that come to mind. Swap at your whim, or whatever is available. Today I'm using rainbow chard-- look at its vibrant colors!
Rainbow chard adds some dazzling color to the pilaf.
Have you joined the 101-Mile Kitchen community? If not, we'd love to have you. You can take care of that right here, and when you do I'll send you my Top Five Tips and Recipes for Cool-Weather Cooking downloadable as a thank you!
Warm grains like barley, farro, or brown rice, gently sauteed greens, and juicy just harvested grapes and a quick in-the-skillet vinaigrette make this dazzling Pacific Northwest-centric pilaf sparkle. Or, use it as a warm salad. Either way, healthy never tasted so good.
Cook the grains pasta style: Rinse the grains and place them in a medium saucepan and fill the pan with at least 6 cups of water. Add a healthy pinch of salt and stir. Bring to a boil, stir again, and adjust the heat to a slowly bubbling simmer. Cook for 45 - 60 minutes or until the barley is plump and tender. Drain well.
While the barley is simmering, wash the greens and remove the stems. Slice the stems into ½" pieces. stack the leaves on top of each other, and roll the stack into a long cigar shape. Slice through the roll first lengthwise, and then into 1" pieces.
In a large skillet, warm the olive oil over medium heat. Add the shallot and garlic and saute for 1-2 minutes. Add the cut greens to the pan and saute, stirring every minute or two, until the greens have become tender and soft. Salt and pepper the greens to taste (about 1 teaspoon salt, 1/3 teaspoon pepper).
Stir in the warm grains and the vinegar. Taste and adjust the seasoning if you'd like. Remove the pan from the heat. Stir in about half the grapes.
Place the warm pilaf in serving bowl or platter. Top with the remaining grapes and the crushed hazelnuts. Serve warm or at room temperature.
Notes
+ Jane Touzalin of The Washington Post says it best."Hulled barley, considered a whole grain, has had just the indigestible outer husk removed. It’s darker in color and has a little bit of a sheen. Pearled barley, also called pearl barley, is not a whole grain and isn’t as nutritious. It has lost its outer husk and its bran layer, and it has been polished. It has a lighter, more matte appearance."They can be used interchangeably. However, hulled barley is a more nutritious whole grain and also holds its shape better is soups and stews. Hulled barley takes up to an hour to cook, whereas the pearled kind cooks in about 30-45 minutes.
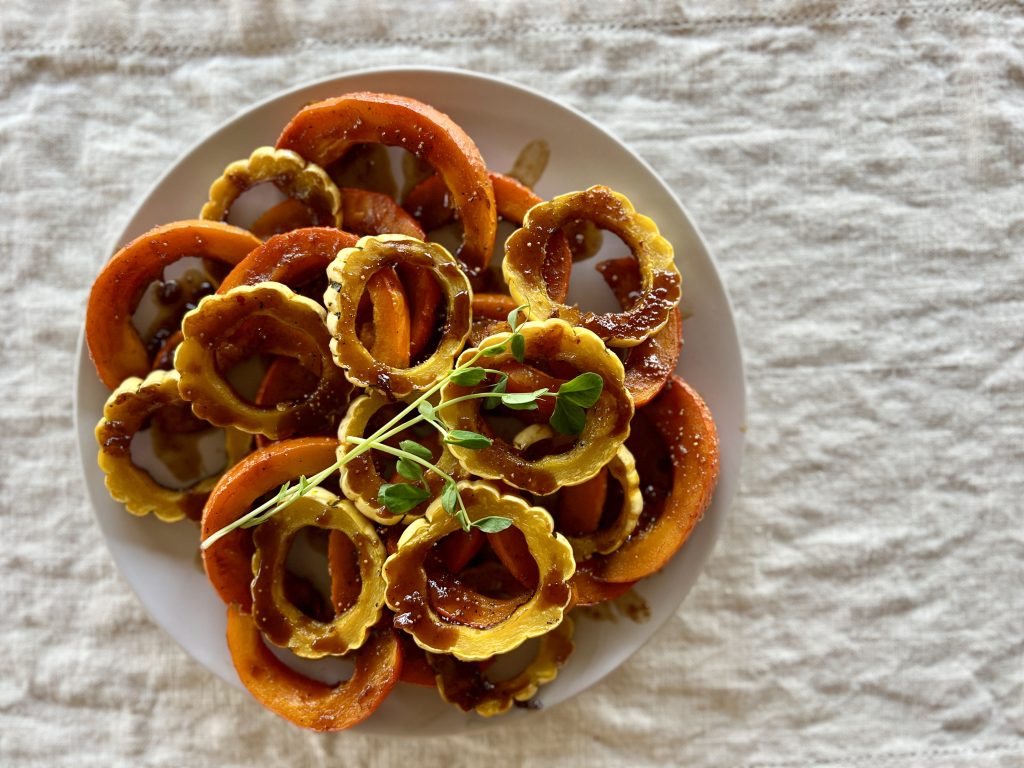
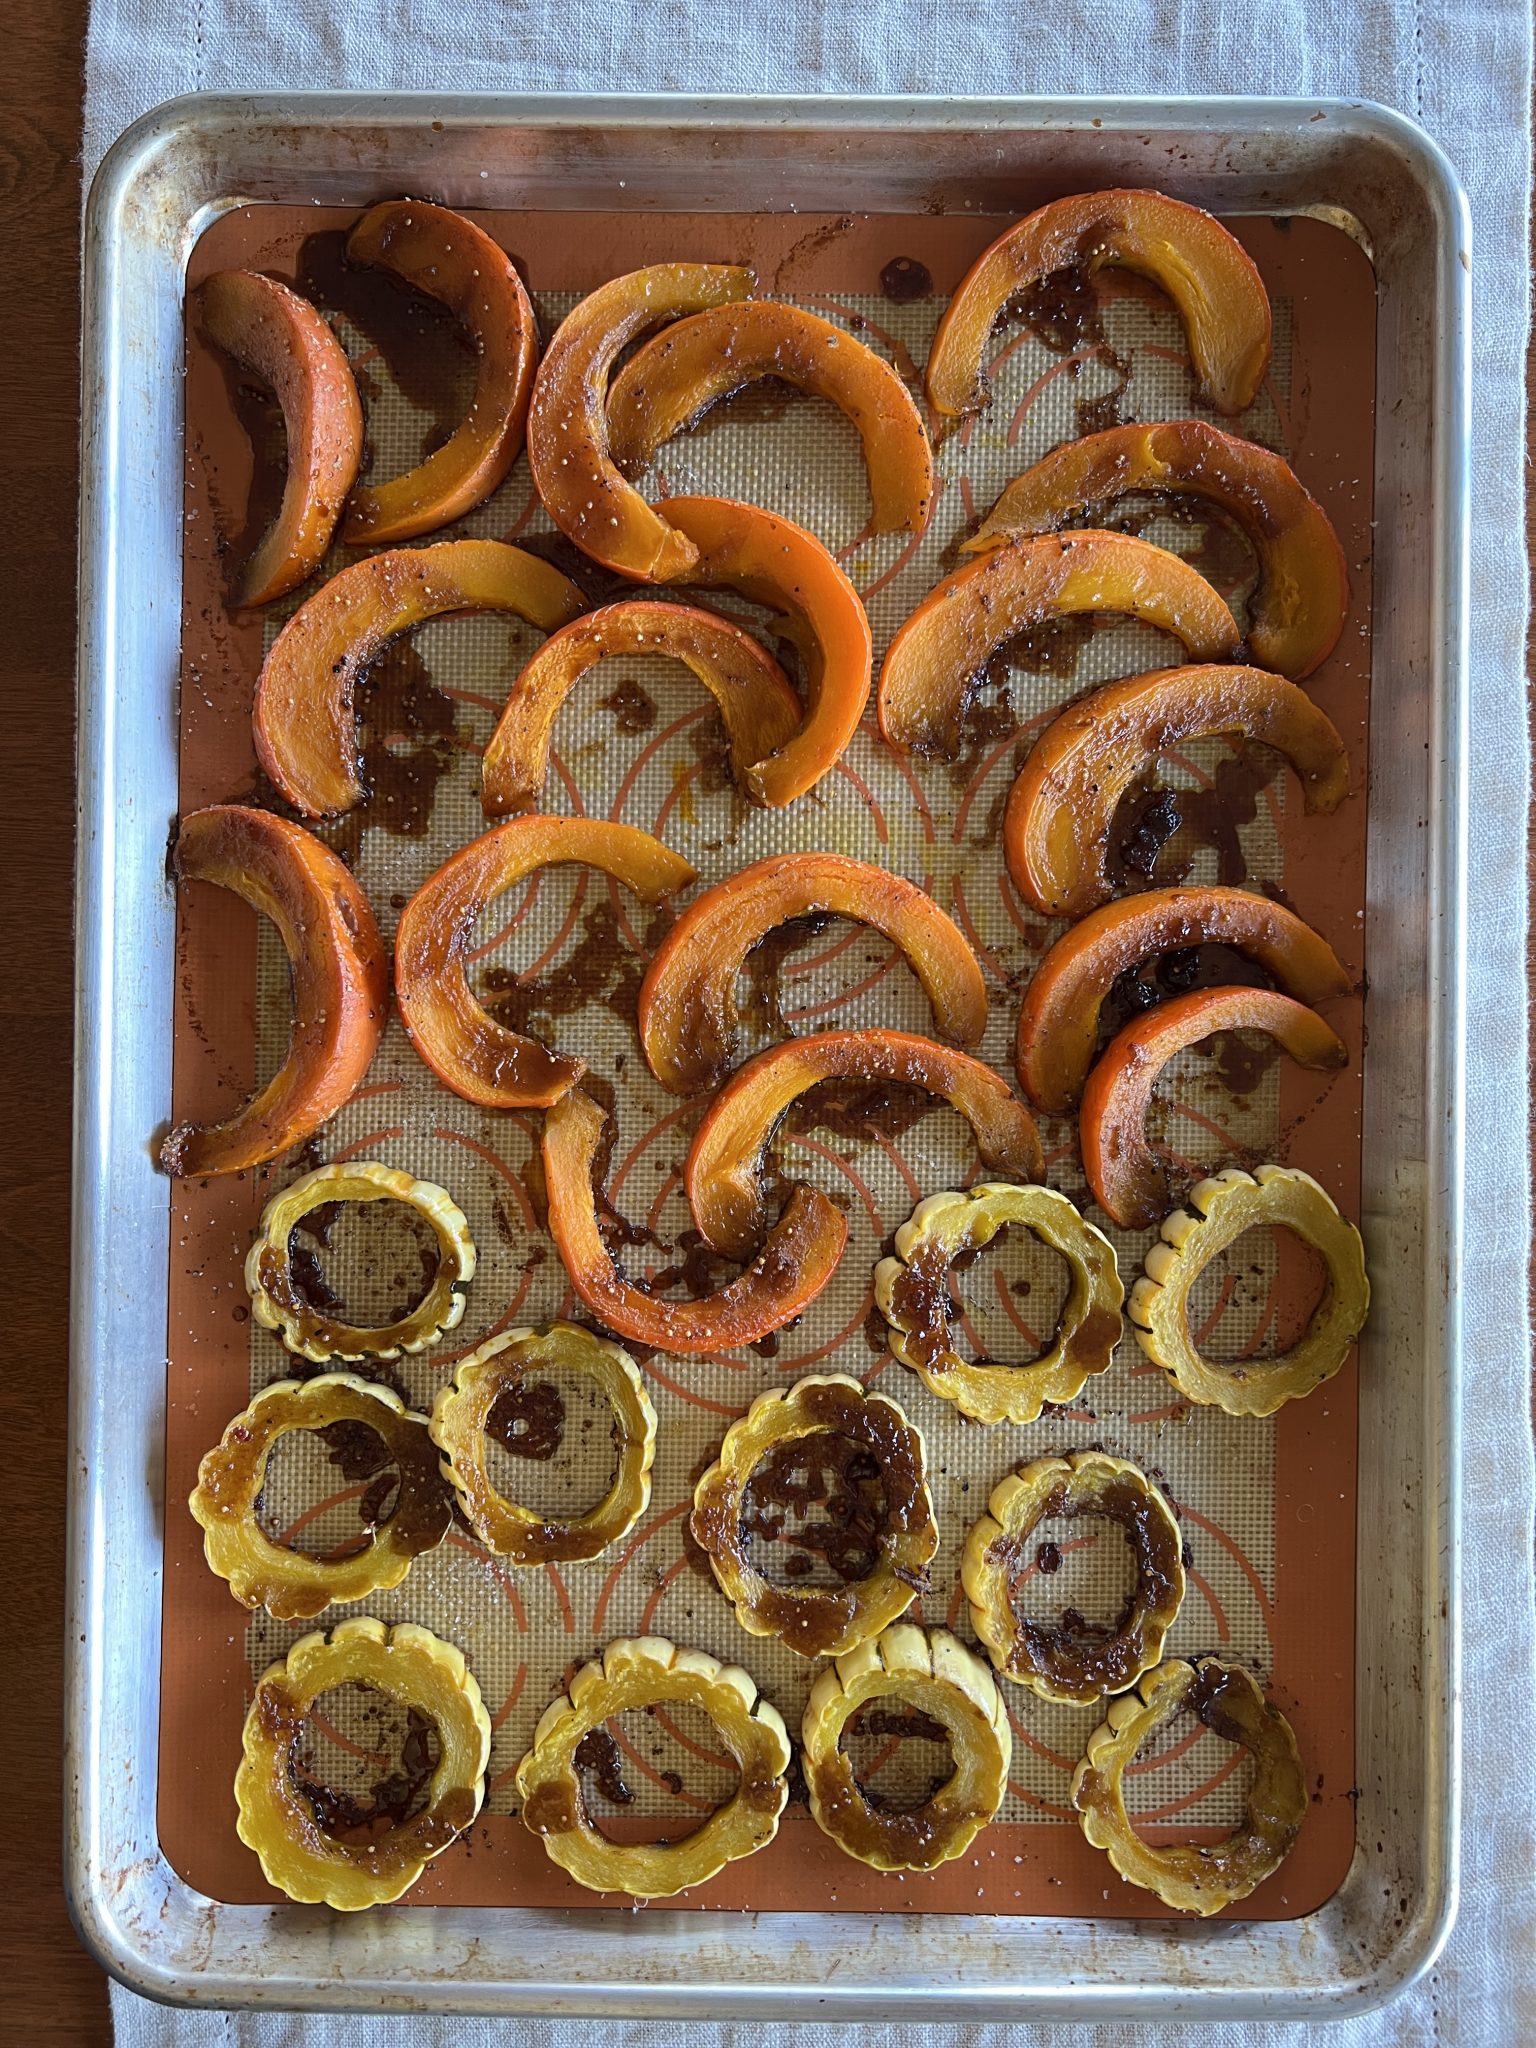
Is it possible to be glum in the presence of orange things, like this autumn sunset-hued roasted fig-glazed winter squash? As autumn comes knocking, this three-ingredient wonder is a cheery and scrumptious welcome to the cool-weather cooking season.
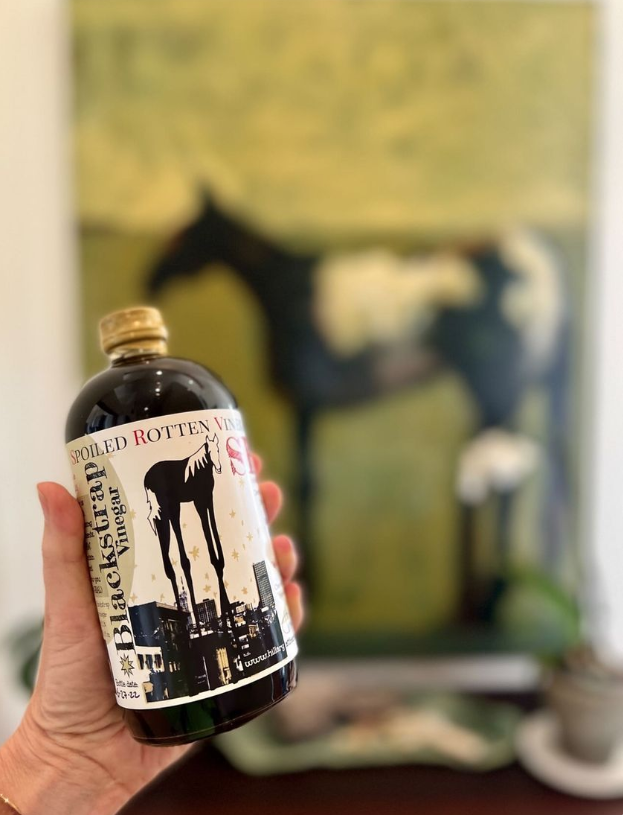
Like an oven being lit, my imaginative cooking fires are lit by trying new ingredients. This little recipe started when I was recently introduced to blackstrap vinegar. At our farmers market, I met Klee and Cherie Wiles-Pearson of Spoiled Rotten Vinegar who make, among other vinegar, the award-winning blackstrap vinegar used in this dish. They appropriately call it "One American's retort to Italy's aged Balsamic." Blackstrap molasses makes it full-bodied, rich, and sweet, and it works in most applications where one would normally reach for Balsamic. One sip of this living food and I am forever hooked.
Klee ferments and bottles Spoiled Rotten Vinegar's distinctive vinegars. Cherie designs the beautiful, information-filled labels that highlight the work of local artists. The charming Spoiled Rotten Vinegar bottles are not made to be hidden behind cupboard doors.
Ways to Use Your Fig-Glazed Squash
Besides straight-up out of the oven, here are other some ways to put this fig-glazed winter squash to work from now until spring.
Lay the roasted rings over a bed of cooked barley, farro, wild rice, quinoa, etc. that has been mixed with olive-oil-cooked onion and perhaps chopped parsley. Drizzle the whole thing with the glaze.
For a salad, put the roasted squash on a bed of slivered kale that has been tossed in a spoonful of the glaze and sprinkle on chopped toasted hazelnuts.
Tuck halved or quartered figs in and around the squash for a lovely fall touch.
Utilize the heat of your oven and make fig-glazed squash alongside a roasted chicken, turkey breast, pork loin, or pork tenderloin. They are delicious together, and energy efficient this way!
Try the glazed squash in a rice bowl, along with some browned tofu or leftover protein.
Tips for Preparing Winter Squashes
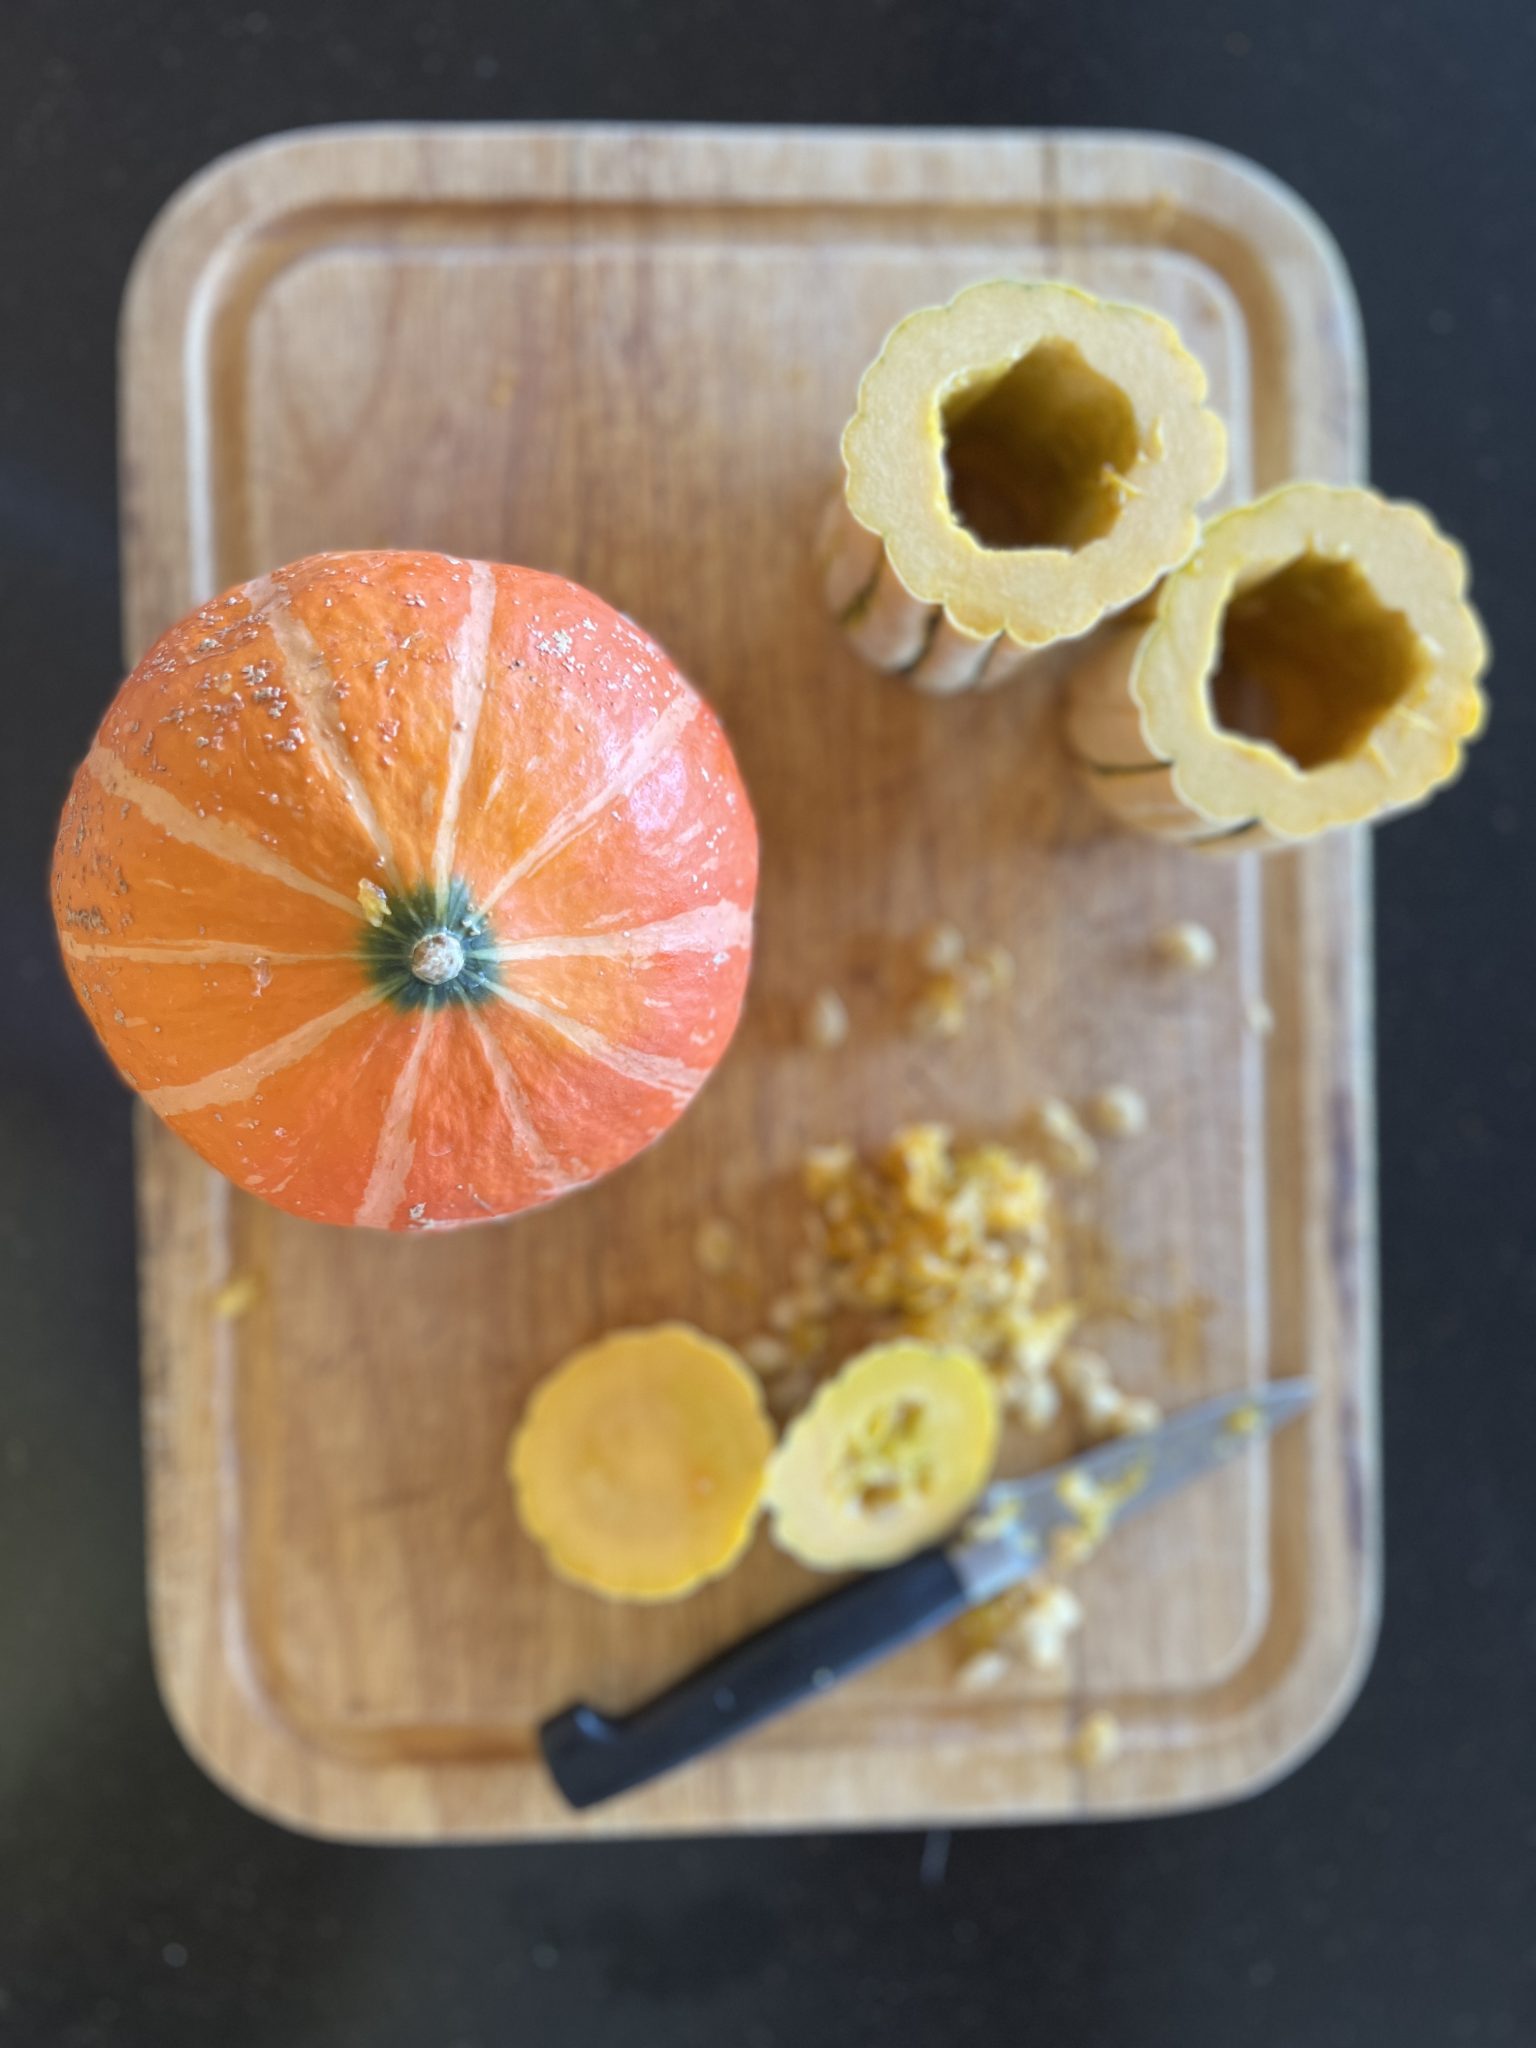
What variety of winter squash wouldn't be lovely in this recipe? I am wildly fond of the Red Kuri variety, not only because of its red-orange luminosity, but also because it cooks to a silky texture without falling apart. Kabocha squash is similar. And don't forget Delicata, which offers a yellow contrast and is a great little squash, too. Except for butternut, none of the varieties listed in the recipe below require peeling. Their skins soften equally to the flesh when roasted.
Scrub winter squash and then microwave it for 2 minutes or so on high power before cutting into it. This allows the knife to slide through the squash more easily. I think it makes scooping the seeds out a little easier, too.
Making the Fig-Glazed Winter Squash
Above all, don't give up on this recipe if you can't find blackstrap vinegar. Dark Balsamic is a worthy substitute.
Where are fig jams, spreads, or butters found? Many grocery stores that have a gourmet-style cheese section carry fig jam, spread, or butter. Ask there. Trader Joe's fig butter is good and is generally the most affordable. I keep a jar or two of it around for cheese boards and cheesy paninis. You may also find it in the jams and jellies section of your grocery. This is the fig spread I'm using at the moment, and it is excellent.
The density of the glaze is dependant on the particular fig jam, spread, or butter you use. If your glaze is so thick that it doesn't drizzle off your mixing spoon, thin it with a tablespoon or so of water. You want it just loose enough to drizzle in a thin ribbon. If you happen to thin it too much, just reduce the fig/vinegar mixture back down in a small saucepan over medium heat for a few minutes.
Save any glaze leftovers and use it in a salad dressing. With a little olive oil added, it is terrific on a leafy salad with apples, chopped dried figs, and some toasted nuts.
Store leftover fig-glazed squash tightly covered in the fridge. Then rewarm it gently in a microwave oven or a toaster oven.
This post contains affiliate links, including but not limited to Amazon. As an Amazon Associate I earn from qualifying purchases. When you use these links to buy something I may earn a commission at no cost to you. Product affiliation helps me to keep this site ad-free while providing you with the content you enjoy. I only promote items that I use, like, and trust, or would invest in myself.
2poundswinter squash, one variety, or a colorful mixred kuri, delicata, acorn, butternut, kabocha, Hubbard, etc. (this was one medium delicata and one small red kuri)
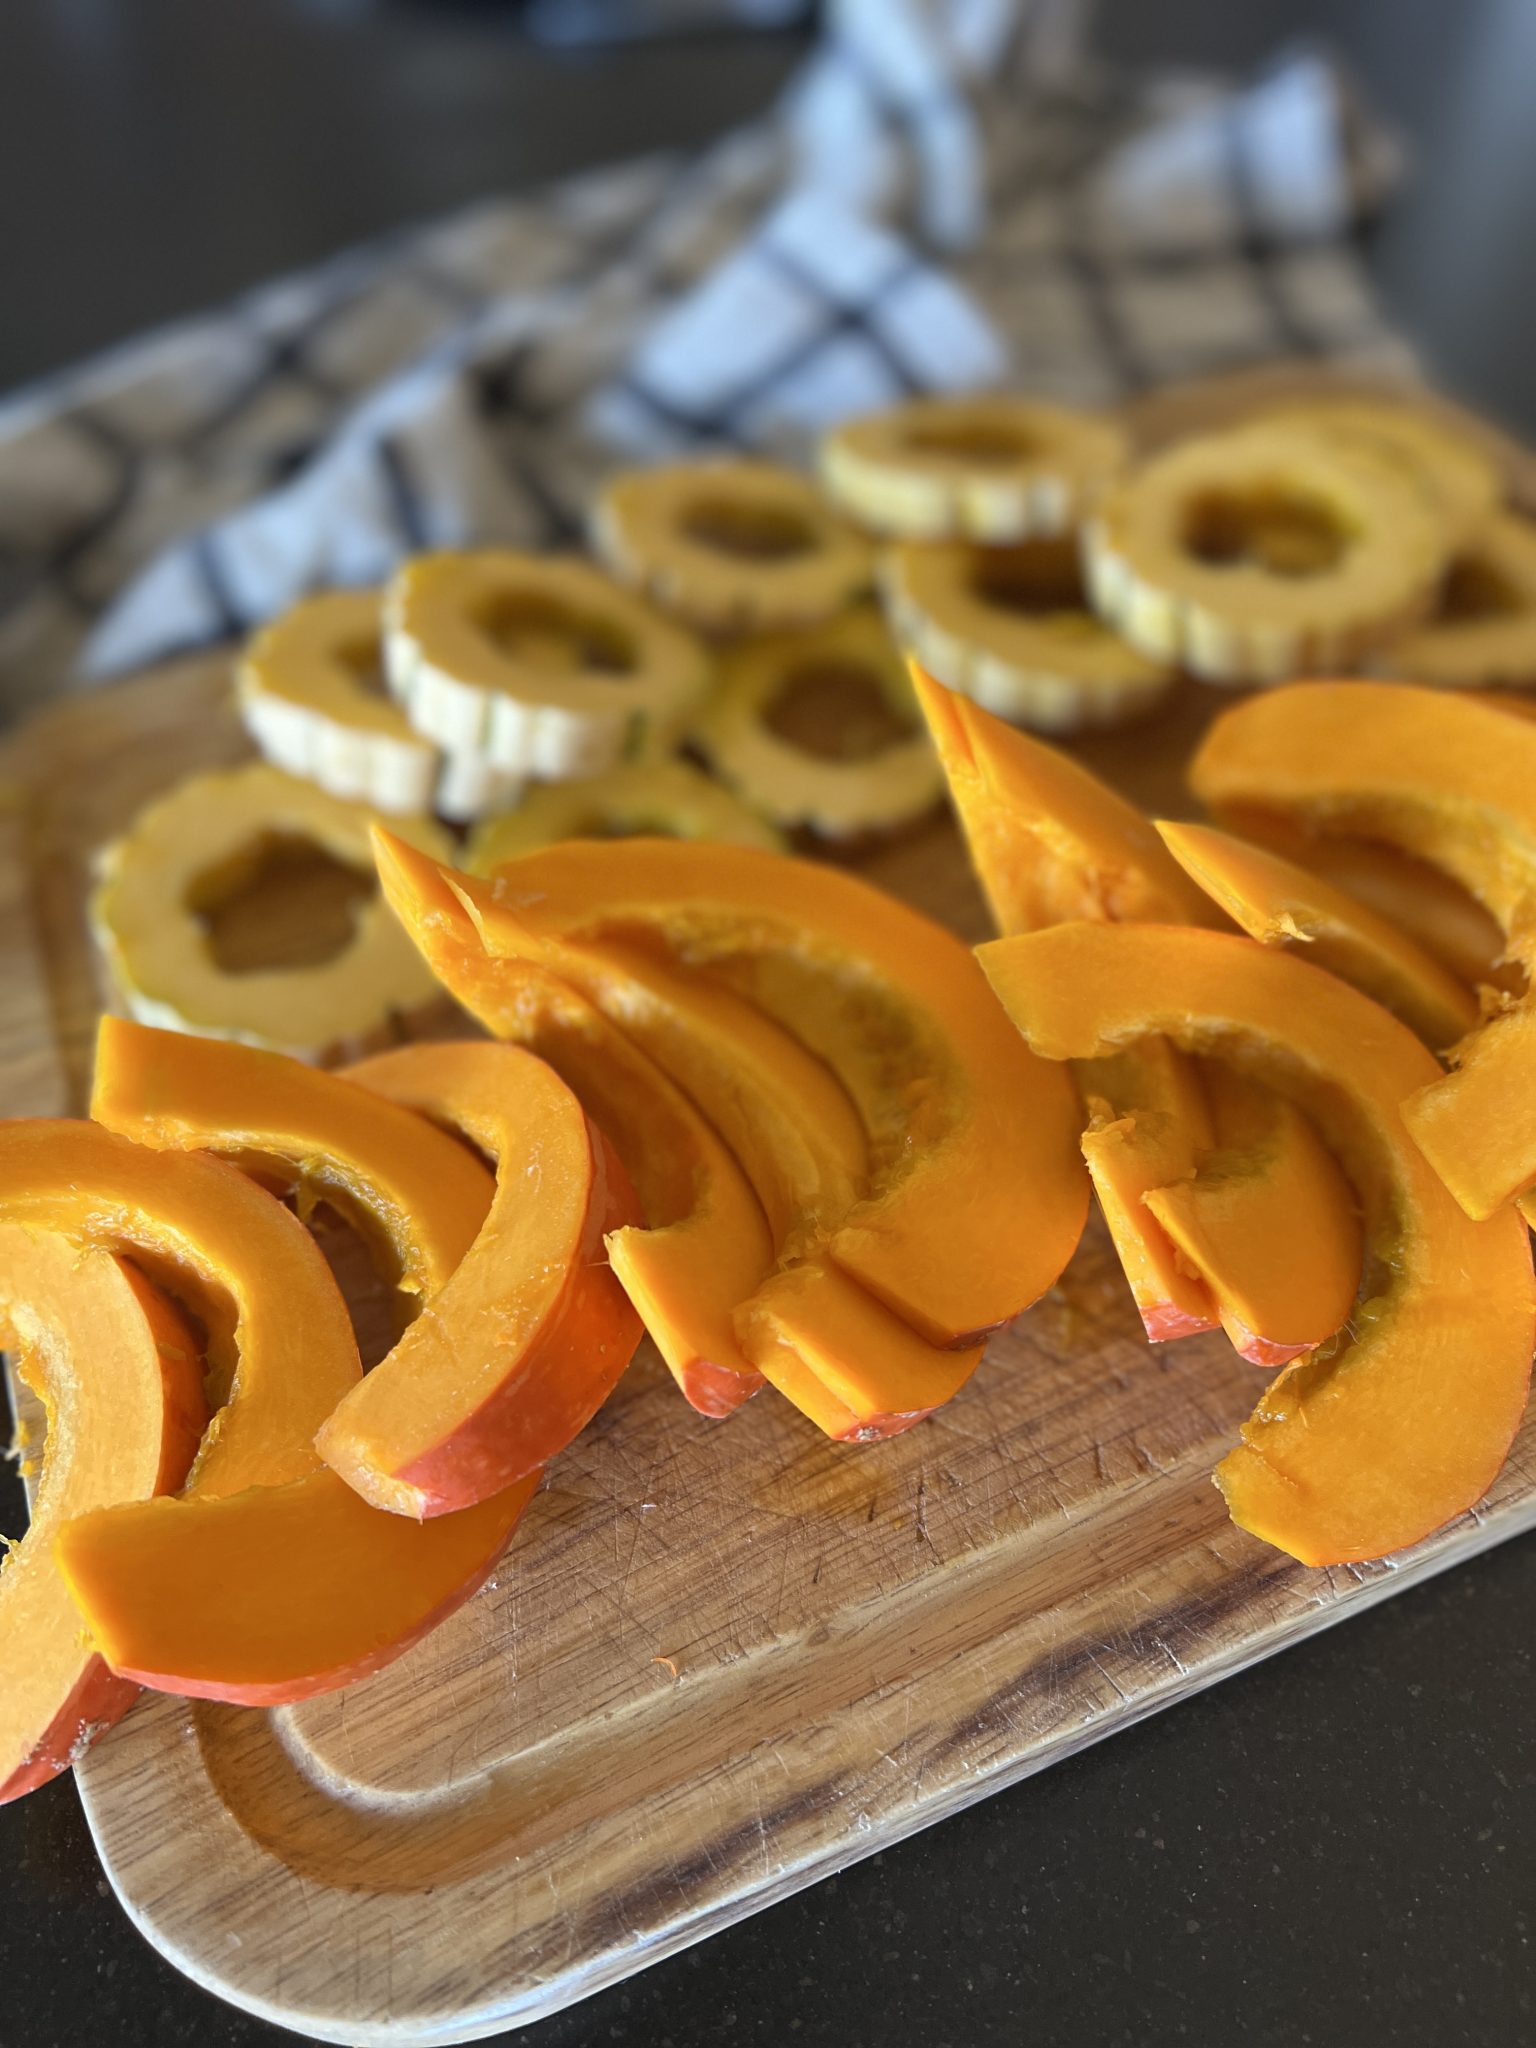
Preheat the oven to 400° convection roast. Scrub the squash, cut them in half, and remove the seeds. Slice the squash into ½" slices. In the case of Butternut squash, slice the sold neck pieces in half. Lay the squash slices on a silicone mat-lined or parchment-lined baking sheet. Drizzle about 1 tablespoon olive oil over the squash, and lightly sprinkle with salt and pepper. Roast for 10 minutes.
While the squash is beginning to roast, mix the fig jam, blackstrap or balsamic vinegar, salt and pepper in a small bowl. Add up to 1 tablespoon of water to the mix to make it thin enough to drip from the spoon.
After the squash has roasted for ten minutes, bring it out of the oven and flip each piece over. Drizzle the slices with about half of the fig glaze mixture. Reduce the oven temperature to 375°, and roast for another 10-12 minutes, until the squash is browned in spots, fork-tender and somewhat translucent in color, and the glaze has thickened. Watch this closely toward the end so the glaze doesn't burn.
Arrange the squash rings and/or slices on a serving platter. Drizzle a few more spoonsful of the reserved glaze over the top, and serve. A green garnish (like parsley or microgreens) makes the colors really pop! Leftovers store nicely in a covered container in the refrigerator.
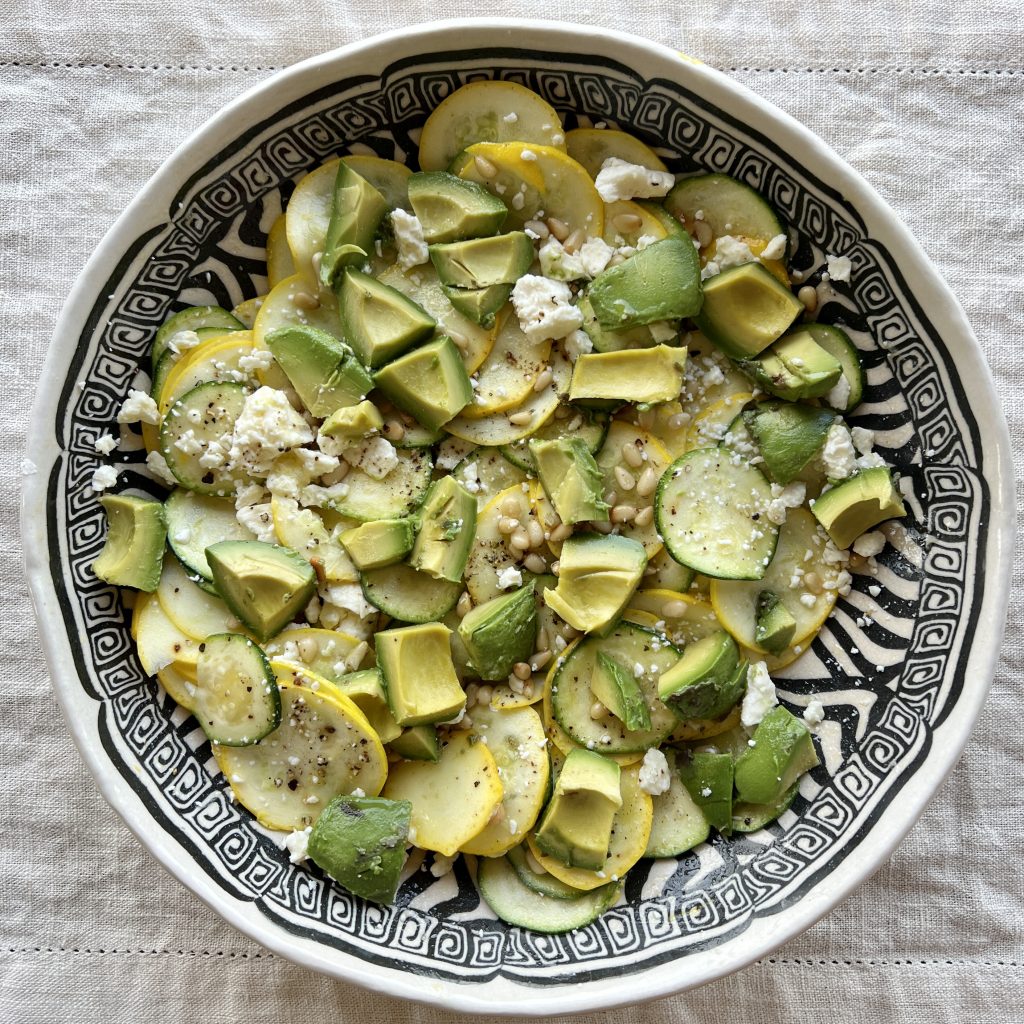
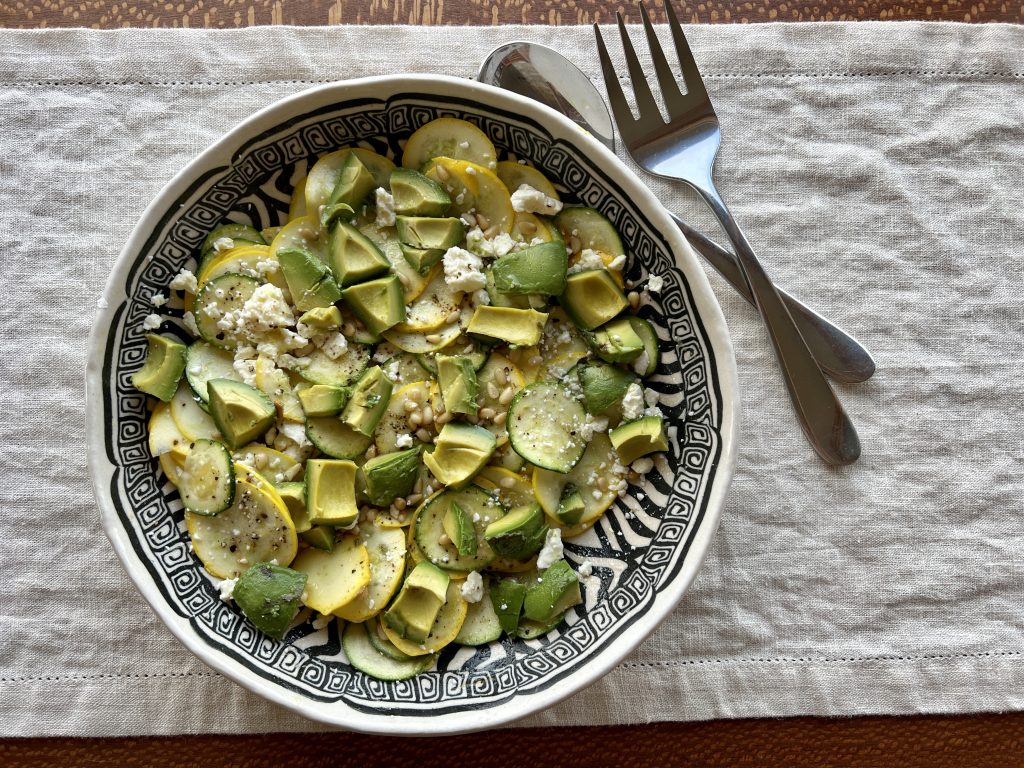
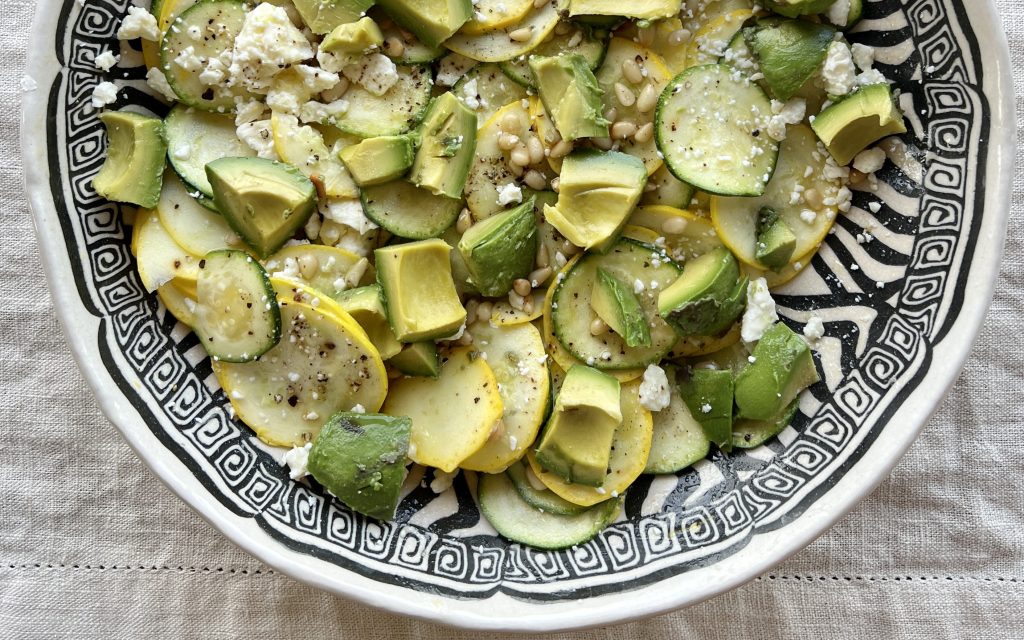
Zucchini has never inspired me much, until this summer, and it is this great one bowl Lemon Feta Zucchini Salad I have to thank for it. It's such a simple salad, but the flavors come together in a big way. Lemon juice and zest offer a bracing acidity and zip, feta adds a salty creaminess, and pine nuts offer a grounding buttery, component. Big cracks of black pepper add a ton of character. Mix it all together in one serving bowl-- so efficient and tidy! This salad is delightful with a multitude of foods, especially anything grilled, or all on its own.
Let Lemon Feta Zucchini Salad Transition You to Autumn
The autumnal equinox is only 16 days away, but zucchini will be with us for yet a while. Nearly all applications (except, maybe, a chocolate cake with zucchini hidden in it) are better with smaller young zucchini. However, don't be afraid to use the big boys of early autumn in this dish. The bigger squashes will need lengthwise halving or quartering and seed removal, but will tenderize nicely with a little marination from the dressing.
Bonus Recipe for an Easy Autumn Dinner: Roasted Pork Tenderloin
Many people tend to get really busy as September gets underway, and this speedy one-bowl lemon feta zucchini salad takes about 15 minutes to make. Snuggle it next to a sliced roasted pork tenderloin for a complete meal in 30 minutes flat. The leftovers will make a nice lunch the next day.
Here's how I'll sequence it: Preheat the oven to 425°. Wipe the tenderloin dry with a paper towel and generously salt and pepper it. In a small bowl, mix two tablespoons Dijon or grainy mustard, 2 tablespoons honey, and 1 teaspoon onion powder, if you have it. Spread half the mixture all over the pork tenderloin, place it in a large cast iron skillet or on small baking sheet, and roast it in the hot oven for 16 to 22 minutes. It should feel firm but with some give when you press it with your finger. The internal temperature should be between 140°-145°. (I remove mine from the oven at 140° to ensure it is juicy, as the temp will raise another 5 degrees while it rests.) Allow the tenderloin to rest under a foil cover for ten minutes. Slice and serve with the remaining half of the mustard sauce.
While the tenderloin is roasting, make the zucchini salad except the garnishes. Set it aside. Once the roast is sliced, give the salad a last toss, top it with the garnishes, and voila! Dinner is served.
Making the One-Bowl Zucchini Salad
The batch you see in these photos uses a mix of yellow and green zucchini, but one or the other delivers the same goodness if that's what you have. Slicing it thinly but not too thinly lets the slices hold up to a stir. A thickness of about 1/8" is your aim. The zucchini will absorb your nice dressing without wilting at this thickness. This is the tool I love to use to get even, quick slices.
A heavy dose of cracked black pepper really makes this dish, so don't hold back. Fresh basil and avocado are optional but delicious additions, but not necessary. If you have them use them; if not, don't worry.
Add the rest of the ingredients directly to the bowl without dirtying a single measuring cup or spoon. This is truly a one-bowl wonder of tidiness!
A note on toasting pine nuts: I wish I had a dollar for every time I've burnt a batch of pine nuts. Kitchen multi-tasking can be a detriment when it comes to nuts. I used to put them on a small baking sheet and pop them into the toaster oven for 6-8 minutes. Sometimes they turned out perfect, other times like mini charcoal briquets. Please take my advice and take the very few minutes it takes to toast them in a small skillet over medium heat. Shake the pan often to let them toast evenly. Stay right there! Notice their change in color and aroma. By all means, do not walk away from the pan. Relax and hang out a minute. Toasting nuts is a definite Be Here Now task.
This post contains affiliate links. When you use these links to buy something I may earn a commission at no cost to you. Product affiliation helps me to keep this site ad-free while providing you with the content you enjoy. I only promote items that I use, like, and trust, or would invest in myself.
Have you joined the 101-Mile Kitchen community? If not, we'd love to have you. You can take care of that right here, and when you do I'll send you a free Taste of Oregon appetizers recipe downloadable as a thank you!
One-Bowl Lemon + Feta Zucchini Salad
Course: Main Dish, Salad
Cuisine: American
Season: Bounty (August - October)
Dietary: Egg-Free, Gluten-Free, Vegetarian
Preparation: Fast + Easy
Total Time: 15 minutesminutes
Servings: 2as a main, 4 as a side
Author: Pam Spettel
An exceptionally flavorful way to enjoy zucchini, this one-bowl wonder is a great transition to autumnal eating.
1poundyellow and/or green zucchiniabout 2 medium zucchinis
1largelemon, zested and juiced
3tablespoonsextra virgin olive oil
1clovegarlic, grated
¼cuppine nuts, toasted
⅓cupfeta, crumbled or in small cubes
lots of freshly cracked pepper
flaky salt, to taste
1avocado, cubed or sliced (optional)
2tablespoonsfresh basil, torn into small pieces (optional)
Instructions
Slice the zucchinis to about an ⅛" thickness directly into a 2-quart serving bowl. (A mandolin really helps here.) Sprinkle the lemon zest and juice and olive oil over the zucchinis. Grate the garlic clove over the top. Give it a good heavy grind of fresh black pepper, and a few generous pinches of salt. Mix together gently but thoroughly with your hands.
Add half the toasted pine nuts, feta and fresh basil (if using) and mix again.
Arrange the slices in the bowl to look pretty-- seperate them and spread them around a bit. Sprinkle the remaining pine nuts and feta on top. Give everything another good grind of black pepper and another pinch of salt. Top with avocado slices or cubes, if you are using them. Serve. Store leftovers in the fridge for 1-2 days.
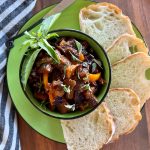
Oregon-style smoky caponata is my attempt to replicate a most memorable caponata I once had at the historic James Beard awarded Nick's Italian Café in McMinville, Oregon. Nick's caponata (a sort of Sicilian version of ratatouille) is made in a wood-fired oven that imparts a lovely smoky note not typical to caponata. I think of it every year at this time, when tomatoes, eggplants, and peppers are at their seasonal peak. This year I decided to make it at home, even without a wood burning oven of my own.
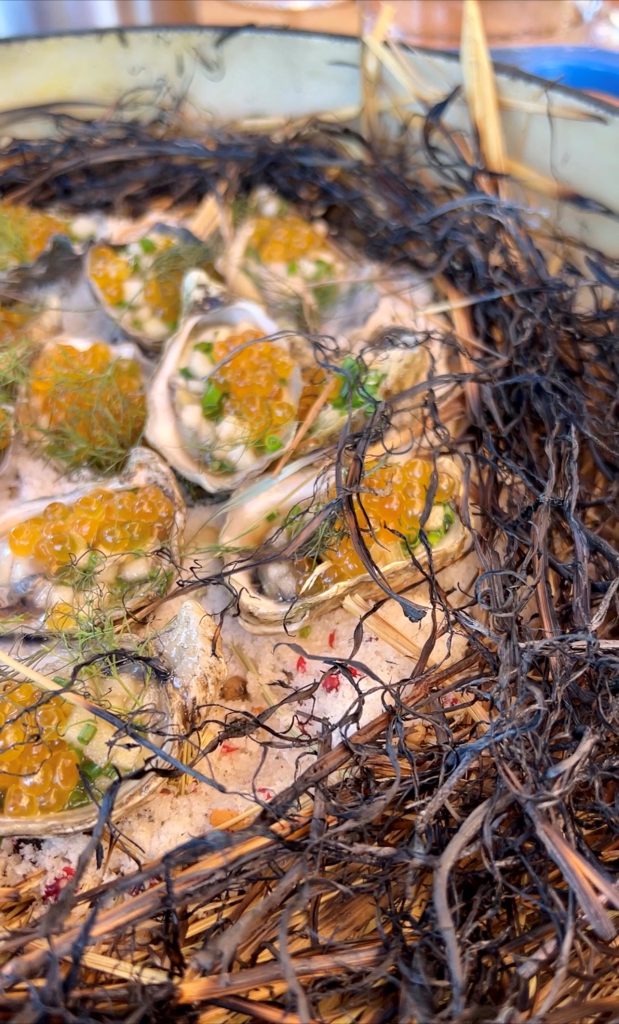
Pan-smoked oysters at King Estate
The idea of how to pull this off, however, came from another Oregon restaurant. We recently ate at King Estate Winery Restaurant, where a fresh oyster dish came in a covered Dutch oven in which hay from their farm encircled the oysters, was lit, and then quickly covered before being whisked tableside. We erupted in happy sighs of awe when the lid was removed, the smoke puffed out, and the gently smoked raw oysters were revealed. The aroma was incredible and the food inside was a stunning surprise.
I thought-- Hey! I mean, hay! I'm an Oregon hay farmer! I've got tons of that stuff. What could I smoke? How about a caponata like Nick's?
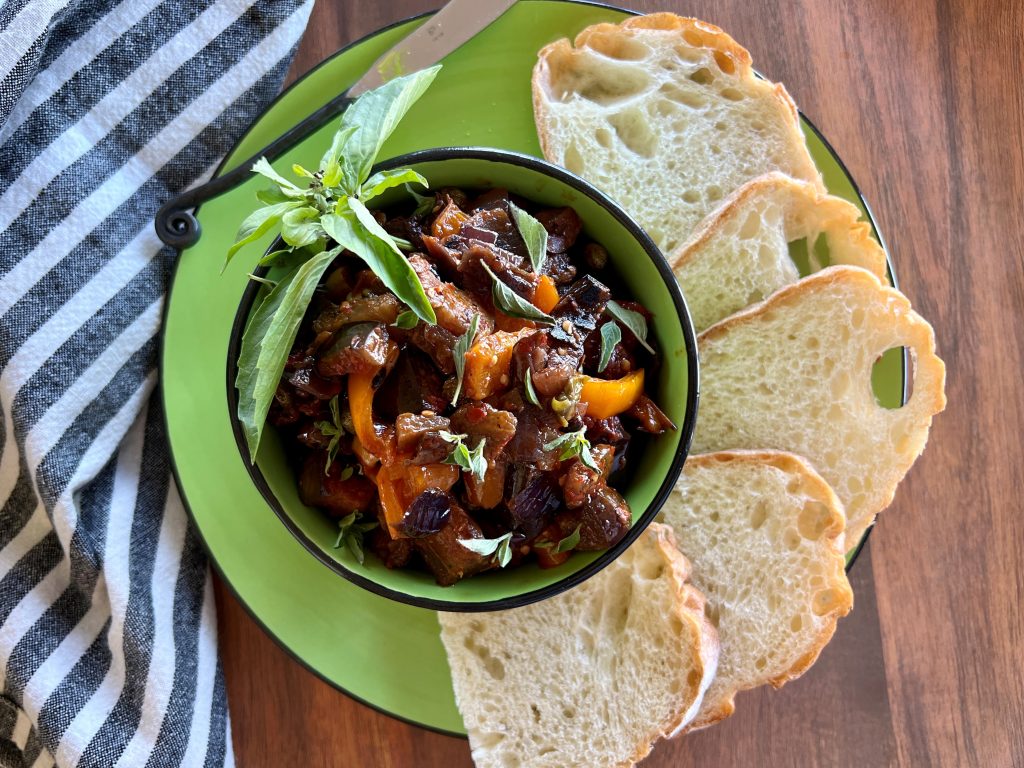
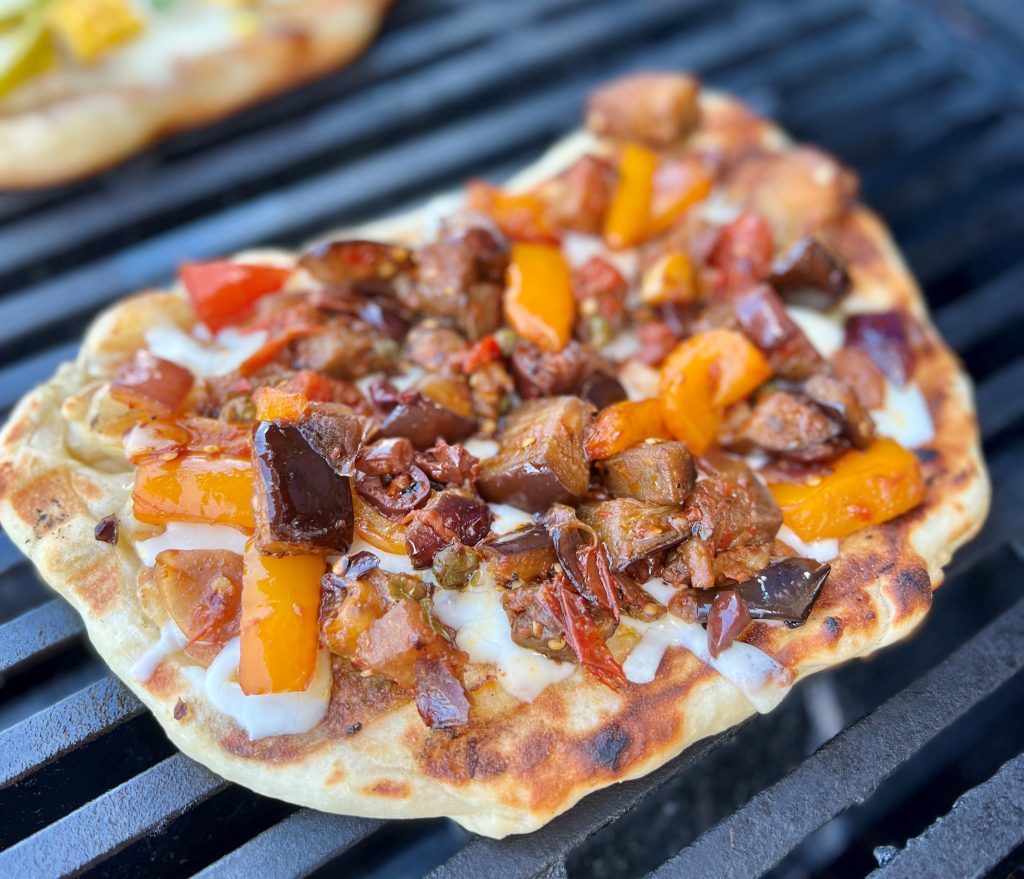
How to Use Oregon-Style Smoky Caponata
Caponata makes a flavorful summer bounty bruschetta. Why not pile it into a bowl, surrounded by the toast for an interactive dish people can build themselves? It's also a great all-in-one pizza topping. Or, use it as a relish on a cheese and charcuterie platter. To change up any leftovers, blitz it into a smooth paste for a dip for flatbread, a sandwich spread, or pizza sauce base.
My most favorite way to use caponata might be in pasta. Caponata with nearly any pasta, with a scoop of pasta water and more olive oil for a silky sauce? Yes! Add a generous spoonful of ricotta, a flurry of pine nuts, and some basil on top and you've got a wonderful weeknight dinner.
Making the Caponata
This little caponata recipe is entirely worth the multiple steps. If you skip the optional hay smoking step you'll still end up with a caponata that will be a little more complex than usual by using the grill.
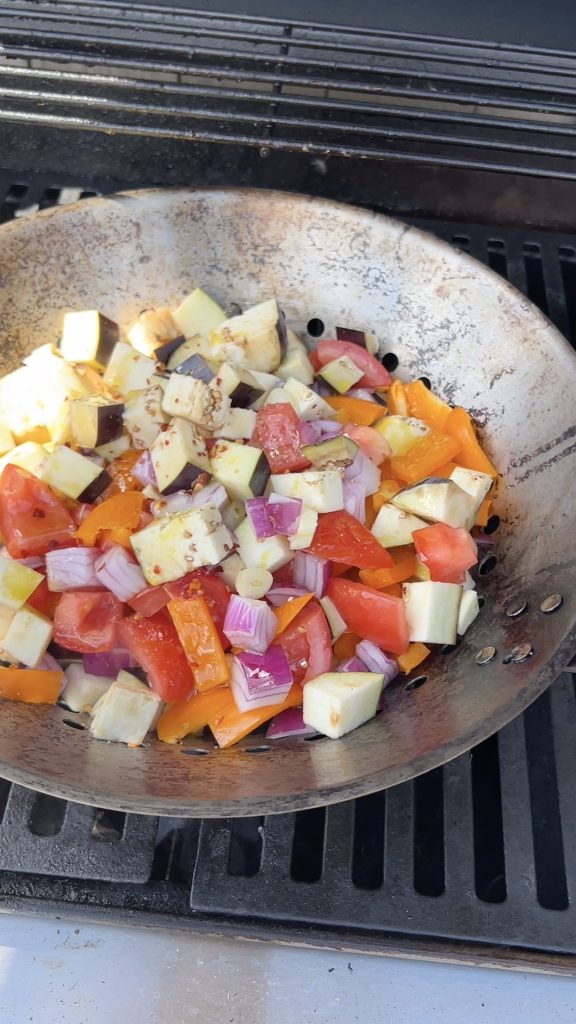
Caponata is usually made by roasting the eggplant in the oven, then adding it to the other ingredients on the stovetop to complete the cooking. I've found that roasting all the vegetables together in a grill basket (this high-quality stainless steel one is on sale right now) on the grill saves turning on the oven and eliminates a step. When making it in the winter months or if you don't have a grill, this step can be done in the oven with all the cubed vegetables on a baking sheet at one time . The oven method will not have the smoky quality, but will be traditional and delicious.
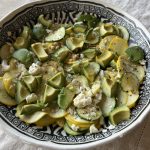
Just getting started on the grill.
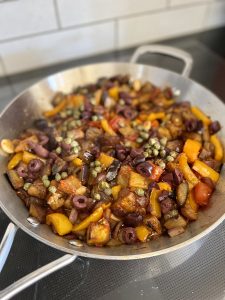
The vegetables are cooked and hay-smoked (directions below) on the grill, then we finish the dish in a large skillet on the stovetop. This is where we lightly and quickly stew the vegetables with capers, olives, a little sugar and vinegar for the typical sweet/sour finish, olive oil, and herbs. This final part takes about 15 minutes.
Serve the caponata at room temperature or lightly chilled. It is even better the day after it's made and the flavors have integrated, making it perfect for do-ahead meals and entertaining.
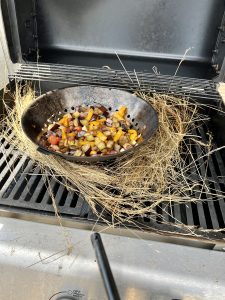
Getting ready to light the hay.After the hay has burnt off, and the grill lid opens.Back in the house to add the remaining ingredients.
How to Smoke Foods With Hay
Hay smoking provides a light, gentle smoked quality to any vegetable, potato, chicken or fish dish cooked on the grill. To hay smoke caponata on the hot grill, carefully take a handful of cut hay and arrange it around the grill pan. Acting very quickly, use a long-necked lighter to touch the hay in two or three places and immediately shut the lid of the grill. You'll see a light smoke coming from under the lid and seams of the grill. After three or four minutes, carefully open the grill to make sure the flame is out. Now, a light kiss of hay smoke aroma and flavor has fallen on the vegetables.
Remember to avoid overcooking! Do this step after the food is not quite at the doneness you desire. It will continue to cook in the enclosed hot grill for three of four additional minutes.
Share Your Success!
When you make this recipe, please show it off to our 101-Mile Kitchen community! Let us know in the comments, or on Facebook or Instagram, @101milekitchen. Speaking of that, have you joined the community? If not, we'd love to have you. You can take care of that right here, and when you do I'll send you a free Taste of Oregon appetizers recipe downloadable as a thank you!
This post contains affiliate links. When you use these links to buy something I may earn a commission at no cost to you. Product affiliation helps me to keep this site ad-free while providing you with the content you enjoy. I only promote items that I use, like, and trust, or would invest in myself.
Oregon-Style Smoky Caponata
Course: Appetizer, Main Dish
Cuisine: Italian, Pacific Northwest
Season: Bounty (August - October)
Dietary: Dairy-Free, Gluten-Free, Vegan
Prep Time: 15 minutesminutes
Cook Time: 40 minutesminutes
Total Time: 55 minutesminutes
Servings: 8
Author: Pam Spettel
A kiss of hay smoke, easily done in a grill, brings this classic Italian summer vegetable dish next level. Use you caponata on bruschetta for an appetizer or light meal, as a pizza topping, or as a relish for a charcuterie plate.
1 largered, orange, or yellow bell pepper, seeded, large diced
½largepurple onion, large diced
4medium tomatoes, ripe, large diced
8clovesgarlic, peeled and roughly chopped into large pieces
6tablespoonsextra virgin olive oil, divided
2tablespoonstomato paste mixed with 3 tablespoons water
1tablespoonsugar
3tablespoonssherry vinegar, or white wine or red wine vinegar
4tablespoonscapers
¼-⅓cupblack oil-cured olives, green Castelvetrano, or Kalamata olives, pitted and roughly chopped
salt and ground black pepper to taste
¼cupmixed fresh oregano and basil, roughly chopped
Instructions
Preheat all elements of a gas grill to high heat (400°-450°) or light a charcoal grill for a hot fire. Wash and chop the eggplant, pepper, onion, tomatoes, and garlic. Place the prepared vegetables in a grill basket. (Alternately, you could put the vegetables in a large cast iron skillet, or on multiple sheets of foil with the edges crumpled in to create a sided container.)
Put the grill basket onto a plate, and sprinkle the vegetables generously with salt and black pepper (at least one teaspoon of salt to enliven the vegetables is my recommendation.) Drizzle the vegetables with 3 tablespoons of the olive oil, and stir. (The plate will contain any olive oil drips as you transport the grill basket to the grill and back.)
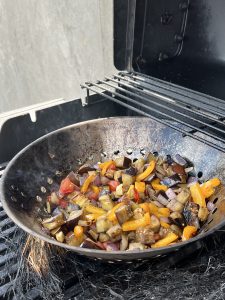
Once the grill is up to heat, place the grill basket onto the grates and close the lid. Check the vegetables every five-seven minutes and stir to help them cook evenly and to keep them from sticking and burning. Adjust your temperature or move your coals as needed to maintain a high but not scorching heat. Cook until the vegetables are beginning to soften but retain their shape, and the eggplant is turning from opaque creamy white to translucent gray-beige but the centers still have a little of their white showing through. Depending on your grill and its heat, this step will take from 15 to 25 minutes.
Do the optional hay smoking technique, described below. Remove the grill basket back to the plate, and bring it indoors to complete the dish. (Or, if you have a burner feature on your grill use it. Lucky you!)
On your cooktop, heat the remaining 3 tablespoons olive oil in a large stainless steel or cast iron skillet to medium heat. Add the vegetables from the grill basket. Stir in the remaining ingredients except the herbs. Cook, stirring frequently, until the vegetables are fork-soft but not mushy, and are coated in the light sauce that has formed. This step will take about 15 minutes.
Allow the caponata to cool a bit before stirring in the herbs. Reserve a few pinches of the herbs for garnish, and serve. Store leftovers in a tightly closed container in the fridge for up to 5 days.
Optional Hay Smoking
Turn off the gas grill, or if using a charcoal grill, scoot the coals to one side away from the grill pan. Find a medium-sized handful of clean, dry hay, and arrange it around the outer edges of the grill basket. Work carefully around the hot grill and grill grates to avoid injury. Use a long-necked lighter to lightly touch the hay in two or three places, and quickly cover the grill. You will notice a light smoke coming from under the lid and seams of the grill. When is dissipates to light wisps, remove the grill lid and proceed.Only try this in an enclosed grill to avoid setting a grass fire.
Follow Me
Welcome!
You’re in the right place! I’m Pam Spettel, home cooking expert and guide, and I’m here to show you how to break up with cooking and hospitality anxiety, learn how to use recipes as guides rather than strict rules, and let your cooking intuition and confidence soar.
Superpower: Dreaming up recipes that work, serving them to my friends and family, and writing little stories about how cooking them well is the same as loving well.
Inspiration: Ingredients! The fresh, colorful, fragrant, local, seasonal ingredients found in the Pacific Northwest are my creative medium.
Heroes: Local food and wine producers– the people who keep me, my family, and our community nourished and happy.
We use cookies on our website to give you the most relevant experience by remembering your preferences and repeat visits. By clicking “Accept”, you consent to the use of ALL the cookies.
This website uses cookies to improve your experience while you navigate through the website. Out of these, the cookies that are categorized as necessary are stored on your browser as they are essential for the working of basic functionalities of the website. We also use third-party cookies that help us analyze and understand how you use this website. These cookies will be stored in your browser only with your consent. You also have the option to opt-out of these cookies. But opting out of some of these cookies may affect your browsing experience.
Necessary cookies are absolutely essential for the website to function properly. These cookies ensure basic functionalities and security features of the website, anonymously.
Cookie
Duration
Description
cookielawinfo-checkbox-analytics
11 months
This cookie is set by GDPR Cookie Consent plugin. The cookie is used to store the user consent for the cookies in the category "Analytics".
cookielawinfo-checkbox-functional
11 months
The cookie is set by GDPR cookie consent to record the user consent for the cookies in the category "Functional".
cookielawinfo-checkbox-necessary
11 months
This cookie is set by GDPR Cookie Consent plugin. The cookies is used to store the user consent for the cookies in the category "Necessary".
cookielawinfo-checkbox-others
11 months
This cookie is set by GDPR Cookie Consent plugin. The cookie is used to store the user consent for the cookies in the category "Other.
cookielawinfo-checkbox-performance
11 months
This cookie is set by GDPR Cookie Consent plugin. The cookie is used to store the user consent for the cookies in the category "Performance".
viewed_cookie_policy
11 months
The cookie is set by the GDPR Cookie Consent plugin and is used to store whether or not user has consented to the use of cookies. It does not store any personal data.
Functional cookies help to perform certain functionalities like sharing the content of the website on social media platforms, collect feedbacks, and other third-party features.
Performance cookies are used to understand and analyze the key performance indexes of the website which helps in delivering a better user experience for the visitors.
Analytical cookies are used to understand how visitors interact with the website. These cookies help provide information on metrics the number of visitors, bounce rate, traffic source, etc.
Advertisement cookies are used to provide visitors with relevant ads and marketing campaigns. These cookies track visitors across websites and collect information to provide customized ads.